Search the Community
Showing results for tags 'Great Wall Hobby'.
-
Mig-29SMT 1:48 Great Wall Hobby The Mig-29M is an improved Mig-29, and has all the improvements over the original aircraft that you would expect in the shape of reduced weight, more powerful engines, increased fuel load and more modern avionics. It also has new radar, a HOTAS control system and other such modern bells and whistles that are en vogue in the 21st century jet fighter. Why do you need to know? Well, the SMT is a retro-fit package that upgrades existing Mig-29s to a similar standard to the M, and includes a pronounced humped dorsal spine containing additional fuel that gives it a range of 1,300 miles on internal fuel alone. Incorporated in the package are seven hardpoints that can carry a variety of weapons that the M can also carry, with the possibility for future upgrades for weapons developed by foreign companies, which must be firmly aimed at their export market. The Kit GWH pleased a great many modellers when they announced their new Mig-29 kit, and they are slowly bringing out variants as time goes by, with this their latest offering showing marked differences from the other releases, which will broaden its appeal. The kit arrives in an end-opening box (I know! The trauma!), but inside is a tray in which all the parts are held, so fret not. You might initially think that there is a white card lid inside, but that is a separate box for the large fuselage/wings part to protect it against damage. Below that is a plastic carton with six rather cleverly slide-moulded weapons in, and under that are the traditional sprues, of which there are fourteen of various sizes, all in a mid-grey styrene. The clear sprue is both separately bagged and protected by a clear sheet that is mildly sticky, which prevents any damage occurring before it is removed by the modeller, or in this case the reviewer to take the photos. A sheet of Photo-Etch (PE) brass parts are bundled in the same bag as the decal sheets, of which there are two, both having thick yellow paper to protect the delicate decal surface. The instruction booklet is printed in black and white on matt stock, while the painting and decaling guide is on both sides of glossy A3 paper, folded in half to fit the box. As always with GWH you get a sense of a quality product even before you have started looking at the individual sprues. The instruction booklet cites Alexander Dramnikov and Yufei Mao as being involved with the project, which is good to see. The cockpit is first to be built, and it is well-appointed with a detailed ejection seat that has PE seatbelts and leg-guides, a floor panel and stick, to which the side panels are added after they are detailed with side console inserts. The main instrument panel is a single part with raised detail moulded-in, to which you add a sizeable quantity of decals once it is painted. There are 15 in all, with optional on and off decals for each of the two main MFD screens, which is clever. It is attached to the underside of the upper fuselage later in the build after preparation of the major parts. A two part circuit-breaker box is attached to the turtle-deck behind the pilot, plus a piece of PE to add more detail. The gear bays of the SMT are all built up from separate panels to ensure that there is plenty of detail, while the main bays have ribbing on the upper areas for additional strength. Drill out the hard-points if you are planning on loading weapons later, build up the twin tails, which have separate rudders and PE slime-lights, and then you're almost ready to close up the fuselage. The flying surfaces are all separate, and are trapped between the fuselage halves to remain free, but the slats on the leading edges simply fit into a curved slot at the front of the wing, so check that you have them at the correct angle on both sides before the glue goes off, or you'll be very sad when you notice they aren't. The fins are added to the top deck by drilling out the flashed-over holes from inside, which is another task you don't want to forget. Similarly, you also need to drill out the holes for the chaff and flare dispensers that sit forward of the fins. The kit includes a pair of very nicely detailed Klimov RD-33 ser.3 engines, which are placed within the engine nacelles before the outer skins and intake ramps are added. There is also a trestle stand included for one engine in case you wanted to display it outside the aircraft. The detail is that nice out of the box, that it would be a shame to hide them away. The intake ramps were re-designed for the SMT, and they are provided here in two halves each, to which you add the integral FOD guards in styrene for closed, and PE for open/stowed. The upper section of the trunking is moulded into the lower fuselage, so to avoid seam-filling, it's probably easier to put the FOD guards down as they would appear when on the ground under normal circumstances. Some small parts, aerials and blade antennae are added to the underside and around the nose, as well as a pitot probe on the end of the separate nose cone. No mention is made of nose-weight, but you'd be well-advised to place a good quantity in there to be on the safe side. The canopy can be shown open or closed by the addition of a jack on the rear deck, which props up the separate canopy, while the windscreen goes on over the PE HUD for which a small slip of acetate film is included, with the outline printed on for your ease. With the airframe substantially complete, the landing gear is built up, with detailed legs, single-part tyres, and separate hubs, which cuts down on any seam filling. Bay doors are all well-detailed, and if you like your in-flight models you'll be pleased to know that they fit in the open or closed positions. The airbrake on the Mig-29 is a weird-looking hybrid of umbrella/clamshell, and sits between the exhausts. The brakes project up and down around a central strut, which is well-depicted, and can be posed open or closed by the omission of a few parts. As a final thought, a crew access-ladder has been included on one of the sprues, which is another nice addition. Weapons & external tanks are supplied along with a collection of engraved pylons and adaptor rails, with the following supplied in the box: 2 x PTB-1150 fuel tank 4 x R-73 AA missile 2 x R-77 AA missile The missiles are slide-moulded for detail, and are protected by a vacformed plastic carton, which takes up quite a bit of space in the box. The detail is really good though, and is further enhanced by PE fore-fins on the R-73s, and the waffle-textured steering vanes on the R-77s. A full set of stencils and painting instructions are supplied for both the missiles and their pylons. Markings There are two schemes included on the decals in the box, but both wear the same modern grey/light blue/darker blue splinter scheme with grey undersides that I associate with the T-50 Pak-fa, with little to tell them apart other than their aircraft numbers on the intake sides. The boxtop subject has a slogan and its tail-code on the tail (duh!), and it is interesting to note that it looks like the boxart was commissioned and printed before the correct serial codes were decided upon, as if you look closely at the box, there is an ingeniously disguised sticker with the correct serial placed over the wrong one. If you sneak a peek at the smaller images, they still read incorrectly RF-92235, rather than RF-92935. From the box you can build one of the following: Red 23 14th Leningrad's Guards Fighter Air Regiment, RusAF Airfield Khalino, Kursk region, 2010. Red 08 14th Leningrad's Guards Fighter Air Regiment, RusAF Airfield Khalino, Kursk region, 2009. The decals are well-printed in China, with very fine stencils being the order of the day. Registration, colour density and sharpness are good, and the satin carrier film is cropped close to the edge of the printed areas where practical. The Completed Model Conclusion This is a thoroughly modern tooling of the SMT, and is a welcome addition to the GWH line-up especially as it has that distinctive spine. Add the PE and clever moulding techniques used, and you have a well-rounded package that should appeal to anyone with an interest in Soviet fast jets. I would have preferred some variation in the colour schemes and squadron subject, but the scheme supplied is at least eye-catching to make up for it. Highly recommended. Available from all good model shops online and on the high street. Review sample courtesy of
- 13 replies
-
- 11
-

-
Good afternoon, friends! Now, the finish line of my F/A-18C build is near and i have to kits i wanted to build absolutely! Decision is yours AMK MiG-31 B/BS Foxhound (1/48) with Eduard mask and Eduard interior or Great Wall Hobby MiG-29 Fulcrum C 9-13 (1/48) with Eduard BigEd Both kits are superb, start from one of them will be in the next 2 weeks! As said before, decision is yours! Oliver
-
 A friend wanted me to build this kit for his dad's Christmas present, I have never built this scale before it was a great little kit which went together really well. It took longer to do the paintwork than actually build the kit.
- 14 replies
-
- 30
-
-
- 1/144
- Great Wall Hobby
- (and 1 more)
-
F-15I Upgrade Sets (for GWH) 1:48 Eduard Following the original F-15A/B release from Great Wall Hobby, new parts were added to allow them to release an updated Ra'am edition in 2015 and Eduard have adapted their sets for this edition. As usual with Eduard's Photo-Etch (PE) and Mask sets, they arrive in a flat resealable package, with a white backing card protecting the contents and the instructions that are sandwiched between. Interior (49772) This set consists of one fret of nickel plated brass that has been pre-painted, another in bare brass for constructional elements, and a small slip of acetate for the HUD glazing. The Ra'am is a two-seater, so the first port of call is to improve both ejection seats with handles, ancillary equipment and seatbelts, much of which is pre-painted for your ease, requiring only the smallest of areas to be removed from the front, and the perforated central column to be removed at the top rear. The side consoles are sanded back to receive new painted panels, as are the main instrument panels with their laminated instruments showing through the top layer. The pilot's coaming is upgraded with a new HUD unit with scale parts, and the opening side panel just forward of the cockpit side is detailed with a full set of fronts for the black boxes, as well as some pull-handles and interconnects to add life to the area. The radome is also detailed with a surface skin and more detailed T-shaped parts replacing the moulded in points for accuracy. The canopy is detailed inside with additional sill parts and a run of locking "fingers" on each side, plus a new roll-over hoop skin with integrated rear-view mirrors. Finally, to use up a little extra space on the fret, a couple of small vents are added to the deck around the canopy rear and forward of the main bays. Exterior (48888) This set is a single large fret of brass, starting with the nose gear bay, which receives a lot of attention. New panels, wiring looms and latch elements are applied to the bay, while a new skin is added to both of the bay doors, with prominent hinges added from brass to add further visual interest. The nose gear leg is fitted with a towing eye, and the main gear legs get new oleo-scissors, and a wiring/hose fit out, with a detailed ring around the outer hubs of the wheels. The main gear doors are also detailed with small hinges and catches. The dorsal air-brake is skinned with detailed panels, plus a little wiring, with additional grilles and blade antennae nearby and under the aircraft's nose. A new afterburner ring is applies to each engine face, a new set of slime-lights throughout, more surface panels, grilles and extra stiffening panels on the wing and tail tips. Detailed sway braces for the kit pylons are supplied, which also have the pylon's attachment points etched in for those leaving pylons unused. Masks (EX516) Supplied on a sheet of yellow kabuki tape, these pre-cut masks supply you with a full set of masks for the canopy, with compound curved handled by using frame hugging masks, while the highly curved gaps are in-filled with either liquid mask or offcuts from the background tape. In addition you get a set of hub masks for the wheels, allowing you to cut the demarcation perfectly with little effort. Review sample courtesy of
-
Hey Everyone! Here's my latest video, a simple film that shows how to mask some straightforward shapes on a model aircraft. It's not groundbreaking as such, but will show you how I do things for Model Airplane International projects and in particular, the very new Great Wall Hobby T-33 Shooting Star, which I will show you once complete in a week or so's time. I hope that you like it! https://www.youtube.com/watch?v=Q2tyki3A5zE
-
 I have had this lovely kit for several months now I picked it up at Milton Keynes IPMS show and have been desperate to start it and not had the time. Today I have started this lovely kit and wish to make a model of the Prototype B2 this will mean deleting the wings carrots , tanks and trimming the leading edge modifying the tail fin and intakes. I am using the Excellent article and Drawings by out very own Bill Clark from SAM August 2006. The Drawings are fantastic by Arthur L Bentley I wonder if there are Drawings for the B1 The initial B2 looked very elegant and similar to the B1 as I have made a model of XH533 the Prototype B2 Vulcan again being similar to the B1 I thought they would make a nice pair and I am fascinated with the early years at Farnborough. Cheers Rob
 -
 Thanks Anton K55 (http://www.britmodeller.com/forums/index.php?/topic/234989178-55th-all-japan-model-hobby-show/) but I think it's better to open a dedicated thread. Great Wall Hobby is to release a new variant from its 1/48th Eagle kits ( F-15C/J: http://www.britmodeller.com/forums/index.php?/topic/234961656-148-mcdonnell-douglas-f-15c-msip-ii-eagle-by-gwh-cads-release-july-2014 & F-15B/D/DJ: http://www.britmodeller.com/forums/index.php?/topic/234956868-f-15bd-eagle-in-us-israeli-service-148/ http://www.britmodeller.com/forums/index.php?/topic/234946867-gwh-is-going-to-do-a-f-15-bd-in-48th-scale/😞 the McDonnell Douglas F-15I "Ra'am" - ref. L4816 Though the question: is there a F-15E Strike Eagle variant in view? Sources: https://www.facebook.com/media/set/?set=a.1206169876076618.1073741833.275708712456077&type=3 https://www.facebook.com/media/set/?set=a.1148942795135165.1073741867.519867854709332&type=3 http://www.1999.co.jp/eng/blog/150928 V.P.
- 10 replies
-
- 2
-
-
- Great Wall Hobby
- Pit Road
- (and 1 more)
-
Lion Roar Photo-etch and Upgrade Clearance We have just updated our stocks on all of our Great Wall Hobby / Lion Roar photo-etch, which we are selling at clearance prices on our website in the Great Wall Hobby Manufacturers section. All these kits are included in the spend over £30.00 and the postage is free for all Mainland UK. All prices have already been changed to show the discounted price. Click on the link to have a look. http://www.creativemodels.co.uk/great_wall_hobby-m-87.html Why not have a look and grab a bargain. Creative Models Ltd
-
Great Wall Hobby 1/35 Zündapp KS750 with Sidecar (L3508) Private Stephens of 5th Northamptonshire Regiment rides a captured German motorcycle combination, Tunisia, 14 January 1943.
-
Hi, I have the above kit, just wondering what the differences are between this and the late 9-12 version? Is it simply the deletion of the 2 ventral fins? As always any help appreciated. FF
-
F-15B/D Eagle in US & Israeli Service 1:48 GWH The F-15 was designed as an Air Superiority fighter by McDonnell Douglas in the late 1960s as the eventual winner of the F-X programme, entering into service at the end of 1974. Since then it has undergone many changes, upgrades and adaptation to additional roles, and gained an envious reputation for ruggedness, as well as dishing out missiles and bombs by the thousand in service with the US Air Force and many foreign operators. The B and D models are the two-seat variants that are designated as trainers and built between 1972 and 1985, changing from B to D in 1979. A full set of pilot controls is duplicated in the rear seat for the instructor, but the ECM package is not installed, which means that the aircraft can still be used in action, and has indeed been used by the Israelis who fielded Bs during the Lebanon war. As the B was the two-seat variant of the A model, the D is the two-seat version of the C, which incorporates the improvements in capability. The following E and SE (Silent Eagle) made two seats the standard with the rear-seater taking on the role of weapons officer, the latter utilising fifth generation technologies to leverage the success of the basic airframe into the modern battlefield at a reduced cost over a genuine fifth generation fighter like the F-22 or Pak-Fa. The Kit A surprise release from Great Wall Hobby that has been available from overseas now since the New Year. It has now arrived in the UK and is available from our friends at Creative Models, from whence the sample arrived. It's a big box, and well packaged. It had to be, as I managed to sit on the review sample whilst wrangling a box I was sending out to one of the other reviewers. The parts inside were safe however, despite my bulk pressing down on them for an instant. Inside you are initially greeted by a trio of impressive clear vacform containers that each hold four missiles and a few delicate parts for the airframe. Under these are twenty sprues in mid grey styrene plus a large lower fuselage part that has been tooled using slide-moulding to provide detail on all sides. Additionally, there is one clear sprue, a small sheet of Photo-Etch (PE) brass, and four decal sheets of varying sizes. The instruction booklet is A4+ and quite thick, with a short précis of the Eagle on the front, and four pages of colour schemes on the rear. There is also a separate sheet in the bottom of the box covering some last minute amendments to the kit and corrected painting guide information for the US options. First impressions are always good with GWH kits, and there is some serious detail on each and every sprue. The slide-moulded missiles are pretty impressive, as is the lower fuselage part, and the overall level of detail puts the kit at the top of the heap when it comes to a satisfying out of the box experience. Two ejection seat systems have been included with the kit, as the Israeli airframes sported a pair of Escapac IC-7 seats, while the US aircraft used the ACES II seats. The detail on both sets of seats is excellent, although I would have preferred PE belts rather than the moulded in kind, which seem a little short and skinny. The seats fit into a single part tub after the addition of a pair of three-part seat rails to the rear of each pilot's tub. The detail on the side consoles is excellent, and has plenty of relief that will respond well to sympathetic painting. The nose gear bay is made up from separate sides to add extra detail, and fits to the underside of the cockpit on two pegs for secure location. The Rear instrument panel is simplified when compared to the pilot's panel, but is provided with a full set of instrument decals to detail it up. For the front panel, there is a choice of parts for Israeli or American, and again they are both provided with decals. The instrument detail moulded into the front panel is superb (again), and should look impressive once painted and decaled. The rear panel's coaming is added before the cockpit side walls are installed, completing the cocoon for the absent pilots. Straight away this is trapped between the halves of the nose along with the bulkhead for the radar, and the front coaming is added to the top, with a PE and acetate film HUD glass to finish it off. I'd either add the windscreen or leave the HUD off until later in the build though, as there is still a lot to do, and it may get damaged during handling. The radar is a two-part assembly that plugs into a socket on the bulkhead, and the radome can be displayed open or closed as you wish. To close it up, just trim the hinge-points off the inside of the radome, and glue it in place. Either side of the nose is the radar compartment, with two large opening panels, and GWH have decided to portray this in some detail. The various boxes and panels are moulded into the nose halves, and it is busy enough to show off with some sympathetic painting, and maybe the odd wire added here and there. The two doors (one each side of the nose) are supplied separately, and open upwards with a ram supporting their weight when open. They are also well detailed with strengthening rib-work, but this is likely to be spoiled due to the six ejector pin marks dotted around this relatively small part. The delicate raised internal structure and fine raised rivets will likely be lost in the process, which is a shame. If you're closing up the bays to preserve the sleek lines of the Eagle's nose, it's a non-issue of course. A pair of full-depth intakes are supplied with the kit, and it might be an idea to paint them before gluing each half together, as getting paint down the narrow trunking after the event will be tricky. If you're careful with alignment of the parts before the glue sets, you should have little clean-up, but ready your skinny sanders and wet'n'dry on a coffee stirrer just in case. Once complete they install in the lower fuselage, with a chunky socket that later accepts the nose section sat between them on large pins. Three holes need to be opened up along the centreline, which is best done before you have installed the intakes. Due to the complexity of the underside of the F-15, the "sills" at the side of each engine are separate parts, with the underside of the wing built-in, and installed on a large mating surface with four locating pins to get them aligned correctly. Here you need to drill out four more holes for the wing pylons before you add the upper wing. A pair of PE slime-lights on the side of the fuselage are added, with a scrap diagram detailing their location with measurements from convenient points and panel lines. The slide-moulding of the lower fuselage has resulted in two fine seams running along the length of it, and these seams would be best dealt with early in the build, possibly before you even start construction, if you remember. The upper fuselage includes the wing tops, as well as the tips, which have been moulded as one to get the requisite thickness to the part. The flaps and ailerons are separate parts and are glued into the upper wing at your chosen position if you plan on modelling a more candid position of an aircraft after landing. As usual, check your references to ensure you're not posing them in an unrealistic position, as you'll get imaginary internet points deducted by those that know! The barrel to the Vulcan cannon is inserted in the shoulder of the wing root, and you have a choice of open or closed by-pass air-spill ducts on the top of intake, which are supplied as separate drop-in parts. The main intakes on the Eagle change their angle of incidence to present more or less of the opening to the airflow, and two sets of intakes are included to allow you to model them fully raised or dropped, as is sometimes seen when parked up, taxying or during flight. In fact, a quick check of some references seems to indicate they're dropped a lot more often than you would think. The engine "humps" on the rear fuselage deck are often a source of problems with F-15 kits, and in this scale both the Academy and Hasegawa kits have been criticised for the shape. Having checked over a fair number of pictures, the difference in light and shadow, foreshortening of the shapes at an angle, and the fact that the tail fins block a good side view, it's more of a gut feeling or impression of whether they're right or wrong. For my part, I feel that the length and height is about right, but looking from above, I suspect that the taper is slightly more oval than the real thing. Watching some video yesterday, I was paying careful attention to the Strike Eagles on screen, and at times from a forward aspect, the humps looked spot-on, which is confusing. This view could change once the plastic is painted though, so I'm going to leave my final decision until I've built it (which could be soon, you never know). A pair of Pratt & Whitney F100 engines are provided in their entirety with the kit, and I'm fast running out of superlatives for the moulding quality of the parts. The engines are each made from two halves, with only two additional parts added to the outside, a fan that sits just within the tube, and a choice of stator blades with central bullet depending on whether you are using the 100 or 220 variant of the engine. The detail of the engine halves is excellent, and there is plenty of tubing moulded in to give the impression of a workable engine. Add a little extra to it and you could pose one on a trolley in front of the finished model. At the rear of the engine is an exhaust trunk with the aft fan in styrene and afterburner ring in PE. Four lugs on the trailing edge of the exhaust trunking receive each of the four exhaust petal parts, which link up and slip inside a delicate ring with fine actuator linkages moulded in. These are protected on the sprue by a surrounding ring of turrets, as they are otherwise fine enough to be crushed very easily, and quite an impressive moulding. Before installing the engines, the airframe is brought together in one step, starting with the upper fuselage being mated to the lower fuselage, then the nose being slipped into the socket that was installed in the front of the fuselage earlier. The fairing behind the cockpit slots in behind the nose assembly on four pegs, again ensuring good alignment. Following this, the intakes (dropped or straight) are added along with the windscreen, which is thin and clear as you'd expect. The engines simply slot inside their apertures in the rear of the fuselage, and I suppose there's nothing to stop you from leaving one loose if you wanted to show it off? With the airframe ostensively complete, the small and easily damaged parts are added throughout, such as the canopy with separate frames and PE rear bulkhead, which has a pair of actuating rams if you want to pose the canopy in the opened position. The airbrake that nestles behind the cockpit is also able to be posed open or closed, with the addition of another actuating ram for open, and the removal of the tips of the hinges for closed. The twin tail fins have separate rudders, and are topped by an aerodynamic sensor fairing, which is added from a separate part. The US airframes have a larger "cigar tube" on the starboard fin tip, so watch you don't confuse yourself here. The elevators are of the all-moving type, and are single parts that slot into a circular hole in the sides of the fuselage, with the tips of the tail sponsons devoid of ECM fit and capped with two small tapering parts that have slide-moulded hollow centres to save them from sink marks due to thick plastic. Happily for this modeller at least, the landing gear is added after main construction is complete, and its fit isn't compromised as a result. The nose gear leg is virtually complete as a one piece moulding with minimal seam-lines marring the finish, two landing lights added from the clear sprue, and of course the wheel, which is made up from separate halves. There's a Good Year logo moulded into the tyre, and hub detail is good, with a couple of red stencils added after painting for a little extra interest. The main gear legs have a one-piece main strut with a slight sinking of the styrene at the lower extremity, so you can decide whether to fill this based on whether you think it will be seen. A retraction jack and separate oleo scissor-link is added, and then the two part wheel on the axle. Detail is good here with defined tread on the wheels, but someone has reversed the BF Goodrich logos on parts J11 & J14, which might not notice if you don't paint them white, but is nonetheless incorrect. The hub and brake detail is some compensation, as is the subtle flattening of the bottom of the tyre to simulate the aircraft's weight, but once seen the reversed logo can't be unseen. All the bay doors have detail on their inner faces that will show up well under painting, but the aft nose gear door has a pair of ejector pin marks down the centre that will need work before completion. You will probably lose some of those nice raised rivets on the surface, so take a quick picture and replace them with Archer 3D rivet decals once you're done. The bay doors can be closed for an in-flight model if you prefer, which just needs the hinges cutting flush to achieve. Weapons & Fuel Tanks The F-15 is capable of carrying a sizeable war-load, and this is reflected in the quantity included in the box. The aforementioned slide-moulded missiles are each single parts with all four fins moulded in fore and aft, so can just have their seams cleaned up and you can then paint them. No fiddly fins to add, only to find you didn't line them up quite right later. There is also plenty of additional tankage included in the shape of three additional fuel tanks on pylons suitable for their location, with separate sway-braces. The full complement of weapons is as follows: 3 x fuel tanks 4 x Python 3 missiles with adaptor rails for side-mounting on the wing pylons 4 x Python 4 missiles with adaptor rails for side-mounting on the wing pylons 4 x AIM-7 Sparrow missiles with shackles to mount them on the belly racks Detail is good on the drop-tanks, which have raised weld seams on their surfaces, and the missiles are well moulded too. Their sprue gates are extremely fine, which caused one Python 4 to break free of its sprue during extraction from the plastic packaging, with no damage to the part. As well as the four seam lines to remove (slide moulding detail generates extra seam lines, sorry), each of the Pythons have three small ejector pin marks on one side, which are probably best hidden by placing them against their ejector rack. The Sparrows have only two each, and again they can be placed against the fuselage if you either don't want to remove the marks, or don't make a good job of their disposal. Each weapon, tank and pylon has a set of decals applied to it, which should improve the look of the build noticeably. As you'll probably notice, the Python missiles aren't standard US fit, but are instead indigenous to Israel, and are produced by Rafael Advanced Defence Systems to counter enemy air assets. The Python 3 was used extensively during the Lebanon War, and was improved to work with Helmet Mounted Guidance systems, as the Python 4, with limited fire-and-forget capabilities. A tail fairing between the engines, arrestor hook and housing, plus a few small aerials in the nose area, and that's construction completed. Markings Two sets of markings each are provided for Israeli and American aircraft, which seems fair. They are printed in China, which IIRC is a departure from their usual Cartograf sheets, but apart from a few corners that could have been cut off the carrier film here and there, there is very little to pick fault with, apart from a slight mis-registration of a muddy blue colour used on the largest sheet on a couple of decals, most noticeably the refuelling probe guide and a pair of yellow decals that are used on the wing tips. Registration is otherwise good, as is sharpness and colour density, and for sheer number of decals you certainly get your money's worth. There are lots. The Eagle is bespeckled with stencils over what seems like every panel, and it takes four busy pages of the instruction booklet to document them. You could argue that more pages are needed, as it gets a bit crazy on the topside, with arrows everywhere. Do not attempt to stencil your Eagle whilst hung over. It will not end well. Your markings options are as follows: F-15B (73-0113) No.113 Knights of the Twin Tail Squadron, 2006 – Grey FS36375 with FS36320 upper disruptive pattern. Eagle motif on outer fin & black band with eagle head on inner fins. F-15B (76-1524) No.704 Knights of the Twin Tail Squadron, 1982 – Grey FS36375 with FS36320 upper disruptive pattern. Eagle motif on outer fin & black band with eagle head on inner fins. F-15D (83-0046) 67th Line Jet 2009 - Grey FS36375 with FS36320 upper disruptive pattern. F-15D (79-0011) 65th Aggressor Squadron Nellis AFB - Grey FS36375 with FS36320 upper disruptive pattern. Striking eagle on outer fins with Oregon in the tip. The last option has since been retired to AMARC in June of 2010 for storage or reclamation of parts. Both US options have revisions in the addendum sheet, which covers the serial. for the last option, and something I haven't yet spotted for the other. The same holds true for the US markings on the top and bottom sides, with the alterations escaping my notice so far. Where's Wally/Waldo? Conclusion Aside from a few occasional minor gripes, this is a first rate kit that just cries out to be built. There is detail almost everywhere that will be seen, and on the engines and radar, that probably won't, which is a shame. A few spare exhaust parts would have allowed the modeller to set aside a completed engine for display by their model, to show off the detail that is otherwise lost to the dark. There is little that could be improved using styrene alone, and I'm hoping that fit measures up to expectations. Having built a few GWH kits already, they have been pleasant experiences overall, with good fit throughout. There are certainly a lot of F-15 aficionados waiting to build one or more of these kits, and for those folks, I'm sure the aftermarket companies will be rushing to bring the parts to super-detail your Eagle. I understand from internet sources that production on this issue has been stopped to concentrate on new boxings, so if you take that on face value, it may be wise to pick one up sooner rather than later. Watch for a build review soon. Review sample courtesy of
-
Douglas TBD-1A Devastator Floatplane 1:48 Great Wall Hobby History The Douglas TBD-1A aircraft was a specially modified standard TBD-1, mounted on Edo floats. The very first production TBD-1 off the line, BuNo.0208, was selected as the test aircraft. It was originally conceived as a test bed for the Dutch Navy, as the Dutch were interested in procuring the type for their use in the Dutch East Indies. Events in Europe at the time precluded the order and it never materialised. However, the single aircraft converted was retained by the US Navy to test different torpedo variants. It was often joked that the TBD-1A dropped more torpedoes in testing than the entire fleet did in WW2. This may not be too far from the truth, as it saw service from the beginning of 1939 out of Newport, Rhode Island, USA, long before the US entered the war in 1941. The Model The kit comes in a very attractive top opening box with an artists impression of the aircraft presumably taking off from quite a heavy sea. On opening the initial impression is very good indeed. There are five sprues of medium grey styrene, a separate cowling, one sprue of clear styrene, all carefully protected in their individual poly bags. Also included is a small etched brass fret, two metal parts, a large sheet of masks and the decal sheet. The mouldings are superb, with crisp fine details in the form of rivets, panel lines, (raised where required), even the corrugated upper wings look more to scale than the some other manufacturers releases of the base aircraft. There is absolutely no sign of flash or imperfections on the review sample, and only a few moulding pips. Construction begins with the pilots, and navigators seats and there complex looking set of etched seat belts, followed by the radio operator/rear gunners rotating seat, made up of the seat pan, lower support bar and ring shaped top section. Onto the top section the race and gun traversing mechanism/mount is attached. The pilots’ seat is the attached to the supports, and then onto the bulkhead, which is then slide into position into the cockpit tub, followed by the control column, rudder pedals. The navigators’ seat is then fixed into place, followed by the mid bulkhead, foreward bulkhead, radio stack, the pilots throttle lever and torpedo release lever. The shoulder height cockpit deck is then fitted out with the gunners’ seat assembly from the underside, which requires the fitting of three PE brackets. Turning the deck over the fire bottle, DF loop aerial, and the 30cal machine gun, consisting of a one piece gun, firing handles, magazine tray and magazine, is fitted to the gunners’ seat mount. The machine gun can be posed either in the firing position or stowed. Before the fuselage can be closed up there are several fittings to be fitted to the cockpit sides, such as more pilots’ controls and the small side windows. With the cockpit assembly fitted to one half of the fuselage the upper and lower instrument panels are then painted up and glued into position. The instrument panels and side consoles have very nicely rendered instruments which will take some careful painting to make the most of them. With everything in place the fuselage halves can be closed up. The pilots’ headrest support is then attached, along with several other fittings on and around the headrest. The complex torpedo ranging sight in then assembled and fitted the front coaming. This is a very detailed and fiddly assembly and is made entirely of PE parts so take care not to feed the carpet monster. The engine, consisting of the two banks of cylinders plus two sets of control rods, is assembled. To this, the crankcase cover and air intake pipe ring is attached. The two exhaust manifolds are then fitted to the front of the fuselage, followed by the engine. At this point the two piece horizontal tailplanes are assembled and attached their respective sides. The engine cowling is mated to the gill flaps and then fitted to over the engine to the fuselage. The instructions call for the canopy to be assembled here, if the closed canopy is chosen then this can be done as it is a single piece moulding. If the open canopy is chosen, leave off the sliding parts an only fit the fixed parts, thus protecting the fragile internal structures. Construction of the wing begins with the single piece lower centre section being fitted to the fuselage, followed by the two upper inner sections can be attached. The torpedo bomb sight windows/doors are assembled with one layer of styrene and two layers of PE. The three piece oil cooler is also assembled, then attached to the lower wing, whilst the bomb sight doors are attached in either open or closed condition under the foreward fuselage. The separate flaps are also fitted at this point, presumably in either retracted or lowered state, but the instructions aren’t particularly clear on this. The torpedo mounting plate is then fitted to the fuselage centre section and the torpedo, made up of front and rear body sections and twin PE propellers, can be attached. Because the original aircraft was meant to be carrier based it was fitted with folding wings, well this wasn’t dispensed with just because they fitted floats. The inner wing fold joints are added along with some nice detail parts, whilst the tow piece outer wing panels are joined and fitted with the separate ailerons, the reciprocal fold joins and the pitot probe on the starboard wing leading edge. PE strengthening brackets are then attached and the wings joined with the two metal wing fold hinges, although it would be wise to leave this until later in the build, as the model will need to be set upside down to allow the fitting of the floats. I’m not sure how well the wings will fit if the option to have them extended will be, as there doesn’t appear to be optional parts to cater for this, being just a butt joint. It may be an idea to use some metal rod to give the join some strength. Each float consists of inner and outer halves with a separate top deck. To each there are a number of cleats attached fore and aft, followed by the nose tip and rudder. Each float is then fitted with their respective support struts, which when set firmly; the two assemblies can be attached to the underside of the model. Decals The decal sheet provides markings for the one aircraft produced. They are very nicely printed, with no sign of carrier film, in good register and nicely opaque. Along with the national markings, you also get the identification and serial numbers, plus some stencils, access walkways and the propeller blade tip stripes. If you’d rather paint the main markings, GWH have provided a full mask sheet just for this occasion, although how good the masks fit over the corrugations on the upper wings is any ones guess. The mask sheet also includes masking panels for the cockpit canopy/canopies. Conclusion Considering that only one aircraft was produced, it does come as a bit of a surprise that Great Wall Hobby decided to release it. That said they turned out what looks like a very nice kit and it’s certainly unusual. Being pre-war the colours are bright with the then standard yellow upper wings, but it would have been nice to have had a “what if” set of markings for the proposed Dutch operated aircraft. Overall a very nice kit that will get people talking at club meets or shows. Highly recommended. Available Soon Review sample courtesy of
-
 Mikoyan Mig 29 9-13 1:48 Eduard Etch Sets for GWH The Great Wall Hobby Mig 29 9-13 has got to be one of the best aircraft kits released this year. But Eduard have seen fit to make it even more detailed with these sets for the exterior and FOD guards. Having reviewed the interior set HERE you can see that these sets will compliment it and further enhance the completed model. Mig 29 F.O.D (48771). This single sheet set provides FOD covers for the upper and main intakes and the nozzles. The intake guards are folded to make a box like structure, but not before the strengthening indentations have been improved by running a ball point pen over them. Each of the guards are fitted with handles and other smaller details, such as the straps for the main guards and locking fittings for the upper guards. The nozzle guards are a two piece affair with the rear sections having to be rolled to shape and either glued or soldered to each forms a ring. To these the covers are fitted with two handles and attached to the rings. Two straps per guard are then fitted between the rear ring and the front of the exhaust petals. Mig 29 Exterior set (48772). This is another single sheet set, but it’s a whole lot more complex and certainly designed for the more experienced modeller. The complexity comes from having to roll and fold to shape several parts for the kits exhaust nozzles, including the interior of the exhaust petals for both the front and rear sections of the nozzles. The EGT spiders web is fitted on the rear fan disc replacing the kit part and the whole lot joined together to make a pair of very detailed nozzles. Next are the internal details on the upper and lower airbrakes in the shape of interior panels, pipework, and strengthening ribs. There are also new panels and brackets for the main wheel bay doors. The nose wheel bay is provided with new sidewall details, whilst the nose wheel receives new mudguards, scissor link as are the main wheel legs. The distinct intake ramps are also provided but they don’t look any better than the etched ones in the kit. Finally each of the pylons can be fitted with new plates for the underside which will look good if the weapons are left off. Conclusion Eduard do seem to produce sets that on one hand are very useful for adding some superb detail, yet on the other do make them rather complex that only experienced modeller can use them. They also reproduce items that are really don’t need to replaced form the kit. That said these sets are still very nice and if you have the right tools or skills then good use of them can be made. The extra finesse that brass has over styrene can really make a model pop. Recommended. Review sample courtesy of
 -
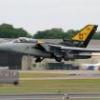
Mig-29 9-13 Fulcrum C 1:48 Great Wall Hobby The Mig-29 is arguably one of the most iconic of the Cold War Russian jets, and probably one of the most frequently seen at Western airshows since the dissolution of the Soviet Union. Its origins began deep in the cold war, when it was designed as a "lightweight" Tactical Fighter, replacing the Mig-23 and having the capability to go up against any fighter aircraft of the day. It entered service in 1984 and has been so ever since, with the former Soviet Union aircraft being taken over by Russia, and its satellite countries retaining theirs for the most part. After the reunification of Germany in 1991 the East German Migs were integrated with the Luftwaffe, following some alterations to make them more NATO friendly. The Fulcrum C is similar to the original production run, but has a large spine extension containing additional fuel to increase its range, and a jamming system for self-defence. It also has more provision for external fuel tanks on the wing pylons, upgraded radar, plus other systems and weapons upgrades. The number of variants that have been fielded over the years is quite staggering, including some "home-brew" variants requested or made by purchasers at the time of buying, or later. This should give the GWH plenty of scope for alternative versions as time goes by. The Kit This is the second edition of the Mig-29 that GWH have produced, the original being an earlier 9-12, which sold out incredibly quickly in the UK, and I believe is now becoming tricky to get hold of. The key here is "don't delay", as this one is likely to prove as popular as the earlier kit, and knocks the Academy kit into the proverbial "cocked hat" in terms of detail and fidelity. The box is a large one by dint of the so-called lightweight fighter being a large aircraft, but also because of the way it is presented. Lifting the lid reveals a large white box within the top, and inside there is the upper fuselage, protected from harm by the additional packaging, a wrap of foam sheet to protect the prominent engine humps and a pair of foam wedges that prevent the fuselage from shimmying around in the box. Under there is another piece of packaging, which is a two-part vacuum-formed container for the six missiles, held together by a number of friction fit pegs and recessed in the middle. There are three large sprues and eight more of varying sizes, all in a medium grey styrene, as are the aforementioned missiles. A set of clear parts are double-bagged for protection, and the large clear canopy has a further sheet of light adhesive material applied to the outer surface to prevent any scratches or chaffing in transit, attesting to GWH's care in packing their products. A small fret of Photo Etch (PE) brass is included, plus a small sheet of acetate, pre-printed with the shape of the HUD glass, two sheets of decals, a print of the box artwork (which is excellent) in a plastic folder, and the instruction booklet are found in the bottom of the box, together with a pair of cover-sheets in yellow for the decals, which were (oddly for GWH) unwrapped, and both cover-sheets had come adrift. First impressions. Well, if you've seen the original release, you know exactly what to expect. The detail is excellent, and it's surprising to see just how much they've managed to cram into the visible internal areas such as the wheel bays and cockpit. Surface detail is just as you'd expect for a high-grade newly tooled kit, utilising slide-moulding to add value, and the overall package just exudes quality. Construction starts with the K-36DM ejection seat, which is built up from ten styrene parts and seven PE parts including a set of seat harnesses, with four decals supplied for the head-box area. The rest of the cockpit is built up from individual faces to maximise the detail, and the sidewalls are further detailed by the addition of extra parts for the side-consoles and structural members. A detailed painting guide accompanies these steps, and a full set of instrument dial decals are included to finish off the nice 3D instrument panel, which incidentally has the older analogue cockpit appropriate to the mark. The instrument coaming is moulded into the upper fuselage part, but don't let that put you off - it is well detailed and has a PE HUD assembly into which the clear acetate HUD glass goes later in the build. The cockpit slots into the fuselage from below, and you are given options of posing the canopy open or closed, with a styrene ram included for the former, and PE rear-view mirrors arranged around the forward hoop of the canopy. The prominent IR sensor that projects from the front of the windscreen is provided with a clear cover, and detailed painting instructions are given for the representation of the equipment within. All the clear parts are crystal clear and well moulded, with no seam on the canopy, which I'm sure will please many (self included). The turtle-deck behind the pilot is decked-out with a large sloped sided box that is festooned with knobs & dials that will show-up nicely under the canopy, so will need careful painting to do it justice. The large upper fuselage is exceptionally well moulded, with detail all over it that is right up there with the best. A pair of sprue-runners protects the wing-tips and the static-wick on the trailing edge, and a sprue-bridge holds the tail extension booms rigid. The large "Fatback" spine extends between the engine bulges terminating smoothly right in front of the exhausts, and if you look carefully you can see a neatly "nipped" injection moulding sprue gate that will need a deft flick with a sanding stick to smooth it off before painting. There are also a pair of small bumps on the mating surface between top and bottom, next to the auxiliary intakes, which initially appear to be "stealth" sprue gates, but have corresponding depressions in the lower fuselage half to accommodate them, so don't be tricked into removing them to improve the fit between the two halves. Either side of the cockpit are two large auxiliary intakes that open automatically when the mesh intake guards come down, allowing the engine to ingest (hopefully) clean air when operating from a rough or poorly prepared airfield without ruining the engines. There are holes in the upper fuselage that accept either closed louvers or open louvers, depending on whether the engine is idle or ground-running, respectively. To the aft of the rectangular hole is a recessed section which accepts a small PE part with three sections of mesh etched in. The lower fuselage is equally well moulded, but has a large number of holes for gear bays, engine bays etc., plus the upper section of the twin intakes. The detail on the lifting-body central section between the intakes is very well rendered, with some deeply set grilles that look excellent. The gear bays are made up from separate faces, as mentioned earlier, and here the detail is reminiscent of resin casting, rather than styrene injection. The nose gear bay is made up from a single central part that incorporates the roof and forward and aft bulkheads, plus separate side panels, while the main bays don't have end bulkheads per se, but shelve away into nothing. The detail on the roof is superb, with rib-work on the topsides that will be seen through the auxiliary intakes if you pose them open. There are some ejector pin marks to clean up on this part though, but you can't complain as the detail on the bay side is unblemished as a result, and only some will feel need to fill them. If you're in that faction, you'll be pleased to know that they're on the edges, and easy to access. Decide for yourself whether they'll even be seen though. Here's where the ingenious design of the intakes comes into play, but I'm sure it won't appeal to everyone. The roof of the intake is moulded into the lower fuselage, and the rest of the intake is built up from two halves split vertically, which mate to grooves in the lower fuselage, creating a broadly circular tunnel. If you want to pose your model on the ground, you can insert the FOD guards and blank off the interior forever, but if you plan on posing it with engines on or in flight, you will need to add the retracted FOD guards within the intake trunk, and clean up a lot of seams and ejector pin marks. The fact that the Fulcrum has built-in guards is just gravy to your average modeller that hates sanding seams in tricky positions, which becomes tedious very quickly. Thank you Mikoyan! The deployed parts are of course thicker than the retracted PE parts, but the detail is very good, although you forego the see-through look of the mesh in the process. I don't see many people losing sleep over that, but if you wanted to, you could bend the PE parts appropriately using the plastic parts as a template a1nd secure them carefully with the use of tabs within the intake trunk. Joining the upper and lower fuselage shouldn't be too taxing unless you're shoe-horning in extra resin details, and at this point you can add the slats, ailerons and flaps, posed at any sensible angle of your choice. The large elevators slot into the sides of the tail, with a sharply angled axis, just like the real thing, while the twin tails, which have caused some problems in the real world, are single-thickness parts with a separate rudder and some tiny auxiliary parts. Forward and slightly outboard of the fin fillets are the fins in which you'll find the chaff and flare dispensers to confuse and avoid enemy missiles. The fins have inserts for the tube detail, or they can be fitted with blanks for those aircraft that don't have the capability installed. Another bone of contention amongst modellers is next, and that bone is the provision of engines with the kit. The pro argument is simple - it's additional detail that goes to add extra visual interest to your model. The detractors argue that the parts are un-needed, most modellers will close up the bays and consign them forever to darkness. Whichever side of the fence you come down on, you will have to admit that the detail include on these engines is excellent, and again more like resin than injection moulded styrene. With a surprisingly small number of parts (17) they build up with highly detailed exhaust petals, a rear fan with stator blades as separate parts, and a detailed afterburner ring. Cleverly, they have avoided the use of halves where the seams will be seen on the inside, instead using short cylindrical parts between the rear of the engine and the exhaust petals. The engine body is split in half, but only the outside seam will be seen, with much of one of them covered with auxiliary equipment. The exhaust inner and outer petals are made up from a central ring with two sides attached, to which the other quadrants are glued to make up the whole. Again, detailed painting guides you through the whole process, and a small engine trestle is supplied with the kit in case you wanted to show one motor outside the aircraft. Ideally a replacement dummy "tube" and spare exhaust would have been provided too, but that would all have added to the cost of the kit. Both engines slot into the lower fuselage and are optionally covered by their cowlings, which has rudimentary rib detail moulded into the inner face, although again there are some ejector pins to deal with if you elect to include them nearby. The nose cone is a separate part from the fuselage halves, and is added later in the build along with its pitot probe and smaller sensors bristling from the nose area. At the opposite end, the rear-mounted air brakes clamshell around the "microphone" sensor suite in either open position with their retraction jacks, or closed, consigning the jacks to the spares box. The landing gear is of course very well detailed and builds up from a larger than average number of parts to offer the best detail, which is to be applauded, as it is the small details that give a better illusion of reality IMHO. The wheels and hubs are separate parts, and the tyres have lovely detail moulded in that is again worthy of resin, even as far as the maker's name and data-plate on the sidewalls. A slight flat is moulded into the bottom of each tyre to better portray the weight of the aircraft on its wheels, but not so extreme as to have you reaching for the compressor to give them some more air. The nose-wheel has the usual mud-guard seen on many Soviet aircraft, and the louvers have been slide-moulded for fidelity. The gear bay doors are similarly details, and the main doors have landing lights with clear lenses added along with the actuator jacks. Happily, for those that like to model their aircraft in their natural environment, a set of alternative parts are included to pose the gear bay doors closed, which just begs for a diorama of one of those low-flying demos the reality of which are oft debated on the forums. The Fulcrum is well appointed for both weapons and additional fuel, with a large tank in a semi-permanent position between the engines and the potential for two more on the inner pylons on the wings. The central tank is split horizontally, and has separate nose and rear parts, plus retention lugs, attaching to the lower fuselage by two large pins. The 9-13 has three hard-points on the wings and you can choose to mount additional fuel or a pair of Vympel R-27R Alamo missiles with their distinctive forward canted fins. The outer pylons seat a quartet of R-73R Archers, and again with all these missiles, GWH have been clever. Each one is moulded on a separate sprue as a single part, using slide moulding to obtain detail on all sides, as well as each end. The four mould seams are set diagonally, as are the sprue gates, so that the seams run along the lines of the fins, minimising clean-up. The moulds are also very tightly tooled, resulting in very fine seam lines that won't take long to clean up at all. The result is a clean, detailed missile with a lot more strength to its construction, whilst avoiding all the fiddly separate fins and associated alignment issues. Given the probable expense of tooling these parts, one can only assume that GWH have more variants of the Mig-29 or some other Russian subjects in mind. Whatever the case, they have introduced a new (to me at least) and intelligent approach to tooling missiles and ordnance, which is the weak point of many a model. Markings Two sheets of decals are provided with the kit, the larger of which contains the markings for the decal options, while the smaller sheet is covered with the tiny stencils that are ubiquitous on modern jets. Two options are supplied, and both are Russian airframes in two tone grey soft-edge camouflage and shark-mouth motif on the nose. From the box you can build either of the following: Red 29 - 31st GvIAP, 51st Air Corps, 4th Air Army, Russian Air Force White 51 - 120th GvIAP, 21st OSAD, 14th Air Army, Russian Air Force The decals are marked as made in China, and appear to be of good quality with first-rate colour density and registration. The edges of the registration marks are visible on the sheet, and shows that the colours are well registered, but also names a few of the colours on the stencil sheet, which is usual as they are usually cropped off before release. The stencils are all legible under magnification (2.5x in this case), and although I cannot read Cyrillic, they seem to form words that are vaguely familiar from other kits. Included with the stencils for the airframe are the stencils for the missiles and fuel tanks, which is a welcome trend within the hobby. A separate diagram gives both painting and decaling instructions for the munitions and fuel tanks. Conclusion Having totally missed the initial release, this new variant was eagerly awaited by both myself and a lot of others, so should sell very well. It deserves to, as GWH have put a lot of work into it, and the results are there to see in the box. The detail is excellent, the build looks to be straightforward, the weapons are first class, and the presentation matches it all. If I had to pick on one thing, it would be that the decal options are a little samey, with only the bright tail stripes and tail codes differentiating to the casual observer. That churlish moan aside, it's difficult to find fault with the kit, and I suspect it won't stay unbuilt for long. Very highly recommended. Review sample courtesy of
-
 We have received a shipment of the GWH4813 MiG-29 9-13 from Great Wall Hobby and they are finally available to order in the UK. http://www.creativemodels.co.uk/great_wall_hobby_148_mig29_913_fulcrum_late_type-p-32112.html Unfortunately we do not have any of the 9-12 MiG available.
 -
Latest work on the bench, i've been a bit slack lately what with the new member of the family but so far so good and pretty happy with what has materialised so far. Not the best pictures, the light wasn't great but plenty of good detail considering its going to be buttoned up.
-
I was just looking at the Hannants website and noticed the Great Wall Hobby are releasing a Vulcan in 1/144. No details on timing or cost yet. Does anyone know anything about this? Is it a rebox or their own?
-
Our latest newsletter is now available to view on the website. This weeks newsletter New arrivals include the 1:144th scale Vulcan Bomber and the 1:48th Black Widow from Great Wall Hobby. The Hobbyboss 1:32nd scale Black Widow and the 1:16th scale Tiger I have also arrived but the Tiger I is already 90% sold. We have around 50 left and expect to sell out within the week. Our 100 weekly specials are also still proving popular with upto 45% discount available. Specials run each week until friday night.