Search the Community
Showing results for tags 'Flightpath'.
Found 23 results
-
Time to start something new. Something a bit more demanding than those kits that I have been working on recently. So I have chosen Revell's fantastic 1/32 Tornado GR1 with lots of lovely aftermarket as follows:- Flightpath UK's Tornado Detail and Conversion Set, Flightpath UK's Flaps, Slats and Spoilers set, Aires resin Afterburners, Aires resin Cockpit, Flightpath's LGBs and AIM-9s, Master Probes, SAC's metal undercarriage, including the supplementary set, and Eduard's canopy mask set. So, without further ado, the obligatory box shot:- And the aftermarket:-
- 177 replies
-
- 4
-

-
- Flightpath
- Aires
- (and 1 more)
-
 Way back in 1997 I bought the Hobbycraft 1/48 Hawker Sea Fury kit along with a Flightpath white metal, resin and etch detail set. Scroll forward to 2020 and to the 'In the Navy Group Build' where I would finally make a modest attempt at putting this together, I should also mention that the intervening years had seen me pulling this out of the to do pile only to then return it to said pile for another time. Anyway, filled with enthusiam 2020 would finally see me put glue to bits and sticking them together. On that occasion, along with boasts of 'once I get started I will get it finished', I got as far as assembling some of the cockpit parts before it was put aside again. Another couple of years would pass before I would give it another 'good coat of looking at', and with a slight lull in my planned model building activities at that time I had decided that I really wanted to get this finished. Then in late January of this year I thought it would be an ideal subject for KUTA 2022 hoping that this Group Builds end date would give me something achievable. It didn't make it over the line then either but on this occasion I have persisted with it and I am pleased to say that some 26 years after my orignal purchases I completed it Friday. I dropped the flaps and opened up the gun and ammunition bays on one wing then used the wing fold details on the opposite side, all of which meant that in the end I only used around half of the Flightpath set but tried to make as much use of those parts to show what is possible. Although the cockpit is well detailed I messed up when trimming the vac-formed canopy and had to use the kit version, so little can be seen of that. The main painting was airbrushed with Hataka's Orange Line series of laquer paints. It has been a long time coming but I hope that you enjoy looking at the end result. John There is also quite an interesting story behind VX730 in the link below. AN IDENTITY CRISIS by John L, on Flickr by John L, on Flickr by John L, on Flickr by John L, on Flickr by John L, on Flickr by John L, on Flickr
- 25 replies
-
- 59
-
-

-
- 1/48
- Hobbycraft
- (and 1 more)
-
Back in 2020 I started this 1/48 Hobby Craft boxing of the Hawker Sea Fury for the In the Navy GB. I had also planned to use a Flightpath Sea Fury set that I had bought several years before to add more details to the cockpit and other areas. Anyway time got away from me and the project stalled and has languished in a drawer since then. But having just finished this pair of builds for another Group Build, I find that I have a gap in the programme and have decided to see if I can get this one finished. by John L, on Flickr by John L, on Flickr Here is a photo taken today of how I had left things back in 2020 along with a link to the previous work. by John L, on Flickr and the remaining details - only some of these will be used for this build. by John L, on Flickr Cheers for now. John
- 28 replies
-
- 6
-
-
- Hobby Craft
- Flightpath
- (and 1 more)
-
This started life as the old Matchbox HP Victor K2 as re-boxed by Revell and I added the Flightpath Victor B1 conversion, took lots of bits away and made a new fin and cockpit transparency. Lots of fun with filling and sanding but it wasn't a difficult conversion. The Work In Progress is here as part of the Big and British GB. The silver is from a Halfords rattle-can, the black and the red stripe are Humbrol gloss enamel. After an overall coat of gloss the home printed decals were added before an overall coat of matt varnish . Back in the early 1950s the Victor must have looked very futuristic compared with the Lincolns and Washingtons in service with the RAF. I think the colour scheme makes it look very menacing as well but was probably chosen to hide a few details from the prying eyes to the East. I couldn't resist a photo with my Valiant prototype from a few years back - the build for that one is here Also a photo with the HP88 which was built to test the Victor's crescent wing - some more photos of the HP88 here Thanks for looking. Steve
- 18 replies
-
- 68
-
-
-
- Matchbox
- Flightpath
- (and 1 more)
-
Later starting than I'd hoped but the plan is to do this; I'll be using the old Matchbox Victor K2 as re-issued by Revell with the Flightpath B1 conversion, some scratchbuilding and lots of chopping up of perfectly good plastic kit parts. The list of things to alter includes; Shortening the forward fuselage Re-shape the tip of the nose Remove the under fuselage hose drum unit and fill the gap Make the fin taller - probably make a new one as it's likely to be easier than altering the kit parts Use the Flightpath B1 resin engine/intakes in place of the larger kit parts Remove the wing mounted pods and fill the resulting gaps in the wings Shorten the wingspan and fit the Flightpath B1 wingtips Re-shape the tailcone Re-shape the fin/tailplane fairing Change the shape of the main landing gear doors and bays Remove the wing vortex generators Remove the blisters on the top of the fuselage Re-shape the cockpit windows Draw and print the decals I'll probably have to add to this list.... ...not much more Remove strake behind cockpit on joint line Remove bumper under tail Reduce chord of wing leading edge Draw and cut masks for the red stripe Fill portholes & drill new ones further aft Vacform new cockpit windows A quick look at where to remove sections from the fuselage, I've never seen any mention of where the extra length was inserted for the production Victors but the prototype had nice curves on the upper and lower fuselage centreline rather than the straight lines you can see where I've marked the 'X's. The advantage of taking these sections out will be when the two parts are re-joined there should only be a small amount of blending to do. I will have to extend the forward wing root cut-outs up to just under the porthole windows -which looks about right from photos A trial fit of the Flightpath replacement engine/intake section which is a big lump of resin but fits well in the kit slot. The join to the fuselage and outer wing sections is likely to need some reinforcing. I think some brass rods through the fuselage and into each resin part and then some more into the wings The difference between the size of the intakes is really noticeable here, a big win is that I don't have to deal with the join on the intake vanes which is a difficult part of the Matchbox kit The wings need the big pods to be removed and the gap filled in, the vortex generators removing and the span shortening. Flightpath provide white metal replacement wingtips which butt-join to the wings but I'll drill into them and fit some more brass rod to make sure everything stays where it should The kit fin on top of a very old and not particularly accurate 3-view of the prototype showing the differences. I don't think the fin chord should really be that narrow but I need to look into that some more. Lots to do but I don't think any of it is too difficult. Steve
- 36 replies
-
- 5
-
-
- Matchbox/Revell
- 1/72
- (and 1 more)
-
 As my ludicrously long Sea Vixen build finally shows signs of drawing to a close, thoughts turn to what to build next. I always try to have two things on the go at any one time, with the other being my never-ending Ark Royal build - but there is a limit to how much 1/350 scratch building and detailing I can stand at any one time, and I need to have something in 1/48 (my aircraft scale of choice) to keep me going. I thought about a twin Buccaneer build - an Anti-Flash White S1 and an Ark Royal (4) final commission S2D. Those will come at some point, since I have the kits and the necessary conversion materials. But watching the splendid work of Steve (Fritag), Debs (Ascoteer) and others has convinced me that it is high time I built something that I actually flew myself. Sea King or Lynx, Sea King or Lynx... much indecision was finally tilted towards the Queen of the Skies by all the press coverage of its retirement from RN SAR service earlier this year (though the ASaC7 Baggers will soldier on for a while yet), and by markdipXV711's excellent build of an 819 SAR cab which he and I flew in together 20-odd years ago. So, since 819 (my other Sea King squadron) has just been done, I have finally plumped for an aircraft from my first tour. Pull up a bollard and listen to a true dit. 820 Naval Air Squadron, 1988, 18 months into my first front-line tour. We were part of Ark Royal (5)'s CAG (carrier air group) throughout my time on the Squadron, and in July 1988 the ship plus 801 (8 x Sea Harrier FRS1), 849B Flight (3 x Sea King AEW2), a detachment from 845 (2 x Sea King HC4) and 820 (9 x Sea King HAS5) set off for Australia, via Malta, Singapore, Hong Kong, Brunei and Subic Bay (Philippines), and home via Mumbai and Gibraltar. 6 months away, and a bloody good time was had by all... Less than 2 weeks after we sailed, we were taking part in a NATO exercise in the approaches to the Med; basically we were playing the bad guys trying to force a passage through the straits, and a number of RN, USN and Spanish units were trying to stop us... including HM Submarines Torbay, Otter and Opportune. The aim of these exercises is not to be 100% realistic, but to make sure that there is maximum interaction, so occasionally there would be a 2 hour pause where the submarines, having come right inside the screen and "attacked" the hell out of the ships, would withdraw 30 miles and start again. We would knock off tracking them and leave them alone to reposition. In those long distant 1980s Cold War days, ASW was our bread and butter, and on the whole we were pretty good at it. Most of the time we did passive ASW - chucking huge quantities of sonobuoys out of the aircraft and finding submarines that way, often working with our Nimrod and P3C brethren, and often working against USSR boats rather than friendly exercise ones. In my first few weeks on the squadron we rippled 3 (3 cabs airborne 24/7) all the way from Norfolk VA to Harstad in Norway, including several days of tracking 2 Victor IIIs that were taking an interest in our games. It was pretty exhausting, but we could keep it up almost indefinitely. For the guys in the back, passive ASW was often good fun; 3-dimensional chess, and all that. But for the pilots it was skull-shatteringly dull, flying around at 4-5,000' (nosebleed territory for any self-respecting helicopter pilot) and stooging at 70kts for maximum endurance for hour after hour after hour. But on this occasion we were doing active ASW, the task for which the Sea King was originally designed. Active ASW in the daytime is enormous fun for the pilots, especially when you are in contact. At night the aircraft flies the profiles for you, closely monitored by the pilots (since you are down at 40', you want to keep a close eye on things in the pitch black; it can be a tad buttock-clenching at night). In the day, however, you generally fly it all yourself ("manual jumps" as the jargon goes) without any assistance from the AFCS (automatic flight control system), and it's a blast. So there you have the scene. I am 18 months into front line flying, and have reached the dizzy heights of being captain of my own crew. My P2 for this trip is a hugely experienced USN exchange pilot (way more experienced than me, but flying as second pilot while he gets up to speed with RN procedures). We do 45 minutes of active Torbay bashing, but then reach the pre-briefed pause while she repositions. Rather than disrupt the flying programme, we simply keep going, so we have taken a plastic milk float with us (hi tech, I tell you) and are doing some grappling training; chuck the milk float out of the back and practice SAR with it - much harder than it sounds, cos the milk float thrashes around in the down wash, so it is great training for the back seat in conning the aircraft and the front seat in hovering it precisely. A few minutes into the grapple work, with Jim the USN guy on the controls, the port engine stops... or so we thought. The Nr (rotor speed) decays as the good engine runs out of puff (too hot and too heavy to hover on one engine) and we subside rapidly onto the water yelling Mayday and punching the windows out. Phil Smith, the Observer, says he had never seen anyone strap in as fast as poor old BJ Sandoe, the Crewman who had been lying on the floor of the aircraft with his head sticking out, conning Jim onto the milk float, when suddenly the Atlantic Ocean came up to greet him. As I reached up to shut down the No 2 engine (cos you sure as heck don't want to abandon a helicopter while the rotors are still turning) it became apparent that the No 1 engine had not in fact failed, but simply run down to flight idle. The fuel computer had developed a fault and tried to shut the throttle, but there is a physical interlock built into the system for precisely this emergency, called the Flight Idle Stop, which is basically a screw jack that prevents the throttle from closing beyond a certain point - the very last thing you do when starting up is to engage it. So we over-rode the computer and managed the throttle manually, the Nr came back up to where it should be and shot off the surface of the sea like a startled rabbit, downgraded our Mayday to a Pan, and flew back to Mum. A Green Endorsement much later (still on the wall of my loo) and very shaky legs for a few hours afterwards. Well, it has to be this cab, doesn't it? So I present to you ZE419 / 014 / R of 820 Naval Air Squadron in July 1988; a bog standard Sea King HAS5. Dark blue (this was just before the days when everything became grey), black markings. Photos of the real aircraft to follow, I expect, but for now she is one of these in the distance (photo taken the day before we sailed from Pompey, so about 2 weeks before the ditching): The aircraft will be built much as in this photo, actually; folded, included the tail, with engine blanks in. The cabs in the photo have tip socks on, but I will probably build mine with the more robust blade support system known as "Forth Road Bridge" gear (as in this Mk 5 at the Fleet Air Arm Museum): The basis of the model will be the Hasegawa 1/48 Sea King, using the "Ark Royal HAR5" [no such thing; it should be HU5] edition (which for some reason Photobucket refuses to rotate, so turn your head): ...and the excellent Flightpath conversion set, which contains all sorts of goodies important to this build - notably weapons carriers, assorted aerials and a tail rotor much better suited to having a gust lock fitted to it. Herewith statutory sprue shot: ...and pic of the contents of Flightpath box and a couple of other aftermarket goodies: As it happens, I also have a Hasegawa AEW2a kit (acquired before the Mk5 kit was released, as the only game in town for a future Mk5 build). This will also be useful, since it contains a number of applicable bits such as Orange Crop ESM aerials (removed from the HU5). And since all the Hasegawa boxings are variations on the same theme, the kit already contains some parts that I will use - e.g. the HU5 has the sand filter in front of the engine intakes, but in my era we simply had the "barn door"; similarly the HU5 has the sonar removed and a blanking plate fitted. The kit contains both a barn door and a (sort of, -ish) sonar. [i also have a second complete "Ark Royal HAR5", designated eventually to be an 819 SAR aircraft... but not yet]. There will not be much progress for a few days, while I get the Vixen over the line.... Herewith photo of the appropriate log book entry (bottom line:
- 2,565 replies
-
- 34
-
-
- Flightpath
- Hasegawa
- (and 1 more)
-
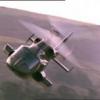
Hi all, Here's my take on the very nice Revell 1/32 kit of this big ugly beast. It's actually a very good kit, the best large scale Revell kit I've ever made. Which is high praise indeed! I used the Flightpath detail set, Verlinden equipment bays and 30mm cannon, and scratch built loads of extra details. I received the kit for free, part built and without any instructions or decals. I got the instructions off the internet and made decals using my home computer. The subject is the flight leader's aircraft from A Company, 1st Battalion, 101st Aviation Regiment. The group was assigned as part of Task Force Normandy, which fired the first shot of Operation Desert Storm in the early hours of 17 January 1991. The mission was at the extreme range of the Apache, and each carried a long-range fuel tank which varies the loadout a bit. All following photos thanks very much to Chris Bradley of IPMS Farnborough. Cheers for looking 🙂
- 30 replies
-
- 45
-
-
-
- 1/32
- Flightpath
- (and 1 more)
-
Time I picked this up again (as several of you have hinted in not entirely subtle ways of late...) It's been 6 months since I last did anything to this model, so some of you might not even be aware of it. If so, I hope you have some spare time, because if you are really interested you have a mere 103 pages of build log to get through... "Fill yer boots" as they say in the Navy. The original build has already walked through: a. the back story (I ditched this aircraft in July 1988, flying from Ark Royal just outside the mouth of the Med); b. the planned configuration of the eventual model (RAF Blue Grey paint job, folded tail, folded rotors, engine blanks, lashed down); c. lots of banter with the much-missed Debs (@Ascoteer) about Cold War ASW; d. some basic explanations of rotary-wing aerodynamics (and push-back against the inexplicable myth that Plank-Wing things that go whoosh are more attractive than Useful Aircraft); e. droop stops, what they are for and how to build them from brass; f. a great deal of discussion of rivets; whether to add them to Hasegawa's entirely smooth fuselage, and if so how. The short answers for those who want to skip the 103 pages is "yes" (because the Seaking has a pretty bumpy skin) and "using HGW rivets". HGW rivets are absolutely superb but be warned; they are not easy to use. I ended up doing them badly once, stripping them off and doing them better the second time - after having to visit Yeovilton and produce my own drawings (Fearless wasn't the first!) to work out where to put them. g. the difference between Sikorsky seats and Westland ones; h. weird Seaking details like the collector cans, pee tube, sonar snub ring & sonobuoy chutes; i. in-flight refuelling from ships (HIFR); j. a minor diversion into restoring an earlier damaged Gazelle model; k. discussions of SACRUs, "Coke cans" and other such load-lifting goodies; l. correcting Revell's Sea Searcher radome (which happily Hasegawa got right); m. the relative merits of masks vs decals/transfers/stickers (& how excellent Maketar Masks are); n. building a tail rotor gust lock & what it was for; o. me being persuaded into adding sliding pilot's windows & other such mad details; p. the joys of a proper micro-chisel in embedding PE convincingly; q. embarrassing accidents involving Seakings landing on top of Sea Harriers; r. the right recipe for RAF Blue Grey paint in Gunze Sanyo lacquers; s. the superb-itude [which isn't a real word, but should be] of the FlightPath 1/48 Seaking conversion set; t. custom-build apparatus for extracting windows which the ham-fisted modeller has shoved into an already sealed fuselage; u. red & yellow engine blanks and how to build them; v. just how sexy a Seaking looks in all black; w. nylon & chain lashings on RN flight decks; x. a second diversion, this time in building a flight deck tractor to tow my aircraft; y. oil dot fading; and z. John Beattie ditching the RNHF Sea Fury... Just to remind you and/or give you a clue about where I'd got to: The tail pylon, Barn Door and tail rotor (complete with gust lock) - plus the beginnings of some weapon stations: Engine blanks! The exquisite FlightPath rescue hoist: A Flight Deck tractor: The rotor head (very much still a work in progress): ...and the aircraft itself (this one wasn't taken today, because it shows the cab before I re-applied masks to the windscreen)... and before I knocked the tail wheel off for the umpteenth time! As she looks today (glossy in preparation for further oil dot fading etc: Still to do? Three main things, all quite complicated: 1. the rotor head (specifically, the snakes' wedding of hydraulic pipes and wires around the blade fold); 2. the weapons stations and associated wiring; 3. the Forth Road Bridge gear ...plus putting it all together. I have just had 6 months away from it, but even before that it had taken me well over a year. Take your seats, Ladeez 'n' Gennelmeeen More soon Crisp
- 410 replies
-
- 29
-
-
-
- Flightpath
- Hasegawa
- (and 1 more)
-
 As seen at the International Air Tattoo, Greenham Common 1986. Build thread HERE for those interested in the Flightpath detailing set. Revell 1/32 kit with Flightpath detail set, Paragon ejection seats, AMS resin nose, Hobbydecal probes and a variety of deliberately obtuse decal sets! I was really disappointed with the decals, really put me off finishing the model. You can't really make it out from the photos, but most of the stencils and insignia went on rubbish. A real labour of love like most Revell big-scale aircraft, phinally phinished with phlaws!! Courtesy of IPMS Farnborough website Finished as 68-480, the CO's ship of 512th FS, 86th TFW based at Ramstein AB in 1986. The 512th nickname was Dragons, so the 'sharkmouth' is actually a dragon mouth! Only the second model I've completed this year, but one of my part-built shelf-sitters since 2008 completed at last! Cheers 🍻 Alan
- 32 replies
-
- 20
-
-
I returned to modelling in the late 80's and several years later, this kit and update set was one of my early larger scale purchases. It has been in and out of the stash several times since then, but being a slow builder, combined with the complex Flightpath detail set I have tended to shy away from starting it. Anyway I thought that this group build would be the ideal opportunity to get this one out and build it. I may run out of time but let's see how far I can get with it, and one thing I can say with confidence is that once I make a start, it will be finished. Anyway, here are the box shots of the kit and Flightpath set. First the kit box and its contents. by John L, on Flickr by John L, on Flickr And here is the Flightpath box by John L, on Flickr with the etch brass sets by John L, on Flickr and the white metal and resin details. The set also includes a vac form canopy and decal sheet. by John L, on Flickr That's a lot of parts to prep, so I will need to plan things carefully and work in stages..
- 21 replies
-
- 13
-
-
- Hobby Craft
- 1/48
- (and 1 more)
-
This is one I have been waiting a long time to do - maybe this time I will finally do it! I suppose I have a bit of a history with the Airfix Lancaster kit. I got my first one as a Christmas present just after it first came out back in 1958 – it cost 7/6 or 37.5p in those days! Several years later I saw an article in Airfix Mag where the Lanc was converted into a Manchester so I bought another of the original Lancs, and converted it using balsa wood and plastic wood ( I had no proper filler in those days). Then, as suggested in the article I used the redundant outer Merlins to convert the old Airfix Beaufighter TFX into a NF Mk II. Having done that, I then converted the Airfix Halifax Mk III to a Merlin engined Mk I – I was a lot bolder in those days it seems. Though I dare say none of the conversions were particularly accurate, I was quite pleased with them! Subsequently I bought Airtfix's 2nd moulding in around 1982. It was an altogether better kit, though I am now tempted by some of their later 3rd mouldings. I decided to hack about the other now “spare” 1st moulding kit into a vague representation of a Grand Slam carrier, using a drop tank of a Revell 1/32 P47 for the bomb.. I still have all 3 but perhaps the Manchester conversion will go soon as I bought a Planet resin Manchester Mk I kit which I will build before long, maybe even in this STGB. At some point I became aware of the DB Conversions set to convert the Lanc to the Lincoln, so I bought that together with the supplementary engine set, and in the early to mid 1990's picked up an Airfix Battle of Britain Memorial set cheap from Littlewoods in Cardiff, who were about to close down. I built the Spitfire and Hurricane, but for various reasons did not start the Lincoln conversion and both the Lancaster kit and the conversion parts ended up in my roof for many a year. When I came to get them down, I could not find the conversion sets, so I ended up buying an replacement set by Flightpath, but again I kept putting it off. Last June I decided to participate in the Frog GB here on BM and, amongst other kits, finally built my Shackleton MR3, and when I saw this GB advertised I though I might as well finally try to build the Lincoln. Of course in the meantime my wife had found the original conversion set hiding under the loft insulation, so I traded that with another modeller, having first swapped the Aeroclub metal props from it for the resin ones in the new one – I hate gluing individual blades to spinners! I also bought replacement Lincoln style wheels and vertical tails a few years back. So let battle commence – in theory it all comes down to 6 cuts – 2 fuselage and 4 wing, plus surgery on the engine nacelles, but then I am not known for my skill with a razor saw so it could be fun - good job we don't have swear box in the house (yet). Knowing my luck, after all the recent Shackleton kits from Revell and Airfix, an injection 1/72 Lincoln may turn up shortly, but not this year I think. More soon. Pete
- 122 replies
-
- 14
-
-
- Airfix
- Flightpath
- (and 1 more)
-
Hi folks, [This was originally part of the first Tornado Group Build back in 2008, hence the various references to deadlines and finish dates!] Here's the project: Aftermarket stuff: I have a lot of Flightpath stuff - the conversion and detail set, TIALD and ALARMs. Also, not pictured is the GBU-24 RAF version with the windmill fuse tail. I also have the indispensable Paragon seats, and the flaps and slats set. Decals from Fantasy Printshop - 18 to choose from. Too many choices! I have so little idea what to do i might just make one up out of various nose art cos it looks good. At the moment I am drawn towards Alarm Maiden or Dallas Dhu, but might end up doing Hot Stuff with the big sharkmouth, or whatever! Either way, it will be a Telic bird. All the best, Alan
-
This is a kit I have always wanted to build. I am the lucky owner of the Airfix twin kit so I wanted to be able to show this amazing airtcraft as best I could. I have decided to depict an aircraft from 208Sqn whilst it was on the Red Flag exercises in the 1970's The Buccaneers had never been seen by the Americans and during the exercise the RAF re-defined to the hosts what low level flying was. Ity was a superlative display of low level fast flying. Not one Buccaneer was intercepted! The kit has its issues, but forms a superb basis for super detailing, so here it goes! I wanted to show an Engine and the bomb bay, all my efforts are from refrence photos and are built by the eye, not plans, so it wont be 100% accurate. The photo etch is from Flightpath.
- 122 replies
-
- 35
-
-
- Buccaneer
- flightpath
- (and 3 more)
-
Hi folks, been away a while. Back again to answer the call that we need more Phantoms! The Flightpath set is interesting as it supplies new PE wheelwells, jetpipes and nozzles, stabilator slats, metal gear legs and new correctly sized wheels. It doesn't contain any cockpit details as they were going to release a separate set but didn't do it in the end. Also using True Details seats, Eduard placard set, and AMS Resins nose (on order!) Also will be using IsraDecals stencils - these stencils are scaled for the Tamiya kits, so may turn out too much trouble. The project I have in mind didn't have that many stencils anyway! I intend to model the Ramstein-based F-4E in wraparound SEA Lizard camo that I saw at the RAF Greenham Common International Air Tattoo in 1983 with the world's biggest sharkmouth on it! Alan
-
Wasn't sure whether to post this here or in WWII Aircraft, but this seemed the best option. I'm trying to build the Flightpath RAF Type D bomb trolley (operative word being trying!) and I'm stuck. The instructions are pretty vague and I've struggled to find a photo that shows the area I'm having trouble with. The instructions state to "form and fit part 2 into the rebates in part 1 (the chassis) fit parts 3 into part 2, adding the cast spring into the recessed areas provided in part 2" I can see the rebates in part 1, but from there I'm stuck. My question is does part 2 form an inverted 'L' shape with the spring pointing forward and if so does the top of the L face forward or backwards? If the location of part 2 is correct where do the two part 3's fit? Has anyone built one and could post a photo, or point me in the direction of a clear photo of the front end of a trolley please?
-
 Thanks to everyone who has followed my WIP for this model. Well its finished at last. For those viewing this for the 1st time: This is the Airfix 1:48 kit, a challenge as many of you know. I have built this model to represent a specific aircraft flown during Red Flag 1977. The Buccaneer force astounded all our allies during this exercise. Not one was intercepted by any aircraft throught the time they were out there. The ultra low level flying astonished our allies and all the spectators. Thiswas an amazing show of flying skill in which this aircraft, the 'flying brick' was the only aircraft in the world capable of doing so. I used the excellent Neomega resin cockpit, Flightpath photo etch and I scratch build the RR Spey engine, bomb bay and wheel wells. I finished the model in Vallejo air paints and washes.
- 67 replies
-
- 79
-
-
Hi all, Firstly I must admit that isn't quite finished. But this has now taken over five months and I think this is the best place to put it. Build thread is HERE (Merv "Spike7451" Milliken memorial build) This one's for you Merv, RIP. The build is from the Revell 1/32 Tornado IDS/ECR/RAF versions (I used the remnants of four different part-built kits to make this!) and both the current and old Flightpath super detailing sets. I also used Flightpath's flaps and slats set. Decals were a motley mishmash of Revell, Eurodecals, Xtradecals, Kinetic (Hawk kit) and homemade. I also scratchbuilt a Brimstone triple launcher and missiles, TERMA pod and numerous details on the kit and especially the cockpit. So... not quite finished (still needs pitot, temp and AOA probes, awaiting them in the post; also the scratchbuilt Brimstone launcher and missiles are being cast and I'm waiting for that) but ready for inspection! Nice photos by Chris Bradley of IPMS Farnborough: Remaining photos are my usual woeful back garden efforts! To be honest I'm sick of looking at this, it's been an absolute beast to build. I'm not even sure what I like or don't like about it, so I leave it up to the BM fraternity to pass judgement. I'm looking forward to the next project already. So... enjoy! (if you're into big grey jets, that is...) Al
- 50 replies
-
- 51
-
-
This'll be my entry: Photo credit and © Carl Woodend via Flickr A bang up to date, 31 Sq GR.4, post-Ellamy and Shader-ready! Probably ZA472, as it also has the code number 031. Don't know if it has the TARDIS upgrade, but it will for this build! There's a lot of work to be done as I have the Flightpath detail set and flaps set, plus all the other complications of making a 1/32 Revell kit (seams, soft detail, dodgy structures etc) © raf.mod.uk It'd help me if anyone could identify the store on the nearest pylon. Otherwise it'll be the standard Sky Shadow like the one in the background. Cheers, Al
-
Here are some pictures of a Matchbox H.P. Victor K2 converted with the Flightpath conversion to a B1. The kit is quite big. It was also a difficult conversion. The engine pods were totally from resin. The model is quite heavy. It took loads of elbow grease and filler to tame it. I made this one for a friend in Engeland. He will pick the model up at Telford. Cheers,
- 24 replies
-
- 46
-
-
- Matchbox
- Flightpath
- (and 1 more)
-
Welcome to the lesson on how not to build the Revell Tornado. I've taken the plunge and started my first build thread, don't expect regular updates, because I don't have nearly enough time to devote to modelling as I'd like to But, I will endeavour to see this through to the end, this may result in a finished model or a pile of plastic lying at the bottom of the wall it's just been launched at. Any hoo, as the title suggest's here's what I'll be using, Closer look at the Flightpath set, Where I'm at to date It'll be converted to a GR4, and if I can find current pictures of a GR4 cockpit, will be bang up to date. Scratch building anything not included in the Flightpath set, at least until my talent runs out. As for the finished markings, I've not decided, But as I live not too far away from Lossiemouth, It will be one of the local Squadrons. 15sqn would be nice but I'd have to make the markings myself, or the easier route 617sqn, using the kit decals but incorperating any changes needed to make a Grey jet. Any encourgement and pointers gratefully recieved Thanks for looking Mike
-
Hi Folks, This is the finished article - only took me 5 months. Unfortunately the Tornado groupbuild was just 4 months Build thread exists again, it's HERE Since i saw the pics i realised i'd missed a couple of blade antennae and the aircon hoses for the crew seats. They are now on! The wire support in the canopy is just so I don't have to glue it in place. This was (near enough) the 617 Sqn 60th Anniversary plane (AJ-T "It's Show Time") - very simple as the Squadron was actually fighting in Op Telic on the anniversary date. I believe this aeroplane was previously called "Rects Controllers Dream" and didn't actually fly any missions as it was used for emergency spares due to some tech problem. ("It's Show Time" was actually applied to AJ-J originally.) The noseart is wrong as applied to this aeroplane (too small and the writing in the wrong place), and the lightning strikes on the tail are also wrong. But hey! WHO CARES!! I know what it's meant to be. Al
-
Hi everyone, After the last Revell Hawk I made, I swore I would never build another one. This is it.* Built using Eduard cockpit set with Flightpath access ladder and FOD covers. Painted in quite thick coats of enamel black and Zero Clear Coat varnish. Scratchbuilt RBF tags and vortex generators from litho plate and plastic card. Had a couple of near-disasters with the gloss coat, but it turned out alright, smooth and shiny! Decals and stencils were from Alley Cat and are excellent quality. *EDIT* forgot to mention CMK MB10 seats, great product! Oh yeah, and it was built from the horrible red plastic kit rather than the much nicer grey one recently released. Still, for £9.99, who's complaining? All the following pics are courtesy of the IPMS Farnborough website, taken by the photo genius that is Dr Flangemeister! The Flightpath access ladder was a work of art like all their stuff. Didn't quite measure the step intervals properly. Ah well. This was a commission build for my good mate Canberra Fan, well actually for his daughter , who usually works at Valley. It's gonna live in a box till delivery, the darn thing attracts dust like nothing I've ever seen! The price of a shiny finish I spose. Hope you like! Alan *with thanks to Spike Milligan!
- 46 replies
-
- 17
-
-
- Flightpath
- Revell
- (and 1 more)
-
Must have been bitten by a bug from Mozambique this month ! Having just posted some pictures of my Mozambiquan MiG-17F on the military side (Fighta flown by a Bomba), I thought it would be an idea to post some pictures of my Boeing 737 from LAM on this side My last Airfix Boeing 737 (!) with Flightpath decals Aircraft named after the port of Beira - had some good holidays there in the late 60's. Comments and criticism welcome as usual mike p.s. I don't suppose anyone has a spare Airfix 737 they'd be willing to sell me ? I have a set of decals for one that run the risk of turning yellow
- 16 replies
-
- 1
-
-
- 737
- Mozambique
- (and 1 more)