Search the Community
Showing results for tags 'F-14'.
-
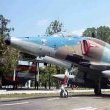
Hi guys, here are some more of the 'lock down, photos processed' collection, this time from Gillespie Field which is the reserve and storage centre for the San Diego Air & Space Museum. The F-14 stars in the new Top Gun movie and the A-6 cockpit was used in Flight of the Intruder (great film for A-6 fans!) IMG_6507 copy by tony_inkster, on Flickr T-33 Shooting Star by tony_inkster, on Flickr IMG_6481 copy by tony_inkster, on Flickr H-21 Shawnee by tony_inkster, on Flickr F-86 Sabre by tony_inkster, on Flickr F-14 Tomcat by tony_inkster, on Flickr A-6 Intruders by tony_inkster, on Flickr A-7 Corsair II by tony_inkster, on Flickr F-8 Crusader by tony_inkster, on Flickr Mig-15 by tony_inkster, on Flickr F-102 Delta Dart by tony_inkster, on Flickr Mig-21 by tony_inkster, on Flickr Untitled-6 copy by tony_inkster, on Flickr Untitled-3 copy by tony_inkster, on Flickr
-
Detail set for Tamiya F-14D and A-late in 1/48. Made of steel with a thickness of 0.05 mm.
-

Daddy defeats the Hasegawa Tomcat intakes!
MattSimps74 posted a topic in Work in Progress - Aircraft
Sincerely hope all you BM’ers are doing ok during this unprecedented time, I know that some time at the bench is a great help for most of us when the proverbial hits the fan. Very grateful to have such a great hobby (and some time to do it!) at the moment. A major milestone passed in my modelling career, my kids are SO proud of me! These suckers have lain fallow for several years and from what I read have been the undoing of many a modeller. I’d just given up, which was a pity as the rest of the build had gone quite well .... ’Challenging’ AMUR Reaver PE wing gloves fitted(this was the second attempt!) Brass sheet shoulder blades added too. Lots more PE around the nose. It’s going to be a Grim Reapers bird, Gunfighter 163 most probably. One day. So yes, build stalled around the intakes, completely stumped. I’d done the tweaks from David Aungst’s build and had them looking pretty decent. Intake ramps though, no dice. Enter the lovely new AMK Tomcat, of which I simply had to have a copy. Amazing engineering, truly a thing of wonder, and I haven’t really started it yet! Having built up their intake ramps, I scratched a version for the Hasegawa kit, using the same method to get the angles right, and voila! Cockpit next. Best wishes to all of you guys and gals, I’ve a feeling RFI is going to be creaking fit to burst in a few weeks time! Take care all Matt -
Since i was a child, when i saw on an italian modeling magazine an article about the Tomcat in VF-31 colors, i dreamed about having it in my collection. It was 1997 or so. Now, after 22 years and lot of failure, i can put a red tailed Cat in my "showroom". It's not the perfect model, but i'm very happy! Tamiya kit with some resin bits from Quickboost (ladder steps, beaver tails, tail plates), Def Model (wheels), and Eduard (seat). Decals are a mix from Haseagawa and kits decals (insgina and stencils). Hope you like it! ciao Ale
- 18 replies
-
- 37
-

-
I had lot of fun building the Tamiya's Cat in 48th scale, so... i made my decision: i will build another Tamiya's Cat! This time i will build a colorful VF-31 bird with the iconic "Felix the Cat" carrying a bomb. This is one of my favourite livery on a Tomcat. (just for discussione purpose) The box Decals came from an unbuilt hasegawa kit I ordered some goodies to upgrade my Tomcat, others (wheels, beaver tails and CHIN pod) are on the way to my lab: I hope to start working on it soon, so stay tuned ciao Ale
- 25 replies
-
- 14
-
-

-
Hi Here is my latest build done for the "In the Years I was born GB" 1975 - Operation Frequent Wind - First F-14 Cruise Grumman F-14A Tomcat Hasegawa 1/72nd with Verlinden cockpit
- 54 replies
-
- 92
-
-
Tomcats of VF-211 at Nellis AFB for Green Flag, March 1981. 159462 159620 159626 159631 160915 Thanks for looking, Sven
-
 Source: http://www.hobbyboss.com/index.php?g=home&m=product&a=show&id=310&l=en V.P.
 -
That's my Tomcat. VF-1, their second cruise on USS Enterprise, on 1976. A real joy to build this kit. Quickboost seats and Fightertown decals. The most difficult part was to find out a bird with Tamiya block 85 configuration (standard beaver tail and two-grills gun vent), but still with the tan radome. Thanks to Forums and to a dedicated Facebook group I found two, choosing Wichita106. Now I Iook forward to see a new release from Tamiya, in A late version. Hope you like it! Paolo
- 15 replies
-
- 23
-
-
Yes, yes, yes, I know. Another F-14 joining the Grumman GB. I was planning to just look around my local store for a bottle of thinner when I realized this Hasegawa F-14A is on sale for Rp 490k (about GBP24,49 in old money), and they're giving 10% discount. A Tomcat? Why of course I can't miss it, even though I already got 3 and my brother threatened to launch any of them if I'm adding another one. This build is going to be a long build... Oh, and I'll be making 161276, the CO bird that was dispatched from USS Kitty Hawk during Operation Iraqi Freedom, dropping 45 bombs and contributed to VF-154 Black Knights' tally of 358 LGBs dropped during its last stint with CVW-5 at Persian Gulf. Let's hope I can make it in time before the deadline...
-
Hello colleagues modellers I would like to introduce to you my third F-14 from Tamiya 1/48. I built this model for Ted Rutherford who flew with him. Of the accessories, I only used Eduard's RBFs and seats. Fightertown Decals.
- 23 replies
-
- 41
-
-
-
 Hello again. Getting ready to take a few days R&R. But before I do, here's something that I've thought about bring up for quite a while. Every now and then, on various sites, people ask about the very early F-14 Grumman Tomcats. Way back when, probably in the early 80's, I did this model of the #2 prototype Tomcat, used for weapons testing. The old Airfix kit was one of the first F-14 kits out, and it had SOME of the prototype characteristics, but not all. Also, about that time, someone came out in a magazine article and told about these prototypes, and how to do them. I forget the who and where, but I'm sure that I still have the info around, if anyone else just gotta... In any event here she is in all her (somewhat) faded glory, after to close to 40 years on the model shelf: Here is a picture of the data card submitted at her model contest debut, where I'm proud to say she took first in class! One of the tricky aspects was to reshape the wing gloves, and still keep the working wing-sweep mechanism. Here she is in the fast flight mode: And then wings extended for slower flight/maneuver: Next, note the modified wing glve outline, as well as the beefy early fuselage stiffeners: The altered wing glove outline was accomplished by cutting a sheet of Mattel vacuform plastic (the green I believe!), to the correct out line of the drawings, and then adding about 3/8" or 9mm to extend under the old wing gloves, where they were glued into place with CA. When the parts had dried, several applications of medium CA were flowed onto the new extensions -- each coat being allowed to dry -- and when enough thickness had been achieved, they were filed and sanded to final shape, resulting in wing gloves with new outline, and at least as strong as the original plastic. Of course, this was done before the top and bottom halves of the fuse were assembled. Also above, please note the half-round lights in the top and bottom of the wing gloves. These were round pieces of the appropriate plastic colors (LIte-Brite pegs, IIRC), installed into drilled holes, and then sanded smooth, then later masked to the half-round shape when painting. All the lights on the model were replaced with colored plastic bits -- no paints used. Also, the "2"'s on the tails were cut with an X-acto knife from black decal paper Below, another rear-quarter view showing the wing gloves, stiffeners, and the modified boat-tail: Another rear view with the wings extended: And with wings swept back. Note the parachute housing on the modified boat-tail, as well as the modified fuel dump: Right side view showing the open refueling probe, and some mods to the nose gear door: Some cockpit detail, and the rather naked fuel probe opening -- I had no photos of this area at that time: And a little more cockpit detail from the other side: Note that this was also before the act of dipping canopies into Future began, and the old girl is still paying the price! BTW, the yellowing areas are not attempts at weathering -- they are the result of applying MicroScale clear topcoat over the model, which because it was enamel-based, has begun to yellow. However, because this coat was very light on the model, it doesn't look nearly as bad as many others that were more heavily coated!. I now have an IMMUTABLE RULE -- no clear enamel topcoats ever!!! Next, the loaded-for-bear undersides: Not certain that all this was ever carried at one time, but it sure is impressive! One other note, at the time the model was originally built, it had no fuel tanks, nor had any other kits arrived on the market to steal from. I has to make my own masters -- and since no one had casting resin in those prehistoric days, I cast my own out of 70/30 lead/tin solder. Needless to say, over the years, the landing gear totally collapsed, and many years later, when some F-14 kit came out with correct fuel tanks, etc.,, I swapped out the tanks and the landing gear for the items you see now. One last shot of the nose: Note the scratched early under-nose fairing, as well as a "sort of" early style minigun cover. Now, I wish I had modeled the boarding steps, but oh well... Hope you enjoyed this trip in the way-back machine, when models were less-complicated, but some still sort of hold their own. I hope some of you will step up and make mine look bad -- can't wait to see YOUR results! Until then, Ed PS: while answer any questions after I return from R&R, but it may take a few days.
- 13 replies
-
- 31
-
-
 Hi, my other cat in the collection. This is a machine from the Desert Storm operation this time. I used the decals from Fightertown, wheels and RBF from Eduard, Chairs and ChinPOD from Aires (Quickboost) I hope you will like it
- 25 replies
-
- 62
-
-
Today (May 13th) is official Top Gun day! Don't believe me? Take a look here: http://www.topgunday.com/ As I browsed the hobby shop looking for a new model, it occurred to me that now would be an excellent time to build an F-14, something I've wanted to do for a while. Nearby I spotted Airfix's A-4 Skyhawk and realised that with some extra decals (currently en-route), and decided to put together a trio of aircraft. The thought for now is to pose them "in flight", lined up to represent the conclusion of this scene: https://www.youtube.com/watch?v=fC976fuQm4E Not much progress yet, but I wanted to prove that I started it on Top Gun day. The Skyhawks will need a bit of cosmetic work to turn them into "E" models, but they were the only type I could find in the shop, and close enough. I've built that kit once before and very much enjoyed it. F-14 Contents A-4 Contents. This should be fun!
- 40 replies
-
- 13
-
-
Hi all. For my second WIP thread I am doing the HobbyBoss F-14D 1/48. This is a kit I’ve wanted to build since watching Genissis models walkthrough on YouTube and his final reveal on this forum. I known i could ha r waited for the carriers ahoy or Grumman GB’s.... but I was very keen to crack on with this kit! This will be another OOB build and I am sticking pretty much with the walkthrough on YouTube until I get to the painting stage. Here’s where I am so far..... Cockpit built along with the radar and front landing gear bay. All assembled and sealed up never to be seen again! I have also covered up the Gatling gun system. This is going to need some filling and sanding sadly. Then I moved into the wings. As per Bob’s step by step I removed the front underside of the flap don i could have flaps and slats up and closed and sit flush. And I have also assembled and painted the engine inside. As they are going to be sealed in I am not doing any of the exterior work on them. And that is pretty much where I am at the moment. Just waiting for the paint to dry on the inside of the intakes then I can start to mask and attach to the lower rear fuselage. thanks for looking.
-
Academy catalog 2018 show a new tooling (yes another one!) 1/72nd Grumman F-14A Tomcat "VF-143" kit - ref. 12563 Source: http://www.greenmats.club/topic/4437-academy-172-f-14a-vf-143-№12563-анонс-на-2018/ V.P.
-
VF-31 at Nellis AFB for Red Flag Exercise in March 1985. BuNo 161866 BuNo 161858 BuNo 161860 BuNo 161862 BuNo 161864 BuNo 161866 BuNo 161868 BuNo 161135 Thanks for looking, Sven
-
In 1982, my USAF Test Pilot School class visited CV-61 USS Ranger as she was steaming down the California coast. The objective of the visit was to see how the 'other guys' do it. We were shuttled out to the boat in C-1 CODs, spent the night in forward quarters under the catapults - whoosh, bang, wirr continuing through much of the night for A-6Es doing their thing. In the morning, a briefing on carrier ops and then left to our own devices to watch VF-124 Tomcats do their Carrier Qualification exercise. After lunch, off to NAS North Island via CH-46 then a long drive back to Edwards. The deck was relatively empty, but watching the activity for recovering each jet and then marshaling it up to the cats for another go certainly gave one a certain respect for the choreography required to get this done without a misstep or mishap. Made me appreciate the opening scenes of "Top Gun" all the more - I thought the carrier deck sequences were one of the better aspects of the movie. And the Tomcats, great aircraft. My apologies for the lighting. I had asked if we couldn't steam northward to get better light from the Pri-Fly, but the crew would have none of it. Go figure. For those who track such things, MODEX and BuNo: 161771 NJ401 160692 NJ436 160693 NJ437 160911 NJ662 161144 NJ670 161165 NJ674 In 1987, I revisited USS Ranger. As part of my assignment at the Ministry of Defense. I was to be the carrier suitability expert, even though I was a USAF exchange officer. The thinking went something like this from my commanding Group Captain: We (the UK) don't operate carriers anymore, you (the US) operate carriers, so you are going to be our carrier suitability Subject Matter Expert. I went to point to my USAF badges, but our uniform-of-the-day was civilian business suit, so the gesture was kind of pointless. I arranged to get a carrier suitability indoctrination from some US Navy offices in Silver Spring Maryland and then off to Point Mugu to get some carrier ops orientation from VX-4 (operational test squadron). Got a couple of flights each in their F-14s and F-4s going out and back from Pt Mugu to Ranger. The reason for the west coast visit was that there was no carrier doing air ops off the east coast at the time. Unfortunately, my camera was in the shop, though I don't think the USN guys would have let me carry a camera anyway. Thanks for looking, Sven
-
At the risk of adding fodder to Tony Oliver's epic saga of 1/72nd F-14s over in WIP, here are some images of VF-143 "Pukin' Dogs" at Nellis AFB for a Red Flag Exercise in 1984. BuNo 161425 BuNo161426 BuNo 161432 BuNo 161419 BuNo 161281 Thanks for looking, Sven
- 5 replies
-
- 15
-
-
- F-14
- Nellis AFB
- (and 1 more)
-
VF-143 was paired with VF-142 for this Red Flag exercise. BuNo 161418 BuNo 161421 A bit fuzzy here! BuNo 141422 BuNo 161435 BuNo 161417 In other news: The motherboard in my iMac died this weekend, so I'm plodding along on an old laptop while I figure out where I want to go from here. The Macs are relatively expensive, but I like the user interfaces a bit more than the PCs. Then there is the buy now or wait till after the hols to see if there are any better deals consideration. The bottom line is that slide processing will definitely slow down in the interim. I may have to finish re-setting up my modelling workbench in the aftermath of my man cave flood this past summer! Idle hands and all that. Thanks for looking, Sven
-
Hi everyone I constructed model in 2014 for the customer. I used PE Eduard and Aires Wheel bay. Cheers, Martin
-
F-14A Cockpit Set (648312) 1:48 Eduard Brassin The F-14A was a much-loved carrier-based interceptor that is sadly missed now it is retired. We've had some decent kits in 1:48, but Tamiya have recently finally released one that caused quite a stir in the hobby. It is quite a well-detailed kit without going overboard with complexity, but while the cockpit is well enough detailed for many of us, there's no escaping the fact that detail is best done with resin, so along comes Eduard. As usual with Eduard's larger resin sets, they arrive in the oblong Brassin box, with the resin parts safely cocooned on dark grey foam inserts, and the instructions sandwiched wrapped around, providing extra protection. The set includes thirty one pieces of grey resin, one of clear, two sheets of Photo-Etch (PE) brass, one of which is pre-painted and nickel-plated, plus a small sheet of decals for stencils etc. The instruction booklet covers three sheets of A4 on both sides, and is printed in colour to assist you in placement of parts. The first thing to note is that Eduard don't just produce a set and let you loose with a sanding stick, scalpel and Dremel to make it fit. They give careful consideration to how they can design the set with minimal interruption to the build of the kit, which shows in the later sections where the set is integrated with the kit fuselage. Building commences with the seats though, which are models in themselves. Each one is made from four highly detailed resin parts, plus a number of PE parts from a constructional point of view, and a further set of crew belts, which are all pre-painted so will take little work. Each seat also has a number of stencils applied once painting is completed to give that extra boost to realism. The work is duplicated for both seats of course, including the important ejection initiation pull-loops on the headbox and between the pilot's knees, as well as the anti-flail leg-restraints that pull taut moments before the rocket motor propels the crew member out of the cockpit on a column of flame and fury. The cockpit tubs are large and open, due to the need for room for equipment and good visibility from the large canopy, and here each one is built up separately in the same basic manner. A rear bulkhead is added to the main tub along with sidewalls and equipment specific to the jobs of the pilot and RIO. The detail on the bulkheads and instrument panels is mind-blowing, and scrap diagrams show how to paint them accurately, as always using Gunze colour codes. More decals are used to provide instrument faces in this old-fashioned (compared to the MFD cockpits of today) instrumented cockpit. Rudder pedals, control columns and stowage compartments are added to the assemblies, and once the pilot's instrument panel is painted and installed along with PE parts, the RIO's coaming with realistic material effect over the instrument backs is added before the two assemblies are brought together in the fuselage. Two kit parts are adapted to fit the cockpit, with only one raised section and a brace needing removal. Two pieces of styrene strip 1x0.75x3mm are added under the rear of the pilot's cockpit and four on the RIO's to locate them correctly on the cockpit tray, and that should be about it. Close up the nose, and add the adapted kit sill area, insert the seats you prepared earlier, and finally the pilot's coaming, with clear resin HUD lens. Conclusion The kit cockpit is good enough, but this resin replacement is just so much better in terms of crisply moulded insane level of detail that it has to be worthy of consideration for the detail hungry modeller. 3D printed Rapid Prototyping, we salute you! Very highly recommended. Review sample courtesy of
-
 First of all thank you for your feedback. I did some changes to model thanks to your suggestion. 1.) removed some decals 2.) added some details, repainted some areas, fixed wrong color on some parts Thenk you for your suggestions and helping me to get better modeler ! Finaly i have some spare Money. I was so close to buy an air-brush, but i think i will stick to brush painting and see how far i can go with it ! New pictures at the bottom of post ! Greating As a kid i had a revell tomcat as a toy and i really wanted to build one now. The kit is not new , just reboxing from an old set with new deaclas. The set is not so hard to build, there are few gaps that needed some filling, but over all it was straight build. The kit has deep and wide pannel lines so it is kinda good for brush painters, since you can apply much more layers of thined paint and still you won't loose those lines. When it comes to painting, i am a huge fan of ''what if'' models. The paints i used are mix of revell acrylic and vallejo acrylic paints. Model is whole brush painted without using any masking type since i have a problems with it. When i use a type i always get some paint beneth it :/ . You can see whole proces of Building this model here : Build is straight from a box with no aftermarket parts. Only thing i didn't like was lack of missiles decals. Story behind this model would be that deep done in South Korea jungle, the kitty is waiting for her pray. Ready to intercept any threat coming to Unated States. I done some heavy wathering that i normaly don't do, since it is tomcat, tomcat in a jungle . Hope you will like this build, it is wird and missiles got me almost crazy, but i am pleased. Any feedback and comments are welcome. Have a nice day ! Second photo set with changes ! Thanks for watching
- 17 replies
-
- 13
-
-
Hello fellow modelers. again after some time I finished another model in the collection. The kit is news from Tamiya 1/48. It is enhanced by seats, wheels, and RBF photoetched from Eduard decals and decals from Fightertown I hope you will like it
- 43 replies
-
- 70
-
-
Hi to all , here's my latest build : 1/72nd scale F-14A from Fujimi. Decals from FCM This is the link of the w.i.p. http://www.britmodeller.com/forums/index.php?/topic/235011816-grumman-f-14a-tomcat-fujimi-172/