Search the Community
Showing results for tags 'Eurofighter'.
-
This is the Eurofighter from Revell's '60 Jahre Luftwaffe' set, but in its regular uniform without the festive decals. Thanks for looking! Luka
- 3 replies
-
- 29
-

-

-
- Eurofighter
- 1/72
- (and 1 more)
-
 Here's my attempt at Revell's 1/72 Eurofighter Typhoon from the "British Legends" kit. I'd heard that the Revell kits don't have the full set of weapons pylons to accurately represent the RAF versions, so these were part of the modifications (new pylon set from Air-Graphics models), along with some Brassin weapons and Eduard etch set. Assorted other ground support bits were from Flightpath, LP, and ReedOak figures, for the 'night shoot' pics. Airbrushed in Hataka acrylics and weathered with oils. Decals were another aftermarket eBay buy (from an Airfix kit) to represent the Coningsby aircraft I wanted. I also modified the etch FOD covers (adding plasticard strengthening and guide vanes) so they could be added / removed as required. The whole thing isn't perfect but it's been fun [mostly!] and good photography practise too. Thanks for looking.
- 45 replies
-
- 92
-
-
-
- Eurofighter
- RAF
- (and 1 more)
-
"Seek and Destroy" (Part 2) 41 Sqn's finest Hi everyone! I hope you're all keeping well. I've been sitting on this kit (metaphorically of course) since last year when I picked it up at the Cosford airshow. As many of you will know, I've had a soft spot for 41 Squadron for quite a while now, after my visits to RAF Coningsby (I wrote a little bit about my first visit here). I've done a Typhoon FGR4 and a Tornado GR.4 in 41 Sqn markings prior to this, but it was only after I was trawling through the photos i took that I decided to have a crack at the Typhoon's family model. Now unfortunately I didn't have the available decals to model the specific aircraft pictured, but to the casual observer it looks like a 41 Sqn aircraft! Kit: Revell 1:72 Eurofighter Typhoon Twin-seater Paints: Vallejo model air Aftermarket bits: 2x Pavla resin MB Mk.16A ejection seats Decals: A mix of kit decals and Xtradecal's "RAF/RN Update 2015" set I've done quite a bit to "liven" this kit up. For example, the cockpit panels were detailed with plasticard, I built the ladder/hatch, the electronic access panel, slime lights on the sides of the nose, scratchbuilt RAIDS pods (simulating ASRAAM's), detailed inboard pylons, drilled out APU exhaust, detailed exhausts, gear bays were detailed (including wiring and adding a honeycomb grid structure to the gear bay walls) and most importantly lots and lots of fasteners (technically not rivets, but I used a riveting tool nonetheless). On with the photos! Well, there we are then. I'll probably only have chance to do one more model before heading back to university, and I've got a Boeing 777 ready and raring to go! One of these days I'm rather tempted to do a comprehensive WIP to try and create the most accurate Eurofighter I possibly can (yes I have noticed that this model is missing the rear MAW antenna that can be found above the parachute door, sorry!). So as always, thank you ever so much for dropping by. Best wishes, Sam Until next time!
-
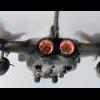
Eurofighter "Luftwaffe 2020 Quadriga" (03843) 1/72 Revell The Eurofighter EF2000 Typhoon started out as the EAP programme in the 1970s engineered entirely by BAe, but was later joined by a number of international partners due to an allegedly common requirement, with the partnership changing over time to end up with Britain, Germany, Spain and Italy remaining, while France went their own way with the Aerodynamics data to create the Rafale, which has a similar general arrangement. Delays and cost overruns seem to be a common factor in modern military procurement, and the Typhoon suffered many, resulting in the Germans taking delivery of the first airframe in 2003, Italy in 2005 and the UK in 2007. Operational airframes have since taken part in operations in Libya and under Italy's control in Albania. After the British Typhoons were initially ordered without guns, then with guns but without ammo, which was again overturned in due course, they were grounded in 2011 due to a lack of spares, which required the RAF to cannibalise grounded airframes to keep flying. The two-seat variant is used for training and conversion, although it is capable of going to war if needs required it, having all the systems in place to make it viable. The aircraft is a great air show crowd pleaser due to its agility at all speeds, and the impressive tearing roar of its twin EF2000 jet engines that propel it forwards with an impressive 20,000lbf of power per engine with reheat engaged. The Luftwaffe doe s not use the term Typhoon for some reason The Kit Here Revell have re-released their own tool kit which traces it's history back to 2016. The kit arrives on 3 large sprues, a smaller sprue; and 2 clear sprues. Construction starts in the cockpit with the 4 part seat going together then being placed in the tub along with the instrument panel and control column. Instruments are provided as decals. The tub is then placed in the fuselage and this is closed up. The lower intake parts are put into the lower wing section, if any underwing stores are to be used the holes for these need opening up at this stage as well. Moving back to the fuselage the exhaust inners go in at the rear, and the top part of the intake at the front. The lower wing can then be joined to the fuselage with the upper wings, vertical tail, nose cone; and front canards then being added. The exhaust nozzles are hen fitted with either open or closed ones being supplied. Wing tip pods go on followed by the top central spine, and at the front the cockpit coaming. The landing gear and doors can then be assembled and added to the model, or just the closed doors if you wish. If you like to open things up there is the option of an extended refuelling probe, and an extended airbrake. The canopy can be fitted either open or closed. It is good to see Revell provide a selection of missile and tanks to hang under the aircraft which some other manufacturers could take note of. Decals Decals are supplied for one specially marked aircraft. 31+49 of the TaktLwG 31 "Boelcke" The markings have "the green binary code stands for the digitization of the Air Force, the blue polygons for the corporate design of the Bundeswehr". The Quadriga points to the Eurofighters of the fourth tranche. Conclusion This is a good little kit from Revell and will appeal to those who like the special schemes, or just ant another Eurofighter in their collection. Recommended. Revell model kits are available from all good toy and model retailers. For further information visit or
-
 Model Number 4 - Revell 100 Years RAF - Eurofighter Typhoon RAF 1:72 - this one was a birthday gift - someone mentioned i like making models invested in a decent airbrush this time - did quite a bit of research before buying as i didnt want to break the bank but at the same time waste my money - i was a bit staggered by the price of some of them - i'm not a pro by any means so just couldnt justify the cost - in the end i bought this one - Fengda Hi-Flow FE-183 All-Purpose Precision Dual-Action Gravity Feed Airbrush - which is exceptional given the price! (look it up on amazon) As for the kit itself, a very good build indeed - all components were very well made and fit together well without the need of any filler - a decent amount of detail given that its a 1/72 - went with the Eduard detailing kit again - didnt go overkill on the weathering this time
- 2 replies
-
- 9
-
-
- Eurofighter
- RAF
- (and 1 more)
-
 I managed to finish this RAF1:48 Eurofighter Typhoon today depicting a special scheme worn in 2014 'TP V'. The Revell base kit is pretty good, I added Eduard photo etch set along with resin intakes. Thanks for looking
- 16 replies
-
- 43
-
-
- Eurofighter
- Typhoon
- (and 1 more)
-
Just finished Revell's 1/48 Typhoon in the 60th Anniversary markings of Taktisches Luftwaffengeschwader 71 "Richthofen". Built OOB with the addition of a Hasegawa Phantom pilot and Phase Hangar Resin's APU exhaust. I used AK extreme metal for the exhausts, AK Real Colour FS35237 and RAF Barley Grey for the main body and radome respectively. Decals went down really well with microset and microsol. A few small creases but nothing the sol couldn't sort out. It's the first time I've had such an extensive decal scheme so I'm quite happy with the results. Hope you enjoy... DSC_5468 by Phillip Loughlin, on Flickr DSC_5481 by Phillip Loughlin, on Flickr DSC_5472 by Phillip Loughlin, on Flickr DSC_5474 by Phillip Loughlin, on Flickr DSC_5477 by Phillip Loughlin, on Flickr DSC_5479 by Phillip Loughlin, on Flickr DSC_5480 by Phillip Loughlin, on Flickr and a comparison shot from it's departure from RIAT 2019 A3379456-C961-4C9E-9A0B-167F57DA93D1 by Phillip Loughlin, on Flickr Thanks for looking.
- 17 replies
-
- 41
-
-
-
- Eurofighter
- Typhoon
- (and 1 more)
-
Well for my quarterly (or so) photo session I pulled out a bunch of completed kits finished this year. I've just posted a couple of them on another forum and was working out the ones appropriate for Britmodeller when in a case of Serendipity I realised the title for he FW190's in the other post applied just as equally to 2 of the subjects with a British theme. The 1st is a RAAF tropical trials Typhoon. It is a Brengun kit and represents 1 of 3 aircraft sent to the Middle East to test out a Tropical filter. They were operated by 451 Squadron RAAF and the kit has been modified by a conversion set made by Red Roo. This consists of a tropical filter in resin and decals for all 3 Tropical airframes. The main issue with the kit is a number of panel lines having mould damage which need rescribing. I also had trouble with the wing to fuselage fit and the canopy. The latter has been replaced by a Falcon vacform. The fishplates on the fuselage come from a Brengun etch set.
-
 Hi everyone and sorry for starting this in the wrong thread earlier! So it all started like this - my modelling mate and all round good bloke Barry had bought himself this beastie last year.. https://www.scalemates.com/kits/115168-trumpeter-01601-tu-95ms-bear-h Me, I was at the end of a year of F-14 builds and was deciding what to build next. When I saw Barry's Bear, I dropped him a message along the lines of... Cool kit, nice purchase Just how big is that thing?! Wouldn't it be daft to see it 'intercepted' by a 1/72 Tomcat! We thought no more of it, except for sharing photos of Tomcats intercepting Russian Tu-95s until Christmas came and I happened to get the these two kits as a present..(cheers Daiske) And what with Mr. Putin starting to act the eejit with his flights around the UK, Ireland and Europe, it had all come together lovely. Just like an A-Team plan - an RAF Typhoon meeting a Russian Bear bomber, somewhere over the North Sea. (Source: Wikipedia Commons, public use) So that's our plan - Barry builds the Bear, I build the Typhoon and they both get displayed on a diorama that probably won't fit in either of our cars (damn, just thought about that one). And if that all that wasn't enough, I also planted a seed in Barry's poor head about maybe motorising the engines on the big Russian... More about the engines (and some WIP pictures) later this week. Thanks for looking. Dermot & Barry (who's still thinks I'm a bit of a nutter for this crazy plan)
- 46 replies
-
- 9
-
-
- Typhoon
- Eurofighter
- (and 5 more)
-
No 6 for 2019 : Hobbyboss base kit with spare Revell decals. Paints were Mr Color and Alclad as usual. This was a paid for build for a pilot friend and after he texted pix to other airline buddies, I’ve got orders for 4 more. That should make a dent in my bar bill for my upcoming trips to Milan and Cadiz. Interestingly my actual physical build time was 5.5 hours including the new angled stand. The next ones will be the actual Revell kit of which I’ve just scored five at a knockdown price, I thought I’d make one for myself for a change! I’ve had a few comments about no pilots, no weathering/open canopies etc. It’s down to who you build for: The folks who like and buy my stuff don’t care about microscopic etch, weathering, rivet perfect accuracy, etc. All of them are non-modellers, not interested in aviation history and most are real life pilots like me (sadly lapsed). To me and them, this brings back memories of a glorious sunny day at Goodwood as we watched the utterly charming Ben Westoby –Brooks chucking this Tiffie around in perfect blue skies with carefree abandon. I was never a fan of the Typhoon but looking at this, I have to say it’s a good looking, beautifully proportioned little plane that no doubt packs a serious punch. The British can do lovely lines on aircraft like no other; elegant is the word that comes to mind. The HB kit has accuracy issues as you would expect for a “snap tite”, worst is the overlong IRST fairing which means the pilot name decal is in the wrong place- it should line up with the slime lights. Revell left out the multiple grey lines for the wings, fin and airbrake which were sprayed decal film cut accurately with my Cricut Air 2. An interesting effect was using a black sharpie on the IRST tracker (a silica gel bead ground in half), it has the shimmery purple black effect the real ones have. The HUD was Hasegawa holofilm and I should have left the top circular. I struggled with this a bit due to a bit of trolling on another part of the form which temporarily sucked the joy out of making models, but that’s passed. Sadly the online world will always be a magnet for said folk, it best to just avoid the places they frequent. Because of that, I’m, taking a break from WIPs etc. as apart from the time, I feel a need to do other real world things, like flying, travel a bit more and playing jazz. There few more RFIs coming up but apologies if I don’t reply to any comments or questions immediately, I’m only logging once or twice a week if at all for a few months as a detox. Now to get ready for the arrival of @Nigel Heath, its my birthday and drink will be taken… Thanks for looking, have fun and stay safe, Anil WIP
- 15 replies
-
- 38
-
-
- Lt Nicholson VC
- Eurofighter
- (and 1 more)
-
Eurofighter Typhoon T3 1:48 Revell Evening all, I finished this build over Christmas, but with the glorious weather we've been having this past week it felt like a good excuse to break out the camera. I haven't really got much to say about this build; despite the excess amount of flash and variations in panel line thickness, it builds upon into a good representation of a Typhoon. Paints, as usual, are Vallejo and the APU exhaust was done by spraying UMP dark dirt. -Thanks for having a look, see you next time! Best wishes, Sam
-
 Hallo! Well, the project is complete. I wouldn't say that I enjoyed the build. The kit goes together only when being asked politely with a gun in your hand. A LOT of cutting, sanding and so on. It looks like Eurofighter to me, but Revell was just l lazy engendering this kit. Manual is nicely printed but sloppy too. But it's a cheap kit, so no offence. Just don't pay more than 20 Euro for it. Anyway, it's a great opportunity to try new techniques and improve your skills. I've used some aftermarket parts. Eduard 49367 is adequate and helps a lot to detail the model. Reskit (from Ukraine I believe) wheels are really nice. They are a little bit smaller than those in the kit, I think they are correct. And now ModelMaker decals. It's a piece of crap. I almost decided that the model is ruined. Everything is wrong with this product, colours, fonts, size and so on. Instructions are laughable. Very sloppy job, simply don't buy it. I don't know about other products of this producer, may be they are better, but I wouldn't use anything from them. Merry Christmas and Happy New Year everyone! K.
- 10 replies
-
- 22
-
-
- revell
- Eurofighter
- (and 1 more)
-
Hallo everybody, I started a new project, Eurofighter Typhoon with a lovely tail art. I used Revell's Tiger Day version, decals from ModelMaker and PE set from Eduard. So far I find the kit not as precise in fitting like many modern kits. Well, I don't know better kit in this scale anyway and Tiger was a bargain! K.
- 22 replies
-
- 8
-
-
- Revell
- Eurofighter
- (and 1 more)
-
 Hello everyone, i started to build this kit: to realize these two airplanes: I used this PE : Wip-EFA#004 by Rodolfo Masti, su Flickr First Step: Wip-EFA#005 by Rodolfo Masti, su Flickr Wip-EFA#006 by Rodolfo Masti, su Flickr Wip-EFA#007 by Rodolfo Masti, su Flickr Wip-EFA#008 by Rodolfo Masti, su Flickr Step 2: WIPEFA-007 by Rodolfo Masti, su Flickr WIPEFA-008 by Rodolfo Masti, su Flickr WIPEFA-006 by Rodolfo Masti, su Flickr WIPEFA-009 by Rodolfo Masti, su Flickr
- 9 replies
-
- 4
-
-
- eurofighter
- Ef-2000
- (and 1 more)
-
 1/32nd Eurofighter Typhoon twin seater by Revell - ref.04855 - release September 2013. Source: http://www.themodellingnews.com/2013/09/revell-has-just-too-many-sub-types-to.html#more Skill 5 The kit features: - Two-seat Cockpit with Instrument Panel - Eurofighter with a detailed EJ200 engine - Finely structured surfaces with recessed panel joints - Detailed 11 Piece Ejection Seat - Detailed Cockpit - Moveable Canard Wings - Detailed Air Intakes - Two configurations for the Thrust Jets with individual Jet-pipes - Detailed Large Air Brake (extended or retracted) - Detailed Undercarriage with finely detailed retraction struts - Detailed Undercarriage Bay - Separate Ailerons and Flaps - Separate Ruder - Detailed ECM Pods - Air Refuelling Probe extended or retracted - Two External Tanks - Pylons - 4 METEOR Guided Missiles - 4 AMRAAM Guided Missiles - 2 Sidewinder Guided Missiles - 2 IRIS-T Guided Missiles - 2 ASRAAM Guided Missiles for the RAF Version - 2 Laser Guided Bombs - a choice of two TAURUS Guided Weapons - 2 STORM SHADOW Guided Weapons for the RAF Version - Super-detailed EJ200 Engine - Detailed Spacing Rings and Heat Shields - Servicing Rig for the EJ engine with detailed support profiles and suspension links - Super Decal Set for the Bundesluftwaffe and RAF versions V.P.
 -
I know this question that has been asked before but IIRC that was over 7 years ago. I know very little about our front line fighter and Wiki talks of 'tranche' and 'block' but I don't know how this is indicated in the kits that were/ are produced. I have read on here that Revell was 'the' standard years ago. Is that still the case? What tranche/ block was that? What are my options for an RAF aircraft? TIA Stuart
-
 Welcome to the RFI of my Revell Eurofighter Typhoon single seater 1/72. She is OOB except for the canopy which is a Pavla vac form one that I had to use as I killed the original. I scratched a few internal bits but apart from that she's box fresh. Painted in Tamiya acrylics and Vallejo metal colour with washes by Flory. The kit went together quite well a few bumps along the road but over all I'm pretty happy with the way she turned out. about half way through I decided to add the D-Day stripes which I'm really happy with. ( My first painted stripes ) I hadn't planned on taking the snaps yet but it was such a lovely sunrise this morning I decided to drag myself out of bed and take some snaps in the garden before heading off to see my old mum on Mother's Day. I think this one should be dedicated to her. The WIP can be found here. Without further ado let's get on with the pictures. I hope you like em. And that's your lot I hope you like them. Thanks to everyone for tagging along in the WIP and helping me through the tough bits and all the technical help. There are a few gaps and errors here and there but I'm happy and damned if I'm going back now. She's in the cabinet and that's that. I have started my new build thread here. If you fancy another joyous ride of the rum and uncanny. Take care and as always Happy Modelling. John.
- 25 replies
-
- 38
-
-
- Revell
- Eurofighter
- (and 1 more)
-
 Latest addition is Hasegawa excellent 1/72 eurofighter typhoon of IX Squadron Royal Air Force. Per noctem volamus or There's always bloody something.. http:// http:// http:// http:// http:// http://
-
- 11
-
-
- hasegawa
- eurofighter
- (and 1 more)
-
 My 14 year old daughter joined the air cadets last year & it appears that she has become mad keen on airplanes (swmbo is not impressed). Her favourite at the airshows we go to is the Eurofighter, despite my fondness for Lysanders, Hurricanes and the Miles Messenger. As it happens my step daughter gave me this kit for Christmas, so it seems it's time to build a kit that requires no ez-line. As with most of the planes I build, this one will end up hanging from the ceiling, so I shan't be bothering with any aftermarket bits & bobs. However, before it gets hung up & gets its' full load of weapons fitted, I'm going to try and photoshop it into this picture: Typhoon by Andy Moore, on Flickr It worked quite well with Sally-B, so I thought I'd give it another go. I can't remember the last time I built a Jet, so this could be a disaster. My paints of choice are Vallejo model-air, so if anyone has any thoughts on the shades of grey that I should use I'd be most grateful if you could share those thoughts. Here are some pics I took that are fairly self explanatory, initial progress should be posted tomorrow. Revell 1/48 Eurofighter by Andy Moore, on Flickr Revell 1/48 Eurofighter by Andy Moore, on Flickr Revell 1/48 Eurofighter by Andy Moore, on Flickr
 -
About to start the Revell 1/48 single seat Bronze Tiger Eurofighter. I have been reading about the intakes and they are meant to be nightmares. Is it work buying the Heritage resin intakes. Seen them for £14 online (plus £6 postage!!!) or just go ahead with the current ones. I've also read opening up the vent in the side and using a straw to make the pipe. How much do I open it up? One last thing! I bought a scriber as ther eneeds to be a panel on the side. Does anyone have a diagram of this or shall I just look at photos cheers Adrian
-
Revell is to release in November 2016 a new tool (simplified new kit) 1/72nd Eurofighter/Typhoon kit - ref. 03952 Source: http://www.plastik-modellbau.org/blog/revell-neuheiten-2016/2016/ V.P.
-
Hello i wlll post my proggres here step by step and will try to explain much as i can. First of all i will make eurofighter different, since i hate pure gray airplanes, i mean i like to bring some life and color to them. For this aircraft i will try to do some splinter desert camo. So to get some idea i do a little bit of a Research on the Internet. And then i find instructions in PDF format and open it in paint, crop it and paint model there first. I will try to make model similar to this one: So i started my build with cockpit, it had nice decals and it went pritty smoth and fast, still i need ejection seat but i will build it later. Model is full of Extra flesh , so i will have alot of fun with cutting and using putty !! When joining fuselage it was horrible at start some part just couldn't stick together. By looking at a texture of aircraft there will be alot of work with putty and i will need to rescribe panel lines to make them deeper. So i will use hobby knife for that purpose and revells PLASTO. I will put a picture of aircraft when i'm done with putty and then one later when i'm done with panel lines. If you would like i can do step by step photos if needed !
-
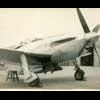
 Last year (2015) was important for all us WWII RAF fans being the 75th Anniversary of the Battle of Britain (BoB). For me a highlight was the visit by our own Procopius and I took great pleasure in driving him around a bit, culminating in a visit, with Jon (06/24), to the BoB display at Duxford. What a trip... Jon encouraged me to buy the Hannants decals for the Typhoon, further encouraged by sending me a kit - thanks Jon. I would say I intend to do it justice but after my Beaufort build I need a bit of a rest... For the RAF it was a chance to show off their new aircraft by painting it in the scheme of the Hurricane flown by Flight Lieutenant James Brindley Nicolson VC DFC, the only Fighter Command pilot to be awarded a Victoria Cross medal during the battle. It's good to see they use the same techniques as us: The kit is well known (I think): and is the 2007 rebox (it's been in my stash since last year). This is what I'm hoping to achieve: Nice. Time for some sprue shots.
- 231 replies
-
- 15
-
-
- Eurofighter
- Typhoon
- (and 2 more)
-
Here are some photos of my recently completed Revell Typhoon dressed up in the livery of the RAF's No. 3 Squadron based at RAF Coningsby. The build was quite a challenge as the kit's quality was not up to the same standards as Revell's previous F-15E and Rafale kits. This was a fully OOB build. Painted with Gunze lacquers and weathered with Tamiya enamels and some pastel chalk. Hope you enjoy the photos! Mark
- 15 replies
-
- 44
-
-
- Eurofighter
- Typhoon
- (and 1 more)
-
Hello all, just started my new projekt, Revells Eurofighter Typhoon Twinseater. I started with the seats. I wanted to add some more details and scratched the harness. You can find more pictures in my blog: http://petesmancave.blogspot.de/ Pete
- 35 replies
-
- 5
-
-
- Revell
- Eurofighter
- (and 4 more)