
Search the Community
Showing results for tags 'EDUARD'.
-
It´s very funny, In past montsh and last days Eduard´s CEO Vldimír Šulc talked about his Top 10 for future projects. No real project, but kit which he wanted make in future. Yesterday night (or today 3:00 AM) when i can´t sleep i tried summarize what he wrote to forums and Eduard Info magazines. I tried to find all post about existing and future projects. I save it only to my computer and not post to any forum. Today without any my endeavour he post his TOP 10 list to czech Modelforum. I can not believe, I guess all without one kits. Of course, his REAL list is better than my list :-). Here is his post: http://modelforum.cz/viewtopic.php?f=1&t=95280&start=4065#p1898395 No dobrý, dám si pivo Tak na oslavu a pro naději mých top ten v 1/48: Hurricane P-40 (včetně P-36 a H-75) Spitfire Mk.I/II/V P-38 MiG-21F (a možná i spárky) Me 262 MiG-15 (včetně UTI) S-199 / CS-199 (+Bf 109K) Camel Jak-9 (včetně Jak-1/7) Pořadí není pořadím, v jakém bychom tyto typy potenciálně pustili do konstrukce, ani pořadím vydávání. V současnosti jsou v procesu v různých fázích rozpracovanosti tyto projekty: Spitfire Mk.VIII, XVI, F.Mk.IX a Mk.IXE 1/72 Bf 109F a G-2/4 1/48 SE-5a 1/48 Avia Bk.534 a Avia B.534 I.a II.série 1/72 Bf 109G-10 1/48 Fw 190A-3 až 8 a F-8 1/48 Tempest 1/48 Fokker D.VII 1/72 P-51D/B 1/48 MiG-21MF/BIS/SMT/PF/PFM/R 1/72 V tomto případě už je pořadí víceméně tak, jak to půjde po sobě.
-
 Saab Draken Upgrades (for Eduard/Hasegawa) 1:48 Eduard Following their limited edition reboxing of the excellent Hasegawa kit, which is still available here, which included some resin and Photo-Etch (PE) parts to improve on the original, here they are again with yet MORE improvements! Danish Pylons (648262) The set arrives in the familiar Brassin clamshell box, with the resin parts safely cocooned on dark grey foam inserts, and the instructions sandwiched between the two halves, doubling as the header card. These resin pylons replace the Swedish designed pylons for the Danish specific items, as would be needed for one of the markings options in the aforementioned boxing. Six resin pylons are included in the box, plus 12 sway-braces; a sheet of PE attachment lugs and mating surface detail skins; and a sheet of stencil decals. The decals on our sample were incorrect for the boxing, so please check yours on receipt, just in case and Eduard have been made aware. A scrap diagram shows where the new mounting holes need to be, with sufficient measurements to allow you to position them accurately from the inside of the wing. A little filling and shaving of the moulded-in pylon details will be needed on the exterior too, but nothing too taxing. Upgrade Set (48892) As usual with Eduard's Photo-Etch (PE) and Mask sets, they arrive in a flat resealable package, with a white backing card protecting the contents and the instructions that are sandwiched between. The set is substantial and the parts are spread over two frets of bare brass, with a full set of skins for the gear bays and their doors, as well as for the trailing edge of the wing root if you are dropping the flaps and even the tail bumper bay. The windscreen, canopy and cockpit sills are all detailed with a large quantity of small parts to improve their accuracy; air-brakes are cut into the fuselage, their floor and brake parts added from PE; fine details added to the three gear legs, and attachment rail fittings are supplied for the Swedish pylons and adapter rails if you are using them. A very busy set! Review sample courtesy of
 -
Eduard US Chaff and Flare Dispenser (49779) 1:48
Mike posted a topic in Aftermarket (updates/conversions)
US Chaff and Flare Dispenser (49779) 1:48 Eduard As usual with Eduard's Photo-Etch (PE) and Mask sets, they arrive in a flat resealable package, with a white backing card protecting the contents and the instructions that are sandwiched between. This set looks a bit small to begin with, but at the rear there is a bare brass fret to accompany the nickel-plated pre-painted front sheet. These are box-ejected units, and the brass fret contains the boxes from which they are fired. There are green, red, Yellow and white top pieces, but no colour codes are available in the instructions, and I have been unable to find them online so far. I suspect white is chaff, and red is infrared, but I have no clue about the rest. The instructions also aren't clear about how best to fit them, as the cutting out of a box shaped hole to then refill it seems a little over-kill unless you are planning a resupply diorama scene, where empty holes are seen in the fuselage, with boxes ready for installation. Otherwise you would be better off just gluing the faces into position to save yourself some effort. Review sample courtesy of -
Sniper ATP (648252) 1:48 Eduard Brassin Manufactured by Lockheed Martin, the Sniper Advanced Targeting Pod is used extensively on modern US aircraft, and is also in use around the world with many countries that have bought variants of these same aircraft. The set arrives in the familiar Brassin clamshell box, with the resin parts safely cocooned on dark grey foam inserts, and the instructions sandwiched between the two halves, doubling as the header card. The pod is highly detailed with four grey resin parts and three more in clear resin, plus Photo-Etch (PE) and stencil decals into the bargain. The main body is capped at one end by a PE sheet, the design of which depends on whether you will be using the scabbed on additional equipment box that is seen on some pods. The targeting head is a separate part that sleeves inside the main body for a neat fit, with a clear resin lens inserted into the opening, and three clear panels covering it. A resin pylon adapter and two PE grilles toward the rear finish the build, with paint and stencilling shown on the markings diagram, with paint codes from the Gunze range. Review sample courtesy of
-
Bf.109G-10 Bronze Gear Legs (632079 for Revell) 1:32 Eduard Brassin The set arrives in the familiar Brassin clamshell box, with the resin parts safely cocooned on dark grey foam inserts, and the instructions sandwiched between the two halves, doubling as the header card. Inside are bronze replacement gear legs that have been patterned and cast for the new(ish) Revell kit of this late 109, which come complete with a set of replacement gear bay doors with lots of additional detail moulded in. The bronze is very strong compared to both white metal and styrene, resisting bending and able to take a lot more weight if you plan on loading your model with heavy aftermarket. Casting is superb, with only very fine lines to cut back with a diamond file, and the sprue cut line at the very top of the leg to file flush to improve fit. A very high quality casting. Review sample courtesy of
-
Bf.108 Wooden propeller (648256 for Eduard) 1:48 Eduard Brassin If you have recently re-released Eduard Bf.108 Taifun kit reviewed here, you might have need of this useful set, which gives you the parts to add a wooden prop to your model. The set arrives in the familiar Brassin clamshell box, with the resin parts safely cocooned on dark grey foam inserts, and the instructions sandwiched between the two halves, doubling as the header card. Inside the box are two resin parts, consisting of the prop and central spinner part that has a peg on the back to assist with assembly to the airframe. There are also four stencil decals for the base of each blade, the location of which is shown on the painting guide, which also shows the outer parts of the blades painted in black-green, while the centre is varnished wood. As usual the paint codes are gunze. Review sample courtesy of
-
 I have just finished the Eduard 1/48 Focke Wulf Fw 190D-9 Profipack. THE AERIAL WIRE WILL GO ON NEXT YEAR TO COMPETE AT THE AUSTRALIAN MODEL EXPO. A finicky kit, but the finished result is superb and very much worth it. The spiral spinner decal was a bit of a mess to put on, but in the end it bedded down well with some micro sol and set. Underwing staining was done with Mig's Panel washes and provided a realistic effect. (I don't know why some of the decals look as if they have silvered- they haven't, as it must be the light. I have checked it, and they are void of silvering...) I would like to dedicate this build to all of the JG 301 Wilde Sau pilots of WW2. Thanks, John
- 7 replies
-
- 8
-

-
- fw 190D-9 LATE
- Eduard
- (and 2 more)
-
Hi there, folks. I did it. I finished my Pz II. Actually it was a while ago, but the model had to wait for his photo session. Finally I managed to do it, so there you go. My Panzer II: Hope you liked it. Thanks for watching
-
 This is a planned build ready in time for a special event being held at my local aircraft museum: Tangmere, formerly RAF Tangmere and one of the most famous RAF stations during the Battle of Britain. On August 9th 1941Wing Commander Douglas Bader was leading the Tangmere big wing which consisted of three squadrons from Tangmer and nearby Westhampnett. On that patrol Bader was shot down and he bailed out over occupied europe and was captured. The infamy of this incident is that it is believed to have been one of his own Spitfure pilots who took the shots! Tangmere Aviation Museum in West Sussex is holding a commerative day on Sunday the 7th August 2016 to mark this occassion and I am attending with my local model club: Aldingbourne Modellers. The kit by Airfix is a special edition supporting Help for Heroes. What is nice about this aircraft is it is a rare mark. Bader didnt like the new MkVb with its cannon configuration, so insisted on having a MkV fitted with the standard eight 303 guns, making ut a MkVa. It is one of thier old moulds and as such does not offer much detail in the cockpit. However the fit is excellent. Wanting to finish this on time the only extras purchased were a set of eduard seat belts and a resin figure of Bader. I completed some scratch building in the cockpit. The build went well and after a cote of vallejo surface primer and pre shading the models was speayed free hand again using my favoured paints: Vallejo model air. This was a battle hardened aircraft and from the very limited amount of photos I have found was heavily weathered. So I added depth with a post shade. Once dry and after a cote of gloss varnish the decals were added, they went down nicley, helped along with some micro sol. Weathering underneath was completed spraying various shades of sand and browns. The model was finished off with a dark wash and some mud from Tamiya pigments placed in some strategic locations.
- 18 replies
-
- 29
-
-
T-14 Armata Upgrade Set (for Takom) 1:35 Eduard Takom have been first to market in this scale with the new range of latest generation AFVs that are being brought in by the Russians (reviewed here), which are all angles and commonality, with crew protection high on the requirement list. As usual with Eduard's Photo-Etch (PE) and Mask sets, they arrive in a flat resealable package but in a larger format ziplok bag this time, with a thick white backing card protecting the contents and the instructions sandwiched between. The large brass fret contains a huge number of parts, the main thrust of which is to create a completely new and in-scale set of slat-armour for the sides that sit around the engine exhausts. They lock together with half-cuts creating their strength, but you will be responsible for getting it all square before you apply glue or solder. Scrap diagrams lay out the parts in profile, so it should be easy to get things right, and then fit them to the kit brackets on the hull sides, to which some retaining chains are added. The rest of the set adds a number of detail skins to the ERA blocks on the nose, brackets, grab-handles and tie-down lugs over the hull and turret, plus a new set of clips for the tow cables; mesh basket covers; new mudguards; new mesh panels for the engine deck, plus various panels for the various sensor and self-protection launchers. Review sample courtesy of
-
source: local forums Upscaling 1/72 MiG-15 series to 1/48 is still in game. But for longer future. Maybe 2019 or 2020?
-
Hi everyone this is my latest finished model, I'm quite happy with it so I though I would show it off! Any suggestions for improvement welcome! Sorry about quality of the images only have my phone to take the images with! Thanks for looking Joss
- 23 replies
-
- 25
-
-
THE DRAGON: Who’s he that seeks the Dragon’s blood, And calls so angry, and so loud? That English dog, will he before me stand? I’ll cut him down with my courageous hand. With my long teeth, and scurvy jaw, Of such I’d break up half a score, And stay my stomach, till I’d more. -- Christmas Play of St. George and the Dragon, as collected by William Sandys, F.S.A., in Christmas-tide - its History, Festivities and Carols, 1852 This shall bestride the sea and ride the sky. Thus shall he fly, and beat above your nation The clashing pinions of Apocalypse, Ye shall be deep-sea fish in pale prostration Under the sky-foam of his flying ships. When terror above your cities, dropping doom, Shall shut all England in a lampless tomb, Your widows and your orphans now forlorn Shall be no safer than the dead they mourn. When all their lights grow dark, their lives grow grey, What will those widows and those orphans say? -- G K Chesterton, The Turkey and the Turk,1925 Only Hope was left within her unbreakable house, she remained under the lip of the jar, and did not fly away. -- Hesiod, Works and Days "A cross-Channel invasion was not, as it happened, how I had visualized the war would be won... If anything, I had imagined some gigantic, climactic duel of aircraft, in which Spitfires without number would have overwhelmed the Germans first in the sky and them on the ground. But if a cross-Channel invasion it was to be, that was an end to it... They were going to win. The Germans were going to lose." -- John Keegan, Six Armies in Normandy From 1941 to possibly as late as 1943, the Luftwaffe's dragon, their butcher bird, their Würger (shrike), the Focke-Wulf 190 was the terror of Europe's skies. You don't need me to tell you that. If you're here, you already knew. Small, fast, heavily-armed and armored, it was a formidable foe for Allied fighter pilots and bombers alike. In a head-on attack, the Fw190A-8 brought four 20mm cannon and two 13mm heavy machineguns to bear; the eighteen-year-old nose gunner of a B-24 (like the one flown by my great-uncle on D-Day) could reply with two 0.50in machineguns to defend not only his own life, but the lives of his ten crewmates. For a horrible year and a few months beyond, the Fw190 seemed to have finally ended the Spitfire's ascendancy, but of course, as it ultimately proved, and as anyone who knows birds could tell you, the merlin is larger, more beautiful, and more deadly than the harsh-voiced shrike. The aircraft I'm building is Werknummer 170393/Yellow 11 of 6./JG1, flow by Fw. Alfred Bindseil, who had five victory claims (B-17, Spitfire, two P-51s, and a B-24), including a P-51 whose tail he severed with his prop. Bindseil survived the destruction of Yellow 11 when he force-landed it after encountering marauding P-47s on 31 May 1944, but met his destiny near St. Lo on 20 June 1944 in Werknummer 731091/Yellow 4, or SO I THOUGHT. Eduard has Bindseil's death as 20 June, so I pulled the combat reports for that date from the National Archives, only to discover he was killed in action on 20 JULY, probably in combat with Spitfires of 441 and 602 Squadrons (among them the great J E "Johnnie" Johnson, my boyhood hero, a dragonslayer for the 20th century and a man who I regard, without a trace of irony, as a great man and a genuine hero). 20 July was a bad day for JG1; though a total of three Spitfires were awarded to Oblt. von Kirchmayr (two) and Obfw Flecks (one), bringing their scores to 20 and 14, respectively. Let me emphasize here: no Spitfires were lost. However, ten JG1 Fw190s were destroyed and seven pilots were killed in combat with British and Canadian Spitfires on this day.. Now, all this being said, I did some archival research on 20 June , and it would be a pity for it to go to waste. On 20 June a low altitude patrol of Spitfires from 317 (Polish) Squadron, operating with 131 Wing, encountered Fw190s, possibly part of a Frie Jagd from I and II/JG1. On this date and in this place, Wing Commander Julian Kowalski (a Battle of Britain veteran of 302 Squadron) claimed a probable Fw190 as did Flight Sergeant Longin Winski, though the latter's claim was upgraded to a confirmed victory based on eyewitness testimony from a USAAF Lt. Gamble (possibly P-47D pilot Richard C. Gamble). Kowalski settled in Britain after the war and died in 1986; Winski appears to have died in May of 1946, apparently in the crash of P-47D 44-20867 in Austria; he was twenty-five. "I noticed a FW.190 breaking cloud on my port and flying East to West. I attacked and the e/a then turned South. I was then astern and at 200 yards: [sic] from him. I fired two long bursts from all armament from dead astern and level with the FW.190 and he started to burn. I saw black smoke coming from him and gave him two more long bursts. Then another Spitfire got between the e/a and myself. I was forced to break off the engagement. A moment later I saw the e/a turn on his port wing and dive vertically apparently out of control. The height of combat was 2,500 feet. The e/a dived into clouds which were at 2,000 feet, leaving a heavy trail of black smoke behind him. I did not follow him owing to low base of cloud...I CLAIM 1 F.W.190 PROBABLY DESTROYED." -- W/CDR Julian Kowalski, AIR 50/127/13 "I then looked around and saw another FW.190 on my port, I was flying south at the time, and I followed him in and out of cloud. I got in a long burst of cannon and m/g from 5-10 degs: from 250 to 200 yards: I saw hits along the wings and fuselage and he began to emit black smoke. He again dived into cloud and I followed. When he came out again I gave him another long burst from all armament and still more black smoke came from him. He turned left towards No. 3 landing strip (USA) and I lost sight of him in cloud." -- F/Sgt Longin Winski, AIR 50/127/34 It would have been nice if Eduard had given me the proper date, since each combat report PDF from the National Archives in Kew costs about $5 US, but it was still very satisfying to read about Fw190s getting shot down. I'm using the Eduard 1/72 kit, from their Royal boxing -- it has a confusing set of sprues to enable you to model different types of Fw190A-8, but some careful reading has what I need ready to go. I should be starting pretty soon, I hope.
- 215 replies
-
- 11
-
-
- Fw190
- Focke-Wulf
- (and 4 more)
-
Eduard Sukhoi Su-27 Cockpit (648260 for Academy)
Mike posted a topic in Aftermarket (updates/conversions)
Su-27 Cockpit (648260 for Academy) 1:48 Eduard Brassin Eduard created a resin cockpit for their boxing of the Academy kit way back in the mists of time, or 2011 if you can remember that far back. This set from their Brassin range arrives in the familiar Brassin rectangular box, with the resin and Photo-Etch (PE) parts safely cocooned in dark grey foam inserts. The PE sheets have been adapted to cater solely for the cockpit area, and are bagged separately with a card protector between them, plus a small slip of clear acetate for the HUD glazing. There are eleven resin parts, including a highly detailed tub with separate rear bulkhead; detailed K-36 ejection seat with a full set of pre-painted seatbelts and a pilot's helmet; a complex layered instrument panel with instrument dials within their bezels. The HUD is replaced with a detailed PE part, plus two sections cut from acetate sheet to represent the glass panels. Painting the edges of those pieces a transparent green will add a little extra realism there too. A little trimming of the upper fuselage aperture will be needed to accommodate the set, and a small area on the rear deck should be filled before it is fitted with a detail skin, and at the front a complete PE coaming is provided. Even the internal structure of the cockpit sidewalls are supplied, and the canopy is dressed with structural parts plus the important latches that hold the canopy in place, which seems to be missed by almost every kit maker. You'll need a small length of 1.5mm diameter rod to act as the ram that props the canopy open, but everything else is there for you. Review sample courtesy of -
Fw 190A-8/R2 1:72 Eduard Weekend Edition The Focke-Wulf Fw190 was designed by Kurt Tank in the late 1930s. His aim was to create a fighter that was not only fast and agile, but also reliable. It had a wide track undercarriage to improve ground handling and also utilised electric rather than hydraulic controls to reduce the risk of system loss in combat. The Fw190 also marked a departure from aircraft like the Bf109 and Spitfire as it combined a 14 cylinder radial engine with a development of the NACA cowling system. This choice was crucial as it meant that the Fw190 would not create additional demand for DB 601 liquid cooled engines. It also allowed a low drag profile for such a powerful engine. Despite early teething problems, the Fw190 first entered operational service over France in August 1941. It proved to be quite a shock for the RAF whose 1440hp Spitfire Mk.V, the best fighter available at the time, was outclassed in terms of firepower and all round performance, particularly at lower and medium altitudes. The Fw190A-8 was the ultimate evolution of the radial-engined fw190s and entered service in 1944. It featured improvements such as extra fuel, improved armour and nearly 2000hp output with emergency boost. The A-8/R2 replaced the outer 20mm cannon in the wings with Mk.108 30mm cannons. The Kit Following on from the Royal, Profipack and standard boxing's; the Weekend Editions are now arriving from Eduard. These new Fw 190 kits from Eduard are setting a new standard in 1.72 for excellence. The kit itself is made up of 92 plastic parts spread across of two sprues of dark blue-grey plastic and a single clear sprue with the now-familiar circular layout. The instruction book is a glossy, stapled booklet with full-colour painting diagrams. All together, the impression is of a quality package, at the great weekend price point. The quality of the plastic parts is second to none. The mouldings are clean and crisp and there are no traces of flash and no sink marks. The surface detail on the outside of the airframe comprises recessed panel lines and delicately engraved rivet and fastener detail. It looks absolutely superb. Eduard haven't skimped on the detail elsewhere, with sub-assemblies such as the cockpit being up there with high end resin items when it comes to the quality and quantity of detail. The cockpit is made up of over thirty parts (including photo etched details), which is a truly phenomenal for a kit of this size. Once assembled, the whole thing can be sandwiched inside the fuselage halves along with the firewall and the basic-but-good-enough-in-this-scale engine face. Setting the semi-completed fuselage to one side for a moment, construction turns to the wing. The lower wing is moulded as a single span, to which the main spar (which also forms the rear wall of the main landing gear bays) must be added. The other parts which form the structures and details of the landing gear bays must be added at this point, prior to everything being fixed in place by the addition of the upper wing surfaces. The ailerons are moulded separately to the rest of the wing, which opens up some possibilities for the diorama builder, as well as enhancing the level of realism. Turning back to the fuselage, the rudder is also moulded as a separate part, although the tail planes are solid lumps. In common with other kits of the type, the upper fuselage forward of the cockpit is moulded separately (in this case as two parts with a third for the cannon barrels). Once the basic airframe is together, its time to fit the undercarriage and other finishing details. Each of the main gear legs is made up of two parts, although you have the option of removing the plastic torque links and replacing them with photo etched versions. The wheels themselves are made up of nicely moulded tyres and separate hubs. This should make painting them much easier. Ordnance is taken care of with a drop tank and a single bomb, along with the associated racks and shackles. There are a number of small parts included to cover the final details, including the aileron balance weights and various aerials and antennae. The canopy deserves a special mention as there are four rear sections included; blown and unblown, with different parts for closed and open options. Two propellers are included as well, although only one is needed for the included options. Decals There is one small sheet of stencil decals and one for the aircraft markings. As seems to be standard now decal options are provided for two aircraft: Fw 190A-8 of Werner Gerth, II.(Strum)/JG 3 "Udet" July 1944. Fw 190A-8 of Paul Lixfeld, 6/JG 300, late 1944. Each option is illustrated with a four-view profile as well as detailed illustrations of the propellers or drop tanks where appropriate. Conclusion This is a great kit from Eduard and it is good to see it released in a Weekend boxing. Highly Recommended. Review sample courtesy of
-
P-38 Lightning Upgrade Sets (for Academy/Eduard) 1:48 Eduard Brassin Following Eduard's recent reboxing of the Academy P-38J in their "Over Europe" Limited Edition, plus other reboxings from time to time, we now have a couple of sets aimed at improving the detail further on those kits. The smaller set arrives in the familiar Brassin clamshell box, with the resin parts safely cocooned on dark grey foam inserts, and the instructions sandwiched between the two halves, doubling as the header card. The larger set is hidden away in their larger rectangular cardboard box that is lined with more foam. P-38J Cockpit Set (648259) The set is secured in three ziplok bags, containing two bags with 17 resin parts plus one in clear resin, and a nickel plated, pre-painted Photo-Etch (PE) set that is protected by a piece of white card. It is a complete replacement to the kit cockpit, and requires no alteration to the kit, but as should always be the case, do check this before committing to glue. The highly detailed seat is decked out with a full set of pre-painted crew belts and attached to the cockpit floor with a number of tubular brackets against the rear bulkhead. The rear deck and seat armour are added, with a pair of equipment boxes on the shelf, replete with some nice PE stencils. The control column is inserted into the floor with the W-shaped wheel at the top, and Rudder pedals are attached to a linkage and suspended over the floor in notches in the cockpit sidewall parts, which are detailed up with some controls in PE, and another ledge in the sidewalls accepts the laminated PE and resin instrument panel. The clear resin part is the gunsight, which sits inside the front of the kit canopy on a PE mount. When all of this is complete and painted, it is just inserted into the upper fuselage "egg" and the rest of the build can continue. P-38 Wheels (648258) Inside the clamshell are three resin wheels, four resin hubs, a small fret of PE, and a sheet of pre-cut wheel masks on kabuki tape. The main wheels have diamond pattern tread, while the nose wheel has oval pattern, with the detail throughout superb! The optional PE flat hub covers can be fitted to the outer side of the main wheels and both sides of the nose wheel, using the etched hole to avoid fouling the axle. Whether you'd want to cover up all that lovely detail other than accuracy's sake is another matter however. The masks allow you to paint the hubs after the tyres and get a neat demarcation line with minimal fuss. Review sample courtesy of
-
Nagmachon Late (36338 for Tiger-Model) 1:35 Eduard It seems that new companies are popping up all over the place, and Tiger-Model is one such that seems to have sprouted out of nowhere with some interesting products. Their new Nagmachon has competition from the new one from HobbyBoss, and curiously their box art and profiles are uncannily similar to Takom's recent issues. Anyway, this set is to detail their kit and improve the detail that is provided in the kit. As usual with Eduard's Photo-Etch (PE) and Mask sets, they arrive in a flat resealable package, with a white backing card protecting the contents and the instructions that are sandwiched between. The set is supplied on a single large fret of brass, and includes grilles for the doghouse; covers for the bullet-proof windows; additional details for the top deck; a large quantity of grab handles for the grilles on the engine deck; another gaggle of triangular tie-downs along the side-skirts, accompanied by additional link-pins with retention chains. Some tread plate is provided for the tops of stowage boxes; a cage for spare fuel cans; a more accurate surround to the light clusters; detail for the mudguards, plus some small hinges and brackets here and there. Review sample courtesy of
-
 Yak-38 Photo-etch and Masks - For Hobby Boss Kit 1:48 Eduard Interior The coloured fret provides mainly cockpit details with new instrument panel, side consoles, ejection seat parts & belts, new HUD, rear cockpit panel; and cockpit interior parts. The brass fret provides details for rear cockpit bulkhead, ejection seat cushions, canopy frames, canopy sils, IFF aerials, control vanes, static wicks, and FOD guards. Exterior This set provides details for the undercarriage bays, prominent lift fan intakes, dorsal antennas, exhaust shields, inside panels for the gear bay doors, and parts for the pylons, missile rails, missile ends, gunpod, and rocket pods. Masks The mask set provides masks for the canopy and wheels. Conclusion These frets should enhance an already good kit. Recommended.
 -
Super Étendard Upgrade Sets (for Kinetic) 1:48 Eduard As is almost standard now with a new release, Eduard have produced a number of sets to improve on the kit detail in their inimitable style. As usual with Eduard's Photo-Etch (PE) and Mask sets, they arrive in a flat resealable package, with a white backing card protecting the contents and the instructions that are sandwiched between. Interior (49776) Consisting of one fret of nickel-plated and pre-painted brass, plus a small fret of bare brass, this set gives the cockpit a comprehensive spruce-up, replacing the side walls, consoles and HUD with more detailed and realistic parts, plus a lamination of either the SuE or SEM instrument panels with alternative fuse-box detail on the sides of the consoles. The ejection seat is detailed with side-panels, a full complement of seatbelts and new cushions. The headbox is then stripped of detail and replaced by either a one- or two-loop ejection handle with top details. An ancillary instrument is added to interior of the windscreen, while the rear-view mirror a demister loop are added to the canopy section. Exterior (48890) Contained on one brass fret, this set contains the expected upgrade to the detail of the landing gear bays, their doors and even the gear legs themselves, which is pretty comprehensive and includes lots of detail skins, structural elements, plus some useful wiring and hosing looms. In addition there parts for the air-brakes, their bays, perforated wing spoiler panels, hinge details for the wing-fold, and even details for the refuelling probe bay, and the recess for the arrestor hook. The rear of the missiles are also provided with exhaust ring parts too for good measure. Masks (EX519) Supplied on a sheet of yellow kabuki tape, these pre-cut masks supply you with a full set of masks for the canopy, with compound curved handled by using frame hugging masks, while the highly curved gaps are in-filled with either liquid mask or offcuts from the background tape. In addition you get a set of tyre masks for the wheels, allowing you to cut the demarcation perfectly with little effort. You can see Muzz building the Kinetic kit using these sets here if you would like to see more. Review sample courtesy of
-
Mosquito FB Mk.VI Nose Guns (for Tamiya) 1:32 Eduard Brassin Following our review of the belly-mounted gun pack here, this new Brassin set includes the parts for the nose gun bay, which gave that bit of extra punch and a total (depending on fit) of 8 guns firing along the centreline with no convergence to deal with. The Tamiya kit is a work of styrene art, but you can always improve on styrene with the right media. This set is made up of resin and Photo-Etch (PE) in the standard rectangular Brassin box, with foam packing keeping the bagged contents safe during transit and storage. There are three bags of resin, a sheet of PE, and a small sheet of decals in the box, plus a chunky instruction booklet consisting of four pages of A5 printed landscape with 18 construction steps. The first part installed into the nose bay is the resin bulkhead, which has a number of decals and various gauges of wire added, which you must provide from your own stocks. Lead fly-tying wire or florist's wire would be of use here, and is cheap to buy if you know where to look. The gun mounts are added to the floor of the bay in order to receive the four .303 Brownings with their ammo feeds and breech stands, plus the PE and resin recoil tubes at the rear. The centre two are added first, wired in, then joined by the outer two, which are in turn wired in. The ammo cans hook into place above them, and each one has a number of decals and tiny PE parts added before they are set in place in the correct order, each with a number stencil on their feed chute. They are linked by a retaining rod made from wire, and the four ammo feeds are then put in one after another after painting and decaling, ensuring that each end finds the input on the gun breech. The nose cone can be left off or added to retain the shape of the aircraft, and this is also improved by the addition of a gun camera on its mount (again with decals), and a PE ring around the aft end to provide the correct lightened framework. This fits slightly inside the lip of the part, so shouldn't interfere with its assembly onto the model. It isn't a simple proposition, but given the care and attention to detail that it deserves, it will seriously improve the look of the bay if you intend to leave it open, or place it in a maintenance diorama setting. Very highly recommended. Review sample courtesy of
-
F-15I Upgrade Sets (for GWH) 1:48 Eduard Following the original F-15A/B release from Great Wall Hobby, new parts were added to allow them to release an updated Ra'am edition in 2015 and Eduard have adapted their sets for this edition. As usual with Eduard's Photo-Etch (PE) and Mask sets, they arrive in a flat resealable package, with a white backing card protecting the contents and the instructions that are sandwiched between. Interior (49772) This set consists of one fret of nickel plated brass that has been pre-painted, another in bare brass for constructional elements, and a small slip of acetate for the HUD glazing. The Ra'am is a two-seater, so the first port of call is to improve both ejection seats with handles, ancillary equipment and seatbelts, much of which is pre-painted for your ease, requiring only the smallest of areas to be removed from the front, and the perforated central column to be removed at the top rear. The side consoles are sanded back to receive new painted panels, as are the main instrument panels with their laminated instruments showing through the top layer. The pilot's coaming is upgraded with a new HUD unit with scale parts, and the opening side panel just forward of the cockpit side is detailed with a full set of fronts for the black boxes, as well as some pull-handles and interconnects to add life to the area. The radome is also detailed with a surface skin and more detailed T-shaped parts replacing the moulded in points for accuracy. The canopy is detailed inside with additional sill parts and a run of locking "fingers" on each side, plus a new roll-over hoop skin with integrated rear-view mirrors. Finally, to use up a little extra space on the fret, a couple of small vents are added to the deck around the canopy rear and forward of the main bays. Exterior (48888) This set is a single large fret of brass, starting with the nose gear bay, which receives a lot of attention. New panels, wiring looms and latch elements are applied to the bay, while a new skin is added to both of the bay doors, with prominent hinges added from brass to add further visual interest. The nose gear leg is fitted with a towing eye, and the main gear legs get new oleo-scissors, and a wiring/hose fit out, with a detailed ring around the outer hubs of the wheels. The main gear doors are also detailed with small hinges and catches. The dorsal air-brake is skinned with detailed panels, plus a little wiring, with additional grilles and blade antennae nearby and under the aircraft's nose. A new afterburner ring is applies to each engine face, a new set of slime-lights throughout, more surface panels, grilles and extra stiffening panels on the wing and tail tips. Detailed sway braces for the kit pylons are supplied, which also have the pylon's attachment points etched in for those leaving pylons unused. Masks (EX516) Supplied on a sheet of yellow kabuki tape, these pre-cut masks supply you with a full set of masks for the canopy, with compound curved handled by using frame hugging masks, while the highly curved gaps are in-filled with either liquid mask or offcuts from the background tape. In addition you get a set of hub masks for the wheels, allowing you to cut the demarcation perfectly with little effort. Review sample courtesy of
-
Hey guys, after quite long time i m back here with some WIP thread I found out, i have problems with time-limited builds, with my inconsistent time for modelling So it is hard for me to follow the group builds here on BM, as much as i love to be part of these ( But.. the irony of fate strikes again and i want to build something as a bday gift for my soon-brother in law as he is big fan of WW2 airplanes.. which is, obviously, nothing less than time limited build.. again.. I would have enough time (1-2months), but still i wanted to chose some nice kit, so i chosed one of the Eduard´s gems, F6F hellcat Im not sure which camo i m going to make, still chosing.. mostly i m thinking about some of the all around glossy sea blue F6F-5(N). As usualy, i started with cockpit I made new sidewalls (used just the prepainted PE with instruments), thinned the fuselage halves and added some construction details there. Made new radio equipment from scratch, adjusted the pit floor and headrest with some more details added there too. Seat belts are from HGW, the instrument panel is from the kit (prepainted PE). I see i took the shots before adding levers to the side walls I wanted to add something to the kit, but i was not sure i would be able to make complete engine area in time, so i made just the tank and firewall with construction - or well, the part of it what ll be seen when opening the little cover All made from scratch. So far i made also new rivets to the fuselage halves and started on the wings
- 60 replies
-
- 10
-
-
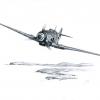
Just started a Hobbyboss kit-the 1/48 Ta 152C-1. This is the original picture of the original aircraft. I will be using an eduard detail set. Cheers, John
-
HMS King George V Eduard 1:350 These sets are designed for the Tamiya kit, which it has to be said has been around for many years, in fact it was first released in 1985. Two of the three sets arrived in zip lock bags with the new style yellow card inserts, whilst the third is in the standard poly sleeve style. They are well up to the usual standard and provide a tremendous amount of extra, as well as replacement detail parts. Detail set- (53-168) comes on two sheets of relief etched brass. The larger sheet contains a myriad of parts such as watertight doors which can be posed open or closed, hatches, bollard tops, inclined and vertical ladders, ammunition lockers, flag lockers, replacement 20mm cannon, complete new mountings for the 40mm Pom Poms along with replacement ammunition racks and even the ammunition belts. There are also replacement aerials for the Type 285 Yagi radar arrays and new mounts for fitting to the main director housings. The foredeck breakwater is completely replaced, as are its respective supports, along with the anchor chains and their respective stop chains. The main turrets are fitted out with replacement hatches, ladders, rangefinder doors, whilst the secondary turrets get new hatches, access doors and ladders. The smaller sheet contains more AA weaponry, plus the Type 282 Yagi aerials, replacement mountings for the etched twin 20mm guns, searchlight guards, and replacement array for the Type 277 radar. The equipment list keeps coming, with replacement deck cranes, funnel caps, mast platforms, funnel foot and hand rails, funnel platforms, ammunition drums for the 20mm cannon, their sights and hand wheels. The mast tops are fitted with new Type 281 radar arrays, as well as new aerials for the ends of the yardarms, not to mention the yardarms themselves. There are also gratings for the hawse pipes, cable reel stands, armoured doors and hatches for the various openings around the superstructure, and numerous poorly identified fittings that aren’t the instructions don’t make clear of their positioning, which is rather annoying, to say the least. Cranes and Railings (53-165). With the title of this fret being so very descriptive, it’s not difficult to see that this provides ships railing which cover all sections of the ship from the main deck upwards, including the turret tops. There is a selection of three bar and two bar rails the majority of which are shaped to fit their specific positions. The two main ships cranes have replacement jibs, cables, rollers and hooks, along with railings and access ladders. Also included in the set is a pair of accommodation ladders and platforms, and what look like twenty five liferings, along with the numerous Carley floats new inserts, that represent the wooden tread boards. The flat, plate like strips you can see in the accompanying photograph are in fact the splinter shields for the 20mm guns mounted on the foredeck and quarterdeck, plus the AA directors, which will have to have the moulded kit parts removed. Lifeboats – (53-169). This single sheet set is exactly what it says on the packet. In that it contains parts to detail the ships boats, ranging from new decks, both upper and internal, deckhouses, windshields, propellers and rudders for the larger motor boats and Admirals barge. To new internal decking, gunwhales, thwarts, rudders and oars for the cutters, whalers and dinghies. Each boat is also provided with a pair of new cradles for them to sit on. Conclusion The Tamiya kit is very nice out of the box, but with these two sets you could dramatically improve the finished model. There are so many parts that you will need quite a bit of patience and care to fit them all, as with any etch set, but the results will be worth it. Very highly recommended. Review sample courtesy of
-

Eduard Nakajima E8N1 Dave detail Set. 1:48
Shar2 posted a topic in Aftermarket (updates/conversions)
Nakajima E8N1 Dave detail Set Eduard 1:48 The Hasegawa 1:48 Nakajima E8N1has been out for a little while now, originally released in 2015, although one with new decals has been released this year. This is what has probably prompted Eduard to issue an etch set for it. Detail Set (49771) This single sheet set, whilst not particularly large, contains quite a few parts to give the finished model a boost. Etched in what looks like a stainless steel sheet, some of the parts are pre-painted, but the majority are not. Included on the sheet are a full set of seatbelts, the engine electrical harness, equipment faces for both sides of the cockpit, the moulded detail having been removed first, ammunition drum tops and handles for the rear cockpit, replacement rudder bar straps, and sights for both the pilots telescope and the rear mounted machine gun. The machine gun stowage trough is completely replaced with etched parts, and includes the hatch section of the upper fuselage. Both instrument panels are also replaced with two part panels, the rear of which has the instruments printed on it. A dab of Aqua gloss or Kleer will make them a little more lifelike. The access steps, central float rudder and outer float access panels are all replaced, whilst on the underside rear of the aircraft there is a large triangular bracket fitted, just before the rudder. The kit bombs have their fins replaced, and for this Eduard have provided a two part template to get them glued into the correct positions before the box rear section is attached. The bombs are then finished off with the fitting of the nose mounted arming vane. Conclusion The Hasegawa kit looks very nice straight out of the box, but with the addition of this smallish set an even nicely model can be achieved with little fuss. Highly recommended Review sample courtesy of


