Search the Community
Showing results for tags 'Complex'.
-
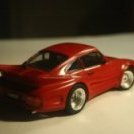
Hi All, I must be a sucker for punishment. Yet another model that I have decided to finish along with all the others. This one has for no reason that I can work out, been sitting on the back-shelf for an enormously long time. I had built the engine, transmission & exhaust and had sprayed all the body parts in their final colour, then I put it away and forgot about it. This is the Revell 'Premium' range of 1/24th kits. There weren't many models in this series, This, a BMW 850 a Mercedes 560 C, coupe and cabriolet. I has many more parts than your usual Revell kit, and has a reputation for being difficult to build, almost to the point of being un-buildable! That currently, has not been my experience. The engine and transmission (No piccies unfortunately. I had assembled the engine and transmission into the floor-pan before I realised I had no pictures) went together well, as did the exhaust system. A bit over-the-top in the parts count department, but engineered well enough. I decided that mine would be black, so I sprayed it with Halfords' grey primer followed by a Halfords' Black (Not sure which one - there is more than one shade!) So, this is where we are now: The somewhat crumpled box. Looks impressive. The body: There are some minor imperfections that will polish out. I use Halfords' polishing compound. It's a old can, and appears to be quite different from the newer Halfords polishing compound. Sorry about the blurry rear-end, but I was using shutter priority on the camera in order to use flash, and it must have selected a very wide aperture, hence the shallow depth of field. The wheels: Now, this is one area where Revell could improve upon. The tyres are that Vinyl stuff. It has a few failings: It appears to be 'oily' to the touch It doesn't look very much like rubber (too shiny) It can melt polystyrene, so you have to ensure the wheel is painted where the tyre touches it. It seems to age badly and become brittle. All but one of the tyres has split right across the tyre. I resolved it by using CA glue in the gap to hold the tyre together. I then filled the remains of the gap with High-tack PVA glue. That has the advantage that it dries clear, so appears to part of the tyre, and it also dries quite flexible, similar to the original vinyl (event when brittle). It is quite difficult to see the splits now, so the repair appears to have worked. This is where the new stuff starts: The rear suspension went in first. There are over twenty parts to make up the rear suspension, even more when you add the brakes and springs! Seems a bit like overkill. Still for all that, it assembled well and it all fitted. I highlighted all the pipe-work by dry-brushing aluminium on to the raised pipes. It needed a bit of clean-up later but nothing serious. The exhaust system is also another example of a complicated break-down of parts. There are nine parts here. Fortunately it all went together well, like this: It all fitted well. No major gaps, just a smear of filler before the back-box on one of he pipes. The headers event connected to the manifolds. I was impressed. Another view of the rear suspension with the axles attached: Again, quite complex, but it all fitted well. This is one of the from suspension parts. Again the fit was well engineered, and it fitted well. This biggest difficulty was ensuring no glue got onto the revolving axle part. That's the bit in the bottom right corner. So, this is where we are at present: All suspension parts added, including anti-roll bars etc. The exhaust looked a bit too shiny, so I used a mix of Humbrol matt black and gloss brown, highly diluted in white spirit to "grubby" it up a bit. The white spirit doesn't attack the acrylic already there. It has stalled here due to a major cock-up on my part. The right suspension part at the front didn't want to stay in place. I thought perhaps that the strut needed to be pressed harder into the wish-bone, so I pushed a bit harder. Not a good idea. I managed to snap off the wish-bone and nearly lost it to the laminate monster (The carpet monster's close cousin). I was not impressed (understatement of the decade). After locating the broken part, I used epoxy glue to fix it back in place. The end result is a bit more flexible than I would like, but it doesn't appear to be going anywhere. The problem still remains that the strut keeps falling out. No better (or worse) than before. I think that the only solution will be to glue the strut in place and lose the ability to have functional steering. Having said that, apart from posing it off centre, I never do anything else with it, so it's not a huge loss. I'll just set it slightly off centre anyway. More soon, I hope. Thanks for looking, Alan.
- 33 replies
-
- 12
-


