Search the Community
Showing results for tags 'Classic Airframes'.
-
 Classic Airframes is back! No, not with the injected 1/48th Fairey Gannet AEW... Sigh. But with a multimedia 1/48th Focke-Wulf Fw.190 V1 kit - ref. R8-009 Source: http://www.hyperscale.com/2019/reviews/kits/classicresinairframefw190v1preview_1.htm V.P.
 -
In February 2024, Eduard is to rebox the old Classic Airframes 1/48th Savoia-Marchetti SM-79 Sparviero kit - ref 11179 Source: https://info.eduard.com/cz/01-2024/page-122 V.P.
-
AVRO Anson Mk.I ‘Anti-Submarine Annie’ (SH48211) 1:48 Special Hobby Originally designed as a fast mail carrier in the early 30s, the original AVRO design was amended in the mid-30s in response to a specification issued by the Aviation Ministry for a reconnaissance aircraft that could also perform other roles. It beat a similarly militarised De Havilland Rapide and was awarded a contract for series production with the name Anson after an 18th Century Admiral of the Fleet. At the outbreak of war it was still performing its given roles, and was engaged in the Dunkirk evacuation where it surprisingly managed to shoot down two Bf.109s and damage another, as they found the low speed of the Anson hard to gauge, overshooting straight into the line of the nose-mounted .303 machine gun operated by the pilot. She was thoroughly outclassed as a front-line aircraft though, so was soon withdrawn from fighting service to form part of the training fleet, and as a communications ‘hack’. Despite its withdrawal from service, more aircraft were built, and they were used as trainers for radar operators, navigators and as a trainer for pilots that were destined to fly multi-engined bombers. Its replacement in maritime service was the Lockheed Hudson, which had a hugely increased range and speed, the Anson only being capable of a four-hour endurance that prevented it from covering much of the Atlantic or North Sea before it had to turn for home. It could carry a small bomb load however, so could take offensive action if it was to find a U-boat on its travels. Following WWII, Faithful Annie as she became known was used as a civilian and business aircraft, although some of the wooden-winged examples that were used overseas began to suffer from problems due to the humidity’s effect on the timber areas. Not all Ansons had wooden wings though, and some of the wooden winged aircraft were refitted with the improved metal wings, although even these were eventually retired, leaving only one airworthy by the new millennium. The Kit This is a rerelease of the Classic Airframes kit that originated in 2006 before appearing in Special Hobby boxes from 2007 onwards. While it has been superseded by a new tooling that is fully injection-moulded, that doesn’t mean that it doesn’t have its own appeal, particularly if you like to include resin in your builds for extra detail. The kit arrives in a top-opening blue/white/grey themed box, and inside are five sprues of grey styrene of various shades and textures, a clear sprue, thirty-six resin parts in two bags, a sheet of pre-painted and nickel-plated Photo-Etch (PE) that is found in the same bag as the two decal sheets. The final item is the instruction booklet that is printed in colour on glossy white stock, with painting and decaling instructions on the rear pages. Detail is good, although the kit won’t fall together if you shake the box. There is a lot of detail present however, enhanced by the quantity of resin, much of which will be seen through the extensive glazing. Construction begins with the floor of the aircraft, adding two sections of spar running spanwise across the middle, fitting the port fuselage side and moulded-in framework behind the window frames. A bulkhead is fixed to the rear of the floor, with another short length and its bulkhead behind that, adding radio boxes and other gear on and around the spars. A pair of resin bucket seats are painted and detailed with pre-painted four-point PE belts, one fitted by the radio equipment, the other to the front behind the control column, and a simpler box seat by the navigator’s table, the occupant held in position by lap-belts alone, as his seat has no back to his seat. Another shallow seat has lap-belts glued on and is placed on the front spar after adding two folded PE toppers to the starboard end of each spar and a cross-brace between the rear edge of the map table and the spar. The single .303 machine gun in the nose is inserted into a groove along with its ammo feed, which requires the trough to be cut out from the port fuselage half before the almost complete interior is inserted into the port fuselage after adding a window, adding a resin bed for the bomb aimer, a fire extinguisher and two blocks of dials on the wall. A scrap diagram shows the completed interior once it is emplaced within the port fuselage, which should help with the arrangement of parts in the nose. The starboard sidewall and framework are glued to the opposite side of the interior, spacing them to the correct width with the roof framework. The starboard fuselage can then be brought in after fitting a square window behind the main windows, plus another small one in the nose, and two recognition lenses under the bomb-aimer’s position under the nose. A small fairing is attached to the wing root fairing on both sides, and another resin equipment box is glued into the starboard nose. The pilot’s instrument panel is built from a blank shape with a coaming for one decal option and sidewall behind it, fitting rudder pedals to the back, and layering two printed PE panels to the front, then gluing the throttle quadrant into position to the lower right along with three PE levers and two more on the main panel, inserting the finished panel into the port fuselage for one scheme, locating the quadrant on a peg moulded into the cockpit floor. An insert for the top turret is detailed with three-part lower framework and a bicycle seat, adding the upper framework, Lewis gun with plate mag and two-part clear dome after main painting is complete. Don’t forget to mask the hole, and similarly mask and paint the clear parts in the meantime. The instrument panel minus coaming is used in two decal options that have less aerodynamic windscreen panels, so the top won’t be seen. Firstly, the nose cone has a tubular recess inserted from behind, and is glued to the front of the fuselage, installing the top turret insert and the upper glazing for the interior at the same time, and selecting your chosen windscreen and gluing a ring sight into the front roof frame. The coaming-free instrument panel is glued to the underside of the windscreen 4.5mm away from the front lip before it is glued into position. The sloped canopy is glued over the cockpit where the instrument panel already resides. The wings are prepared by inserting a roof and bulkhead panel with a nick cut from each side into the lower along with the twin-strut gear leg and cross-brace, painting the details and gluing the upper wing into position. This is repeated on the other side, as is the insertion of the retraction jack, followed by the two-part nacelle front. The wings are butt-joined to the fairing moulded into the fuselage, and the joint would be strengthened by adding stiffening material or a pin to the equation. The elevators are each two parts, and these too butt join with the tail and would also benefit from strengthening of the joint. A diagram at the bottom of the page shows the correct dihedral of the wings, and the elevators are shown in red, as they would otherwise be invisible due to the wings being at the same height. The Armstrong Siddeley Cheetah IX radial engines have the 7-cylinders moulded as one, adding a reduction bell to the front, a spacer to the rear, and an exhaust collector ring around the rear. You are shown the arrangement of the push-rods in an additional diagram, but you must make them from 0.4mm wire from your own stock, each length 5.8m long. Another diagram shows the arrangement from the front, and once you have it painted to your satisfaction, the largest resin cowlings with extended bulges can be slipped over the engine and glued in place via the locators shown in red through the drawing. Two resin exhaust stubs are glued into the collector rings through the oval holes in the cowling, repeating it for both engines, which is probably best done after main painting is completed. Detailing of the exterior of the aircraft is the last task, starting with the underside, fitting the two-part wheels in between the twin struts, and gluing the resin radiators under the nacelles. PE actuators are fitted to each of the ailerons and elevators, adding a pitot under the nose, and the yoke with separate wheel under the tail. Flipping the model onto its wheels, more actuators and hinges are dotted around the flying surfaces including the rudder, with an antenna mast and D/F loop fixed on the roof over the interior. The two-bladed props are each sandwiched between two plastic washers, and have a PE detail plate on the forward face, sliding onto the short peg protruding from the engine’s bell housing. Two small clear lights are glued to fairings near the wingtips, painted clear green and red, adding a length of 0.2mm wire between the mast and the tail once the rest of the model is completed. Markings There are three decal options on the sheets, all wearing either A or B variants of the early war green/brown upper surfaces, with sky or silver undersides depending on which decal option you have chosen. From the box you can build one of the following: K6285/MW-F, No.321 (Dutch) Sqn., RAF Carew Cheriton, late 1940 EG359, Groupe Artois, Escadrille Arras, Point Noire, French West Africa, 1943 N5331/5, No.6 Air Observer & Navigator School, Staverton, early 1945 The decals are printed using a digital process and have good registration, sharpness, and colour density, with a thin gloss carrier film cut loosely around the printed areas. This means that the carrier film on their decals can be coaxed away from the printed part of the decal after they have been applied, effectively rendering them carrier film free, making the completed decals much thinner and more realistic, and obviating the need to apply successive coats of clear varnish to hide the edges of the carrier film. It’s a great step further in realism from my point of view, and saves a good quantity of precious modelling time into the bargain. The third decal option has upper wing roundels that originally had the white painted out, but the paint is shown wearing badly on the decal sheet, as it was a well-worn machine that the instructions advise was filthy, especially on the underside. Conclusion Whilst this isn’t the newest kit on the block, it should result in a good replica with careful building and painting, taking the time to test fit and adjust fit as necessary. Highly recommended. Review sample courtesy of
-
Special Hobby (SH) is to reissue in 2023 the Classic Airframes 1/48th Avro Anson Mk.I with two new injected sprues under ref. SH48211 Source: https://www.specialhobby.net/2023/07/sh48211-avro-anson-mki-148-boxart.html box art V.P.
- 18 replies
-
- 2
-

-
- Anson
- Special Hobby
- (and 1 more)
-
 I'm working on Classic Airframes 1/48 Blenheim IV.f. I've vacuformed the blister side windows, and cut out and filled the triangle window in the center of the windscreen, and am working on the other details that make the 404 Squadron Coastal Command aircraft interesting. Here's some of the progress so far … The blister windows .. The cockpit (based on pilots handbook photo's) Lot's of scratchbuilding here, including the throttle quadrant (20 pieces in that!) The engines, props, and flame suppressing exhaust (Ultracast Beaufighter long exhaust, with a reprofiled bomb nose) ... and the twin Browning .303 upper turret (all scratch built) hope you like so far Colin
 -
 #15/2023 My dad finished the next double pack. After the two F3F, now the second F2A. Classic Airframes kit, which as expected needed some more work than the Tamiya F2A-2. Canopy parts didn´t fit well, sliding canopy sat like a too small hat, did cut it in halves at the top and inserted a piece of plastic sheet. EZ Line for brake lines and antenna wires, mast from Tamiya, added the missing engine push rods with plastic rods. Engine sat too much backwards, moved it forward. Painted with an altered AK Real Color Yellow and Mr Paint White Aluminium. Build thread here https://www.britmodeller.com/forums/index.php?/topic/235125888-yellow-wings148-brewster-f2a-1-buffalo-vf-3-felix-cat-usn/ Only 53 F2A-1 built and only 10 of them served with the US Navy, VF-3, onboard the USS Saratoga. Eight were later converted to F2A-2. The rest went to Finland. DSC_0001 by grimreaper110, auf Flickr DSC_0001 by grimreaper110, auf Flickr DSC_0004 by grimreaper110, auf Flickr DSC_0005 by grimreaper110, auf Flickr DSC_0006 by grimreaper110, auf Flickr DSC_0002 by grimreaper110, auf Flickr DSC_0008 by grimreaper110, auf Flickr DSC_0011 by grimreaper110, auf Flickr DSC_0005 by grimreaper110, auf Flickr DSC_0013 by grimreaper110, auf Flickr DSC_0014 by grimreaper110, auf Flickr DSC_0006 by grimreaper110, auf Flickr DSC_0016 by grimreaper110, auf Flickr DSC_0017 by grimreaper110, auf Flickr DSC_0008 by grimreaper110, auf Flickr DSC_0019 by grimreaper110, auf Flickr DSC_0020 by grimreaper110, auf Flickr DSC_0021 by grimreaper110, auf Flickr DSC_0022 by grimreaper110, auf Flickr DSC_0023 by grimreaper110, auf Flickr DSC_0024 by grimreaper110, auf Flickr DSC_0026 by grimreaper110, auf Flickr
 -
So, my dad has started the second last yellow wing subject for now. Let´s see how this turns out, definitely more work than the Tamiya kit. DSC_0001 by grimreaper110, auf Flickr DSC_0002 by grimreaper110, auf Flickr
-
 Evening all. I am trying (or rather, failing) to complete my entry into the Ju 88 GB in time, but what the heck - might as well try with another GB as well. As you can see, whilst black basing the Ju 88 last night, I used the opportunity to add some "rubber black" base to the cockpit, engine and wheel resin of this kit, but otherwise it is unstarted.. Looking forward to eventually painting that camouflage! Thanks for looking, Icarus
 -
Hi everybody, Tomorrow is the Greek National Day commemorating the rejection of the surrender ultimatum and the victorious repulsion of Mussolini’s attack against Greece. Those more interested in history, they may take a look here: https://en.wikipedia.org/wiki/Greco-Italian_War . For the moment it is enough to say that in fall 1940 Greece was the only other country bar Britain, fighting the Axis in Europe, and this mountain war has been characterized as the first major military setback of the Axis powers. Nough with history though. The below model, a Royal Hellenic Air Force Avro Anson in 1/48, is my small contribution to the commemoration. Eleven of these aircrafts were used during the campaign, having as their main duty sea patrolling and anti-submarine search. After the German invasion in April 6 1941 five of these aircraft (among which the depicted N56) managed to escape via Crete to Egypt, where they formed the nucleus for the renaissance of the Greek Air Force in the Middle East, under RAF command. It’s the well-known late version Anson by Classic Airframes that has been released later by Special Hobby. Being a limited run kit, it was a bit of a challenge in certain cases (i.e. engines and cowlings, landing system), but it was one of the best of its kind that I have coped with. It takes its time, with trial and sanding, but I believe it turns out in a really nice kit of an iconic WWII aircraft. I used the photo-etched provided and I just added a proper for the Greek version turret machine gun. Unfortunately, the decals provided for making the RHAF plane are not correct, being too dark blue and wrong font for the codes. I had to order custom made ones, which with a bit of care and a layer of Future were applied with no problem. The colors, Dark Green and Dark Earth, are from Gunze’s MrColor range, and the more demanding Night undersides were painted with a mixture of 45% German Grey, 45% Navy Blue and 10% Russet, for a more realistic appearance (plain Black just doesn’t look right). Weathering with pastels and post-shading, washing with dark brown and black. I did try some detailing in the interior, but surprisingly not many things can be seen. Hope you enjoy it. Dimitrios K.
- 26 replies
-
- 67
-
-

-
- Greek
- Avro Anson
- (and 1 more)
-
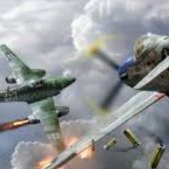
.thumb.jpg.d3635a7ef6507d35f372dd09671fe96f.jpg) With the purchase of Gloster Meteors the Israeli Air Force fleet entered the jet fighter era. In 1952 the British government agreed to sell 15 Meteors to Israel (as well as to the neigbouring Arab countries), The first T.7 trainers arrived in June 1953 and by the end of the decade the IAF had also acquired reconnaissance and night fighter versions of the Meteor, the FR.9 and the NF.13. The fighters saw action during the Suez Crisis in 1956. Gloster Meteors got two victories when captain Aaron Yoal downed two Egyptian Vampires. The last Meteor retired from IAF service in 1970. My model depicts an IAF Gloster Meteor F.8 from the early 1950's. The plane belonged to the "First jet squadron", which was stationed at the Ramat David air base in Northern Israel. The fighter wears the black and white checks on the nose and on the tips of the nozzles. In addition, the plane has black identification stripes painted on the wings and fuselage. In the beginning, the Meteors were metallic in colour, but in the late 50's the IAF started to change them into the brown, blue and grey camo. Building the model was quite challenging and especially fitting the wings and the engines was nerve wracking. I painted the model with Alclad's Dark Aluminum and for weathering I used MIG's pigments and pastels. I also added about 80 grams of weight inside the nose to prevent the Meteor from becoming a tail sitter. I added many details to the model, e.g. the ladder, the ejector seat handle and the sight, I also drilled holes to the nose for the camera cannon and the air intake. The instrument panel is from Eduard's photo etch set and the excellent decals are from Isradecals. This is the IAF Gloster Meteor T.7 trainer in the metal color version from early 1950's. I took this picture when visiting the IAF museun in Hatzerim near the city of Beersheba.
With the purchase of Gloster Meteors the Israeli Air Force fleet entered the jet fighter era. In 1952 the British government agreed to sell 15 Meteors to Israel (as well as to the neigbouring Arab countries), The first T.7 trainers arrived in June 1953 and by the end of the decade the IAF had also acquired reconnaissance and night fighter versions of the Meteor, the FR.9 and the NF.13. The fighters saw action during the Suez Crisis in 1956. Gloster Meteors got two victories when captain Aaron Yoal downed two Egyptian Vampires. The last Meteor retired from IAF service in 1970. My model depicts an IAF Gloster Meteor F.8 from the early 1950's. The plane belonged to the "First jet squadron", which was stationed at the Ramat David air base in Northern Israel. The fighter wears the black and white checks on the nose and on the tips of the nozzles. In addition, the plane has black identification stripes painted on the wings and fuselage. In the beginning, the Meteors were metallic in colour, but in the late 50's the IAF started to change them into the brown, blue and grey camo. Building the model was quite challenging and especially fitting the wings and the engines was nerve wracking. I painted the model with Alclad's Dark Aluminum and for weathering I used MIG's pigments and pastels. I also added about 80 grams of weight inside the nose to prevent the Meteor from becoming a tail sitter. I added many details to the model, e.g. the ladder, the ejector seat handle and the sight, I also drilled holes to the nose for the camera cannon and the air intake. The instrument panel is from Eduard's photo etch set and the excellent decals are from Isradecals. This is the IAF Gloster Meteor T.7 trainer in the metal color version from early 1950's. I took this picture when visiting the IAF museun in Hatzerim near the city of Beersheba. -
 Hi all, Continuing my Fleet Air Arm jet aircraft build, I recently completed Classic Airframes 1/48 Sea Venom. I was very lucky to find this on ebay and I paid the price for the rare kit (most expensive kit I have ever bought...), however, its my favourite British jet of the 50's one of my favourite British aircraft. The kit was overall good in fit, although every part required some cleaning up. I replaced the (albeit rather nice) kit resin ejection seats with some even finer and more detailed resin seats. In addition, I CAD modelled and 3D printed the undercarriage as the kit parts weren't brilliant. Brush painted with hataka acrylics and weathered using Mig panel line wash plus some weathering powders. Decals were from the kit, I really like this striking scheme with suez stripes and tip tank stripes. All done, aside from a windscreen wiper and an aerial or two... Thanks for looking! Ben
- 36 replies
-
- 77
-
-
-
- Sea Venom
- Fleet Air Arm
- (and 1 more)
-
In my opinion one of the most iconic Finnish Air Force fighters of WWII was the Brewster-239. Finland ordered 44 of them from the US and they saw action against the red army from the summer 1942 onwards. The pilots liked the Brewster very much and they achieved an incredible number of 460 victories with that fighter type. The nickname the pilots gave to the stubby BW was "Pylly Waltteri" or "Bum Walter"😆 One of the highest scoring aces of Finland during the whole war was major Eino Luukkanen. He scored a total of 56 victories. In his personal mount, the BW-393 he had a special way to mark the victories. He stuck a beer bottle label to the tail for each kill 😂 The Brewsters of his flight were painted in blue with white numbers. I built the 1/48 scale model of his plane from a very challenging Classic Airframes kit. The fit of the parts was poor and especially the clear parts of the cockpit caused a lot of trouble. After a long fight I managed to get them somehow in place. Building the kit was practically endless sanding and puttying. However, despite the difficulties I'm pretty satisfied with how the model turned out. Major Luukkanen with his BW-393 and 17 beer bottle labels to mark his victories
-
Some years ago I decided to build the very interesting looking Westland Wyvern S.4 which was a British carrier-based multi-role strike aircraft. The plane saw active service during the Suez crisis in 1956 in the Anglo-French Operation Musketeer whose aim was to capture the Suez canal from Egypt (who had nationalized that vital sea route). The Wyverns engaged in 82 missions, both in fighter-bomber as well as reconnaissance roles and black- yellow identification stripes were painted to the planes during the crisis. The Wyverns were powered by a turboprop engine driving eight large counter rotating propellers. Only a total of 127 Wyverns were built. I built my model from a 1/48 scale Classic Airframes kit which in my opinion was the best quality CA kit I have so far come across. The fit was very good and for instance the engraved panel lines were very fine and accurate. The model depicts the Westland Wyvern of the 830 Naval Air Squadron that operated from HMS Eagle in 1956 during the Suez crisis. Unfortunately I don't anymore remember the number of the paints but the colours were Extra Dark Sea Grey, Sky and Maroon.
-
Some years ago I built a model of the Royal Australian Navy's Fairey Gannet anti-submarine warfare plane. Gannet’s maiden flight took place in 1949 and the last one went out of service by 1978. In total 348 versions of Gannets were built during those years. The British aircraft industry have always been very talented in building sleek and elegant aircraft like the Spitfire. On the other hand they have also introduced some of the most odd looking flying objects. The Fairey Gannet anti-submarine warfare plane is definitely one of them. With the 2950 hp engine even this lump of metal could stay airborne 🙂 Despite its plump looks the plane was very versatile. It could carry bombs, torpedoes, depth charges, missiles and sonar. The plane's crew consisted of three, a pilot, an aerial observer and an electronics operator. The power plant of the Gannet was the Double Mamba turbine engine that drew two counter rotating propellers. The benefit of that was for instance the elimination of torque when taking off from the aircraft carrier. Once airborne the other propeller could be switched off to diminish fuel consumption. In addition to the British Royal Navy the plane was operated by the West German Bundesmarine, the Indonesian Navy and the Royal Australian Navy who ordered a total of 36 Fairey Gannets. I built my model from quite a challenging Classic Airframes' 1/48 scale kit. In addition to the usual CA fit issues attaching the canopies and wings caused a lot of sweating, fixing and sanding. The model needed exceptionally lot of ballast in the nose to prevent it from being a tail sitter. I added many details to the model that I found in different sources on the net. To paint the model in RAN’s colours I used Xtracolor enamels but unfortunately I do not anymore remember the exact paint codes. For sealing the decals I used Johnson’s Pledge and Humbrol’s enamel matt cote.
-
 I thought I had it there for a moment. I did. I really thought I had it. Subject matter with extra added interest. Don’t you feel somehow diminished by all these hordes of modelers who manage to find subject matter with extraordinary background stories, exciting histories, and tales of derring do ? You know who you are mes amigos What do I get? Another mundane, dull, run of the mill, and oh so boring 28 Squadron aircraft. I must have picked the most boring Squadron in the whole of the RAF to choose as my modeling subject matter. Not even a fancy nickname. Boring. Those of you who follow my ramblings may remember some time back that I acquired this little bundle of joys. Two of those have since fallen off the top of the stash, somehow got assembled, and I'm now left with just the CA Vampire (with all its warts and carbuncle's) So anyways, as always, I've been amassing what few photos there are of 28 Squadron Vampires which I can pretty much count on the thumbs of both hands. Yes, 'twas that many. At some point in my google bashing I stumbled across this little beauty That was 2 years before I was born. I probably bought her a drink in Red Lips (which was akin to an initiation rite for those unsuspecting new arrivals destined for Sek Kong back in the 80's) sunk deep in the depths of Tsim Sha Tsui Ah, nostalgia. Enough of that. I won't mention that fact that the aircrew of 28 conned Hot Gossip into making a trip to Sek Kong for a little party when HG were in mid tour back in the early 80's. Just in case you were wondering, us groundcrew types didn't get within 100 meters of Sarah & Co as they were ushered off the pan surrounded by a bunch of salivating green flying suits, never to be seen again. Enough digression and back to the (boring) matter at hand. That one photo of a BOAC stewardess perched precariously atop a small portion of Vampire doesn't quite get the blood rushing to one's head does it? Then I happened across this little snapshot entitled "Sek Kong Vampire and Audrey." with Tai Mo Shan just visible in the background. Okay, we've got an aircraft with a 'Y' on its nose. A little better I suppose, but still not one of those Cor, this is really interesting moments forever carved in the squadrons stone tablets is it? Nope? I thought so. It was then that it happened. The thing. The thing that made me think I had it. Immortality At last. Following breadcrumbs and diving into worm holes I somehow stumbled across this rather intriguing shot That's interesting said I. Or maybe just words to that effect. Or along those lines. My interest was piqued further when I started chasing down the story and found this. Aha! That's not your typical runway I noted observantly. What happened here then? On further investigation I discovered that the pilot flew in from Singapore, somehow missed Hong Kong, ran out of fuel and had to perform an emergency landing on a strip of beach. That beach happened to belong to China. And a bunch of (Chinese) Pirates. It probably wasn't one of his better days, but it was for me as I stumbled across this shot. Wow! That's it!. That's the one. What a shot. Mystery. Intrigue. Tension. Suspense. It has it all. The Army, the Navy, the RAF. Interest in abundance. What an absolutely wonderful diorama that would make. Then I read all about the adventure here It wasn't 28 Sqn after all VG703 was part of the Vampire Trials Unit. Therefore, I'm afraid you are stuck with just another boring 28 boring Sqn boring aircraft, this time a Vampire. Not even Gothic. Gee up folks, it maybe not that bad - it's all relative, right? It begins: In the never ending quest for stash incrementation I appear to have purchased the Flightpath PE set Along with a nicely yellowed Sepia toned canopy from Aeroclub. That should add that nice vintage touch to the finished model. let's look on the bright side. It's not a biplane Plastic has been fettled. More to follow. if I can be interested.
- 167 replies
-
- 30
-
-

-
- Classic Airframes
- 28 Sqn
- (and 1 more)
-
Hello All, This is going to be my first thread of a build here on this site. Its going to be this kit, its a classic one. I already started with this kit a little while agoo. I started with te resin cockpit. In addition there are some PE parts too. Some parts of the resin are very smell,en very brittle. Some of these parts i had to replace with some evergreen rods in different sizes. Also the PE had the tendency to fly as soon as it felt the tweezers. So the levers were made of evergreen rod also. After all this work, i started the painting. First a black primer, and after that i sprayed it in interiour green. Now i am gonna let it dry and next time i wil start the wheatering. This is where i am now. I hope u all like it, and please share your thoughts with me. I know its not going to be an easy build, so i am gonna need your support on this build.\ Greetzzz, André
- 12 replies
-
- 10
-
-
- whirlwind
- Classic Airframes
- (and 1 more)
-
Maybe I'm just a glutten for punishment, but I'm starting a 1/48 Classic Airframes Lockheed Hudson III, to be finished as LM*L, 113(BR) Sqdn, RCAF, which scored the RCAF's first U-Boat kill. Right off the hop, I knew about the split elevator problem, instead of the correct one piece elevator. What I didn't know until now was that CA had molded ALL of the fight controls scalloped out as though they were fabric covered instead of the correct metal! Should be an interesting challenge! Aviaeology's excellent decals set "First kill Hudsons"
- 45 replies
-
- 6
-
-
- Hudson
- Classic Airframes
- (and 1 more)
-
 Spured on with enthusiasm supplied by GREG DESTEC's superb desert camouflaged He 111 and then totaly being hooked by yet another Gregs entry in this G/B I have decided to do this aircraft useing the Classic Airframes kit { so i cant be accused of being a 100% plagiarist as Greg is useing the ICM kit . P1030499 by Alistair Pearce, on Flickr I got this kit off ebay years ago . this seems like a now or never time to build it . It comes with a good size bag of resin . I think first job will be to wash this off . Just occured to me that i hace never built a Classic Airframes kit . I,m guessing it will be a similar experience to a Special hobby kit which i love . P1030501 by Alistair Pearce, on Flickr The box has practicaly disintrgrated so sprues have been choped up and now secure in storage box P1030502 by Alistair Pearce, on Flickr Greg (NZ) gave me the lead on the peddinghaus decals . These are not cheap so after pressing the buy button there is no turning back . P1030503 by Alistair Pearce, on Flickr P1030504 by Alistair Pearce, on Flickr I have a little more work to finish my He 111 / Skua entry in the He111 STGB but will now make a slow start to satisfy my impatients. Here goes ...........................................................
 -
Westland Whirlwind - Classic Airframes 1/48
bryanm posted a topic in Ready for Inspection - Aircraft
I bought this on ebay earlier this year as 'part built' - it had been started but I guess the builder was expecting a 'shake and bake' and had given up. It wasn't too bad to complete, but although it was the second release with the injected canopy it was evidently an early CA mould and a way from the Gosling and Hornet, the other CA models I've completed. It still went together OK with the usual test fitting and some filler, although the fit was generally quite good. It's mostly from the box with just a stretched sprue antenna and the aerial mast moved to the canopy to suit this early production example. I'm still puzzled how this worked - presumably when the canopy was opened, the antenna went slack. I haven't found any photos of the early arrangement with the canopy open and on most photos the antenna is barely visible anyway. The decals looked nice on the sheet but some of them broke up easily, not least the fin flashes. I managed to piece together the bits and then touch them up with paint. One of the upper wing roundels totally disintegrated so they are from the spares box. There is a little silvering even after a good coat or three of Kleer. It's brush painted with Humbrol enamel. Whirlwinds are some of the few aircraft regularly parked with their flaps down, presumably because the flaps and radiators were linked and the Peregrine engines suffered from overheating. Even with the flaps up, the cooling vents in the upper wing surface didn't completely close so there's plenty of scope for scratch builders to work on this area. That's a bit beyond my skill! There's a photo of P6969 in the Warbird monograph looking very tatty and captioned that it was towards the end of 263 Squadron's use of the type, which was January 1944. In fact it was lost on 8 February 1941 in a combat with an Ar 196.- 11 replies
-
- 20
-
-
- Whirlwind
- Classic Airframes
- (and 1 more)
-
 Hi comrades! Here my take on Classic Airframes kit. The kit was great, I liked it more than Tamiya (built simultaneously - see "family photos" and built/RFI thread somewhere here. The only thing I regret-is the leading edge lights - they are to close to/part of wheel wells, not to my recent skills to insert the clear plastic here 😰. Otherwise-I'm happy with the result. The build is here: Thanks for looking!
- 12 replies
-
- 29
-
-
-
- Brewster Model 239
- Brewster Buffalo
- (and 1 more)
-
Good afternoon all, I’m working my way through a Classic Airframes Hudson and need some help with the turret. I’ve already given up with the one that comes with the kit and have pinched one from my Revell Ventura which is far better in profile. However, one thing they both have in common is the total lack of interior detail. Does anybody have any interior photos or diagrams they would be prepared to share? I’m aware there is a restored one at the Yorkshire Air Museum but a trip up there isn’t convenient at the moment. Best regards Howard
-
Hi all I have a few on the go after I caught the gotastartalotofkititus virus . I have finally started my first Classic Airframes Kit. I bought the kit on BM as a Part started kit as below The Cockpit is the kits supplied resin one and really is very detailed The kit was missing the seat mounting frames and I will be making those shortly following some measurements from a fellow BMer. The rudder pedals were broken so I added a simple bar and pedals and two levers from brass rod Drilled the top Cannon mounts and added fairings to the lower ones made out of cut hollowed sprue as per Moa's method on one of his amazing builds. The cut out the tail area for the clear housing for the aerial wire and replaced with clear sprue I am also building a Special Hobby 72nd scale Sea Fury T20 at the mo but have not got anything worthy of photographing yet and I have started rigging my long term 32 scale Tiggie so have a few on the go now.. Thanks for looking Chris
-
Hi! I'm starting to build the classic Classic 😆 Airframes kit of Electronic Warfare Canberra. IMHO most brutally looking Canberra version. I will use: -Kit (more than 10 years in my stash) -Loon replacement wingtip tanks (resin) -Eduard interior etch set intended for Airfix B.20 kit -ResKit wheels (resin)-looks waaay better than in-box resin - compare the pictures below... The start is trivial - assembling the 1kg of resin interior parts and building the fuselage halves. Thanks for looking
-
Hi comrades! Full build is here Model is fun to build, but it needs some modifications and more details to better represent the prototype. Modifications I made: -Third crew member station was added (and it's visible!!!) -Painted antennas inside the canopy -Antennas scratchbuilt -Navigation lights scratchbuilt -Landing light - Elf -Details on wheel doors-scrach -Wheels - replaced with ResKit -Brass In cockpit - Eduard -National insignia - painted (decals are wrong) -Stencils - partly painted, most from Model Alliance decals -Loon replacement wingtip tanks And great thanks to @canberra kid and @Lord Riot for the help and protecting me from making big mistakes!!! Thanks for looking!
-
 I am starting to work on the interior now of the 1/48 Anson using the Classic Airframes boxing of it. I really dislike the amount of resin used in these kits as they use it for many parts that don't need it eg the framing is poorly cast and chunks of it are going to be replaced with plastic rod. The interior green needs some more work and I have yet to paint some of the detail areas. At this stage I am tossing up between A4-6 of 22 SQN circa 1939 or No 1 Comms Flight circa 1941. Both are in overall aluminum and have their gun turrets. I have put in a bit more of the interior and plan to put in some wiring behind some of the dials, radios etc. The instrument panel was a pain to position as there are no location points visible and I can't find an image of the real Mk 1 to show me the positioning. Where it is here fits and the canopy goes over it when I do test fitting so it is a good a spot as any. I still have more additions for interior where I will be replacing poorly cast resin with plastic and building up a few extra bits and pieces. I am not going to get that excited as I don't think that much will be seen once it is done and closed up. The wings are not too bad when going together. The wheel well is a bit dodgy as there are no location markings to help you locate the internal bits. While the wing goes together well the engine nacelle needs some help as the profile of the front bit is different from the wing part. A bit of filler and some work with a file and wet and dry managed to get it looking ok. This isn't hard but it does take time.
- 8 replies
-
- 5
-
-
- 1/48
- classic airframes
- (and 1 more)