Search the Community
Showing results for tags 'Bristol'.
-
 Wingnut Wings is to release - in September 2015? - a 1/32nd Bristol F.2b Fighter new variant (Post War) - ref.32060 Source: http://forum.largescalemodeller.com/topic/3999-another-worldwide-exclusive-just-for-lsmwnw-fans/ Box art V.P.
 -
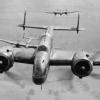
Beaufort Mk.VIII A9-559 - a composite of several RAAF aircraft, displayed as Mk.IIA DD931/L. Full history from the RAF Hendon website here. Pics thanks to Ian (Depressed Lemur) at The RAF Museum Hendon.
-
Recently completed Frog Beau as a night fighter, wanted it to look well used! A few changes/additions; -nacelles; tried some resin ones, very disappointing, the gills were underscale and ended up shattering the front ring. in the end I wrapped the kit item in plasticard and made the gills from a thin strip. Still under sized but a big improvement. -antenna to wings made from thin wire -landing lights added to wing tips -used the decals supplied even though some broke up but note the serials as they are grey not red and seem to be the wrong number. Will add some when I have enough need to buy a sheet. Quite please with how it turned out considering the age of the kit. Trying to keep one step ahead of Airfix releases so Kinetic Whitley next!
- 15 replies
-
- 18
-

-
Here is my latest Valom offering, the 1/72 Bristol Bombay Mk1. This has been a long and 'interesting' build, WiP thread here. OOB build (as usual for me) primed with Humbrol grey plastic primer, underside Vallejo Model Air aluminium and camoflage Vallejo DE and Humbrol DG (latter brush painted). Guns and bomb racks omitted to represent the transport variant (and because the supplied guns are pathetic and I'm too lazy to scratch build). First flown in 1935 the Bombay was introduced in 1939 and retired in 1944. I believe only 40 were in service and this one stalled on approach and crashed. Wikipedia here and, as usual, no colour photos for reference. The build thread has lots of references (please have a read if you have any questions - it's only 21 pages!) so I'll go straight into the photos of the completed model. Here's what I was aiming for and my attempt at a similar shot of the finished model: And some more colourful shots... Thanks for looking!
- 28 replies
-
- 30
-
-
Obscurity Corner! First attempt at a Resin Kit, not as bad as I suspected, all parts fitted quite well but still a fair amount of filling. The model is a Bristol 148, two prototypes were made in response to Air Ministry Spec A39/34 for an army co-operation aircraft. The 148 undertook trials against the Lysander in 1937 and performed well, both met the spec but the Lysander's better visibility and fixed undercarriage won the day. Bristol transferred all efforts into developing the Blenheim, the shape of the tail on the 148 looks familiar!
- 11 replies
-
- 14
-
-
 Thought it was time I presented the result of my efforts to take an Airfix F2b and turn it into a Bristol Tourer Seaplane. It took far too long but has proved that I can take a kit and change it into something else using reasonable scratch building techniques. All of this was originally inspired by The Old Mans excellent WW1 scratch builds, I just thought I'd go half way to start with. Anyway the history of the Tourer is basically that at the end of WW1 manufacturers like Bristol had to diversify to stay in business and like Avro they looked to the civilian market and their new found fascination with flying. The tourer came in a number of types, two seat, three seat, open passenger compartment, closed in and a seaplane. There's a part WIP for anyone interested, I'm afraid I lost patience with posting progress; must give up the day job! http://www.britmodeller.com/forums/index.php?/topic/234969660-airfix-f2b-conversion-to-bristol-tourer-seaplane/?hl=%2Bbristol+%2Btourer There is a bit of a mistake which I have to confess, the logo is wrong! I had them specially made based on artwork I found on the internet and overlooked the fact that this is the later Bristol logo used after the late '20's. One day I might correct it but getting white bespoke decals made is not cheap!
- 22 replies
-
- 16
-
-

Bristol Brigand B Mk 1 Valom 1/72 (Pic heavy)
CedB posted a topic in Ready for Inspection - Aircraft
This is my first RFI and there's a somewhat protracted WiP thread here. I hope you like it. This is an OOB build (more or less) - the kit comes with additional resin and PE parts. Research shows that this "brute" was a challenge and the Boys of 84 Sqdn certainly had some experiences in Malaya, where the climate had detrimental effects on the aircraft including, but not limited to: - main undercarriage failing to lower - propellor blades 'departing', usually resulting in the engine going with it - air brakes not operating in the dive. More information here. Possibly the worse problem was that the Brigand tended to shoot itself down: "The losses of several aircraft during strafing runs and several more being damage led to the discovery of a deadly problem. The long cannon blast tubes that ran beneath the cockpit seemed to have the tendency of trapping propellant gases when the four cannons were fired. This gas would occasionally ignite when the aircraft used high explosive rounds, the resulting explosion would damage hydraulic lines and fire would severly damage the aircraft or cause it to crash." In a great example of British grit "At one point, the commanders of the units that operated the type began to have doubts over the wisdom of continuing operations." -
Valom is to release a 1/72nd Bristol Bombay Mk.I (African campaign) kit - ref.72097 Source: http://www.valom.net/index.html Box art And we are still waiting the Bristol Bombay Mk.I - ref.72056 Source: http://www.hannants.co.uk/product/VAL72056 Bristol Bombay Type 130 - ref.72055 Source: http://www.hannants.co.uk/product/VAL72055 V.P.
-

Bristol 138A Prototype with wheel covers
Xantippos posted a topic in Ready for Inspection - Aircraft
Here I comeback to the forum after a long time with this kit. Although not a wartime aircraft, it is one of the closest things you can find that actually didn't fought but looks like if it would have had. The main thing that separes these kit from the usual is; modified pilot to resemble the actual pilot who achieved the records, with a white suit, resembling a pulp fiction astronaut, and I sculped with putty the wheel protections on the wheels, which I think gives a great style, besides the chroming of the nacelle. This has been a family build - built by my father, wheel protections and pilot made by my brother, and painted, chromed and decalled by myself. I have made also a full review; http://toysoldierchest.blogspot.com/2015/01/frog-novo-bristol-138-research-plane.html -
Bristol Beaufighter Mk.IF 1:32 Revell The Bristol Beaufighter (Or Type 156) was developed by The Bristol Aeroplane Company from their earlier Beaufort Torpedo Bomber following a suggestion from the Air ministry following delays to the Westland Whirlwind aircraft. The name Beaufighter being an amalgamation of the words Beaufort and Fighter. Unlike the Beaufort the Beaufighter was to prove to be an aircraft which would have a long career and provide service to the RAF throughout the war in many different theatres. Using the new Hercules engines instead of the Beaufort's Taurus engine would give the new "fighter" much better performance. Since the Beaufighter was to be a conversion of an existing design, development and acceptance was far quicker than that for a new design. The differences between the two aircraft were actually minor. The wings, control surfaces, landing gear and rear fuselage were identical. The Beauforts bomb bay was omitted with four 20mm cannon being mounted in this area. At only 335 mph the aircraft was slower than frontline fighters at the time but in times of need it was available. A favourable development at the same time was that the new Air Intercept radars were coming off the production line. With its cannons in the lower fuselage the Beaufighter had no problems mounting the new radar in its nose. Even fully loaded the aircraft was able to catch the German bombers of the time, and the Beaufighter Night Fighter was born. As the faster radar equipped Mosquito aircraft came on stream the Beaufighter was taken ;off the Nightfighter role and used very effectively in the anti-shipping, ground attack and long range interdiction roles. Using a combination of rocket and torpedo armed aircraft they were very effective in the anti-shipping role. The Beaufighter would serve in all theatres of the war. Production was even moved to Australia following successful use in the pacific. During WWII the aircraft was used by the British and American forces. Post war Portugal, Turkey and the Dominican Republic used the aircraft. In addition it was briefly used by Israel following their clandestine purchase in 1948. The last RAF variants were used as Target Tugs and finally retired in 1960. Overall 5564 were built in the UK by Bristol and Fairey; with 365 being built also in Australia. The Kit Using the wayback machine this tooling now dates back to 1974. The moulds seem to have held up very well. The kit arrives with nine sprues of grey plastic (its obvious they have been broken up to fit the new size box revell are using), and one clear sprue. There is no flash evident on the parts. As a kit of this age would suggest detail is sparse and the panel lines are raised. Construction shockingly enough does not start with the cockpit, but the engines. Two banks of cylinders are assembled (two parts to each bank)along with an inner hub. The hub is attached to the propeller in the next step. Both of these procedures being completed twice. Construction can then proceed to the cockpit! The cockpit tub is fairly simple. A one piece tub is backed with the pilots bulkhead with a representation of the entry doors on it. A seat is provided along with a control column. Rudder pedals are moulded into the tub. If needed a pilot figure is supplied for use. Next step is the construction of the seating area for the rear gunner. A floor part is attached to two sides and the front and rear bulkheads. A seat is provided as is another figure. All the control panels for both areas are provided as decals. Next step is construction of the four part tail wheel. Once this is done the tail wheel along with both cockpits are placed into the right fuselage. The fuselage halves can then be buttoned up. The next step is then the wings. The upper wings are two part whereas the lower ones are three parts. There is a centre section combining the under fuselage part with two outer wing panels. Once the wings are one the tail planes, rudder and cockpit transparencies are added. Clear parts for the navigation lights, and landing light are added, along with the grill for the oil cooler. Construction then moves on to the main landing gear. Two part wheels are added to the main double strut with the retraction struts added to the rear. There is no detail at all in the wheel wells. Gear doors are also added at this stage. Once the gear is on the modeller moves onto the engines. Cowlings are added along with the actual engines complete in the first step. The exhaust collector rings and exhaust parts can now be added. If the modeller is making the night fighter version then the various antenna are added. Canopy The canopy is clear but a little thick which shows the age of the kit a little. The rear blister could certainly do with a good polish. Decals Decals are provided for two aircraft. They are printed in Italy for Revell and up to the now usual standard. They are in register and colour density looks good. No.252 Sqn RAF, Abu Sueir, Egypt May 1941 No.406 Sqn RAF, Coltishall, England, August 1941 Conclusion It maybe an older kit but its the only game in town for 1.32 Beaufighter. Despite its age it should make up to be a good looking model. recommended. Revell model kits are available from all good toy and model retailers. For further information visit
- 6 replies
-
- 1
-
-
- Bristol
- Beaufighter
- (and 1 more)
-
Inspired by The Old Man's excellent WW1 scratchbuilds i decided to dip my tow in the water with a conversion of the old Airfix F2b to a Bristol Tourer Seaplane. After WW1 Bristol like a lot of manufacturers faced empty order books and so turned to the domestic market and the publics fascination with flight by starting to produce aircraft as a means of transport. The Tourer was created by replacing the gunners position with two seats side by side in awidened body and fitting a Puma engine. There were numerous types including one with an enclosed passenger cabin, the one selected is open and fitted with floats, I beleive two were made. Source material comes from a drawing in The Book of Bristol Aircraft and excellent quality comtemporary photos. There are no drawings of the floats but the lenght is qoted in a 1919 magazine article.
- 26 replies
-
- 2
-
-
- bristol
- conversion
- (and 1 more)
-
Completed this Sanger Bristol Bombay a few Months ag and got around to some photos this weekend. It's my first vacform and last for a while until my stress levels come down. Not sure of the percentage of filler compared to plastic but it's quite high! The model represents a Bombay in use in 1942 as an Air Ambulance in North Africa and Sicily, based on photographic evidence and research, I am grateful to all those on the Key Publishing Historic Aircraft Forum that contributed to my plea for information. Like all vacforms the kit is basic so most of the details are sratchbuilt additions, as is the interior and all the landing gear, struts etc. All comments welcome.
- 30 replies
-
- 27
-
-
Bristol M.1c 1:32 Special Hobby History The Bristol M1C was a well designed and effective aircraft that was not given a real chance to show its true potential. The M1C had a maximum speed approximately 30-50 mph (50-80 km/h) faster than any of the contemporary German Fokker Eindecker monoplanes. The M.1A prototype was designed by Frank Barnwell in 1916 and built as a private venture by the Bristol Aeroplane Corporation. The War Office ordered four aircraft for evaluation - designated M.1B - which had a single 0.303 in (7.7 mm) Vickers machine gun mounted on the port wing and a clear-view cut-out in the starboard wing to give the pilot more downward visibility. Despite its excellent performance, the Bullet was rejected by the Air Ministry for service on the Western Front. The reason given was because its landing speed was considered too high for small French airfields. It was more likely because of a widespread belief that monoplane aircraft were unsafe in combat. Nevertheless, a production order for 125 aircraft was placed on August 3, 1917. Designated M.1C, this version was fitted with a Le Rhône 9J, 110 horsepower (82 kilowatt) 9 cylinder air-cooled rotary engine. The aircraft was armed with a single Vickers 0.303 in (7.7 mm) machine gun, centrally-mounted in front of the pilot. The Model The kit comes in rather an attractive top opening box with an artists impression of the aircraft overflying the enemy somewhere in the Middle East. Inside there are four sprues of medium grey styrene, a sheet of photo etched parts, decal sheet, a couple of resin parts and a small acetate sheet for the windscreen. The parts are all cleanly moulded with no sign of flash or imperfections and very few moulding pips. Surface detail is well defined and fitting for a model in this scale. Although the model looks quite simple there is a lot of detail included, particularly in the cockpit area, which, considering the size of the cockpit opening will probably be lost once the fuselage is closed up, which is a shame. There are currently two versions of this aircraft released, this one being the “Wartime Colours”. The build naturally begins in the cockpit which as mentioned above is highly detailed. Firstly the sub assemblies for the two instrument panels, with each instrument face provided on the decal sheet, which will look great, having had a small drop of Crystal Glaze, Future or the like on them to simulate the instrument glass. The foot rest structure is fitted with the joystick and rudder bar on top and a dwarf bulkhead on the underside. The sub assemblies are then fitted to one side of the internal structure of the fuselage which are moulded as two cross braced panels, followed by further lateral cross bracing, dwarf bulkheads, front bulkhead and the front face of the fuel tank at the rear of the main structure. The beautifully moulded resin seat with ultra fine wickerwork backrest is fitted with the etched seat belts and lap straps, which are pre-painted and the styrene seat cushion. The completed seat is then fitted into position and the other braced panel is attached to the front bulkhead and rear tank assembly to form a rigid structure. If you really want to go to town there are a couple of nicely drawn diagrams showing how and where the bracing wires are fitted around the cockpit structure. The completed assembly is then fitted into one half of the fuselage, but before closing up there several more control levers to be added should you wish as they are shown as optional in the instructions, along with the non-optional tail skid. With the fuselage closed up it’s now onto the engine assembly. This consists of front and rear halves of the cylinders, individual cylinder heads, individual push roads and a single piece exhaust manifold. The engine is then slid onto the rear mounted shaft and fuselage attachment point. The engine is then mounted on the fuselage and covered with the three-quarter cowling. At the same point in the instructions the horizontal and vertical tailplanes are fitted, followed by the separate elevators and rudder. Each mainplane is moulded as a single piece with the exception of the separate ailerons and are mounted on to the location points at the shoulder of the fuselage. With these firmly set in place the undercarriage can be added, which consists of two struts and the aerofoil/axle fixed between them. The wheels have separate outer hubs and slide onto the axle on either side. With the build coming to completion, it’s on with the propeller, which is made up of the steering wheel looking backplate, single piece two bladed prop, bullet shaped spinner and two etched parts that are fitted around the propeller slots in the spinner. The single machine gun is then fitted into position, along with the streamlined belt covers, fuel tank filler cap, oil tank filler cap followed by the two twin braces fitted over the cockpit. The modeller has a choice of windscreens to fit. Either one with a simple single etched mounting or one with a more complex twin armed etched mounting. To complete the model there are clear diagrams showing the rigging, which, being a monoplane is mercifully quite easy. Decals The decal sheet, printed by AVIPRINT.CZ provides markings for two machines. They are well printed, in good register, which is vital with the size, particularly of the roundels. They are also remarkably thin, with little carrier film visible, but appear to be nicely opaque. The markings are for:- Bristol M.1c, C4907, of No.150 Squadron, RAF, Ambarkoy Airbase, Mesopotamia Autumn 1918. This machine is painted brown uppers over light blue undersides and spinner. Bristol M.1c, C4918, of No.72 Squadron, C flight, Mirjana Airbase, Mesopotamia Spring 1918. This machine is painted with brown fuselage and upper wings, natural linen colour on the undersides of each wing and wheel hubs and with a grey forward fuselage and spinner. Conclusion This is a lovely kit of a beautiful looking aircraft that will certainly make an an interesting addition to any collection, and will stand out in a collection of WW1 biplanes. The mouldings of both the styrene and resin parts are very well produced with the seat a masterpiece of resin moulding. With everything in the box the modeller could possibly need it should bring hours of fun without any extra outlay. Some parts could be tricky so probably not for the novice modeller but anyone with some experience shouldn’t have a problem. Highly recommended. Review samples courtesy of
-
Special Hobby is to release a 1/32nd Bristol M1C Monoplane Scout kit - ref. SH32057 Source: http://www.modelforum.cz/viewtopic.php?f=97&p=1580692#p1580692 V.P.
-
Hello all, Excuse me if this topic has been covered before, but I'm wondering if any of you could possiby point me toward some good resources for detailing a Mk1 Blenheim? I'm relatively new to the hobby and as such am struggling to find the stuff on my own. I'm really looking for the normal kind of stuff, drawings/photographs of wheel well, cockpits, gunner's position and flaps and the like. But my google fu is woefully inadiquate. Help me Obi Wan Ken-Britmodeller, you're my only hope! Many thanks, Paul
-
Aircraft being restored at Duxford. Photos are mine. Julien
-
Pics mine of the one being restored at Duxford. This was a Bolingbroke Mk IVT 10201 being rebuilt with a Mk.I Short Nose.
-
Having been brought up near Filton airfield, I have set myself the task of building as many aircraft associated with Filton over the years, to a greater or lesser extent. This will be done in 1/144 due to limited storage space. I have started with VC10 RB211 testbed G-AXLR, VFW614 D-BABC and DC-3 G-AMPO. If anyone has photos/slides etc of aircraft at Filton and would be willing to share tham with me, please let me know.
-
Having been brought up near Filton airfield, I have set myself the task of building as many aircraft associated with Filton over the years, to a greater or lesser extent. This will be done in 1/144 due to limited storage space. I have started with VC10 RB211 testbed G-AXLR, VFW614 D-BABC and DC-3 G-AMPO. If anyone has photos/slides ets of aircraft at Filton and would be willing to share tham with me, please let me know.
-
Bulldog K2227 (S.No. Unknown) at the RAF Museum, Hendon, pics thanks to Mark Mills. Pics mine;
-
Having been brought up near Filton airfield, I have set myself the task of building as many aircraft associated with Filton over the years, to a greater or lesser extent. This will be done in 1/144 due to limited storage space. I have started with VC10 RB211 testbed G-AXLR, VFW614 D-BABC and DC-3 G-AMPO. If anyone has photos/slides ets of aircraft at Filton and would be willing to share tham with me, please let me know.
-
First post on Britmodeller. Recently completed Blenheim 1F, purchased on ebay as a way back into the hobby after a 35 year break1 Thought this would be an easy one to start on but ended up replacing the nose glazing with a Falcon one having completely ruined the original, framing is decal strip. Tried my hand at weathering, wanted it to look well used, the paint finish has been sprayed using cans and then thinned with fine wire wool and top coated with weak black oil paint. Also my first attempt at a detailed cockpit interior. The finish depicts 25 Sq North Weald 1939 based on details from the Blenheim Warpaint book, still need to find a serial number to show L1257. Thanks for looking. http://s124.photobucket.com/user/neilh2/library/
-
Bristol F.2B Fighter 1:48 Revell History The Bristol F.2 Fighter was a British two-seat biplane fighter and reconnaissance aircraft of the First World War flown by the Royal Flying Corps. It is often simply called the Bristol Fighter or popularly the "Brisfit" or "Biff". Despite being a two-seater, the F.2B proved to be an agile aircraft that was able to hold its own against opposing single-seat fighters. Having overcome a disastrous start to its career, the F.2B's solid design ensured that it remained in military service into the 1930s, and surplus aircraft were popular in civil aviation. After only 52 F.2As were built production switched over to what became the definitive Bristol Fighter, the Bristol Type 14 F.2B which had first flown on 25 October 1916. The first 150 or so were powered by the Falcon I or Falcon II engine but the remainder were equipped with the 275 hp (205 kW) Falcon III engine and could reach a maximum speed of 123 mph (198 km/h). The F.2B was over 10 mph (16 km/h) faster than the F.2A and was three minutes faster at reaching 10,000 ft (3,000 m). F.2Bs often carried a second Lewis gun on the rear cockpit mounting, although observers found the weight of the twin Lewis gun mounting difficult to handle in the high altitudes at which combat increasingly took place in the last year of the war. A number of attempts were made to add forward firing Lewis guns on a Foster mounting or similar on the upper wing - either instead of, or in addition to the Vickers gun. Unfortunately this caused interference with the pilot's compass, which was mounted on the trailing edge of the upper wing. Some F.2Bs were fitted with a Lewis gun offset top starboard to minimise this effect. The Model The kit comes in a nice looking top opening box, with a picture of an aircraft in the process of dropping bombs, whilst another aircraft chases off the opposition in the background. On opening, all the parts are fairly well protected in a single poly bag. The four sprues of parts in light brown styrene are nicely moulded with no flash and only one or two pips on some of the smaller parts. Strangely there is no clear sprue as the aircraft definitely had a windscreen, albeit a small one. The cockpit is a complex affair with several sub assemblies constructed first before the whole lot is brought together. Beginning with the cockpit floor, onto which the rudder bar and joystick are attached, followed by the engine priming pump handle, front bulkhead and fuel tank. The engine exhausts are then shown to be painted up and addition parts fitted. The instrument panel will need some careful painting and the instrument decals added. Onto the panel the bracing struts and machine gun are attached. The fuselage interior has some nicely moulded representation of the internal structure will also need to be carefully painted to bring out the details. The moulded internal detail is complemented by the fitting of the spare Vickers drum magazines, various pump handles and fittings along with the exhaust panels. Before the fuselage can be closed up the cockpit sub-assembly is fitted, followed by the pilots seat and supporting structure over the fuel tank, the gunners seat pad, rear bulkhead and instrument sub-assembly. With the fuselage closed up the exhausts can now be attached, as can the scarf attachment panel ring over the gunners position. The pilots windscreen frame and the external control fixtures for the rudder bar. The horizontal tail plane is then fitted out with the two elevators then the fin and rudder is also attached. The whole tail assembly is then attached to the rear of the aircraft. Moving forward the lower wing struts are attached to the fuselage and put to one side to set firmly. The upper wing is then assembled with the addition of the pilots compass, gunsight, ailerons and their associated control horns. The lower is also assembled at this point, with the addition of the ailerons, control horns, what look like either grab rails or representations of the control lines. The lower wing is then fitted to the fuselage via the struts fitted earlier. The cabane and inter-plane struts are attached to the fuselage and lower wing respectively onto which the upper wing can then be fitted. The undercarriage struts and axle are fitted to the lower forward fuselage, and the wheels attached. To the rear the tail skid, with bracing struts is attached to the rear fuselage just forward of the tailplane. There three pairs of bomb rails fitted to the lower wing centre section onto which the modeller can choose to fit either the two 100lb bombs, (on the centreline), or eight 25lb bombs, four per side on the outer rails. The engine front is now assembled, with the fitting of optional style radiators which are surrounded by the nose cowl and the two bladed propeller is attached via a pin passed through from the rear of the radiator. The completed assembly is then fitted to the fuselage. The single Vickers machine gun, scarf ring and elevating fittings are assembled and attached to the gunners position, completing the build. Well, perhaps not quite complete, as there is an awful lot of rigging on this aircraft and it would be a waste to build the model without it. Take great care to read and digest the rigging diagrams, which are quite complex, but should be ok if taken one step at a time. Decals The decal sheet has been printed in Italy, so no doubt that it’s by Cartograf. So naturally you’d expect them to be pretty good, and they are. Apart from the twin fuselage bands there is very little sign of carrier film. The decals appear to be nice and thin, slightly matt, with good opacity and in register. The blue of the roundels and fin flash is nicely muted as per the orders of the day. The modeller has the option of building one of two aircraft. Bristol F.2B, C=4630, No. 62 Sqn RFC, Spring 1918 Bristol F.2B, B1134, “19”, No 35. Sqn RFC, France, February 1918 Conclusion This is a great looking kit and Revell have done themselves proud with providing enough detail for all but the most ardent modellers with AMS. It will build into quite a reasonably sized model and should be a great addition to any collection, especially fully rigged, which I’m sure all modellers who buy it will be diligent enough to do. Please note we have walkround photos of the Brisfit HERE Revell model kits are available from all good toy and model retailers. For further information visit
-
Bristol M.1C Monoplane Scout. Pics thanks to Mark Mills. This aircraft is replica built for the Shuttleworth Collection but it uses an original 110hp Le Rhone engine.
-
 Hi All, Since Airfix will be bringing us some new tool Blenheim aircraft kits, a few pictures that show the bombs as carried plus the bomb bays of various Finnish Blenheim variants may be of interest. Since I am putting up a lot of pictures I decided not to flood Mark Haselden's thread on the Airfix Blenheim with them. All of the 62 images which will follow below are sourced from the SA-Kuva website. To date I have examined around 144,450 images from SA-Kuva and have downloaded 4703 images of interest which include 3122 aviation pictures. Fortunately I am most of the way through what SA-Kuva has online. Anyway here are some pictures; More to follow, over....