Search the Community
Showing results for tags 'Bomber'.
-
 Figured I'd go ahead and start this thread even though the kit won't be arriving until Tuesday. I've noticed all of the resin aftermarket parts for the Il-28 are for the Italeri kit, but I had ordered the Trumpeter kit already and it was cheap enough that I'm not worried about super-detailing. The markings will be from a NOS ESCI 1/72 sheet of Sudan (pre-60s), Somalia, Nicaragua, Guatemala, Honduras, and Cuba "national insignias" (roundels and flag tail markings). Now on to the other issues - every Il-28 kit in existence, from what I've read, is problematic. I think I'll be able to build it successfully, but references on this aircraft are fairly poor from what I've seen. The main discussions are about the Soviet version or the Chinese Harbin H-5, and most pictures are either Soviet or Polish. The Trumpeter kit comes with decals and a painting guide for the PLAAF, and I believe the VPAF, which is a green upper and grey lower surfaces scheme. I honestly think the only difference between the Il-28 kit and the Harbin H-5 kit is the box art. This is definitely not the scheme of the Somali Air Force in the 1970s. Every other operator seems to run either NMF or a grey scheme. This Romanian example is pretty wild - Which leads to the main issue - I have no references for how to paint this aircraft at all. I can apply the markings without much difficulty (excluding the serial number), but roundels and tail markings are pretty much universal in their placement. I have found this video - https://www.youtube.com/watch?v=ftofj4wsFvY - but it's of very poor quality and does not appear to show any Il-28s. I have been unable to find a single photo of a Somali example so far. If Mr. Cooper has any input on this (I know it's not a MiG or Sukhoi, though), I would be most grateful. The only other images I found besides pictures of Soviet Bloc examples were these hand drawings of the cockpit and navigator's position. Any ideas? I'm thinking they probably flew them as they were painted on delivery, which would be the Soviet scheme (right?). I'm a little hesitant to try doing NMF on my second aircraft. I feel like I need a lot more practice before I try that. Likely to end up a neutral grey underside with a darker gloss grey upper surface. I feel like I've seen Polish examples of that. Still, painting is a long, long way off.
 -
Hello, Having noticed a dearth of discussion regarding said kit, I thought I'd start the ball rolling myself. Sprue pics are already floating on the Net, however here are mine. Looks like this boxing is the only one that we'll get, with optional parts for early and late versions and something for the spare box as well. Manufacturers take advice: the fuselage interior shape follows, well, is the actual fuselage: the Karman fairing is a separate part. Great for accuracy, although it remains to be seen how this will affect putting on the wings. With respect to their first kit, ejection pin marks are more in check, and there is some detail on the inside of the wheel wells: You get enough bombs to prevent takeoff. I don't think the Il-4 was ever armed with rockets, however their provision doesn't certainly harm no one. Spare box, here we come! A rather unusual load is an AMG-1 naval mine with aerodynamic fairing; there's also a torpedo (possibily a 45-36-AN model?), one FAB-1000 and two FAB-500 bombs. If you build the bomber version the torpedo can be used for a Soviet A-20... What let me down is the width of the panel lines. What to do here? Mr.Surfacer? Stretched sprue? Bite the bullet? Suggestions are welcome. Some oddities of the surface detail: Rendition of the fabric has improved a bit: There are a lot of parts for the interior, but the detail is rather on the soft side: The clear parts are thick but clear. You get a dorsal turret and a half (the difference is in the number of frames), the other half might be a starting point for a field-modified Boston...? This was the feature I was most anxious about. How do the nose windows fare? Fit seems good but they sit 'recessed', not flush. Thinning of the fuselage in correspondance to the frames is in order. Part of the engine. See what I mean about the 'soft' detail? Re the decals, we're finally spoiled for choice. Register is good. However, there's a bit of a problem with the star borders and other details: the white and especially the yellow don't quite cover. This kit will satisfy enthusiasts first and foremost by virtue of its existence, however in some regards (surface detail...) it's a step back from the Tu-2. Pity. Still, I'd rather put together this one rather than wait for Tamiya. If I get some spare time today, I could try and tape it together to check for fit and shape. HTH, Bone
-
Hello, I've been bitten by the bomber bug and wonder what kits are available in injected plastic and in 1-72. These are the types that I know about, can you add more? Martin MB-2 Martin B-10 Douglas B-18 H.P. Hampden A.W. Whitley Hawker Hart Vickers Vimy Bristol Blenheim I Fiat Cicogna S.M.79 and 81 CANT Z.1007 Tupolev SB Tupolev TB-3 Amiot 143 Potez 540 Bloch 200 and 210 Heinkel He.51 Junkers Ju.86 Junkers Ju.87A Heinkel He.111B, ecc. Dornier Do.17 Kawasaki Ki.48 Mitsubishi G3M Aero A-100 Admittedly I know very little about the single engine types.
-
 WWII RAF Bomber Re-supply Set 1:72 Airfix As Bomber Command increased the air campaign against the Axis forces in WWII, the demand to handle logistics on the airfields grew both technically and in activity. The four engine bombers in comparison to the earlier twins carried more fuel, more bombs, more ammunition and more crew and stood higher off the ground, so re-supplying them needed more dedicated equipment. The ‘Tilly’, derived from the name ‘utility’ vehicle became familiar for moving crew around the airfields early in the war. When you think that a Lancaster fully fueled needed over 2000 gallons of fuel, bowsers had to be sufficiently large to make them practical for readying a squadron with short turnaround. Also needed with the Merlins was oil. Unlike modern engines, these drunk fuel at a hefty rate, so the Brockhouse bowser with a 450 gallon capacity became a common sight topping up the oil tanks between missions. The Bedford truck came in different guises utilising the same chassis. The MWC carried a water tank for topping up radiators on the bombers, where as the MWD was used for ferrying crews around the bases. It’s easy to forget the shear amount of effort required on an airfield to fuel, bomb, maintain and crew a squadron of four engined ‘heavies’, but without these men and machines, the bombers would never have achieved their goals. The kit Airfix have produced airfield sets in the past so there’s nothing new there, but this is the first set that delivers such a wide array of equipment found on a bomber airfield whilst delivering on the quality standards that they’ve now set themselves. Within the end opening box, wrapped in fantastic artwork, you get 5 light grey sprues, 1 clear sprue, a decal sheet, comprehensive A4 instruction booklet and a colour painting & decaling guide. The instructions are broken down by equipment type for ease of following. First impressions are excellent. Crisp moulding with stunning detail leave you in no doubt that you’re looking at a 21st century kit. So what do you get in the kit? Standard Light Utility Vehicle - Standard 12hp 4x2 'Tilly' Bedford Truck built as either MWC or MWD David Brown VIG1 Tractor/Tug Motorcycle - 500CC Maintenance Tower Bowser - 450 Gallon Bomb Trolley - Type C (x2) Bomb Trolley - Type F Small Bomb Containers (SBC) - with 4lb incendiaries (x6) 1000lb Bombs (x6) 500lb Bombs (x6) 8000lb Cookie 4000lb Cookie Ladder Bike Chocks Fuel Cans Oil drum The Bedford trucks... The two trucks share a common build guide to create the chassis with no less than 23 parts making it up. Unfortunately, you can only make the MWD or the MWC, you can’t make both. The MWD has a wood / canvas rear end. The wooden panels are superbly reproduced with recessed butt lines. The MWC has an equally well produced rear end for the water container. Clear doors eliminate the need for gluing windows in so there’s no risk of getting white glue lines around the window. The doors can be mounted in the open position. A clever touch is the use of rounded hubs to mount the front wheels on. This allows them to be positioned in any turning direction. These small details have been well thought out and go along way to adding realism and life into a diorama. The Tilly... A combination of wood and steel panels with a canvas top are well replicated on the Tilly. Protruding rivets are visible on the steel panels. A useful touch is that the canvas roof for the front cabin is made from clear plastic due to the small windows integrated into them behind the doors. This will eliminate any risk of glue marks from inserting tiny windows. Whilst the construction is quite simple, the detail in the parts make an impressive model. As with the Bedfords, the doors are made from clear plastic and the front wheels can be positioned at any angle. Tractor... Whilst we’ve seen an earlier tractor in the Stirling kit, this is a TRACTOR! The detail is so much better and again benefits from positionable front wheels. Oil bowser... This comes with an articulated front bogie and independent chassis. There’s a toolbox moulded into the front end which is then hidden by doors, so it might be worth considering to cut these doors and have them in the open position. I find it a little strange that the instructions don’t show this option and a lack of cut line or detail on the reverse side of the doors indicates that wasn’t planned. Trestle.. A common site in airfield photographs is trestles butted up around the engines with ground crew beavering away under the hoods! I made one of these years ago out of soldered steel rod and thin wood. Having these parts available saves a lot of work. The parts are quite delicate but finely moulded, again with superbly replicated wooden planks. As with all the vehicles, the wheels are stunningly realistic. Bombs & bomb trolleys... No airfield is complete without the very reason Bomber Command existed. The sole purpose was to deliver an unwelcome payload to the enemy. A great selection of finely detailed bombs are included in the set from the 8000lb Cookie right down to the 500lb and SBC's. There's going to be some left over for other kits here as well as giving your display it's purpose. The fins on the small bombs are a little thick if one looks for a criticism, so you may want to thin them out using a scalpel or cut them off and scratch them if it concerns you. Two type C trolleys are included for the 500/1000lb bombs and a type F for the Cookies. The motorbike is a little work of art, formed in three pieces and positionable front forks, this is a great extra. A decal sheet adds the important detail markings to the vehicles and bombs. I’ve never been a fan nor any good at painting the coloured rings on bombs, so these are rather welcome! Conclusion It would of been nice to have two complete Bedford trucks rather than being forced into a choice. Apart from that, this really is a stunning set at a great price. The detail and clever design adds great realism in a small scale. If this and the recent Lancaster B.II is a sign of the direction that Airfix are going, the next few years are going to be rather exciting for anyone interested in the Bomber Command era. I’ve just started work on an airfield base so the timing of this set is perfect to bring it to life around the aircraft display. Review sample courtesy of
 -
Hello So first post...and my god I feel so happy with this. So I've always loved the V-Force. Cliche I know, but I do love them. I already have a Valiant and Vulcan at home (both Airfix kits). I got a Victor a few years back too, the Matchbox one. I got it complete on eBay for the stellar price of £8 and P&P. Bargin. I haven't realy started it...ok I did but the paintwork is awful and when I get my airbrush/compressor set I'll do some practice models and move onto it. So here's the pretty box...(please don't judge my need-copious-amounts-of-cleaning carpet) So I haven't really explored my local area before...and I said to my partner after work one day I wanted to see a few shops. I know we have a web based store here that lets you purchase from it's warehouse directly but I wanted to see a more traditional one like I'm used to in Swindon - you know the sort, walls of models and too much choice? So as I said I had one Victor already. Well there was one sat there in the second hand section. I grabbed it and checked it was complete - one thing missing off the sprue but rolling around in the box. I couldn't resist - I've seen these sell for £50 on eBay now and it was only £30...so I got it. I had to. So I now have 2 Victors...and maybe 2 Vulcan kits soon too. Somebody help me xD Also, isn't that artwork just glorious?
-
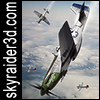 I originally posted this in the Aviation Art section, but I'd really like some feedback as I go along so please treat this as any other work-in-progress build Here's my current project, a digital 3D model of the famous "wooden wonder": the De Havilland Mosquito. This is actually my first British WW2 project since I started doing 3D some fifteen years ago! About time too, as I lived in the UK for the better part of a decade! I've started with the most common version, the FB Mk VI. The Mosquito served in no less than two dozen countries and about 60(!) pilots made ace on the Mosquito, so it's a nice and versatile subject! Some more images of its current state: Still some modelling left to do, but it's starting to look like a Mosquito! As per usual there were no "perfect" drawings available, so it's a combination of known dimensional data, scale plans, engineering drawings, manual drawings, DH fuselage lofting data generously supplied by Mark Gauntlett (many thanks Mark!), AAEE reports, NACA reports and hundreds of photographs. I.e. plenty of research! Mark's drawings are the most accurate around, by the way, and form the basis of this model, though especially on the tail, wing and engine nacelles I've deviated from them were necessary. My goal is to make this an absolutely accurate 3D Mosquito. The Mosquito will go well with the Junkers Ju 88 I made last year. These two aircraft are perfect adversaries and during the course of WW2 they fought eachother around the clock, over sea and over land, in all bomber, fighter and recce roles. Interestingly the battle between the Ju 88 and the Mosquito started even before the prototype was finished! On 3 October 1940 a well-aimed attack by a single Ju 88 flying at just 60 ft destroyed most of the jigs and killed 21 De Havilland staff, while injuring another 70. The prototype escaped major harm luckily, and as a sign of things to come, the Ju 88 was shot down by small arms fire... I should be rounding this up this month, so stay tuned!
- 37 replies
-
- 4
-

-
- De Havilland
- Mosquito
- (and 8 more)
-
 Hello everyone, I'd like to have a play if that's all right. It's been the thick end of a year since I did any modelling at all, so am going for a relatively straightforward build of the first prototype Mosquito, which I've always loved since first visiting Salisbury Hall as a kid. My work probably won't trouble the judging too much, but it will be a valued addition to the collection so thank you for hosting this GB! I shall be using the Tamiya 1/72 kit of the B.Mk.IV twinned with the Paragon Designs conversion set with the short engine nacelles, early wingtips and different tail surfaces. I shall make my own decals for the serial code, and decide whether to go for the first registration of EO234 or her more enduring identity of W4050 during the build. The roundels and tail flash will be cobbled together from my various 1/72 leftovers - but any recommendations for the correct shade of yellow would be welcome - from a rattlecan if possible as I don't have an airbrush. I'm assuming that the props and spinners provided by Tamiya will be right for the job. I've heard tell that they're actually closer to those found on Lancaster kits, so this would be good to know. Sprue and box shots will follow as soon as Hannants have processed my order, so in the meantime here's a shot of the 1:1 aircraft back in late 1940. And belated New Year greetings to all - nice to be back!
 -
In with this one, hope to start this soon but need to get my F-15 builds done for another Group build, so it may be slow progress at first. Anyway box and other shots below, two choices for this but leaning towards the Dyess one as a Bone with the bat symbol on its tail seems to suit the aircraft.... Nice box art Bagged sprues, no comments on the background,... Updated Resin Cans Decals