Search the Community
Showing results for tags 'Bandai'.
-
One of my latest creations. Great Mazinger by Bandai at 1/144 scale, Infinitism range. Really a nice kit. Easy and pleasant to assemble. I really enjoyed this model. I had fun customizing the colors and adding details and a bit of weathering. And a finish with a satin varnish to make it less plastic. He's coming to keep his big brother, Grendizer, company. On to the pictures. Hope you will like it. Alain.
-
Another Star Wars kit done, this time Bandai's B Wing, a bit more involved than the X Wing but still an enjoyable quick build (11 days from start to finish). Built OOB with Tamiya and Mr Colour acrylics. As with the X Wing all the panels were painted and only the small stencil decals used. Panel chipping done with Mr Colour maskol which i found to be thicker than the Humbrol Maskol. Not completely happy with the pilot but at this scale he's ok. It is possible to get the LED light module that comes in the limited edition kit (twice the price) to light up the engines but I didnt think the cost would be worth it. I would still like to do the 1/144 AT-AT if I can get hold of one. As usual any comments welcome. Bandai supply some "laser bolts" Wings folded. Size comparison with the X Wing shows why the B Wing was classed as a capital ship killer rather than a figther. WIP linked below
- 10 replies
-
- 19
-

-
Another Star Wars kit finished, this time Bandai's excellent X Wing in 1/72. This is the first of their kits I've done but there will be more, possibly the 1/144 AT-AT next. I have glue a few parts together mainly the engines but mostly its clipped together as designed. The Bandai kit has moveable wings and removable undercarriage but I elected not to. I only used the decals for the cockpit and the bands on the guns all other panels and markings have been painted using Tamiya and Mr Colour acrylics. Chipping was done with Humbrol Maskol. As usual all comments welcome.
-
Another Bandai kit finished, this time Darth Vadar's Tie Figther Advanced. A quick build this time, received on Friday, started Saturday evening and finished today. In total 5-6 hours work over all, 1 hour to build, 2 hours to paint and 1-2 weathering/finishing off. If you're after a quick build then these kits are an excellent choice. Painted with Tamiya and Mr Hobby acrylics, black oil wash for weathering. No paint chipping or multi colour panels on the Imperial ships so a much simpler paint job, Mr Colour H51 Light Gull Grey as primary colour and Tamiya Nato Black for the panels.
-
 Hello and welcome. This area of Britmodeller is new ground to me I have been stalking a few builds over here recently looking for inspiration on building Gundam suits. (Excuse me if my terminology is a bit off I’m new to these kits). I’m finding some good WIP builds but nothing that goes through step by step like what I’m used to on the other side, mainly it’s finished kits or finished parts, not a bad thing but I was looking for a WIP that might help me build THIS. 😍. I was gifted this lovely looking kit by a work friend on my birthday in April who has far too many in the stash. I decided that this would be my next build and I’d do the WIP exactly how I do them for my other kits. It’ll be a bit photo heavy and I’ll be learning on the job. I’ve gleaned some info about how these kits go together and they seem a lot different to your regular Airfix our Tamiya kit but we shall see.🤩 I’m planing on doing a nice amount of weathering on this but I’m not sure how you go about building and painting. Folk seem to build first and paint together (alien to me) or paint in chunks frame them armour? Oh I don’t know but I do know it’ll be fun🥳 so here goes let’s open the box.... I’d be honoured if some of you guys would follow along and help me out if I’m headed in the wrong direction. Here goes.... Okey so lid off and I get another lid? Nice pic though. 😍 woah!!! There’s a lot in the box. I love the feel of this crisp Bandai plastic and the cool multi coloured trees are sublime. 🥰 loads of bits and my first stumble block. I don’t know why I expected the instructions to be in English but what with Tamiya kits and the like you never know. So even still how hard can it be eh. 🤪 just like Ikea. 😩 Looky that molding 🤩🤩 so crisp. I do have these too. I’m used to water slide decals and these things are?? Stickers and what looks like those run on transfers?? What is this cRaZy? 🤪🤪🤪 right one with both feet. The first few steps sees lots of putting together and no glue? Oh my, I just don’t get it. 😳 strangely addictive though. sanding off the nub ( there’s no flash to speak of ) bits is great as the plastic is so nice. It does really scratch the plastic though. I got around this by smoothing off the rough bits with Tamiya extra thin. this part was rough as a badgers Harris but with TET it looks great. I’ll be priming and painting any how but how I don’t know yet. Quick as you like all the chest parts came together. I guess after each section gets put together I can see what needs painting then I can dismantle and paint accordingly. It’s this the usual procedure with these kits? What slightly rough bits there were I sorted out with TET. Looking sassy. And you can see how the TET has worked it’s magic in this shot. Even though it’s freaking me out that I’m not gluing any of this together yet I’m loving that all the seams are in logical places. Like here on the head. Oh man this is ace!!! The instructions (I think) ask for stickers to be put on the eyes... screw that. 🧐 I’ll paint ‘em .... probably.. 🤩🥳 So here we are. Looking good. I’m really loving this so far even though it’s totally alien to me. Thanks for looking in hopefully it’s not too boring and if she turns out well others might be able to use this as a good reference point. 😇 Take care and any comments are welcome. Happy modelling. Johnny. 😃
- 63 replies
-
- 12
-
-
- Gundam
- Gundam freedom 1/100
- (and 1 more)
-
 Hello, It will be my first model build. I am used to painting gaming miniatures and larger busts, but I would like to try something new. Millenium falcon starship always fascinated me. Since I was a little boy I always wanted to build it. I have chosen 1/144 scale because finished product is not gigantic and can nicely fit in the shelf, on the other hand, model details are still superb. I was lucky to get this one really cheap. I know that recent released version has some minor bugs fixed, but for me this already is supper cool (by the way, you can read more about it here: https://sites.google.com/site/millenniumfalconnotes/bandai-s-millennium-falcon). I’m not inted to make my build supper accurate to original work – this scale in my opinion is too small to do it right. Of course, you can find many 3D printed parts to enrich you millenium falcon but they are quite expensive and not as smooth as the Bandai plastic is (here is the good example: https://www.shapeways.com So just to start a few photos of parts moved just out of the box:
 -
I had a taster flight out of Duxford a while back with Classic Wings. The aircraft was a Cessna 150L Aerobat. When I got back I had a quick look and found a Bandai kit in 1/48 - my usual scale. So as a change from the usual military jets I would have a go at painting it to look a bit like G-BCDY. This is how she turned out This was the kit The faired over wheels had to be fixed. The wheels in the kit are only half moulded so whole new wheels needed. The colours are not quite right. The blue is too dark. I had to loose some of the engine detail to stuff in enough lead for her to not tail sit. I should have used some fine 1mm tape for the lining but just tried cutting some. And the serial number is in the wrong font and too big. 8mm high letter when I think 6mm would have been better. But she will do to remind me of my first time on the controls! Thanks for looking
- 12 replies
-
- 32
-
-

-
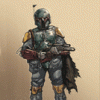
I've taken a small delivery of Star Wars Bandai,/Revell Kits to test the water as I don't normally do Film, TV and SciFi. Feedback appreciated https://testvalleymodels.com/products/slave-1-gift-set-05678 https://testvalleymodels.com/products/boba-fetts-starship-06785 https://testvalleymodels.com/products/outland-tie-fighter-06782 https://testvalleymodels.com/products/death-star-star-desdtroyer https://testvalleymodels.com/products/razor-crest-06781
-
Well, after searching and searching for a suitable base I have chosen to use the support of a photo frame. If someone wants to see the process that I have followed in this model, they can do so at the following link. Andrés S.
- 13 replies
-
- 32
-
-
 Hello all, This is my rendition of Bandai's 72nd scale T-70 x-wing painted in blue squadron markings as seen in Star Wars episode VII TFA. Overall this was a pretty fun build, there were some mishaps along the way, but I managed to finish it in the end, and am really pleased with the results. Here's the link to the WIP I did on it (this was my first wip, and I also think it turned out well): Here are the pics of the finished model: Hope you enjoy it! Oompa Loompa
 -
 This is a project I started last year that has been on and off the bench since then. I had initially not planed to make any WIP for this one, but as I have been taking some photos during the process I've changed my mind. May be this will give me enough motivation to complete the model. The Bandai kit of the Super Cub was initially released way back in 1973, togehter with 5 other general avaiation types. Nice kits for the time, but not quite up to modern standards. But as general aviation types are not on the priority list of current kit manufacturers, these oldies have to do. I bought the kit second-hand, and here is what came in the box: I plan to build the model as "LN-RTC" as used by SAS Flying Club around 1980. Decals are from Lima November. Her I have started playing with the parts. The cockpit is not bad, but I decided to add a bit of extra detail. Here, I have added new rudder pedals and control columns, as well as knobs that I guess are throttle levers along the port cockpit edge. Seat belts are made from strips of Tamiya tape and buckles comes from a generic photoetched buckle set I have had for ages. Made by Reheat sometimes in the 90-ties I think. The exact colours used in the cockpit of LN-RTC are uncertain - my guess is light grey overall with dark blue seats. Floor with seats mounted in the port fuselage half. A light wash and gentle dry-brushing brings out the details. Regards, Ragnar
- 22 replies
-
- 15
-
-
I couldn't resist the temptation of starting this so I just put the inner frame together, an amazing bit of kit with so many amazing details tucked away.
-
Hello all, This is my first WIP, so I’m going to be learning as I go along; I chose to build Bandai’s lovely 1/72 T-70 X-wing, this isn’t my first x-wing (I’ve already built a T-65 in “Red 5” scheme) and this certainly won’t be my last as I’ve got 2 more in the stash. The kit itself is as good as any Bandai kit, which means that the detail is crisp, everything fits together without any glue needed, there isn’t any flash to be seen and the clear parts are beautifully moulded without any defects. I’ll be doing this ship in Blue Squadron scheme as seen during the attacks on Takodana and Starkiller Base in episode VII The Force Awakens. I have already cut off the cockpit parts which I painted in Ak real colors RC261 Neutral Grey, and I also cut out the pilot and droid which I proceeded to prime with Tamiya XF-2 flat white. Here are some sprue shots, I know this has been done before, but I thought it would be nice anyway.Note: I cut off the clear parts sprue section from the main sprue to avoid damaging the canopy. Box Art Instructions Bandai decals and stickers Sprue A with fuselage Clear parts sprue section, cut off from main sprue A Sprue B with s-foils Sprue C with silver coloured parts Sprue B2 with BB model droid Sprue with base for The Last Jedi version Sprue with base for The Force Awakens version Here's what I've done so far: The seat was painted with Tamiya XF-19 Sky Grey I don’t know how long I’ll take to finish this kit as I’ve got other projects going on, including a P-51D Mustang GB with my dad; I hope to finish before the end of the year but I doubt that will be possible. I will also try to take some comparison shots to show the difference between the T-65 and the T-70 x-wings using both Bandai kits and hopefully by next week I will have painted the cockpit, and maybe done some sub-assemblies.
- 13 replies
-
- 11
-
-
Hi all and here's my first finish for 2022, Bandai's 1/72 Poe's T-70 X-Wing from Ep. 7 The Force Awakens. I'm going to try and build more Star Wars stuff this year. Not much of a build thread as it went together so quickly! The fit of the parts is a joy and I only used glue in a couple of places. You could build and decal this straight from the box and have a lovely kit on your shelf. But I decided to repaint the orange markings with a custom Tamiya mix of red, orange & yellow. The hull was painted Tamiya XF-69 Nato Black My first time weathering with a liquid mask and I learned a lot - will do better next time. Rest of the weathering was a Flory Models wash and some oil streaking. Most of the kit decals were used. Thanks for looking and happy modelling. All the best, Dermot
-
Hi all, After almost a month of work I finished Lord Vader’s ship. This was a very fun and a relatively quick build and, like all Bandai kits, it fits together perfectly. The model was painted with AK Real Colors Acrylics and weathered with Abteilung 502 oils. I hope you enjoy it, Comments welcome! A picture with the enemy.
-
Hello everyone … Ive been working on this for a few days. My wife has been collecting “Hello Kitty” since she was a kid. I saw that Bandai had released a “Hello Kitty” Gunpla in 2020. Now I never thought Id see one in real life but surprisingly found six in August at what counts as a my local hobby shop. I bought this for my wife's birthday which is actually in August. Sadly its taken me three months to actually clear my desk off enough to build it. The large Head is interchangeable with the little gunpla body. I hate stickers so painted the yellow, reds, silver, some of the whites on the feet, and the pink. I chose to put this here as its more of Sci fi/anime vs figure. Please feel free to ask questions post comments or thoughts. Dennis
- 3 replies
-
- 7
-
-
- Bandai
- hello kitty
- (and 1 more)
-
Just a quick build of Bandais 1:144 Tie Fighter crashed on a desert planet, undamaged solar panels scavenged for scrap.
-
 I've a thing for the original Macross Anime kits from IMAI that appeared in the early 80's. The kits were available in the UK even though Macross or even the bastardized Robotech version from the the US wasn't. This a 2010 repop by Bandai of the orginal IMAI kit of probably the coolest looking mecha in the series. The boxart is particular captivating and adds a lots of character to a machine that only appeared occasionally in the series. Had great fun building this and rather pleased with the finish. I enjoyed experimenting with weathering techniques chipping (airspray and painted) and oils. The dull weather and basic photography skills means a the pictures don't show it all. Painted and partially weathered with Humbrol Enamels which suit the early 80's origins of this kit. Even in my late 40's I still think this looks as freaking awesome as I did in my teens 😁
 -
This is another one that has been through the wars a bit. This is when Bandai were making some very cool large scale cars and things (A Steam roller and a Showmans engine) all in 1/16th scale, long before they got into Gundam and the like. Now, don't get me wrong, those Gundam and Star Wars model kits are really impressive, and I do see myself indulging an a Star Wars kit some time in my future, but giant robots are not my thing. They look amazing when built, but they leave me a bit cool. My adult son, on the other hand, thinks that they are really great. I suppose it's a bit like Rap music or Drum 'n' Base,: Technically really impressive, and I can appreciate te artistry, but I just don't like it. Anyway, middle-aged moan over, on to this kit. The obligatory box top. This has to be one of Colin Chapman's prettier cars, not as beautiful as the original Elan, but pretty none-he-less. Now this kit has had a chequered history. Early on, I decided that I wanted a dark blue Esprit, and sprayed it with Car aerosol paint. However, that stuff was very different from the modern acrylic based car paints. It was the old fashioned Cellulose paints. There are two main problems that I have encountered The paint is very unkind to polystyrene. It will eat into the plastic and do some real damage. The cured paint is very brittle and doesn't flex as well as the underlying Polystyrene. The first can be mitigated a bit by carefully priming the plastic with a Cellulose primer. It seems a bit less 'hot' than the colour coat. Anyway, the inevitable happened and the paint started cracking and peeling off before I had even started assembling the body! Tis left me a bit depressed, and I vowed never to use car paints again... It ended up in the loft, to probably be ignored forever... Many years (and house moves) later, I decided to give it another go. This probably was about 5 or 6 years ago. I stripped the really disastrous blue paint on it, and decided I would paint it Red. The ideal Lotus colour... So, at this point, we had: The body, stripped. (You can see a bit of the sub-frame to the left) The sub-frame. This was assembled a very long time before, and just forgotten. It was one of my better efforts from way back when, but had suffered the ravages of time. When I took it out of the box, the front end looked rather tatty, and the whole rear end fell apart. So, after much cementing, filling and touching up, it was back together again. This is how it looks at present. The floor pan, with release marks suitable filled and sanded. Most likely, none of them would be visible when assembled, but hey ! The engine, almost complete. Then I noticed that avital ancillary part had gone missing during the 30+ years in storage... I'm not sure what it is, but the instructions were good enough for me to re-create the thingummy, thus: I was so proud of it, I took many pictures of it. The last gives ma sense of scale, I think. The engine again... Finally all the other body parts, stripped. This poor car has suffered the Lotus curse: "Lots Of Trouble, Usually Serious" So, this was where it was about two or three years agio. It has been in suspended animation since then. Thanks for looking, Alan.
- 17 replies
-
- 7
-
-
- Bandai
- Lotus Esprit
- (and 1 more)
-
 This my first sci-fi/space build: a Bandai X-Wing for a friend. Stay on target.
 -
 Hi all, I am calling this done, not quite got it across the line for the May 4th Star Wars day, mainly due to shipping delays getting the last of my 1/144 Stormtroopers from Shapeways. I have 76 Stormtroopers in total in this hanger bay, 40 of them together with Darth Vader came last Saturday morning, thanks to Keith at Cozmic Scale models. The other 36 had a different pose and Shapeways had those. Anyway I got them on Tuesday afternoon. Darth Vader seems to have almost disappeared amongst the black flooring and lighting, but I have tried to show him best I can. I have continued the tradition of ILM by placing characters from other movies that they had worked on into the build. In the mother ship from Close Encounters they added an R2D2 on the edge of the ship just for fun. So, can you spot the Star Wars character from a later movie? I have placed it in the unlit photos to make it easier. I intend to display both this hanger bay and my recently completed Imperial Shuttle Bay together in a bookcase unit. Thanks for all the great comments and may the Force be with you always! Mystery Character Update Hi all, first of all thank you so much for all the wonderful comments on this build, it's very much appreciated. Just goes to show what you can do with a few old kits and a bit of imagination. Congrats to those of you that found BB8, yes it was staring at you in the face all the time! BB8 was in the Bandai Force Awakens Millennium Falcon kit and it sparked my memory for what ILM had done with the Close Encounters mothership. Let's see if I can hide another character in the next build. Bye for now, and may the Force be with you!
- 20 replies
-
- 34
-
-
-
- Millennium Falcon
- Star Wars
- (and 1 more)
-
This is the Bandai 1/72 B-Wing. Built from the box and added the lighting unit for the engines (at £2.50 from HK it was not a hard desision). The paints I used were mixed so they "looked about right". The photos make them look a little darker than reality. A fun build. Tim
-
Hi guys, this is going to be another Star Wars diorama. This time it will be a scene from the first movie A New Hope, which is when we get the first view of the Death Star. The Millennium Falcon got caught in a Tractor Beam and is pulled into hanger bay 3-27. My diorama will be based around this hanger bay. This kit of the Falcon is from the later movie and has the wrong antenna dish shape, so I have ordered the correct round dish from Shapeways. The first task was to build the hanger bay floor with the 8-sided elevator lift shaft; I bought some 2mm gloss black acrylic sheet in A3 size which had to be trimmed to fit my intended hanger bay box. I part built the Falcon up to get the basic proportions of the lift shaft and get the correct scale of the floor chevron markings. I had some clear Perspex from an old display case that I used to make the side walls of the shaft, this allowed me to mask up the lighted segments. I used old kit parts, zip ties and some photo etch to detail the walls with. My initial plan was to use some mirror coated styrene sheet to give depth to the shaft, but the position of the Falcon meant this was not possible due to the cockpit over hanging the shaft and its reflection would be seen. I have enough spare Perspex to build a 2nd layer to give me the required depth. I masked and sprayed a light grey onto the acrylic to give me the floor chevron markings. Next will be to drill the holes for the floor lighting, that's all for now folks.
- 10 replies
-
- 19
-
-
- Star Wars
- Millennium Falcon
- (and 1 more)
-
Hi all, I've been away from the forum for a while(18 months I think) and I haven't really started a model in that time either, family stuff,work etc... But over the summer I talked the wifey into letting me get a shed as a work shop in the garden. And I'm really getting the bug again. It's so much easier not having to get all of my materials out of the kitchen cupboard. Here's the shed for anyone who is interested: So first off was something I have wanted to do since I saw the Rogue one promo shots. I think this image is amazing and shows off the iconic storm troopers perfectly: I think it's the colours that work for me. So I just wanted to try my hand at a diorama and hope it looks something like this. I am quite a way through this and haven't taken too many photos as I've gone on but as I got to thinking about using resin I turned to the site for advice and got some great ideas, it was this that made me realise how great Britmodeller really is and I haven't been off it for the past two weeks. I thought it was best to document the build up to now and going forward. I haven't really done a WIP before so be nice and bear with! So, I started off with two Bandai Troopers, built out of the box. I airbrushed the black parts using a mix of Vallejo light grey and NATO black, just to dull it down a bit and not make it look so shiny. Everything has been said about these kits already, awesome detail and easy to put together. I haven't yet decided on weathering or which blasters they will be holding. On the pic they have E-11's but there is a nice Dlt-19 that comes in the kit so might swap this out nearer the end. I really dont mind if it isnt accurate, im building this so it probably wont be 😂😂If I do weather the troopers it will be minimal. It was good to find I could get a good pose as the articulation is good on the kits. Next was the base. I cut a 15x15cm square of MDF. Which was big enough for the two figures. Its a bit bigger in the pic, i changed my mind and made it square before i cut it out. This shows the thickness though of the board used. Next was the tree trunks/twigs sticking out of the water. I intended to go out searching for the right twigs to use but as it happened my wife had done some gardening and left a root off something on the path which when cut down was perfect. I drilled holes in the MDF and sprayed them light grey and a darker grey towards the bottom where the water line will be. Happy with it so far so onto the gravel and Sandy base. The stones were just pea gravel from the garden and the sand was filler from wilko's which was smoothed and then I used a wooden stirer to pull it up into ripples as it dried. I then sprinkled silver sand on. I wanted the sand to look whiterthan it did like on a tropical beach which Scarrif was, so I painted it with Vallejo white and interior yellow which did the trick. The gravel was hand painted with all sorts of colours to get the right effect, basically making it look the same as when I started 😂😂 The small kit base which holds the feet were incorporated into the base to hold the troopers steady and I also found a snail shell from my aquarium which I painted red to add a bit of detail under the sea. So that's where I am at right now. I have some water clear resin on order which is something I have never used before. So this could all go great and look just how I imagined or I could screw the Resin step up completely and two models will be forever trapped in a badly made diorama 😂😂. Thanks for looking, will keep updating and will show the rest of the steps as I do them. Cheers! Chris.
- 35 replies
-
- 14
-
-
- Star Wars
- Storm Troopers
- (and 1 more)
-
Hello everyone! Another model to add to my growing Star Wars collection, another RFI - this time it is Bandai's 1/72 A-Wing that I completed last week. I finally understand the hype surrounding Bandai's Star Wars kits, even more so than the T-70 (Resistance) X-Wing that I completed last year, this kit was an absolute joy to build! The engineering is brilliant and it can be completed in an afternoon without needing a drop of paint or glue, while still being not only a faithful representation of the studio model from Return of the Jedi but also a very solid build, without any loose parts falling off. Everything from the multicolor sprues, the box art, even the instructions, is top notch quality. The Death Star gun tower is an added bonus! Having decided that I won't be building an exact replica of the studio model but another similarly colored A-Wing that fought at Endor. I started by masking several of the odd out-of-place red panels (molded in colored plastic) and sprayed them with an enamel Revell matt white, then I pre-shaded the panel lines and sprayed the white-molded parts to get the same shade everywhere. The red panels just received a good panel wash. I sprayed the inside of the engines with Mr. Color RLM 04 yellow but several small streaks went around my masks and onto the white tail surfaces; so, I masked again and carefully resprayed the white panels. Incidentally, it resulted in a nice, gentle yellow gradient that looks like a decent representation of engine glow! Overall, I went for a decidedly less weathered look than my Fine Molds X-Wings using only a small brush to simulate paint chipping on the red panels, and I masked several panels and sprayed them grey as if they were changed due to battle damage. One small mishap was caused by my airbrush when it splattered a black flake of paint on the starboard panels during the final matte coating process; the black dissolved and looked like a blast mark. Not being content with having a blast mark on a Star Wars model (...), I gently sanded down the affected panels, sprayed them matt white and redid the entire weathering. There's a barely noticeable difference in the shade of the panels if you look closely but I decided to stop trying to fail myself and accept it's a Rebel fighter - they always look cobbled together! Still struggling to get good photos with my old camera and poor lighting... hope you enjoy, comments and criticism welcome!