
Search the Community
Showing results for tags 'Arma Hobby'.
-
 I should've kept my big trap shut, but no, I just couldn't help myself! And a contract is a contract, eh @TonyOD? This will be a double-build, a sort of vignette if you will, the idea being to display a USN Wildcat and an RAF Spitfire Vc on a section of the USS Wasp's flight deck, during the second operation to re-supply Malta, Operation Calendar. Now, as anyone who has ever had even the tiniest interest in the defence of Malta will know, the colours of those particular Spitfires are a veritable minefield. Recent research has thrown up a few curved balls but at the same time has perhaps added a greater degree of "likelihood" to the interpretation of their colours than some of the more off-the-wall ideas of the past. But interestingly, there is also a possible variation from the "norm" in the colour of the USN's, and particularly Wasp's, Wildcats at this time, so I'll be going slightly off-piste with that as well. All Good Fun!!! Anyways, that's about it until I get the kits on the bench (which incidentally will be a KP Spitfire Mk.Vc and and Arma Hobby F4F-4). Cheers for now, Mark
- 62 replies
-
- 12
-

-
- Arma Hobby
- Kovozávody Prostejov
- (and 1 more)
-
Given my track record for completing builds, I must be out of my tree to even think about adding another one to my SSD list! And yet here we are...... This will be Arma Hobby's Yakovlev Yak-1b in 1/72 scale most probably finished in the markings of "25 White", 3GvIAP of the Red Banner Baltic Fleet Air Force, Lavensaari airfield, Jul-Aug 1943. The finish is the typical Black/Olive disruptive pattern upper surfaces over Light Blue under surfaces, plain stars in six positions with the code number, spinner and rudder in white. Come on Royal Mail Sleep? Who needs it! Cheers, Mark
-
Hi all, quite late to be joining this year's KUTA, but while delving for other things I found my languishing Ki-84 that I'd started in the Turning Japanese Group Build. I'm not sure why I didn't finish it: its a super kit and OOB should have been a breeze. Anyway, here we are - the original thread is here for anyone who might be interested - there are a few photos but nothing profound as I really didn't get far. So over the last few days I've finished the cockpit details and assembled the fuselage and wings. Pics. Fuselage halves with added quadrants etc Cockpit tub with IP decals and PE lap belts Assembled fuse halves with tub added - the tub can be added after the fuselage halves are joined by inserting from underneath, which ensures everything is nicely level Wings panels joined I opted for underside colour for the wheel wells to save masking later Thanks for looking in, hopefully more soon! Cheers, Mark
-
Thought I’d have a look at this while my other build is on a break. It’s a land based aircraft of the German equivalent of the RNAS, whose task was battling said RNAS over the North sea and thereabouts. Seeing equivalent planes here I assumed it was salty enough. I’ll be building the plane on the cover, piloted by Gotthard Sachsenberg, who definitely was at least a brackish sea dog. Sachsenberg started the war as a cadet on battleship Pommern, but soon transferred to the naval air service. After a succesful pilot career he was to return to the marine business after the war with pioneering hydrofoil work - which, as his life path, itself a blend of sea and air. The kit is refreshing after struggling with Toko plastic (disclaimer: I love Toko/Roden for their detail and choice of subject but they aren’t *easy*). One sprue with neat detail: I wish Eduard had used the fuselage solution with one-piece underside for their Fokkers - it makes that peculiar Fokker seam much easier to deal with. Preparing the pieces for painting: The cockpit is simple, but so is the original. I’ll be adding some PE seatbelts. I snapped that strut - will replace with brass.
-
Here is the Plastic for my build, a (Sea) Hurricane IA of the MSFU. Markings are undecided at the moment as I am still trying to match a serial to a code and individual letter for one of the operational launches.
- 57 replies
-
- 17
-
-
- Arma Hobby
- MSFU
- (and 1 more)
-
Placeholder. My first build in the Recce GB will be a Mustang Mk.III, finished as one of three aircraft operated by 541 Squadron RAF during and after Operation Overlord. The kit I'll be using is the excellent 1/72 scale Arma Hobby F6C Expert Set. I'm planning at this stage to paint my own insignia, for which I'll be obtaining masks from The Crafting Well. The three Mustang Mk.IIIs operated by 541 Sqn have been the subject of discussion in recent (and not so recent) years, but consensus is that they were finished in overall PRU Blue with D-Day Invasion Stripes, and that is how I'm going to finish this build. I would very much like to say thank you to @Ed Russell for his generous help and advice and sharing of information recently, which has helped me enormously in figuring out where I'm going to go with this model. Thanks, Ed! Thanks for looking in, Mark
-
 UPDATE - ref. 70051 - Nakajima Ki-84 Hayate/"Frank" Expert Set Sources: http://armahobbynews.pl/en/blog/2022/03/18/new-arma-hobby-model-kit-ki-84-hayate/ https://www.facebook.com/ArmaHobby/posts/5216672161696432 https://www.armahobby.com/70051-nakajima-ki-84-hayate-expert-set.html Arma Hobby new 1/72nd aircraft kit type will be unveiled on Friday 18th, 2022. Source: https://www.facebook.com/ArmaHobby/posts/5205698066127175 V.P.
- 156 replies
-
- 7
-
-
- Arma Hobby
- Ki-84
- (and 1 more)
-
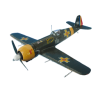
Cactus Air Force Deluxe Set (70049) F4F-4 Wildcat & P-400/P-39D Airacobra 1:72 Arma Hobby The Cactus Air Force was the name given to the Allied air power that was stationed in the area around Guadalcanal during the latter part of 1942 at the beginning of the Allied campaign there, predominantly stationed at Henderson field. The name came from the Allied code for the island, and they were later subsumed by the Solomon Islands Air Command. At this stage of the war, the US forces were using a lot of Wildcats and Airacobras, as the more advanced designs had not yet reached scale production. The Set This is a combined boxed set containing two kits plus new decal options, and some new 3D printed parts. It arrives in an end-opening box with a lower tray inside that pulls straight out, revealing separately bagged kits totalling four sprues in grey styrene, two sprues of clear parts, a bag of 3D printed parts, a bag of three ball-bearings, two sheets of pre-cut kabuki-style masking material (not pictured), a decal sheet, and a glossy A5 instruction booklet that covers the building of both models with colour profiles at the end of each build process. In addition, there is a sheet of instructions for the new 3D printed parts that are applicable to both aircraft, again printed in spot colour. P-400/P-39D Airacobra The P-39 was the result of Bell’s response to a specification for a fighter from the USAAC, which was to be a high-altitude interceptor. With Bell’s usual left-field approach to aircraft design, the team produced the world’s first tricycle landing geared prop-driven aircraft, as well as the first aircraft to site the engine behind the pilot, while the airscrew remained at the front. The prop was driven by a long drive shaft that ran under the pilot’s floor, with a coaxial 37mm cannon firing through the centre of the spinner, in a quest for high penetration and accuracy. Ancillary armament varied depending on model, from nose mounted .50cals to four 7.62mm machine guns in the wings. The Airacobra had limited internal space for fuel thanks in part to its tapered nose, and the lack of a supercharger substantially limited its abilities at higher altitudes. Despite these drawbacks, and the likelihood of engine failure after hits from a rear attack, the Airacobra flew in most arenas of combat, but distinguished itself best on the Eastern Front in Soviet service, where almost 5,000 were flown with some notable aces racking up victories whilst flying them. The N model started life as a G model, but due to changes on the production line, were designated N instead, with around 500 made. In fact, no G models ever left the factory, being superseded and re-engineered as later marks. The final variant was the Q, which ceased production in 1944 after a variety of sub-variants and one-offs were created. The Kit This is a reboxing of their recent kit, and detail is exceptional, especially for the scale, with finely engraved panel lines, raised and recessed details, and gorgeously crisp details within the gear bays and cockpit. Add the extra 3D parts, and the result should be even better. Construction begins with the cockpit, starting with the footwell, which has the rear of the breeches for the nose machine guns, and the rudder pedals fixed to the front, then the instrument panel with decals and gunsight added to the top half. The rear of the cockpit has a horseshoe-shaped frame glued to the front to hang the new 3D printed pilot’s seat from, which has decals to depict the four-point seatbelts. The two assemblies are fixed to the floor at either end along with the control column, the location of two more small 3D parts, and a V-shaped part under the floor. A scrap diagram shows the location of the instrument panel, and the fact that the drive-shaft is painted a brass colour. The V-shaped part is actually a cross-member within the nose gear bay, which is beneath the forward end of the cockpit, and is completed by adding the side walls, which also have two scrap diagrams to show their orientation, and that they taper toward the front. The forward roof of the nose gear bay is installed over this, and here’s where the ball bearings come in handy. There are three hemispherical depressions in this part that you glue the ball bearings into with super glue or epoxy, and this acts as the model’s nose weight. It’s always nice when a company includes the nose weight to take the guesswork out of the process, so it’s appreciated. The cockpit still isn’t finished, as there is a complex side console on the port side, plus a small detail part on the sidewall that even has its own decal. The fuselage halves have a circle of neatly positioned ejector-towers inside, and the instructions advise removing them before proceeding. Then it's time to put the cockpit in position within the fuselage, along with a long, ribbed shelf behind the pilot’s position, which should have two holes drilled out to receive the radio before it is glued in place. A bobbin is trapped between the two halves as they are brought together, which will allow the prop to spin if you don’t glue it together. There is a small inspection panel under the nose on the starboard side, which should be removed for this edition, which is ringed in red to assist with its location. The Airacobra is a low-wing monoplane, so the lower wing half is full span, with some optional holes drilled first if you are using the centreline bomb or fuel tank. The upper halves are glued over the top with a small inverted T-shaped stiffener in the centre, first installing the 3D printed gun barrels, which are mounted in pairs on a support. Four raised bulges under the centre section need to be removed for this version, shown in red on a scrap diagram. The tail is a separate assembly that begins with the elevator fins, which have the fin fillet moulded-in, and has a separate elevator fitted across the span before it is glued in place at the rear, plugging the fin into the top, and a separate rudder panel glued into the rear. The wings are also added at this point, filling the three engraved recognition lights in the starboard tip, taking care to avoid marring the detail around it. There’s a 3D printed nose insert appropriate to this mark placed in the gap above the prop, and the radio unit is installed for just one. The Airacobra’s ground-breaking landing gear format revolved around the nose gear, and that starts with you bending a triangular frame and locking it into position with another strut to form the retraction strut for the front leg. The long leg itself is moulded with a separate oleo-scissor and wheel, and inserts into the front of the bay, supported by the cranked strut that fixes to the rear on four raised pips that give it additional strength. The main gear legs are comparatively short and have separate wheels and captive gear bay doors. Unusually, the inner main bay doors and their actuators are added first at the same time as the three cooling flaps under the engine, slotting the legs into the outer ends in the following step. While the model is inverted, a front nose gear door is inserted in front of the strut. With the model back on its wheels, probably for the first time, the canopy is dealt with. The Airacobra had weird car-doors on the sides of the canopy, with the rest of the glazing fixed in place, so the main part covers the whole cockpit aperture. The two side doors are painted inside and have a few decals added inside to detail them further, so you can choose to leave them closed, leave one open, or both open at your whim. There is a choice of two styles of 3D printed exhausts for the mid-engined Airacobra that fit into slots midway down the sides of the fuselage, but the prop is still in the front, so don’t worry. The blades are moulded as one, with the spinner fitted over it and the assembly glued to the bobbin you trapped between the fuselage halves earlier. In the centre of the spinner is a choice of two styles of cannon muzzle, which differs between decal options and both are 3D printed. There are two long bay doors to be added to the nose bay, a recessed landing light under the port wing, and you also get to choose what to hang on the centreline pylon. You have a choice of a two-part fuel tank, a three-part 250lb or 500lb bomb, both of which have a tiny spinner inserted in the rear. F4F-4 Wildcat Grumman began development work on a new carrier-based fighter in the mid-30s, starting with the F2F, which was a biplane, but it and the successor F3F led to the basic shape of the Wildcat, minus two of the wings. Initially, the new aircraft was outpaced by the Brewster Buffalo, and Grumman had to redesign their progeny to carry a supercharged version of the Pratt & Whitney R-1830 Twin Wasp radial engine, and later on, new flying surfaces that gave it the required improvement, receiving orders from the US Navy as a very sensible and prophetic backup-plan in case the Buffalo was a let-down. Initial orders from France were delivered instead to the British Royal Navy after France fell before they could be delivered, where it was initially designated as the Marlet. The US Navy would adopt the type in late 1941 after the Buffalo turned out to be an unanticipated disappointment, although it was quite a manoeuvrable little aircraft that saw some service elsewhere. Originally armed with 4 x 0.50 cal machine guns, the F4F-4 was introduced in 1941 with an increased 6 guns to improve the aircraft's punching power. Although the armament was increased to 6 guns, the ammunition capacity was not, giving pilots less time with their fingers on the trigger, which was generally disliked by the pilots for obvious reasons. The extra weight from two more guns and the new wing fold gear also reduced performance, which could keep the pilot in harm’s way longer than with the early mark. It was the primary US Carrier fighter during the early years of America’s war, with production continuing until 1943 when they switched over to building the replacement Hellcat, but one factory continued to make Wildcats for the British Fleet Air Arm (FAA). The Wildcat’s smaller size and slower landing speed was a boon on the typically smaller carrier that the British Navy operated in large numbers as escort carriers. The Kit This kit too is a recent tooling of this important early WWII US fighter, and it too is finely engraved and well-detailed, so much so that it makes this 1:48 modeller a little jealous. It also has added 3D printed parts to improve the detail further. Construction begins with the cockpit, replacing the kit seat with a new 3D part and adding decal seatbelts before installing it on the rear bulkhead. The front bulkhead incorporates the instrument panel and rudder pedals, with decals depicting the dials, installing in the front of the floor section with a control column and side consoles in between them. More decals are included for the consoles, and additional 3D detail parts are supplied too. The completed cockpit and firewall bulkhead are glued into the starboard fuselage half, adding more 3D printed parts to portray the gear retraction pulleys. The mechanism is inserted between the bulkhead and the front of the gear bay cut-out, then the engine and its mount needs to be made up before it can be installed in the front of the gear bay. Both banks of pistons are depicted as separate layers, adding the bell-housing, 3D ignition harness, two-part push-rod ring and intake ring at the rear, then applying a number of stencils to the bell-housing after painting to further enhance the detail. The engine mounts and air intakes/scrubbers are made up using scrap diagrams and differing colours to guide you, then inserting it into the front of the fuselage before closing it up. The engine is then added at the front and cowled over with two half cowlings and the intake lip. At the rear of the fuselage, the elevator fin is slotted in from behind, followed by the elevator panel, closing them in by installing the rudder panel behind it and fixing a choice of faired and un-faired tail-wheels underneath. The wings are relatively simple due to the fuselage mounted landing gear, each one made from two halves and drilling holes under the inner section before closing them up if you intend to hang drop tanks under there. The landing gear legs are a mass of struts, starting with a pair of A-frames glued underneath the central divider in a diamond shape, bending the struts down slightly according to the accompanying drawing. A jig is supplied to make up the top frame that mirrors the lowers, and is made from front and rear sections, glued together while laid on the jig, then glued over the top of the bay divider and bracketed by the main struts, which have a short ‘strut-let’ added to the top. The captive bay doors are fixed along the centreline of the assembly, and another 3D drawing shows you how it should look. The completed assembly is lowered into the inverted gear bays with the model inverted and adding a wheel to each axle. More diagrams show the correct location of the top ends of the struts in the bay to assist you. A fairing is installed behind the bay divider, and the two lower windows for the pilot are inserted from outside at the same time. Two 3D printed exhaust stubs are included for under the nose, plus more 3D parts that consist of a pair of gun barrels and optional 100lb bombs, stencils and their pylons for the outer wings. The optional fuel tanks under the inner wings are made from two halves plus anti-sway braces, taking care to put the short brace in the front. A clear lens is popped over the landing light under the wing with the pitot probe at the tip, then it’s a case of installing the gunsight and two-part canopy over the cockpit, the forward-raked aerial mast, and the single part prop to finish it off. Markings There are four decal options for each kit, all of which are contained on the one sheet. The masks of course are on separate sheets, and although they aren’t documented, they should be simple to locate on the sheets. The stencils for the Airacobra are covered on the page before the profiles to avoid overly complex diagrams, while the Wildcat has very few markings, and no stencils to speak of. From the box you can build one of each from the following two lists: P-400/P-39D Airacobra P-400 Airacobra, White 13, ‘Hells Bell’, BW151, 67FS/347FG, pilot Lt. Robert M Ferguson, Guadalcanal, August-November 1942 P-39D-2 Airacobra, White 12, ‘Beth’, Cpt. Paul Bechtel, 12FS Commander, Guadalcanal, December 1942 P-400 Airacobra, White 12, ‘Fancy Nancy’, BW156, Pilot Lt. Richard Johnson, 67FS/347FG, Guadalcanal, August-September 1942 P-39D-1 Airacobra, Yellow 56, 41-38400, 68FS/347FG, Lt. Vernon Head, Guadalcanal, December 1942 F4F-4 Wildcat F4F-4 Wildcat, Black 29, Pilot Lt. Samuel Folsom, VMF-121, Guadalcanal, shot down two Betty bombers on 12th November 1942 F4F-4 Wildcat, White 2, Pilot Mjr. Marion E Carl, VMF-223, Guadalcanal, February 1943 F4F-4 Wildcat, Black F-12, BuNo.5192, Pilot Lt. James ‘Pug’ Southerland II, VF-5/USS Saratoga who shot down the first Japanese bomber on 7th August 1942 F4F-4 Wildcat, White 19, BuNo.03417, Pilot Lt. Stanley W ‘Swede’ Vejtasa, VF-10/USS Enterprise, shot down two dive-bombers and five torpedo bombers in one sortie 26th October 1942 Decals are by Techmod, which is a guarantee of good registration, sharpness and colour density, with a thin gloss carrier film cut close to the printed areas. It includes seatbelt, instrument panel and stencil decals where appropriate. Conclusion A great tribute to a lesser-known area of conflict during WWII, and two of the Allied combatants that took part. Two great kits in one box with appropriate decal options make a compelling argument to open your wallet. Very highly recommended. Review sample courtesy of
-
 Hi all. There's not much to say about this kit other than it was an enjoyable build. I've read a few articles and seen a few build/review videos and I don't know what the issues were that folks found. This thing fell together with the only care being taken on the clean-up of the sprue points. A few additional items in the way of Eduard exhausts and SBS Model block tread tires. An included set of resin tires for the RAAF option from Arma Hobby would have been a welcome addition as the build was held up for a week while waiting for them. Paints are Mr Color lacquers along with a stack of others including oils, pigments and a few acrylics for the interior. I'd build another one for sure. Bancroft the bench mascot for scale. Cheers, Mick
- 12 replies
-
- 27
-
-
- RAAF
- Arma Hobby
- (and 1 more)
-
Build last year, Arma Hobby Mk IIB, 1/72 scale with some minor changes and CMK resin photo pad.
- 18 replies
-
- 60
-
-

-
- Arma Hobby
- 1/72
- (and 1 more)
-
Good day, I am checking in with my second completed kit for the year. This is the Arma Hobby F4F-4 Wildcat ( Expert Set ). I depicted it as flown by Capt. Joe Foss while based at Henderson Field on the island of Guadalcanal. Here are some of the highlights of the kit…………. 1. No shortage of parts both plastic and photo etched 2. Canopy / windscreen masks included. 3. Semi bulged tires included. 4. Wide variety of decal options including a Royal Navy version ( correct parts included for the RN version ) 5. Weathered using pastels, paints, and washes This is a bit of a complicated kit to assemble. Care needs to be primary concern especially early in the build process as alignment issues can become worse. I only recommend this model for those who have more experience. Thank you in advance, Mike I decided to assemble and paint the airfield base from Italeri for the Wildcat. Included with the kit was the PSP base, guard tower, fuel / oil drums, sand bags, and “Jerry” cans. The Jeep and trailer are from Academy and the figures are from various sources. The palm trees are from Pegasus and JTT. Unfortunately, I could not find any appropriate dressed personnel for the scene depicted in my “stash”. We all know that aircrew and maintenance dressed in an entirely different manner in the tropics but this is what I had at the time. And lastly, while I should have posted these pictures first for this subject, here are some of the details one will find with the Arma Hobby Wildcat unfortunately much of which will not be seen.………….. And the overall number of parts within the fuselage before gluing the halves together……………….
- 19 replies
-
- 48
-
-
- Arma Hobby
- 1/72
- (and 1 more)
-
Sea Hurricane Mk.Ib (70061) 1:72 Arma Hobby The Hawker Hurricane was one of Britain's foremost fighters of WWII, and although overshadowed by the more graceful and slender Spitfire during the Battle of Britain, it was a capable aircraft that was available in large numbers, and made more than its fair share of kills during the conflict. It went on to see service to the end of the war, but was relegated to less onerous tasks as technology leapt forward resulting in faster, more agile aircraft that came on stream on both sides of the conflict. The type originated in the early 30s and first took to the sky in 1935, despite the Air Ministry’s tepid reaction to monoplanes at the time, and it was an aircraft that set standards for fighters that followed it, being a monoplane with a predominantly metal airframe, retractable landing gear, an enclosed cockpit and of course the delightfully powerful and throaty Rolls-Royce Merlin engine. Compared to the Spitfire it was a little old-fashioned, starting out with a fabric-covered ‘rag’ wing that was eventually replaced by an all-metal unit, and it was less aerodynamically streamlined, with a thicker wing and overall chunkier, blunt appearance. Although the wing was replaced by a metal aerofoil later on, it kept the fabric rear fuselage and as such was able to have minor damage repaired quickly and easily, compared to the Spitfire that would have to go back to a repair facility for structurally insignificant through-and-through bullet damage. A fabric patch and a few coats of dope, and the Hurri would be back to the fray, which endeared it both to its pilots and ground crew alike. The Sea Hurricane was initially developed to be launched from Catapult Armed Merchantmen (CAM Ships) as a one-shot launch that would be used to defend a convoy from attackers, and then either flown to friendly shores, or ditched close to the convoy in the hope of being picked up. The aircraft were converted from well-used airframes for a last hurrah to protect the merchantmen, and were initially known as Hurricats. They had several alterations to make them suitable for launch and operation by Navy pilots, including naval specification radio gear. The later 1B was equipped with an arrestor-hook and catapult equipment and were used on aircraft carriers of various types, while the later 1Cs had cannon armed wings and an overboosted engine that put out 1400hp at low level. The IICs were used on naval carriers, and over four hundred were built. The Kit Arma’s Hurricane Mk.I was first issued in 2018, and has been reboxed in various guises since then. This new boxing depicts the Hurricanes that were converted to maritime specification, with the sprues to match. The kit arrives in a small end-opening box, and inside are two sprues of grey styrene, a clear sprue, a Ziploc bag of 3D printed parts, a sheet of pre-cut kabuki-style masking material, a sheet of pre-cut black vinyl (not pictured), a decal sheet and the A5 instruction booklet with colour profiles to the rear. If you’re a neophyte to Arma Hobby kits, the detail is excellent, with fine engraved and raised details, plus a generous quantity of components within the box that many companies would consider to be aftermarket. As a 1:48 modeller, I’m really quite envious of the quality of these kits. The fishtail exhausts had come free from their mountings in transit. No harm done, and no clean-up done before taking the pics. Construction begins with the main gear bay for a change, which is made from two C-shaped parts that form both bays in one assembly, with a central tank applied to the front wall before it is inserted into depressions inside the upper wing, which is moulded as a single span part. The gear legs and dividers are installed and painted, then the full-span lower wing is offered up and the assembly is glued together in a similar manner to the real aircraft. Work begins on the cockpit, starting with the rear bulkhead, which has a round headrest, the seat and decal four-point belts. The instrument panel is also made from the styrene panel with raised details, and two decals laid one over the other for enhanced detail. Before the rest of the cockpit is made, there need to be some alterations to the fuselage halves, cutting out the lower section between the trailing edge of the wing roots and the tail-wheel fairing. This is replaced later by a 3D printed insert. With the dusty work out of the way, the cockpit sidewalls are detailed with framework overlays that fit into sockets moulded inside, adding a cross-brace under where the seat will go, and gluing the completed instrument panel into the front. On the top of the wing, the foot troughs, control column and rudder pedals are applied to the centre, section and the fuselage is closed around the rear bulkhead and seat, filling a hatch panel line on the starboard side for one decal option. Flipping the fuselage over, the 3D printed insert and arrestor hook are slotted into place, and you are incited to drill a small hole low on each side of the fuselage and place a length of wire or rod into the holes. The two pre-cut vinyl panels should be glued under the centre of the wings to depict a pair of raised panels, and two more resin parts are also placed there next to the location of the central radiator housing. The wings and fuselage can now be mated, taking care not to ping off the raised cockpit detail perched atop the wings as you bring them together. At the rear, the elevators are moulded as one and drop onto the back of the fuselage with the fin and moulded-in rudder inserted from behind to complete the empennage, adding the tail-wheel into its socket under it. One decal option has a pair of glare hiding strakes added in front of the cockpit to preserve the pilot’s night vision whilst flying that are 3D printed and wafer-thin. A scrap diagram shows where they locate from above to assist you. Inverting the model will allow you to put the retraction jacks on the gear legs, and the wheels on the axles, with their captive bay doors fixed to the outer side of the legs. The radiator housing is a separate assembly, but it needs the radiator core inserting in the centre and a top fairing adding before it can be emplaced, with a circular light behind it painted with clear orange. Forward of the radiator is a chin intake, and you have a choice of two styles of 3D printed exhaust stubs with partially round or full fishtail ejectors that give a good impression of being hollow, especially for their size. Each wing leading edge gets a clear landing light, and under the port wing a T-shaped pitot probe is inserted into a small hole in the skin. The Mk.Ib mounted a De Havilland propeller, the blades of which are moulded as a single part, sandwiched between a spinner cap and back-plate, which has a peg on the rear to fit though the fuselage front insert that is secured in place by a styrene washer and a little glue to keep it mobile. This is then carefully glued into the front of the fuselage, with a resin oil-catcher lip fitted around most of the cowling behind the prop. The windscreen is fixed to the forward deck after adding the gunsight to the coaming, and has a 3D printed rear-view mirror glued on top. To pose the canopy open or closed, there are two parts, one patterned to fit the cockpit aperture snugly, the other widened slightly so that it can slide over the spine behind the cockpit, stopping just before the aerial mast, which you’ll need to join to the tail with a piece of fine wire or thread to depict the aerial itself, and the fly-lead that enters the cockpit via the spine. You can see a great side view of this in the colour profiles at the rear of the booklet. Markings In the typically generous Arma Hobby manner there are five decal options included, and you’ll need to decide which one you plan to depict early as it affects the finer details of the building of your model. All options are painted in grey/green camouflage over a sky underside, and have their individual markings to differentiate them. From the box you can build one of the following: Z7153 F, 801 Naval Air Sqn., Aircraft Carrier HMS Eagle, Operation Pedestal, August 1942 V6695 K, 801 Naval Air Sqn., Aircraft Carrier HMS Eagle, Operation Pedestal, August 1942 AF953 A, 802 Naval Air Sqn., Aircraft Carrier HMS Avenger, Summer 1942 V7506 7T, 801 Naval Air Sqn., Aircraft Carrier HMS Victorious, Operation Pedestal, August 1942 Z4849 7G, 880 Naval Air Sqn., Aircraft Carrier HMS Indomitable, Operation Pedestal, August 1942 Decals are by Techmod, which is a guarantee of good registration, sharpness and colour density, with a thin gloss carrier film cut close to the printed areas. Conclusion A superbly crisp model of the doughty Hurri in her seafaring role, with a comprehensive gaggle of multimedia parts adding extra detail and accuracy to the proposition, making the asking price more than reasonable. Very highly recommended. Review sample courtesy of
-
P-39Q Airacobra (70055) 1:72 Arma Hobby The P-39 was the result of Bell’s response to a specification for a fighter from the USAAC, which was to be a high-altitude interceptor. With Bell’s usual left-field approach to aircraft design, the team produced the world’s first tricycle landing geared prop-driven aircraft, as well as the first aircraft to site the engine behind the pilot, while the airscrew remained at the front. The prop was driven by a long drive shaft that ran under the pilot’s floor, with a coaxial 37mm cannon firing through the centre of the spinner, in a quest for high penetration and accuracy. Ancillary armament varied depending on model, from nose mounted .50cals to four 7.62mm machine guns in the wings. The Airacobra had limited internal space thanks in part to its tapered nose for fuel, and the lack of a supercharger substantially limited its abilities at higher altitudes. Despite these drawbacks, and the likelihood of engine failure after hits from a rear attack, the Airacobra flew in most arenas of combat, but distinguished itself best on the Eastern Front in USSR service, where almost 5,000 were flown with some notable aces racking up victories whilst flying them. The N model started life as a G model, but due to changes on the production line, were designated N instead, with around 500 made. In fact no G models ever left the factory, being superseded and re-engineered as later marks. The final variant was the Q, which ceased production in 1944 after a variety of sub-variants and one-offs were created. The Kit This is a brand-new tooling from the designers at Arma, and again it’s another stunner for the scale, with tons of detail baked-in. The kit arrives in a small end-opening box with a painting of the aircraft flying over the Golden Gate Bridge, although I’m not America and have never been to San Francisco, so I could be wrong. On the rear are the five decal options in side profile with a little information about each aircraft to the side. Inside are two sprues in grey styrene, a clear sprue, a Ziploc bag containing three 5mm ball bearings, the decal sheet, two small sheets of canopy and wheel masks (not pictured) and of course the A5 instruction booklet that is printed on glossy paper in colour with profiles on the rear pages. Detail is exceptional, especially for the scale, with finely engraved panel lines, raised and recessed details, and gorgeously crisp details within the gear bays and cockpit. Construction begins with the cockpit, starting with the footwell, which has the rear of the breeches for the nose machine guns, and the rudder pedals fixed to the front, then the instrument panel with its decals and gunsight added to the top half. The rear of the cockpit has a horseshoe-shaped frame glued to the front to hang the pilot’s seat from, which has decals to depict the four-point seatbelts. The two assemblies are fixed to the floor at either end along with the control column, and a V-shaped part under the floor. A scrap diagram shows the location of the instrument panel, and the fact that the drive-shaft is painted a brass colour. The V-shaped part is actually a cross-member within the nose gear bay, which is beneath the forward end of the cockpit, and is completed by adding the side walls, which also have two scrap diagrams to show their orientation, and that they taper toward the front. The forward roof of the nose gear bay is installed over this, and here’s where the ball bearings come in handy. There are three hemispherical depressions in this part that you glue the ball bearings into with super glue or epoxy, and this acts as the model’s nose weight. It’s always nice when a company includes the nose weight to take the guesswork out of the process, so it’s appreciated! The cockpit still isn’t finished, as there is a complex side console on the port side, plus a small detail part on the sidewall that even has its own decal. The fuselage halves have a number of neatly positioned ejector-towers inside, and the instructions advise removing them before proceeding. Then it's time to put the cockpit in position within the fuselage, along with a long, ribbed shelf behind the pilot’s position, which should have two holes drilled out to receive the radio before it is glued in place. A bobbin is trapped between the two halves as they are brought together, which will allow the prop to spin if you don’t glue it up. There is a small inspection panel under the nose on the starboard side, which should be removed for this edition, which is ringed in red to assist with its location. The Airacobra is a low-wing monoplane, so the lower wing half is full span, with some optional holes drilled first if you are using the 0.50cal gun pods under the wings, or using the centreline bomb or fuel tank. The upper halves are glued over the top with a small inverted T-shaped stiffener in the centre, then once the glue is dry, you should fill in the holes for the wing-mounted guns. The tail is a separate assembly that begins with the elevator fins, which have the fin fillet moulded-in, and has a separate elevator fitted across the span before it is glued in place at the rear, plugging the fin into the top, and a separate rudder panel glued into the rear. The wings are also added at this point, filling the three engraved recognition lights in the starboard tip for all but one decal option, taking care to avoid marring the detail around it. There’s a nose insert appropriate to this mark placed in the gap above the prop, and the antenna mast is placed behind the intake that is itself behind the cockpit. The Airacobra’s ground-breaking landing gear format revolved around the nose gear, and that starts with you bending a triangular frame and locking it into position with another strut to form the retraction strut for the front leg. The long leg itself is moulded with a separate oleo-scissor and wheel, and inserts into the front of the bay, supported by the cranked strut that fixes to the rear on four raised pips that give it additional strength. The main gear legs are comparatively short and have separate wheels and captive gear bay doors. Unusually, the inner main bay doors and their actuators are added first at the same time as the three cooling flaps under the engine, slotting the legs into the outer ends in the following step. While the model is inverted, the two gun pods are added under the wings for all but one decal option, and a front nose gear door is inserted in front of the strut. With the model back on its wheels, probably for the first time, the canopy is dealt with. The Airacobra had weird car-doors on the sides of the canopy, with the rest of the glazing fixed in place, so the main part covers the whole canopy, once you have glued the radio rack in place behind the pilot. The two side doors are painted inside and have a number of decals added inside to detail them further, so you can choose to leave them closed, leave one open, or both open at your whim. The exhausts for the mid-engined Airacobra fit into slots midway down the sides of the fuselage, but the prop is still in the front, don’t worry. The blades are moulded as one, with the spinner fitted over it and the assembly glued to the bobbin you trapped between the fuselage halves earlier. In the centre of the spinner is a choice of two styles of cannon muzzle, which differs between decal options. There are also separate barrels to be inserted into the gun pods, and a barbed pitot probe in the port wingtip. It’s not over yet! There are two long bay doors to be added to the nose bay, a recessed landing light under the port wing, and you also get to choose what to hang on the centreline pylon. You have a choice of a two-part fuel tank, a three-part 250lb or 500lb bomb, both of which have a tiny spinner inserted in the rear. Markings There are five options on the decal sheet, with a variety of disparate schemes to choose from. From the box you can build one of the following: P-39Q-10 363rd FS, 357th FG, Lt. Clarence ‘Bud’ Anderson, Oroville, California, October 1943 P-39Q-1 6th FS, 15th FG, Makin, Gilbert Islands, late 1943 P-39Q-15 10° Gruppo, 4° Stormo, Galantina Air Base, November 1944 P-39Q-5 82nd TRS, 71st Tactical Reconnaissance Group, Lt. Michael Moffitt, Saidor, New Guinea, Spring 1944 P-39Q-20 2nd Mixed-Special Air Regiment, Gen. Col. Fiodor Polynin Decals are by Techmod, which is a guarantee of good registration, sharpness and colour density, with a thin gloss carrier film cut close to the printed areas. It includes seatbelt, instrument panel and stencil decals, the latter covered on a separate set of diagrams from the main markings to avoid confusion. Conclusion This is a stunning 1:72 model of the oft-neglected Airacobra. It is packed with detail and has some excellent decal options and masks included in the box. Very highly recommended. Review sample courtesy of
-
I love Arma Hobby kits. They've been doing great kits of interesting subjects for years now, and each new release is better than the previous. I can see a day when they're going to be as synonymous with modeling and quality as Tamiya. The PZL P.11C is one of their earlier releases, and doesn't have the finesse of their latest, but is still a great little kit, and very easy to build. I finished this model in a week. This doesn't happen often, but this kit is just such a joy to build, and the painting is very easy too. I built my machine from no. 141 squadron flown on September 2nd, 1939 by Captain Florian Laskowski. Captain Laskowski was leading a strafing mission against Nazi motorized columns north of the city of Toruń (where Copernicus once lived) when his plane was hit by flak, and he was badly wounded. Laskowski crash landed in a field. But the Nazi marauders reached him first and blocked civilians who attempted to pull him from the wreckage to provide first aid. Captain Laskowski bled to death. Thanks Arma for kitting these markings, so we can remember what happened. Here is the P.11 with it's real life stablemate, the P.7 (also an Arma Hobby kit, I built about 5 or 6 years ago) And my collection of Arma Hobby kits built to date (I have several more in the works. I love what these guys are doing!).
-
Romanian Hurricane Mk.I 1940 - Arma Hobby 1/72
Fin posted a topic in Ready for Inspection - Aircraft
I know the plane in the foreground is a Messerchmitt, but I was - sort of - recreating this photo: http://www.cartula.ro/forum/index.php?app=core&module=attach§ion=attach&attach_rel_module=post&attach_id=142957 It shows the Romanian BF 109 E-3 no.1 next to Hurricane Mk.I no.1 in pre-Eastern Front markings. The Bf was destroyed in an accident on December 4 1940 so this picture was probably taken earlier that year. The first Emil was flown to Romania in December 1939 and the Hurricanes were delivered in crates at about the same time. In the summer of 1940 when the Soviet Union presented Romania with a 24 hours ultimatum to give up its eastern and northern provinces under the threat of invasion, these few Hurricanes and Messerschmitts were the most modern fighters Romanian had. I think it`s something of a poetry to see an 109 and a Hurricane next to each other under the same country colours. Indeed, the 12 Hurricanes that Romanian bought from Britain formed the 53rd Squadron, which initially was paired in the 7th Fighter Group with the 57th Squadron equipped with the first batch of 11 Bf 109 E-3. These acquisitions made after the war had already started in Europe created the situation where the British pilots and technicians sent to help press the Hurricanes (and Blenheims) into service found themselves neighbours at Pipera with the German personnel who was doing the same for the He-112s. The no.1 Hurricane was flown by Emil Georgescu, the 53rd Squadron`s commander. For anyone interested in the subject, the book under my model is a good starting place and I`ve reviewed it HERE, on BM, several years ago. My build is not the most fortunate and better modellers will notice quite a few things that could have been done better. The lighting conditions were not ideal either these days, being mostly cloudy, but somehow able to make both my models and the Coastal Kits base more shiny than in reality. Still, three photoshoots - and several sessions of fixing small issues and removing particles of dust virtually invisible to the naked eye, but popping up in pictures - later I`ll call it done for now. I`ve used the Arma Hobby 70021 Hurricane Mk I Trop kit (simply because that`s the one I found locally and the plastic is the same as in the other Mk.I boxes). The five spoke wheels characteristic of the L series Hurricanes that Romania had came with a decal set by Kora (Dec7269) dedicated to the Yugoslav Hurricanes. The De Havilland Spitfire Propeller is a Quickboost (72166) product. The cockpit ring gunsight is from an Eduard PE sheet (72403) and the bead on the cowling is from a Master set dedicated to British P-40 B/Cs (AM-72-123). I`ve replaced the kit`s antenna mast with a 0.9mm brass tube as the L series had the early, pole type. I`ve also removed the extra access panel on the right side of the fuselage that was not present on this series. The roundels and numbers are from a dedicated RB Productions decal sheet (RB-D72022); the stencils are from the Arma kit. I`ve also used the dedicated masks from Pmask (PK72154) which are great and Eduard`s Superfabric early RAF seatbelts (73025) - wish Eduard would still be making these. I`ve used Lifecolor`s UA 092 for Dark Earth as recommended by the RB decal`s instructions. The UA 091 that was recommended for Dark Green proved to be a rather bright and saturated green so I had to overpaint it with the only other Dark Green I had available, Italeri`s 4726AP. The Black (36108), White (36105), Aluminium (36199) and Blue (36156 - on the rudder) are from Revell`s Aqua range. The Yellow is also Revell (36115), but I`ve addded a bit of Carmine Red (36136) to try and match the RB Productions decal yellow and for once I think I`ve done it. The red on the rudder is Vallejo`s 70.817 and the interior grey green is Hataka`s B025. The model is brush painted so having to add a couple more layers of dark green was not fortunate. The white and yellow also do not brush easily and need several layers and this made it harder for the wash to settle in the panel lines. The wash is a combination of 4 parts Light Grey, 1 part White and 1 part European Dust from Vallejo. With half the underside being white and the other black I`ve tried to choose something light enough to show on black, but still dark enough for the white and the two colours on the upperside. I think it ended up too dark for the white wing. The plane would have been fairly new and well maintained at this point. The small bump between the antenna pole and the canopy was actually a light on the real thing and would have been better represented by a transparent piece, but I`ve realized this late so I`ve just painted it gloss white.- 12 replies
-
- 21
-
-
I have been following @AliGauld's Airfix Hurricane build and saw the discussion on the Arma Hobby Hurricane. I built a couple of Airfix Hurricane's a few years back, converting them from fabric wings to metal wings but I then remembered I had one of these in the stash. So out it has been dug and put on the top of the lets get started pile. I do recall following a @Procopius build a few years back and there's a bit of care needed with fitting the undercarriage which happens right at the beginning. Anyways the boxing isn't a Sea Hurricane as I originally thought but the options are for two former RAF Hurricanes transferred to the Naval Fighter School, and a bit of an oddity, a former Sea Hurricane 'Hurricat' provided to a Polish RAF Squadron for training. And left in Temperate Sea Scheme. I think I'll go for W -D2 with Popeye on it. Two beautifully moulded sprues in grey plastic. Crisp and fine. and a transparent sprue with options for an open and closed canopy. Nice transfer sheet with a fair amount of stencils And what looks like a comprehensive set of instructions. This is my my first Armato Hobby build and I'm looking forward to it. I will have to think about how to distress the paintwork. I don't have airbrush facilities, or skills, to do filters, shading, etc.. But that's a fair bit off
-
Good evening all. After a 'little' break between June and now, Ki-84 has been already finished. Now it's #1 kit on my personal list in 'fine detailed, easy to build & fun' category. During work I had some troubles with finding a photo of real plane so I focused only on gaining experince in painting the scratches. If I build one Ki-84 more then I'll paint all yellow straps, as there is currently a small colour difference between the decal and the leading edge 😪 (but hard to see on photos 😄)
- 19 replies
-
- 60
-
-
- Arma Hobby
- 1/72
- (and 1 more)
-
Hello all, this is my latest completion, Arma Hobby's 1/72 F4F-4 Wildcat, built in the markings of John.L ."Smitty" Smith's aircraft, White 2 (Guadalcanal, 1943). This kit was the most complex one I've built yet, there were lots of small and thin parts for the internal structure and landing gear (which I broke by accident, but managed to fix by inserting a metal pin to reinforce it). The detail in the kit is great and the engine is fantastic. The model was painted with Ak real colors acrilycs; the decals used are the kits', though I modified the numbers because this scheme doesn't come in the box. The model was weathered with a silver pencil, tamiya weathering powders and tamiya enamel washes. The aftermakets used were eduard PE and brass tube for the gun barrels. The figure is from the CMK set, US Navy F6F Hellcat Pilot and Mechanic Hope you enjoy it! Oompa Loompa
-
Source: https://www.facebook.com/ArmaHobby/posts/4494536197243369 Update http://armahobbynews.pl/en/blog/2021/08/13/f4f-4-wildcat-1-72-test-shots/ V.P.
- 38 replies
-
- 5
-
-
- Arma Hobby
- F4F
- (and 1 more)
-
And again something from me. This time a Fokker E.V from Arma Hobby. A great kit, but not easy. The colors are mostly from AK this time. I hope you like the little one.
-
F-6C Mustang Expert Set (70040) 1:72 Arma Hobby The P-51D was developed by the North American Aviation company as a fighter for Great Britain, but due to the poor performance of the engine that was initially fitted, it wasn’t all that good at higher altitudes. Fortunately they slotted a Rolls-Royce Merlin engine into the airframe and it brought out the best of its design, which included the energy efficient laminar flow wing that gave it the potential to escort Allied bombers all the way to Berlin with the addition of drop-tanks and a lean fuel mixture when not in combat. It was flown in this guise as the Mustang III in British service, and as the P-51B/C in US service, then as the P-51D with the bubble canopy and cut-down aft fuselage, with an additional fin-fillet added later to improve stability that had been reduced by the new shape and fuel tank location. The F-6C was developed from the B/C variants, most of which were built in the Dallas factory, with openings for two cameras in the fuselage, with one camera mounted obliquely in the side of the rear fuselage, firing to the left, and the other mounted underneath, just aft of the radiator flap. Apart from some other minor changes the aircraft was fully combat capable, so didn’t need an escort to carry out its assigned task, and some of its pilots became Aces flying recon. The Kit This is a retooling of Arma’s original 2021 release to depict the reconnaissance variant of the Mustang, and as it is the Expert set, it’s the top-of-the-line boxing. It arrives in a sturdy end-opening box with an attractive painting of the subject on the front, plus profiles of four of the decal options on the rear. Inside are two sprues in grey styrene, a single clear sprue, a small fret of Photo-Etch (PE), a sheet of pre-cut kabuki tape masking material (not pictured), a large decal sheet, and an A5 portrait instruction booklet with full colour profiles on the rear pages. Detail is stunning for the scale, and the finish of the exterior surface is a pristine satin texture with some areas left glossy, an example of which are the lenses of the underwing identification lights on the starboard wing. Construction begins with the cockpit, which will be familiar to anyone who has built a Mustang before. The stepped floor has the seat, armour and support frame added to the front section, with PE belts supplied for your use, and a choice of bucket seat or tubular-framed type for your use. The rear of the cockpit can either be filled with the original fuel tank with radio on a palette on top, or three other configurations for your consideration. Decals are included for some of the radio boxes, and the finished assembly should look good with sympathetic painting. The pilot has his control column added and two dial decals applied to the floor, with more decals for the highly detailed instrument panel that is fixed below the coaming and has the rudder pedals glued to the back as shown by a scrap diagram. The cockpit sides are also detailed with additional parts, a copious quantity of decals to portray the instruments, and some adaptations to the fuselage sides to cater to your chosen decal option. The radiator pathway is also made up, adding a PE grille to the front of the bath, and another to the oval intake before it is inserted into the starboard fuselage side. The port side is prepared to receive the cockpit and tail wheel, beginning with the instrument coaming, then the cockpit assembly and tail wheel, closing up the two halves to complete the task. The wings are next, beginning with the centre of the main gear bay and a section of the spar. This is inserted into the upper wing half, and a detailed diagram shows how the bay roof should be painted correctly, which is best done before closing up the wing halves and inserting the separate flap sections, which you are advised to paint before insertion, as they also have a decal around the halfway point. Unusually, both wing surfaces are full-width, in much the same way as the real thing, and after adding some internals, the wings and fuselage are joined with a choice of either a filleted tail, or the earlier unfilleted tail, which you get to choose by using different fin and elevator parts with moulded-in fairings. Some panel lines behind the cockpit should be filled depending on your earlier choices, and this might be easier done before adding the wings. The main gear consists of a strut with single wheel and a captive bay door attaching to the leg, which slots into a socket in the outer edge of the bay, with a pair of inner doors fitted to the centre-line. The airframe is ostensibly complete, but some small parts and assemblies are yet to be added, such as the radiator cooling flaps under the rear, pitot probe under the wing, a pair of bomb-shackles outboard of the main gear bays, and a pair of lips for the chin and main radiator intakes. The perforated grille on the lower nose is slotted into its aperture, a choice of two types of exhaust stacks, two types of antenna masts plus an optional D/F loop with fairing are fixed in place around the same time as the prop, which consists of four blades moulded as one, with a two-part spinner hiding a small washer that can be used to hold the prop in place and retain the option to spin it if you so wish. There are two styles of canopy supplied for your model, so choose the correct type for your decal option, both of which have the option to portray them open or closed. The older straight hood consists of the windscreen with a section of the fuselage moulded-in, the canopy and the two scalloped rear-view panes, with the optional parts provided to display the canopy opened to the sides, assisted by a couple of scrap diagrams nearby and a warning decal for the inner lip. The later Malcolm hood is the second option, with a blown canopy that gives the pilot more room to move his head for better situational awareness. This option firstly requires removal of some small bumps on the spine behind the canopy. There are parts supplied to portray the canopy rail, and these are shown correctly applied in scrap diagrams to assist you getting it right. The final choice is to hang paper fuel tanks, metal fuel tanks or bombs under the wings, all of which are made from two halves each and have stencil decals supplied from the sheet. Markings There are a generous six decal options in the box, two of which are a bonus for this boxing. From the box you can build one of the following: F-6C-10-NT Mustang 44-10889/R7-N, GR II.33 Savoie, French Air Force, April -May 1945 F-6C-1-NA Mustang 43-12400/ZM-O, Cpt E B Blackie Travis, 12th Tactical Reconnaissance Sqn., 67th Tactical Reconnaissance Group, Middle Wallop, England, Spring 1944 F-6C-5-NT Mustang, 42-103604/600 Lt. Col. E O McComas, 118th Tactical Reconnaissance Sqn., 23rd Fighter Group, Chengkung, China, Dec 1944 F-6C-1-NA Mustang, 43-12404/266, 26th Fighter Sqn., 51st Fighter Group, China, 1944-45 F-6C-5-NT Mustang, 42-103604/600, Maj. E O McComas, 118th Tactical Reconnaissance Sqn., 23rd Fighter Group, Chengkung, China, Oct 1944 F-6C-1-NA Mustang, 43-12330/263, 26th Fighter Sqn., 51st Fighter Group, China, 1944-45 Bonus Decals Decals are printed by Techmod, which is a guarantee of good registration, sharpness and colour density, with a thin gloss carrier film cut close to the printed areas. Conclusion Another superbly well-detailed kit from Arma that makes this 1:48 modeller more than a little bit envious. Detail is excellent throughout, and the instructions are concise to help you with your build. Very highly recommended. Review sample courtesy of
-
I have ordered the new 1/72 expert set from arma hobby for this build. If online reviews are to be trusted it promises to be exquisite. (images from arma hobby below) I’ve also ordered some AM (which will please our gratious GB leader @trickyrich eduard wheels, a yahu IP, some 3d printed exhaust stacks and a reference book. The kit comes with some nice extras too… and among others, markings for ‘Evalina’. Here’s Arma hobby’s write-up of the airframe’s story… ’A P-51C with the charming name “Evalina” was the first and, as it turned out, last fully airworthy North American Mustang to be captured by the Japanese. Intensive tests followed by demonstration flights at combat units convinced both veterans and commanders of the Imperial Japanese Army Air Force that their most recent “acquisition” was a truly fantastic aircraft – the fulfilment of every fighter pilot’s dreams. The North American P-51C-11-NT Mustang with registration number 44-10816 (manufactured at the Dallas plant in Texas as 111-28949) was the personal aeroplane of First Lieutenant Oliver E. Strawbridge. At the turn of 1945, the fighter was stationed in China with the 26th Fighter Squadron, itself an element of the 51st Fighter Group. The unit’s combat trail had started in India and proceeded through Burma and China, ending in French Indochina, a territory that comprised present-day Vietnam, Laos and Cambodia. But by the time the war drew to close, “Evalina” had not been flying with the unit for months… A rather unfortunate event had led to its capture by the Imperial Japanese Army Air Force. “EVALINA” ENDS UP IN JAPANESE HANDS In truth, the circumstances of the incident have still not been fully clarified. We do know that on 16 January 1945 the pilot landed “Evalina” on the Chinese airfield of Suchin, which was still held by the Japanese. While the Americans concluded that this was the result of a navigational error, Japanese sources mention an emergency landing – and then muddle the story still further. Namely, some maintain that the aircraft belly-landed in a rice paddy near the base, but according to others the fighter made a normal landing necessitated by a technical fault. Practically all historians reject the former version of events, logically assuming that Japanese ground crews would have been incapable of repairing damage sustained by an Allied fighter during a wheels up landing made in difficult terrain (especially as there are no extant documents suggesting that such repairs had actually been performed). This would appear to be supported by the fact that later, when “Evalina’s” tail wheel leg suffered only slight damage, it was simply left locked in the down position. Whatever the case may have been, the chance acquisition of a virtually brand-new and fully functional Mustang was a godsend to the IJAAF. It was no surprise, therefore, that the aircraft was collected and flown to Japan, where it underwent detailed testing, by one of the leading aces of the Imperial Japanese Army Air Force – Major Kuroe. At the beginning of the war, Yasuhiko Kuroe was a pilot with 47 Dokuritsu Chūtai (47 Independent Squadron), which flew prototypes and pre-serial production variants of the Nakajima Ki-44 Shoki (Tojo) fighters over Malaya. After the campaign drew to a close, however, he did not return with his unit to Japan; instead, he was transferred to Burma, to 64 Sentai, on the insistence of its legendary commander, Colonel Tateo Kato. Fate tied him to 64 Sentai for nearly two years, during which time he achieved the majority of his 51 aerial victories. In the spring of 1944, Kuroe was ordered to return home, where he was assigned the role of air combat instructor and test pilot. He flew many Japanese aircraft, captured Allied aeroplanes, and even Bf 109E-3/4 and Fw 190A-5 fighters received from the Third Reich. He also carried out intensive tests of “Evalina”, and went on to demonstrate the Mustang at a number of fighter units of the Japanese Homeland Air Defence (Hondo Boei Butai), giving detailed presentations of its strengths and weaknesses, and outlining optimal battle tactics. Numerous veterans of 3, 18 and 59 Sentai later recalled that his lectures and displays helped them get out of the firing line of enemy P-51s, basically saving their lives. Although he was shot down thrice and thrice wounded, Major Kuroe survived the war in good health. Counts made on the damaged aircraft which, somehow, time after time got him back to base determined a total of more than 500 bullet holes. After the war he became an ardent proponent of the recreation of the Japanese Air Force, and following the establishment of the Japan Air Self-Defense Force (JASDF) he was appointed commander of No. 3 Squadron, which operated Sabre jets; soon after, he was promoted to the rank of Major General. His colourful life came to an end on 5 December 1965. He drowned during a fishing trip, a favourite pastime of his, under circumstances that have not been fully explained to date. Major General Kuroe was just 47 years old. THE RIDDLE OF “EVALINA” The final act of our story took place several dozen years after the end of the war. In the nineteen eighties and nineties, growing interest in the wartime activities of the Imperial Japanese Army Air Force led to the publication of numerous press articles and monographs. “Evalina” also became rather widely known, both among World War II history buffs and modellers. Strangely – albeit in a sense logically – it was taken for granted that since the aircraft had been regularly flown by Oliver E. Strawbridge, he must have been the leading protagonist of the whole unfortunate event. Whereas… Around the mid-nineties, First Lieutenant Strawbridge’s granddaughter, Sara, finally shed some light on the riddle. Namely, she stated that although she had never met her grandfather (due to family reasons), she knew with absolute certainty that he had not been the pilot of the Mustang on that fateful day of 16 January. Furthermore, she informed that her grandfather had served in the USAAF until the very end of the conflict and had never been a Japanese POW. From what she recollected, he had died in 1987 in the USA. The name given to the aircraft, “Evalina”, was that of his then girlfriend. Their love fizzled out, however, and after the war First Lieutenant Strawbridge married a woman by the names of Ruth Anne. The topic was taken up by a few historians, with the renowned Henry Sakaida first and foremost among them. Finally, it was determined that the Mustang had been piloted by First Lieutenant Sam McMillan, Strawbridge’s friend from the 26th Fighter Squadron. Captured and imprisoned by the Japanese, he survived the war and returned home. When this research was being conducted, First Lieutenant McMillan was still alive, living in his hometown in Connecticut. However, due to his age and state of health, he did not assist in clarifying the circumstances of the incident. Sakaida published his conclusions in “Flight Journal” magazine sometime around the year 2000 (although it would seem that they are not widely known today). “ maybe i should build it with the barrel at the rear end ( see above ) This is a tiny kit compared to my usual builds and scales, I’m looking forward to the challenge of building so small. I’m a serial project starter. Hopefully this one reaches full fruition.
-
Nakajima Ki-84 Hayate Expert Set (70051) 1:72 Arma Hobby Founded by Chikuhei Nakajima in 1918, the Nakajima Aircraft Company was Japan’s first native manufacturer of aircraft. The company produced a number of successful designs for the Japanese Armed Forces, not least of which was the Nakajima Ki-84 Hayate (Hurricane). Known as the Army Type 4 Fighter in Imperial Japanese Army Air Service, and simply as the ‘Frank’ by the Allies, the Hayate was widely regarded as the best mass-produced Japanese fighter aircraft of the war. The Hayate originated from a design competition instigated by the Air Headquarters of the Imperial Japanese Army for a fighter aircraft assembled around a licence-built version of the liquid-cooled Daimler Benz DB601A engine. Although Nakajima’s design lost out to the Kawasaki Ki-61, many of the lessons learned during the competition were applied to the design of the Ki-84, although the engine didn’t. Powered by an indigenous eighteen-cylinder Nakajima Ha-45-21 radial engine, the Hayate possessed excellent all-round performance including a top speed in excess of 400mph and outstanding manoeuvrability. Unlike many previous Japanese fighter aircraft, it was also fitted with armour and self-sealing fuel tanks, thus enhancing combat survivability. Although an effective fighter, the Ki-84 arrived too late to have much of an effect on the war in the Pacific, despite the fact that over 3,500 examples rolled off the production lines. It was plagued by reliability problems throughout its service life, thanks to poor manufacturing and quality control standards late in the war. The Kit This is a brand-new tooling of the Frank from Arma Hobby of Poland, and it arrives in a smaller end-opening box, which has a nice painting of the type on the front, and the decal options on the back. Inside are just two sprues of grey styrene in a resealable bag, clear parts in a Ziploc bag, another Ziploc containing a fret of Photo-Etch (PE) and some pre-cut masks, plus a portrait A5 instruction booklet in colour on glossy paper. I’ll hold up my hand to being a 1:48 modeller by nature, and yet again I’m impressed with the detail that Arma have packed into this model. It makes me fervently wish they did more in my preferred scale. A fella can dream, eh? The surface detail is very finely engraved with a clean matt finish to the outside, showing off the recessed panel lines and other raised details to great effect. It’s one of those surfaces that makes it seem a shame to cover it in paint. Construction begins with the cockpit, which is based upon a slightly curved floor onto which the rudder pedals and throttle quadrant are placed, then from beneath, the control column and another stick are pushed through. The rear frame has the seat-frame moulded-in, and unusually for styrene, you are incited to pull the mount out at the bottom to give it the correct slope to fit the seat on later, held in position by a pair of holes in the cockpit floor. The instrument panel is made up on a short frame, and has the main panel and an integrated side panel, both of which have decals provided to detail them up. Incidentally, colour call-outs are given in blue circles that correspond to a table on the front of the booklet that gives colour names, plus Hataka, AK RealColor, MRP, AMMO, Mr. Color, and Tamiya codes to give pretty comprehensive coverage of brands. The two frames are added to the floor and joined by the seat, which has a pair of lap-belts included on the PE sheet, and another dial decal for an instrument embedded in the floor. Before the cockpit can be glued into the fuselage, a number of PE and styrene parts are added to the ribbed sidewalls, and for one decal option, there is a small recess in the outer skin that should be drilled and filled before proceeding. The engine is also required before the fuselage can be closed up, and this is built from two rows of nine-cylinders, a two-part push-rod assembly at the front, and axle that pushes through the PE wiring loom and the bell-housing at the front. A scrap diagram shows the correct locations for each of the many wires sprouting from the loom. Once it’s painted it is slotted into the port fuselage half along with the cockpit and the tail-wheel, which should also be painted per the scrap diagram. Turning to the wings, the lower is full-width, and has the top two halves placed on top, which have the main gear bays moulded-in. The fuselage is inserted into the gap, and a cowling part covers the top of the engine with moulded-in gun troughs, while at the rear the elevators are glued into the tail using the usual slot and tab method. Underneath is a choice of two styles of chin intake, with PE grilles for the front of either one, while the rest of the cowling underside is inserted along with the intake lip. The canopy is placed into position over an insert that depends on whether you plan on building your kit with open or closed canopy. Additional diagrams show their location and where the glazing parts fit accordingly, and each of them need a small hole drilling in the side, again as per the diagrams. Before installation of the inserts the gunsight and some stencil decals should be fitted into the surround after painting. There are pre-cut masks included for the canopy, although they’re not numbered. It isn’t exactly difficult to figure it out though, so no problem! The main landing gear legs are supplied as single struts with a captive door on the outer, and a wheel with masks on the short perpendicular axle at the bottom. The inner bay doors have good contact points and fit on the inner edge of the bays, with a pair of smaller doors on the retractable tail-wheel, and twin bomb-shackles under each wing, to accommodate either long-range tanks, 100kg or 250kg bombs that are included in the box. The smaller bombs have a little wedge moulded into the perpendicular fins to help with handling during painting, and they should be nipped off and painted over once complete. The fuel tanks also have decals for the details on the top side. The remaining parts go to make up the cooling flaps with the separate exhausts protruding from within, the gun barrels in the wing leading-edge; pitot probe, an aerial mast on the spine, and the four-blade prop that is covered in the centre by a curved spinner cap. Markings There are a generous six options on the decal sheet, and they offer substantially different looks, depending on which one you choose. From the box you can build one of the following: Ki-84 Otsu (4x20mm cannon), 104 Sentai, Ota Air Base, Japan, Aug 1945 Ki-84 Ko S.n. 1446, 2 CHutai 11 Sentai, Philippines, 1944/5 Ki-84 Ko, 10. Rensai Hikotai (OTU), Lt. Takana, Japan, Spring 1945 Ki-84 Ko, 3 Chutai 47 Sentai, Japanese Home Defence Forces, Ctp. Haneto Narimasu Airfield, Feb 1945 Ki-84 Ko, 57 Shimbu-tai, Mijokonojo Air Base, Kyushu, Japan, Battle of Okinawa, May 1945 Ki-84 Ko, 2. Yuso Hikotai, Lt. Shuho Yamana, Saigon, Summer, 1944 Decals are by Techmod, which is a guarantee of good registration, sharpness and colour density, with a thin gloss carrier film cut close to the printed areas. Conclusion This is a good-looking kit of the type, and if it wasn’t 1:72, it would have made it onto my bench later today. The Expert Set is a well-rounded boxing that should allow the modeller to build a great replica of this powerful late war Japanese fighter without having to resort to aftermarket. Very highly recommended. Review sample courtesy of
-
Let me present the result of our small group build. It is the F4F-4 Wildcat of VGF-29, USS Santee, operation Torch , October 1942. The build is straight OOB with small improvements. I think Arma Hobby kit has a high value for wide range of modellers. For those who makes only simple OOB builds as well as for those who wants improve it as there is some potential to make it more detailed and accurate. If you are interested, you can visit the galery with more finished Wildcat builds there: https://kitforum.cz/viewforum.php?f=94
-
I fancied building something Finnish: https://www.armahobby.com/70025-hurricane-mk-i-east-front-limited-edition.html After building an arma hobby Hurricane in the BoB GB, I promptly bought one more - and this felt like a good time to build it. I’ll be building the one on the box cover, HC-452. If I did my googling properly, I should just replace the kit spinner with a Spitfire DH spinner, which is slightly wider, and I’m good. I’m pondering whether rummaging through boxes on the attic will be more work than ramming the kit spinner with a semi-hot poker to widen it just a bit. We’ll see. Sprues: as you can see there are three spinners here, none correct? In addition there are resin wheels with 5 spokes. I’ve made a start: The IP has some nice decals. I only used the right side, the left and middle sides I just painted with some random white squiggles. I actually think the squiggles look more realistic at a distance (closeup not so much). The real reason is not realism however, I wanted to use the instrument decals for an open-cockpit biplane and after having a peek in the BoB Hurricane and seeing absolutely zilch of the IP I decided to keep it for when it will actually be seen.


