Search the Community
Showing results for tags 'Airfix'.
-
 Hello Britmodellers, Here's my take on the Airfix MiG 17. I wanted to build a slightly different machine than the famous '3020' so I did some decal juggling there. A few grainy pics show '3012' in a heavily weathered condition. It took me two tries before I ̶g̶o̶t̶ ̶f̶e̶d̶ ̶u̶p̶ ̶w̶i̶t̶h̶ ̶i̶t̶ / got the effect somewhat acceptable. Other modifications were the KK-2 bangseat, reshaped inner wing leading edges and brass gun barrels. Thanks for watching! Luka
- 11 replies
-
- 42
-

-
North American B-25C/D Mitchell (A06015A) 1:72 Airfix The Mitchell was a twin-engined medium bomber that served with distinction during WWII, with over 10,000 being produced by war's end. Named after General Billy Mitchell, the type reached prominence early on in America's entry to the war, as it was used in the famous carrier launched Doolittle raid on mainland Japan, leaving USS Hornet to bomb Japan, and attempting to land on fields in East China after the mission. It was a good aircraft to fly, and was well-liked by its crews, as well as being able to soak up a tremendous amount of punishment from the enemy and still remain flyable thanks to its rugged construction. These traits led to the Mitchell being used in almost every theatre of war, and in addition to bombing duties it was also converted to a "gun-truck" for ground attack, and was fitted with various armaments, including cheek mounted machine guns in fairings, and sometimes the 75mm cannon from a Sherman tank in a solid nose cone, as well as four .50cal brownings in the nose (B-25G) that was named ‘Strafer’, plus the turret guns that could be aimed forwards to add to the hail of munitions. The J-model was the last production variant in a long line of upgrades and improvements, and although many were built with glass noses, they were often converted in the field to a solid nose for ground attack duties. The Kit This kit was first released in 2018, and this boxing adds new decals to the existing tooling and new box art to match, depicting a gaggle of Mitchells flying low over desert terrain. Inside the box are five sprues of different sizes in dark grey styrene, two clear sprues, decals, and the instruction booklet, which is printed in colour with decal option profiles on the rear pages, accompanied by a separate page of profiles for the common stencils applied to the aircraft. Detail is good, and this 1:48 modeller was quite surprised by the small size of the Mitchell at this scale, probably because I’ve been handling a 1:48 B-25 kit recently for another review. It includes a detailed cockpit, bomb bay, turrets, and gun position details, with options for dropped or retracted flaps plus poseable tail surfaces, and raised or lowered wheels to add some personalisation to your model. Construction begins with the cockpit, based on a stepped floor, to which the twin control columns with integral centre console is added, with the instrument panel in front, applying a decal to depict the dials. A bulkhead is fixed to the front of the floor, and two crew seats are slotted into sockets in the floor behind the controls. Another bulkhead is slotted in from the side behind the crew, and an additional lower floor part it fixed to the bottom of the assembly after drilling out two flashed-over holes in one side. At the rear of the assembly, a further bulkhead with moulded-in spar is mounted, then the nose compartment is detailed with a small seat and a bicycle-like seat in the very front of the floor. The bomb bay is just behind the cockpit, and the fuselage halves are thinned here to accept the bay wall inserts, which also have the bay doors moulded-in to give it a strong join, and is detailed with the bomb ladders down the sides of the walls. A note in this step tells you to skip ahead if you plan to leave the bay doors closed, which I missed initially, so make sure you don’t. The cockpit assembly is installed on the port fuselage after detail painting, sliding it into position by feeding the spar through a hole in the side of the fuselage. Another spar is prepared with an extra layer to the bulkhead, located on circular pads, then it too is slipped into the port fuselage, adding 25 grammes of nose weight under the cockpit, making use of the box-like structure there. The bomb bay roof is fitted between the two bulkheads, and an insert is added to the belly behind the bomb bay with the socket for the belly turret and its pivot point moulded-in. The bombs are provided in this boxing, making four of them from three parts each, and gluing two on each side of the bay, adding retraction jacks and their mounts to the front of the bay opening. With both sides of the bay built and painted, the fuselage halves can be closed, and the seams dealt with in your preferred manner. If you elected to leave the bay doors closed, a separate part is included with a panel line down the centre to represent the two doors closed against each other. The wings are built on the spars projecting from the sides of the fuselage, adding the upper surface first, and installing the clear landing light lenses in the leading edge, drilling out some flashed-over holes, which are used to locate the aerodynamic fairings over the exhaust ports on the trailing edges of the wings. The lower surface is then glued in place, two clear inserts are fitted into holes in the fuselage sides behind the wings, which cater for various window arrangements through the different variants, and should be test-fitted carefully so that they are level with the rest of the skin of the model. The elevators are built from top and bottom halves with separate flying surfaces trapped during gluing, which can be deflected according to details given as the assembly is glued onto the rear of the fuselage ready for the rudder panels to be built. Again, the panels are made from two halves with separate rudders, one per side, and these too can be deflected according to the numbers given on the diagrams, plus another diagram that confirms that the rudder panels should be posed at 90° to the elevators. The next choice is whether to pose the gear up or down, with gear down the first choice to be described, starting with positioning the main gear legs, using the outer nacelle half as a jig to locate the strut, but not applying any glue to the nacelle part at this time. It can be left in situ while the glue on the gear leg cures, and in the meantime the engines and their cowlings can be made, which are common to gear up or down options. The front row of pistons has a central axle trapped between it and the reduction bell-housing at the front, then it is glued to the combined bulkhead/rear bank of pistons, providing detail that will be dimly seen through the spaces between the front bank of pistons, and via the cooling gills at the rear if you have sharp eyes. The cowling is prepared by adding seven small raised fairings around the main part, sliding the completed motor into the back of the assembly before fitting the cowling gills using the tabs and slots that are shown in the diagrams. The nacelle halves are joined together, assuming the glue has cured on the main gear legs, and these two parts are augmented by a short forward section on the outer half, then mounting a bulkhead and intake to the front, repeating this for the other side in mirror image. The completed nacelles are then lowered over the main gear legs and glued onto the underside of the wings. For the gear-up option, the legs are omitted, and the small curved bay door covers the opening before gluing the nacelles to the wings, removing the two hinges from one end first, which is done again in mirror image for the opposite engine. The engine cowlings are then glued to the front of the nacelles, regardless of the gear option chosen, then the two flap sections per wing can be glued in place lowered, or retracted by using different parts, doing the same on the opposite wing. Both wheel position options have the curved bump-stop at the very rear of the tail, then for the gear down option, separate scissor-links are glued to the legs, adding the doors and a retraction jack near the front of the bay. The wheels are each in two halves, and have a diamond tread pattern moulded into them, so take care aligning the halves once you have applied glue to minimise clean-up. The attachment points on the struts are specially designed to prevent mistakes, so check that the inner peg is aligned with the hole in the bottom of the tyre cut-out before you leave the glue to set. The Mitchell was unusual for a WWII bomber because of its tricycle undercarriage, and for gear-up the bay is covered by a small door that has been reduced in width prior to fitting. The gear down option has the strut inserted into the slot, a translucent scrap diagram showing how it should locate, then the uncut door is fitted to the edge of the bay, adding the wheel with separate outer hub to the bottom of the leg. The belly turret could be retracted so that it was almost flush with the airflow to increase speed and reduce fuel consumption whilst on the way to and from enemy territory and for landing. You have the option to pose it in either position, gluing the two machine guns into a different centre mount, depending on your choice. Both options are then inserted into the clear upper section of the turret, installing both in the cut-out under the belly, the mount holding each option at the correct attitude. The deployed turret clips into position without glue thanks to an expanding spring clip on the mount, but it is a one-time use clip, so make sure you’re ready to install it, and don’t be tempted to put it in early to see how it looks. The retracted turret has its guns aligned with two long recesses, so can be glued into position as there is only one possible position for them. Behind the turret is a crew hatch, which has four tabs around the lip that can support the door if you intend to leave it closed. To open it, the tabs should be cut away, fitting the combined door and ladder to the front of the cut-out, with the same process carried out on the door to the front of the bomb bay. The upper turret is next, fitting the twin machine guns to the central mechanism, and trapping them in position with another part of the assembly. The two ammo cannisters with a twin feed of link is glued to the front of the assembly, then the completed assembly is inserted carefully into the glazing, a scrap diagram showing how it will look from below. The completed top turret is then fitted into its cut-out, locating in a socket in the floor inside. The nose is open at this stage, allowing you to install a rack of ammo cans, plus the gun that is offset to one side of the bomb sight, which is another part fitted to the front lip of the floor. Under the nose is a small window that is inserted from below, then the top glazing is added, followed by the nose glazing, which has a flexible mounted machine gun pushed through the central hole, slotting the fixed gun through the other offset hole in the clear part as you install it. There are two styles of canopy included on the sprues, one for each of the decal options, and at this stage you can choose to seat the two pilot figures that are supplied or not. An astrodome is added to a hole in the fuselage behind the cockpit, fitting two landing light covers in the leading edges of the wings, installing some windows in the sides, and the glass dome in the tail. The final few parts dotted around the airframe include pitot probe in the port wingtip, two antenna masts on the spine, plus a D/F loop in an aerodynamic fairing, and the twin three-bladed props, one in each engine nacelle. Markings There are two decal options on the sheet, one in US service in a desert scheme, the other a lend/lease aircraft in Soviet service, each with a full page of profiles to help you complete the task. An additional page of profiles shows where the stencils are applied to both decal options, using line drawings to simplify the process. From the box you can build one of the following: B-25C Mitchell ‘OH-7’, 41-13207, 445th BS, French Morocco, 1943 B-25D Mitchel ‘09’ 42-87594, 1st Sqn., Uman Airfield, 1944 Decals are by Cartograf, which is a guarantee of good registration, sharpness and colour density, with a thin gloss carrier film cut close to the printed areas. Conclusion A nicely detailed B-25 in this scale with plenty of personalisation options that belies the scale, with a couple of interesting and more unusual decal options, which combines to make for a welcome re-release. Highly recommended. Review sample courtesy of
-
My first kit in over 50 years. Thoroughly enjoyed it. Made some mistakes but all part of the fun! For a starter kit I was impressed by the quality of the fit.
- 10 replies
-
- 33
-
-

-
With the Jet provost done and the other activities out of the way, it’s time to get back in the saddle and do some more modelling. For a bit of a mojo boost, I watched Top Gun, Top Gun Maverick and The Final Countdown on DVD’s. So tonight, out came the Airfix F-14A Tomcat (blueprint box) and the Revell F-14D Super Tomcat from the stash - both 1/72. I’m going to try to build them both together stage by stage (rather than build one and then the other). The Revell is better in detail as it’s a much later kit, but the Airfix one still has a certain charm to it - even with the raised panel lines which I’ve decided to leave to see how it turns out. So, the first stage was to build the two cockpit tubs. The Airfix one is much longer then the Revell and both have raised detailing in the some consoles in roughly the same depth. The ejection seats are worlds apart in detail, so I might see if I can 3D print something a little more interesting for the Airfix kit. Otherwise the offices are fairly well detailed considering….. Both tubs were painted with Tamiya XF-19 Light Grey (as it’s what I had to hand) and are drying off. They will both receive other colours to highlight the consoles and IP’s. I’ve also bought an extra set of Airfix F-14A decals which offers two options - TopHatters and the Black Aces - to go with the Bounty Hunter and Grim Reaper options for the kits.
- 44 replies
-
- 12
-
-
The Airfix Blenheim has been built a few times in BM and I previously built a both a MkI and a MkIV of 771 NAS based at RNAS Twatt. So a quick look in the stash revealed this one as well. I had laid down some paint previously but that’s all. I have some aftermarket, the masks are vital for the Blenheim’s glass house and turret, while I’ve got a selection of transfers. I’ll use the markings for 787 NAS the Naval Air Fighting Development Unit. I’ll add in some etch seat belts but otherwise OOB.
-
A third entry, and for me an iconic Baby Boomer, following the release of the film Goldfinger, the Corgi version of James Bond's Aston Martin DB5 became the must have toy back in the mid-60's. For this build I am using the 1/43 Airfix starter set version which should make up into a nice little representation of this classic Grand Tourer, by John L, on Flickr Here are the main sprues, by John L, on Flickr and the clear parts decals, paints and glue. by John L, on Flickr John.
- 19 replies
-
- 18
-
-
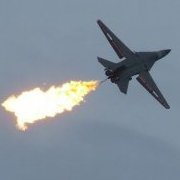
This is AK431, a workhorse from the North Africa campaign, based in Fayid, Egypt in 1943. With its battered, leaky exterior, this P-40 looks like the survivor of a tough environment. The Airfix Tomahawk is a nice kit - easy to build with a nicely detailed interior. I added a Master gunsight and replaced the pilot with the one I didn’t use from the Tamiya P-38, a well sculpted figure that deserved to be reassigned. Apart from an unfortunate Me-109 I mauled as a 10-year-old, this is the first desert scheme I’ve attempted in the second phase of my modeling career. Another first was attempting some riveting, as well as using Mission Model paints, which layer nicely when thinned down considerably. Forgive my amateur Photoshop experiment with getting this thing to fly. Well, under the circumstances, you’ve got to keep yourself entertained. Thanks for looking.
- 34 replies
-
- 62
-
-
-
I'd like to enter with this please; Bought a few years ago, along with the Airfix Curtiss Tomahawk, each costing me the princely sum of £2.49! The Mustang is my all time favourite aircraft, and many moons ago I built the Matchbox and Academy 1/72 P-51Ds, so it will be interesting to see what this much newer kit is like. It certainly looks nice upon initial inspection; Mine actually came with two sets of decals; This RAF scheme is nice, but its not how this one will be finished. Back in 1995, when I built the previous two Mustang kits, I had just started to get interested in the Eighth Air Force, and, whilst on holiday in Suffolk, had recently visited my first old airfield, which happened to be Leiston. Ever since then, Leiston has been a bit of a special place for me. Ended up visiting Hannants, and buying some Repli-Scale "Yoxford Boys" decals. The Matchbox kit was finished as "Old Crow", and the Academy as "Glamorous Glen III", which leaves me with these options: I'm thinking of going for "Missouri Armada". The decal instructions show this as an early model D, but I consulted this; There is a photo of Missouri Armada showing it with the fin fillet. The serial number given on the decal sheet (414709) is not amongst those listed at the rear of the book, however 414789 is, which is only 1 digit different. Using other numbers on the sheet, I can cobble together the right number for the model. Time to saddle up and get started!
-
I'd built the Airfix Valiant quite a while ago and it was interesting to note the advances made by the company in the 5 years or so between the two kits being released (2011 - 2016 according to Scalemates): a clear step up in refinement and build quality, which they've continued pretty much ever since. Next on the production line is the Vulcan so I'm looking forward to see how it stacks up against their much more recent releases. The size & shape of the Victor makes it hard to photograph, let alone display but I'm quite pleased with how it turned out. Thanks for looking, J.A.
- 19 replies
-
- 78
-
-
-
Another more recent completion of an old kit--this Airfix kit was from 1970 and I finished it in July of 2023. This may be the oldest kit I've built and there were no issues in the build quality. Unfortunately, one small piece was missing from the bag it came in (see if you can tell which one). I painted this in the pre-war Splittertarnmuster scheme using AK Real Colors' line (RLMs 61, 62 and 63 with 65 (1938) underside) The lines came out extremely smooth and better than I expected. No issues with the decals either, though this kit did not contain any swastikas for the tail. I don't have a place near me that sells these either (and shipping to Canada for anything is outrageously expensive), so I've left the space empty right now. Maybe one day I'll pick up a sheet of swastikas (there's a fun sentence) and throw a nice red banner on the tail. ----------------------------------------------------------------------------------------------------------------------------------------------------------------------------------------------------------------------------------------- he Hs 123, designed by the transportation company Henschel, was a German dive bomber and close air support biplane, used during the Spanish Civil War and much of the Second World War. Though originally intended as a dive bomber, the Hs 123 was overtaken quite early in this role by the Junkers Ju-87 Stuka, the latter having much better range, and larger bomb capacity. Due to this, the Hs 123 was transitioned into a close air support role, where it did quite well. Production was short-lived however in favour of the Stuka. The Hs 123 was used during the initial invasion of Poland where it could drop bombs very accurately, and the sound of its engine was apparently quite terrifying to hear (if the threat of being bombed wasn't enough, I suppose). It was considered a very effective aircraft and would be used by the Luftwaffe during the Blitzkrieg and later on the Eastern Front. Apparently Colonel-General Wolfram von Richthofen requested they be put back into production as late as 1943 due to their reliability in poor weather conditions which could ground more advanced aircraft.
-
 Hi folk's should be enought time to do another 1/48 build for this GB so instead of the common sense route of Tamiya's offering's I'll head back to Happy childhood days and Airfix's at the time much lauded release.KK have a dozen in stock so not sure which boxing will arrive if the decals are unusable AM will be bought.
- 44 replies
-
- 17
-
-
Well who doesn't like a bit of nostalgia. I got this kit last October from the Glasgow Model Show first time in three years it had been on and it was back to it's usual self I am glad to say. While the base work continues on York and in-between other small work to give my eyes a rest and something to build at the Local Model club this is my Thursday night relief. I have already assembled the hull and paddle wheels but the area around the aft cabin windows will need some attention to sort out the gaps and raise the details this will be a change from the old grey navy I normally build. The only thing that looks a bit tricky is the ratlines have to be made using a jig the old kits used to have a pre-fabricated stuff should be interesting I think we will see. Stay Safe beefy
-
 As I sit here waiting for the final bits of glue to dry on my 1/48 Gazelle, I have decided what the next project will be. I've gradually been assembling the bits I need, and I have a 4-5 week window without too much work, so can make a decent start as the Autumn draws on. If you follow aircraft WIPs, you might already know me from the Gazelle in the Helicopter 2 GB, and a long-running (and ongoing) 1/48 Barracuda III. But this will be my first ship since building the Airfix 1/600 Fearless about 45 years ago... This is going to be Ark Royal (5) as she was when I served in her in the late 80s, on my first front-line tour on Sea Kings (820 NAS). Based on the Airfix Illustrious, obviously, but there are quite a few differences to be adapted / reworked / scratched. In no particular order: - Different shape to the ramp; Ark's was built at 12 degrees right from the start, whereas the other 2 were modified, so Ark's was a different shape underneath as it faired into the hull; - Ark had Phalanx as her CIWS throughout her life, rather than Illustrious' Goalkeeper. I have acquired some Veteran Model 1/350 Phalanxes, so that's sorted - but I need to modify the sponson on the port quarter, which is not as deep as Lusty's; - Similarly the bow CIWS deck, and a much smaller one on the starboard side of the island; - The port quarter of the flight deck is a different shape; my Ark didn't have the "bulge" alongside 8 spot; - I have to reinstate the Sea Dart installation, which means completely re-working the starboard forward flight deck; no Spot 0, as in Lusty, different profile, visible fo'c's'le, capstans and other Fish-headery, DF aerial on a pole, rather than (as later in her life) up the mainmast; - Speaking of masts, the mainmast needs major rework to reinstate UAA1 and the 992 aerial, and lose 996; the mizzen is much smaller, without the large radome she acquired in her later life; - SCOT terminals further aft, just by the mizzen mast; - Two 909 domes to reinstate, though at least the superstructure beneath them doesn't appear to have changed much; - Different catwalks - the excellent WEM PE set includes the earlier catwalks, thank goodness - and Ark didn't have a stern catwalk at all at this stage; - A Cheverton in the port midships davit (just aft of the SRBOC sponson); - Different deck markings; I will be able to use some of Airfix's decals, but there will need to be some serious maskery later on in this build - at least the lines were all straight on the flight deck I knew, unlike these semi-circular things later on! - A few other more minor differences to do with 20mm placement, configuration of liferafts etc The CAG has been assembled; some extra Airfix aircraft sprues, 8 WEM Sea Harrier FRS1s, half a dozen Trumpeter Sea Kings a plus the WEM conversion kits, plus a couple of the WEM Air Group PE sets - the aim being to have 8 SHARs, 9 Sea King 5s, 3 AEWs & 2 HC 4s, which was what we carried for the trip to Australia in 1988. I know how I am going to do the HAS5s and the AEW2s; still working out how to get the HC4s right. So lots of work to do! I have made a start; the hangar deck is built, and I have cut off a) the stbd aft flight deck "bulge"; the forward area of the flight deck; c) the port aft CIWS sponson. I'm working from a lot of reference photos, a couple of books, plus the excellent Jecobin plans (suitably reduced in size to make them 1/350). More soon (including pics of the destruction); pull up a chair!
 -
 This is a fabulous kit by Airfix, very little filler needed and slots together really well. This particular Javelin was originally built as an FAW.7, and subsequently converted to FAW.9 standard before being one of the first pair of the latest version to be delivered to 25 squadron in December 1959. XH768 went on to serve with 11 Sqn after 25 disbanded and this airframe is now preserved in Italy (marked as XH707), having had a recent restoration: https://www.museoaviazione.com/en/gloster-javelin-faw-mk9-restoration-2021/ All comments and discussion welcome as always …
- 14 replies
-
- 35
-
-
-
Bit of a place holder as I am at the painting stage of a Soviet PE-2 in the WW2 twins GB and am just starting to build an EE Lightning in the Baby Boomers GB. I have never made a Mustang before, but it is probably my favourite WW2 US fighter, although I do have a bit of a thing for the Hellcat....... Will hopefully make a start on these in the next couple of weeks. George
-
This is my latest build, the 1/48 Sea King from Airfix. It took quite a while for this kit to arrive in Oz but it was worth the wait. It lives up to all the hype. The detail is very crisp and the fit is good. There are 4 versions to choose from and there is a bit of cutting, sanding and filling required to build the original HAS.1. This is understandable because the other 3 versions are very similar externally so there will be far fewer changes required in building those. The kit went together quite well. I only had 2 problems. The first was a missing piece from one of the Observer’s consoles. I think it may have been loose in one of the plastic bags when I threw them out, so my own fault. I scratch built a replacement which can’t be seen anyway. The other was a poorly moulded brace for the winch housing. I still managed to use it and it can hardly be noticed. It was built OOB except for poles and wires for the crew doors, home made seat belts and lambs wool seat covers. Painting was done with Tamiya acrylics and Vallejo Metal Colors. The main colour called for RAF Blue-Grey. I bought 2 brands of Blue-Grey, neither of which was any good. One was a pastel baby blue and the other was almost black. So, I made a custom mix of XF-18 Medium Blue and XF-17 Sea Blue in a 5:1 ratio. It was weathered with Dark Dirt wash and Abteilung Smoke for exhaust staining. The base is a piece of plywood painted as a section of HMS Eagle 1960's style on one side and 1950's on the other side. Cheers
- 13 replies
-
- 46
-
-
I had forgotten I had this. I have built a few Mustangs over the years starting with the original Airfix 1958 D release, followed by the Revell 1963 D version with the spurious red upper surface to the fuselage, and the Monogram B from 1967 with a Malcolm hood, which I may still have somewhere. I certainly have the Airfix B from 1978 and the Hasegawa D from 1978, and back in 2012 I picked up this new Airfix D which I may do in different markings, but more on that another time. Pete
-
While the weather continues to be unfavourable for gardening or hiking, and with no play to rehearse for, it seems there’s ample opportunity to start another kit. I’d considered a couple of others including the Kinetic Harrier T-bird and a crud n’ custard Zvezda Herc, but with two of these Javelins in the stash I fancied getting one on the shelves. The now familiar box. The moulding and finely engraved panel lines look excellent. Big colourful decal sheet. But will there be aftermarket alternatives? Of course there will! And reference material. The Jav is one of my favourites so got a few books to use. I’ll be doing it in the Xtradecal markings for 25 squadron, this aircraft, XH909/R based at RAF Waterbeach, Cambridgeshire in 1960-61.
- 38 replies
-
- 10
-
-
Hi All, Here is my second attempt at building a 1/48 Javelin. The first was using the Dynavector kit and on completion was handed over to the FAST museum in Farnborough and was last seen on display there. This one is using the excellent Airfix rendering which was a joy to build and a real test of masking skills! I purchased two sets of Master pitots and found the A Sqn decals in a Alleycat conversion set other decals came from the kit ones. Paints used were entirely Revell Aqua and finished off with a coat of Xtracrylics Satin Varnish. This aircraft was used for some time at Boscombe as as chase plane and was very accurately calibrated for airspeed readings. It came close to being written off when a new airframe fitter fitted a belly tank release catch the wrong way round so a lot of airframe had to be removed before the catch could be freed ( So I am told by one who was there). The full size airframe was retired to the Duxford museum. MODeller
- 18 replies
-
- 67
-
-
-
 Expected in Spring (May ?) 2024 - ref. A06023 - Boeing Chinook HC.1 Source: https://uk.airfix.com/products/boeing-chinook-hc1-a06023 V.P.
- 95 replies
-
- 23
-
-
-
Hi folks, After what has been a very protracted build, I present my attempt at the whatif He277B-1. The backstory was going to involve the DB610 engine being made to work, followed by German aspirations for something that could carry a heavier payload further than a He177. During the course of the build, I realised that the Airfix '177 cowlings were significantly smaller than those of the Revell kit. I therefore now think this was merely an attempt to reengine the '177 with smaller engines that actually worked. Backstory aside, here is my cut n shut, comprised of 2 Airfix He 177s, a butchered Revell He 177A-6 rear section of considerably reduced height and 2 upside down E-2C fins. Both fuse and wings have been extended and the armament system has been upgraded. Hope you like it: regards, Martin
- 12 replies
-
- 23
-
-
 Just completed this one today, my take on PO Jack Bartle's "Nan". This was a pretty fun build, not only my first ever Airfix P40/Tomahawk, but also my first ever RAF variant. The upper and lower cowl bits needed some fitting and filler, nothing terrible though. I broke the control stick, which seems to be a rite of passage with this kit. Some Tamiya extra thin got it whole again. Miraculously, I didn't knock off the gun barrels, antenna or pitot! Paints are Vallejo Model Air, decals are a mix of Eaglecals and the kit decals, and I added a Master external gun sight. The exhausts and 50 cal barrels were drilled out. I cut the seat down to a square back, added Eduard belts, scratched out the rear view mirror and gunsight in the cockpit, and added the bullet resistant panel behind the windscreen. I separated the canopy from the windscreen with a razor saw, wanting to position the canopy open. It fit fine, until the rear side glass was installed. I spent, at minimum, an hour last night with sanding sticks and polishing pads thinning the canopy from the inside so it sat in the open position better. Probably would have been easier to use a vacform canopy, but this turned out ok. Weathering was done with oils and Tamiya Weathering Master, and the brake lines were made from 32 gauge beading wire. I went for a dusty, but not battered look, which I attempted with Mission Models translucent dust, thinned, and sprayed from directly above. The effect is subtle and hard to photograph. I probably could have done a couple things better, but it will display fine. I wasn't satisfied with the exhaust staining, I toned it down with some gray after the photos were done. Thanks for looking in on this one, feedback is always welcome.
 -
Westland Sea King HAS.1/HAS.5/HU.5 (A11066) 1:48 Airfix The Sea King is one of the most enduring rotary-winged aircraft of the post-war period, the original Sikorsky SH-3 Sea King flying for the first time in 1959 under the company code S-61. Although no longer in production, the Sea King continues to serve with air arms around the world, including those of Canada, Germany, India, Ireland, Italy, Spain and the until recently, United Kingdom, although they still fly in private hands. The WS-61 built under license by the then British-owned Westland was substantially different from the American airframe though, powered by a pair of Rolls-Royce Gnome turboshaft engines, which were a development of a General Electric power-plant, so not entirely new. British air-sea warfare doctrine required other changes to equipment fit of the Westland built Sea Kings, which were further sub-divided depending on what tasks they were expected to undertake. The first British Sea King flew at the end of the 60s from the docks to Westlands to act as trials and patterning airframe, going into service first as Anti-Submarine HAS variants, and adding more capabilities as time went by. The HC4 Commando played a part in the Falklands War, alongside other marks that were transported into the islands aboard the ships of the Task Force, where one was lost, presumably due to a bird strike, with the crew and SAS passengers killed on what should have been a routine ship-to-ship trip, sadly. During the Gulf War conflicts, the Sea King was deployed again, providing important inter-ship transport facilities, although their AEW facilities weren't needed due to the blanket coverage provided by other assets. A further crash during Gulf War II highlighted the need for better night operations equipment, and throughout the type’s service, one constant has been change, with earlier variants often upgraded to the same standard as their replacement, which is evidenced by looking at the history of XV666, which started life as a HAS.1, was re-engineered as a HAS.5, and finished up as a HU.5, going through many livery changes, and changing operator into the bargain, as you’ll see later. Many Westland build airframes have been sold to overseas operators, including Norway, Australia, India, Pakistan and Belgium amongst others, and although the Sea King has been retired from operations with the British Armed Forces, they still fulfil a training role under the auspices of HeliOperations, training German crews to operate the Sea Kings that are still on charge with the Marinefliegerkommando. The Sea King remains in the skies of Britain thanks to Historic Helicopters, who have restored several airframes, some of which still fly. The launch event for this kit was held at their museum, but we were unable to attend due to my health, however Dale from Airfix has sent us out an advanced sample for review, so we’re only a little behind. The Kit As mentioned above, this new tooling was announced with a flurry and is currently all over the internet, having created quite a splash and for good reason. For years the choice of British Sea Kings has been poor, and the available tooling pretty old, so the large fanbase for this old girl has been wishing and hoping for a new kit for quite some time. Airfix did a good job of keeping it quiet that has paid dividends, and I expect the pre-orders to be massive, especially now the sprues have been seen around the internet. The kit arrives in a large red-themed box with great artwork on the front, and the decal options on one side. Inside are three bags containing seven sprues in grey styrene, a clear sprue, a long decal sheet, and a thick instruction booklet that has colour profiles slipped inside, printed on folded A3 glossy paper, with one side for each of the four options throughout XV666’s long career. Airfix have clearly put a lot of effort into the tooling, as evidenced by the detail that is visible on every part, of which there are an impressive 348. The exterior is covered in fine engraved panel lines and rivets, with lapped panels in places, and stiffener plates in raised relief where appropriate. The seats and cloth elements have folds and wrinkles to give them a more organic look, and the detail extends from the tip of the tail to the end of the nose, including masses of avionics and equipment boxes, much of which will remain visible thanks to some crisp-and-clear transparencies. There are also some parts that will remain on the sprues for as-yet unreleased options, which will be pleasing to those still waiting for their preferred mark. The good members of the forum have been discussing the ins and outs of the design and what can be achieved from the sprues in detail since the launch, so head over to the Rumourmonger thread if you need to update your Sea King knowledge, as we all need a little help at times, especially if you have my kind of memory. Construction should sensibly begin with choosing a decal option, as each livery of this single airframe comes with a different sensor and equipment fit, so you need to decide right away. The first four pages of instruction steps have you opening up the rotor head and drilling out many holes in the floor, lower fuselage, sides and roof, for which you will need drills of size 1.5mm, 1.1mm, and 0.8mm depending on which choice you have made, plus a little filler to hide some recesses in the lower fuselage near the nose and along the keel near the rear. It would be a sensible idea to cross through the diagrams you won’t be needing in advance to prevent any mistakes at this stage that could have you cursing yourself later. The real building starts with the interior, and is based upon the full-length floor with a step up into the cockpit, adding a nicely detailed bulkhead with a separate equipment box at the step-point, then building one side out with an equipment storage that slots into the floor and aligns on a ridge on the back of the bulkhead. On the other side of the hatch, a shallow step is placed on two holes to locate it, then the crew seats are built from a back that has a pair of front leg extensions and braces that support the seat pan, which has grooves moulded into it, and a rear pair of legs that are stiffened by the moulded-in brace, making it look a bit like a folding chair found in most schools. To keep the pilots’ bottoms comfy, an L-shaped seat cushion is laid into the completed seat, hiding those nice grooves. The seats fit into holes in the cockpit floor, and the leftmost one has a suitcase shaped box fitted to the rear, plus collective and cyclic sticks for both crew, and a pair of foot pedals for them toward the nose. The instrument panel is based on a T-shaped former, adding three detail skins to form the side of the centre console, and topping it off with an extremely busy central instrument panel, for which a decal is provided, the panel and decal choices differing slightly between options. The same is true of the main panel, which has a choice of coamings and panels, one having an additional centre panel over the main one, with decals to match. Your choice of centre console assembly is glued to the floor in the nose, and covered by the coaming and instrument panel assembly appropriate to your choice, then either one, two or three more seats are made in a similar manner for the rear crew, depending on variant, although these have a bottom rail instead of extra legs at the rear. The instrument housing and panel for the rear crew that are common to all variants is made next, with decals to depict the radar screen in active or off conditions, building into a well-detailed sub-assembly. Another console with more decals is made for two options, as is a winch mechanism, all similarly well-appointed, and the latter including the dipping sonar buoy that is suspended from the winch. Sadly, you can’t wind this one up and down by rotating the rotors like the old 1:72 kit I built as a kid. The sonar winch is fitted to a palette once complete, and a cowling is placed around the winch mechanism for safety’s sake, with the console butted up to it and set to one side while two equipment racks are built, one having a map of the UK and Ireland on the table below an instrument panel. The later decal options have passenger seats aplenty, starting with a three-seat set with separate backs, all of which have creases that show their canvas structure moulded-in, separated into seat and back cushion, and adding tubular legs underneath the front edge, as they can be folded away. Another longer run of seats for nine people is made in a similar manner with more legs that are shown in a scrap diagram below to prevent confusion, after which another raised rack is built with legs on one side for insertion next. The instructions show the early variant first, adding the radar and dipping sonar assemblies around the hole in the deck, fitting a rack to the front, and two seats to the rear, then placing the panel with the map behind the seats with another seat if you are portraying decal option B, plus a canvas bulkhead at the rear where the floor tapers. For the two later options, the radar unit and seat are fixed in place, with the long row of seats on the opposite side, and the shorter three seat set behind the operator’s chair, filling the space forward with the rack on legs. All decal options have the rear bulkhead fitted to a tab on the rear, although option A won’t be seen thanks to the fabric bulkhead further forward. The passenger compartment has an interior wall skin fixed to both sides, and there are a few ejector-pin marks that will need dealing with if you think they’ll be seen, and it’s almost certain that some of them will be obscured by the internal equipment. The port side has a stepped equipment rack glued onto a pair of ribs before closure, then the peculiar smooth fuselage assembly is completed by inserting a narrow ceiling strip where all the ejector-pin marks will be invisible. Three side windows are fitted to the fuselage halves, and an insert is added over a hole in the port side to give it depth before closure. You can pose the door open with this model, but if you have opted to close it, the door, window, and ladder insert are fitted at this stage, again on the port side. Before the fuselage can be closed around the interior, the exhausts must be made up from two halves, plus a tapered lip, fitted to a bulkhead with the lips facing outward and toward the rear, then slotted into the top of the interior without the use of glue. The port fuselage half is brought in first, locating on a pair of lugs near the centre of the lower edge, and mating with the exhaust bulkhead, as illustrated by a scrap diagram nearby. An insert is added to the open rear of the rotor cowling, then the starboard fuselage is brought in, locating in a similar manner, and allowing you to glue the whole assembly, dealing with the seams in your preferred manner. Option A has two rectangular recesses in the floor insert filled, and the skin for under the nose is different from the others, gluing the appropriate one in place at the front of the fuselage keel, then inserting a short tunnel under the floor of the fuselage before gluing the keel into position with or without the blanking plate for your chosen version. The rotor cowling is completed by installing a large insert over the rear of the hump, and adding a curved part to the front, both of which have fine mesh panels moulded-in, then the intakes are built, starting with a central divider that has the curved cowling glued to the top, after which the intake trumpets are inserted, their part numbers depending on which decal option you choose. The side cowlings are common, as is the panel at the top rear, each covered with detail, then behind the rotor, a choice of radome cowlings and bases is provided, and some spine details are removed for some options, flatting the area back to profile, which is best done before they are glued onto the model. Three options have an additional trunk applied down the port side of the tail, mounting on small lugs that correspond with recesses on the boom side. Returning to the front, there is a choice of nose cone for the decal options, two of which also have a small rectangle sanded flush on the port side, and a flashed-over 1.0mm hole drilled out from inside. The boxy interior of the main gear sponsons is created from roof and four sides, and the assembly is slotted into the outer half of the fairings, aided by a scrap diagram, then they are closed by fitting the other halves, one having an insert for a light in the rear floor, and both having inserts in the roof appropriate to their location, plus handed noses. The aerofoil sections that link them to airframe are similarly handed, and made from top and bottom parts, plugging into a recess in the inner faces of the sponsons. The diagonal support struts are made from two parts and are installed after the sponsons have been plugged into the fuselage on two pegs, nestling into recesses in the sponson and fuselage sides, with their correct orientation shown in overhead views. You can build your Sea King with the gear up or down, although as the wheels and struts are still visible in the bays, there’s not much work to be saved, but it’s your choice! The gear struts are adjusted at the top by removing the peg and a pivot point there, then adding tie-down lugs and oleo scissor-link at the lower end, fitting a pair of two-part wheels, one each side of the axle. The retraction mechanism is inserted flat into the bay roof, and the legs are inserted retracted into the bays, locating the main pivot on the support moulded into the front of the bay. For gear down, the legs are built in the same manner, without adjusting the tops, and using different shaped retraction inserts that have the strut projecting from the bay at an angle, as demonstrated by the scrap diagrams. The legs fit into a hole in front of the bay roof, locating the upper retraction arm in the pivot point, and the diagonal leg to the back of the lower end of the gear leg. The fixed tail-wheel is two parts, as is the strut and yoke, the wheel flex-fitting into position, and slotting into a hole in the stern of the fuselage’s keel. Another choice is ahead of you, allowing you to fold the tail of your model if you wish, cutting off a small tab on the two tail halves, as demonstrated in the scrap diagram. The two halves of the fin are glued together, inserting a mesh panel in the top, and the stabilising fin and rotor cowling on either side of the fin’s tip, with a choice of clear light added to the fairing on the fairing. The fairing is assembled from upper and lower half, trapping an axle between the halves before it is mated to the fin, which should allow it to rotate freely if you’re careful with the glue. The fin is completed by choosing the straight link between it and the boom, or adding the two open bulkheads on each side of the break, making for a strong connection between the two assemblies. We’re back at the nose again, glazing the canopy with two side sections and the combined windscreen/roof, which has an overhead console glued to the inside before it is installed. There are two windscreen parts, one with moulded-in windscreen wipers, the other without for those that want to take advantage of PE detail sets when they build their models. That’s rather considerate of the designers, especially as it isn’t even their concern. There are two choices of intake filters for this boxing, split between three of the decal options, the first of which is a simple deflector with fairing behind it, the second a sloped box that is built up from individual faces, and filters the air before it reaches the engines. Both types fit over the same portion of the roof, and are shown from the side in scrap diagrams to assist with placement. Two more side windows are installed, the port one having a choice of flat or blistered parts, while the larger one under the sponson support on the starboard side is flat and appropriate for all options. Two small landing lights are installed into recesses in the sponson supports, which is done with the model inverted. Now the fun begins. There are four pages devoted to the aerial fit for the decal options, one for each choice, so pick your fit and get started. This includes some items such as a crew step that were added during the type’s long career, as well as radar warning fairings as technology became available. When you come out of the other side of that, option D has a three-part FLIR infrared turret mounted on the fuselage side under the port sponson, depicted with the window closed. Three options have a SAR winch suspended over the large side door, the fairing formed by a single part into which the winch mechanism slots, while the two support arms are mounted on the inner side, fitting onto the transition between side and roof above the door. The door itself is a single part that accepts a window with radiused corners, and this can be posed open or closed, as can the door on the port side behind the cockpit. If you selected the closed option it was done early in the build, but for the open option, the door halves are detailed with a ladder in the lower part, and a window in the upper, gluing them to the top and bottom of the aperture, as shown in the scrap diagram. Whether you fit the fin folded or not, you have a choice of two types of rotor for the decal options, both of which have their own actuator crown in the centre, using the same parts for both folded or straight options. The main rotor can be posed folded or open and ready for flight, the instructions starting with the latter, building up the details of the rotor mechanism, then skewering it and the lower portion through the centre with the axle and adding actuators to each blade root. The spinner cap is glued over the centre for all options, the colour differing between them. To finish the main rotor, you have a choice of early blades for option A, and later blades for the other options, all of which fit to the blade roots in an overlapping half-joint for strength. To build a Sea King with folded blades, a different rotor-head is used, with the blade roots positioned accordingly, as are the detail parts, following the stages exactly, only ending with all the blades facing in the same general direction, except the two outer blades that splay outward a little. The last job is to glue the completed rotor into position in the cowling, although you could leave them loose for storage or transport. The only thing missing from the folded arrangement is the curiously shaped bracket that supports the weight of the blades near the end, but you could either make one from scratch or wait until the inevitable aftermarket support arrives from Eduard or someone else. Markings This first outing of the kit has a special set of markings that depict the career of an individual airframe with the tail code XV666, which was first ‘born’ in 1970, so is currently over 50. I know that feeling. Getting the nickname Damian was almost inevitable, but she’s far from an unlucky bird, having survived all these years and been upgraded numerous times over the years. There are four marking options from her career, and you can build her as one of the following: XV666 HAS.1 No.826 Naval Air Sqn., RNAS Culdrose, Cornwall, England, 1970 XV666 HAS.5 No.814 Naval Air Sqn., RNS Culdrose, Cornwall, England, 1988 XV666 HU.5 No.771 Naval Air Sqn., RNS Culdrose, Cornwall, England, 1995 XV666 HU.5, Heli-Operations, Portland, Dorset, England, 2022 Decals are by Cartograf, which is a guarantee of good registration, sharpness and colour density, with a thin gloss carrier film cut close to the printed areas. Decals for the exhaust hider patches, tail-rotor tips and tramlines on the main blades are included, as well as several decals for the flight and operations instruments that are all printed on clear backgrounds so you don’t need to match any colours. Conclusion I’m really sad to have missed the fun of the announcement the other Tuesday, but it was a sensible decision on my part, and it has been worth the few days wait to get our review sample in the mail. The detail is fabulous, the options well-researched, and the choice of depicting the career of this single aircraft in this first boxing was inspired. I can’t wait until everyone has the opportunity to lay their hands on one or more this summer, and then for the next boxing to fill more gaps. Extremely highly recommended. You can pre-order one or many from Airfix by visiting the link below, and set up a stock alert so you don’t have to wait behind the door to ambush the postie. Review sample courtesy of
-
Hi All, Happy Easter to one and all! Whilst I am waiting for a replacement kit for my DAF duo project, I thought I'd start another build! Inspired by @AliGauld's lovely 1;48 B25, I thought I'd have another crack at Auntie's lovely Mitchell II. This was one of my very first RFIs on this forum, a whole 5 years ago, so I thought it was about time to build another. As that build was one of the kit schemes, I thought this time I'd try something a little different, so I'm going to build this as a PRU version, specifically MA956 of 684 Sqn RAF: You will note that this is a single colour scheme, so I will have to try and add some texture! I was a little dubious regarding the scheme as presented above - an AVM flying on operations?? There is very little photographic evidence I can find of this scheme, but the legend Tony O'Toole did build one a few years back. Here's the scheme as presented on his thread (I believe it is a DK Decals sheet): That shows no mission tally, no AVM pennant, white centres to the roundel, and a serial in white - hmmmm! Any photographic evidence gratefully received, but at least I can paint it PRU blue. Interestingly this version of the scheme shows de-icing boots, whereas the other does not (I suspect the latter to be correct, and it will certainly add a little interest). So, here's the boxart: Here's the sprues: The lovely transparencies: The decals (stencils only will be used), along with obligatory mask set: In order to make a PRU version there are a couple of changes I shall need to make: - Fair over the astrodome behind the cockpit - Plunge mould a large astrodome in place of the dorsal turret - The ventral turret is faired over - The 3 cameras were mounted in the ventral turret location arranged in a lateral fan (one pointing downwards, two oblique), so appropriate holes will need to be drilled. I don't think the cameras will be at all visible so no point adding them. As I say, references are scarce for this one, so any information gratefully received! As the wife is infected with the spicy sneeze we will be laying low this weekend, so plenty of available bench time. There's always a silver lining,,, Thanks for looking, Roger
-
RAF English Electric Lightning F.2A, No. 19 Sqn. B (Wng. Cdr. R.K. Barcilon), November 1974, Gütersloh, Germany Another Airfix kit I built this year that did not disappoint. Huge chunk of an airplane represented nicely in 1:72 scale. Metal finish was tempting but I went with the green in the end. Built straight from the box apart from the seat ejection handles, seat harness & pitot tube. Painted with Vallejo acrylics and weathered with Ammo products and oil paints.
- 18 replies
-
- 57
-
-