Search the Community
Showing results for tags 'Airfix'.
-
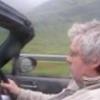
 In another post, someone asked about what our first models were – mine, via an assist, was an Airfix Do217 (‘red stripe’ box in those days) but it prompted me to dig out an old photograph that I remembered my Dad taking. A bit of a deception of course because the writing on the back says ‘1969, over the River Tay’! The picture was taken at the family home in Dundee with the River Tay just at the bottom of the road. The models were suspended on threads from the window frame. Hats off to Dad because he must have spent a bit of time in getting the angles right – looks like a beam attack from port in progress. (Wasn’t that the year that the film ‘The Battle of Britain’ was released?). I can remember him saying ‘Achtung, Spitfeur’ but he was of that ‘war generation’, after all! However, since I am getting going on modelling again and need a theme to really push me along, I thought I would re-do an Airfix Dornier Do217E-2 and a Supermarine Spitfire Mk.IX both in flight and try to re-create the scene in the black and white photo. I do have both of these kits in the stash so firstly re-lived the ecstasy of opening the red stripe Do217 box – look at that sky blue plastic! In the spirit of these things, I put together as much of the kit as I could, just pausing to paint in the engines in black and the crew areas in what I imagined to be a reasonable ‘cockpit green’. The general fit of everything is not too good and I remembered that some time ago, I saw the previous excellent builds ‘A brace of Airfix old timer Dornier 217's ‘ by Mottlemaster, September 11, 2013 in The Obsolete Kit Group Build (photobucket images now not visible) and this really made the penny drop as to the limitations of this kit – totally ignored in 1969. The ailerons had to be trimmed to be moveable and had sink marks – I’ll leave this as ‘battle damage’. The dorsal turret was a very tight fit in its mountings so much sanding and filing was required before I could rotate it easily without bending the protruding machine gun. So, when it came to putting the flight deck together, I raised it in the fuselage by adding in a couple of layers of corrugated cardboard – this Do217 had the thickest armour plating in the whole Luftwaffe! I positioned the seats slightly differently to bring the control column and instrument panel within reach of the pilot and to allow the seats to come up into the canopy space. Unfortunately, the pilot ended up sitting slightly ‘side-saddle’ as I wasn’t keen on taking a file to the insides of his legs, poor guy. Now that the crew is going to be visible, I gave them brown overalls and black boots (with a shine), varying the brown on helmets and life preservers. The detail of the crew is basic but I had a go at putting some silver on their large round goggles – hoping it will all look OK behind the canopies. Cut out the instrument panel fascia from the Instructions and fixed with PVA glue. Getting the propellers in place was a bit of a nightmare because I was determined that they were going to be able to rotate when subjected to a breeze when finished – they would not press together satisfactorily and the final fit was wobbly. The engine cowlings would not assemble to the nacelles without a great deal of sanding/filing down and all of the exhaust/flame dampers required a large dot of plastic removed from the top surface as well as flash removed. Some filing back of one side of the engine nacelles was also required to get a decent fit. The main undercarriage all went together and remained ‘retractable’ but the port wheel has an off-centre axle hole on one side and will need to be filled and re-drilled later. There are no bracing struts on this undercarriage so leaving them moveable will be dodgy unless I come up with a method of bracing. The undercarriage doors seemed to fit well once a little flash was removed so the idea sprung into my mind that I would try to have them ‘hinged’ in some manner so that the undercarriage could be stowed and the doors shut for ‘flight mode’. Grey duct tape was available and I was able to cut thin strips with my wallpaper scissors. The tailwheel doors will have to go flat against the formed well to be flush with the rear fuselage but I initially found this to be impossible because of the thickness (albeit slight) of the duct tape ‘hinges’. A bit of filing in the hinge positions with a small square file has sorted this out. The tailwheel is not a tight fit in the rear fuselage so when the rear wheel doors are open, I’ll need to keep the tailwheel in place with a blob of blue-tac – just re-created a ‘castoring’ tailwheel. After a couple of attempts at the main undercarriage doors and a little removal of flash, I managed to insert small strips of the duct tape and press in place in the hinge tab positions. It is a bit fiddly to close the doors and set them in place flush with the undersides of the engine nacelles but it can be done – I don’t plan on demonstrating this often! I think a blob of blue tac can be used as something to close against when the doors are shut and something to ‘lock’ the main undercarriage legs in the vertical when they are open. Dry fit of wings on fuselage - looks reasonable but a bit more sanding required. On with the painting…..
- 49 replies
-
- 7
-

-
- Do217E-2
- Spitfire Mk.IX
- (and 1 more)
-
BLACKBURN NA39 Holme on Spalding Moor, 1959 Nostalgia or what? I think I was about 11 or 12 when I first build one of these, having saved my pocket money to find the substantial sum of 4/6 before going into the local Woolies to buy one after school with great excitement. This one was built about 7 or 8 years ago but recently came out for dusting and a photo session. I kept most of the original working features apart from the silly retractable nosewheel (with fixed doors and fixed main gear!) In fact the undercarriage on this one is from the later Airfix Buccaneer S.2 kit. I went a step further and added working airbrakes – Airfix chickened out on this in their kit, presumably because of the complexity. I based the working airbrakes on an article in an old Scale Models magazine which I had intended to scan and post here, but I couldn’t find it! The folding wings lasted a bit longer this time around – back in the early 60s they suffered from too many carrier landings on the HMS Dining Room Table and needed repair after a day or two. Anyway it was enjoyable to build something with a bit of artistic licence for a change rather than bothering about scale and accuracy. Chris
- 23 replies
-
- 40
-
-

-
 Hi guys, I will be building the 1/48 Airfix Javelin. It is already started, but just. So it will be under the 25%. I have just started the cockpit and some parts are of the sprues, but noting more. It will be build out of the box. I might get me some seatbelts or some resin seats. I have also got a sheet from Xtradecals Javelin part 1 (X48-125). I think I will make the 5 Squadron Javelin. Pictures will follow later. Cheers
 -
G'day All, A question for those who have built Airfix's masterpiece, the 1/24 Typhoon kit. Do you think it would be possible to fit the cowlings over the complete engine (i.e. fully built engine for display) by thinning out the plastic of the cowlings in the areas where they interfere with the engine? I really can't decide which way I would like to build the kit. I love the complete shape of the Tiffie and would like to build it all closed up, but I also would love to build and display that wonderful engine detail as well. I've been toying with the idea of thinning out the cowlings and using small magnets to hold them in place so that I could have my cake and eat it to but, unfortunately, it would mean having to build the kit with the full engine detail (including building the magnets into the structure during the build), before I could get to a stage where I could see if the idea was practical or not. So, for those of you who have some experience with this beast, what do you think? Could the cowlings be thinned out enough in the areas where the detail gets in the way? (I'm not worried about any sort of realistic detail on the inside of the cowlings. I'd be fine with various divots etc where it was necessary). Thanks for any thoughts and advice. Cheers, Motty.
-
Hi Guys, I didn't finished this on time for the Made in Britain II GB. As I still wanted to show it to you guys I have placed the finished pictures here. Here are the pictures of my finished 1/48 Airfix Gloster Javelin FAW 9. The model was build OOB, exept for some decals. I used some decals from Xtradecal. I used the decals to make a plane from 5 squadron RAFG based at Geilenkirchen, West Germany. Cheers,
- 18 replies
-
- 31
-
-
-
Here my last one for 2013, the new-tool Airfix Gladiator modelled as the Chinese option from the new Xtradecal sheet: Aplogies for the poor pictures - I actually completed this on Christmas Eve, but today's had the best daylight since then! It's a bit depressing only getting 4-5 hours worth of good daylight this time of year! Mike.
-
Here's my latest completion, Airfix's new-tool Tiger Moth in RAAF colours. Paints are Humbrol throughout, H149 being used to represent Foliage green, the markings are from Xtradecals and represent an aircraft from No. 12 Local Air Supply Unit RAAF, Cape Wom, Wewak, New Guinea in 1945. On September 14, 1945 the commander of the Japanese 18th Army, Lt. General Hatazo Adachi was transported as a passenger in the forward cockpit of this aircraft. Piloted by Flying Officer T. L. Collier, it took off from Cape Wom airfield and was flown south to Kiarivu airfield where Adachi returned to his headquarters nearby. http://www.pacificwrecks.com/aircraft/dh82/A17-489.html I rather liked this kit, but I did end up braking the wing struts when I came to remove the "X" brace between them. This was intended as a quick build, so I didn't bother rigging or weathering it. Finally, here's a sneak peak of one of my current projects : As always, comments and criticism welcome! Mike.
- 10 replies
-
- 16
-
-

First completion for 2015 - Scarf's Blenheim
MikeR posted a topic in Ready for Inspection - Aircraft
Started last November and finally completed today! Airfix's new-tool Blenheim Mk I completed OOB, the only aftermarket used being Eduard's canopy mask for the kit. It's brush painted with Humbrol enamels (H29 and H116 uppers, H85 lower surface with H78 used for the interior), then glossed with Humbrol's Clear for decal application and finally matt coated with a Humbrol Rattlecan. There's also some light weathering as well, using various colours of paint. All in all, not that difficult to build, you just need to take your time and test fit prior to gluing anything. The nose glazing was fiddly, but not insurmountable if you put some thought into how your going to do it. I did have to resort to a touch of filler in that area. My only real complaint is the Eduard set - some of the window masks are a little too large compared with the detail as moulded by Airfix. Comments and feedback welcome! Mike.- 10 replies
-
- 13
-
-
Hi everyone, here's my last for the year; Focke-Wulf Fw 190F-8, W+526 of 102 csatarepülő-osztály, Magyar Királyi Honvéd Légierő (Royal Hungarian Home Defence Air Force), Kemenesszentpéter Airfield, January 1945. This is the new tool Airfix kit with some minor alterations to help the general look. These consist of the undercarriage oleos being shortened by about 1.5mm, the wing trailing edge has been sanded down to a more acceptable thickness and a Peil G.VI D/F loop sourced from a Revell Me 262 has been added to the lower fuselage. I managed to get the angle of the undercarriage legs wrong, but that was me and not the kit! Paint is Humbrol's new enamel RLM 71,74 and 75 with an old tin of Humbrol Authentic RLM 76 and Xtracolor RLM 02,04 and 66 enamels also being used. It's all hand painted with the fuselage mottling done with cotton buds. The lighter area on the tail is Humbrol Acrylic RLM 76 which is quite a bit lighter than the old Humbrol Authentic colour I used on the underside. As for the new Humbrol RLM colours... hmmm. A bit thin with the RLM 75 being the most awkward to use. The RLM 71 and 74 weren't too bad, but the acrylic RLM 76 behaved much better. Decals are from a Techmod sheet for Hungarian Fw 190's and I used Dénes Bernád's and György Punka's "Hungarian Fighter Colours 1930-1945 Volume 2" as reference. On to the pics: Here's a view of the spinner spiral - this is the first time I've hand painted one of these! As always, comments welcome! Mike.
-
I bought this just after it came out, earlier this year, but it has been sitting on the to do pile as a couple of modelling friends said it was a tricky build. Anyway I thought I'd give it bash and gosh what a surprise, it was a joy to put together. After last years Defiant, I thought Airfix could get no better but the Stuka literally clicked together. I used the merest smear of filler to repair a scar where I had been clumsy removing the part from the sprue and though there are ejector pin marks on the inside none are visible after assembly. I don't normally like to have my aircraft with their innards on display but the engine was so lively that I thought I'd give it a go. I don't know how the kit assembles with the cowlings in place of the engine but that's for the next one. I did have trouble fitting the rear bulkhead which did need a lot of sanding, I also have a large bag of spare parts, probably about as many as I used to finish the kit. I used some ROP decals to finish her as a machine of 8/St.G51 I've always wanted to do a Stuka in this scheme with the comet tail since reading a book on the aircraft of the Battle of Britain in about 1970!. I know the actual markings are dated for the French Campaign but thought it might till be carrying them later. I have built a number f Hasegawa B-2s and converted a couple to B-1s using resin conversions, but this is a class above those kits. I hope you see that I am very impressed with kit. Thanks for looking
-
As mentioned elsewhere, I have an affection for Supermarine’s ungainly, initially unloved (by the Air Ministry at least), Steam pigeon, the utilitarian but ultimately highly successful Walrus. I have tried several times over the years to build one in 1/72, but have run aground on the shores of the elderly models available. Although limited run kits have been around for a while, Airfix’s new release is the first mainstream model in this scale for many years (Did Frog once make one?) I have a family connection, albeit tenuous, in that my maternal grandfather was a pattern maker for Saunders Roe in Cowes, and while I have no definitive proof he worked on the Walrus, it’s a close enough connection to give this build added interest. The model is unstarted (since I only got it today and box shots will follow when I get home. In the meantime, a trawl of the IWM archives found a number of inspiring shots for reference. Feast your eyes on these until I have some actual modelling to report! AIRCRAFT OF THE ROYAL AIR FORCE 1939-1945: SUPERMARINE WALRUS. © IWM (MH 6866)IWM Non Commercial Licence AIRCRAFT OF THE ROYAL AIR FORCE 1939-1945: SUPERMARINE WALRUS.. © IWM (CH 18540)IWM Non Commercial Licence A SUPERMARINE WALRUS AIRPLANE TAKING OFF AT MERS-EL-KEBIR, WITH THE SS EMPRESS OF AUSTRALIA IN THE BACKGROUND. 20 JANUARY 1943, MERS-EL-KEBIR.. © IWM (A 14367)IWM Non Commercial Licence NORTH AFRICA - FLEET AIR ARM SUPERMARINE WALRUS KEEPS WATCH OVER HOSPITAL SHIP. FORCE H AT SEA AND IN HARBOUR, 12 TO 14 JANUARY 1943, AT SEA AND AT MERS-EL-KEBIR.. © IWM (A 14168)IWM Non Commercial Licence Especially for Ced – ITMA! "ITMA" IN THE AIR; TOMMY HANDLEY & PHT VISIT FLEET AIR ARM. 14 JANUARY 1944, ROYAL NAVAL AIR STATION TWATT. TOMMY HANDLEY AND THE MEMBERS OF HIS "ITMA" COMPANY HAVE MADE A SIX DAYS TOUR OF THE HOME FLEET AND NAVAL AIR STATIONS IN THE NORTH.. © IWM (A 21446)IWM Non Commercial Licence "ITMA" IN THE AIR; TOMMY HANDLEY & PHT VISIT FLEET AIR ARM. 14 JANUARY 1944, ROYAL NAVAL AIR STATION TWATT. TOMMY HANDLEY AND THE MEMBERS OF HIS "ITMA" COMPANY HAVE MADE A SIX DAYS TOUR OF THE HOME FLEET AND NAVAL AIR STATIONS IN THE NORTH.. © IWM (A 21444)IWM Non Commercial Licence AIRCRAFT OF THE ROYAL AIR FORCE 1939-1945: SUPERMARINE WALRUS.. © IWM (CH 9027)IWM Non Commercial Licence THE ROYAL NAVY DURING THE SECOND WORLD WAR. © IWM (A 20690)IWM Non Commercial Licence The last two images suggest how I have in mind to display the aircraft, if I can contrive a convincing water effect base.
- 49 replies
-
- 10
-
-
Hi all, I am looking to build one of the three sea gladiators that was involved with the defence of Malta, I have looked at multiple reference photos and they have three bladed props rather than the two bladed prop seen in the Airfix kit. They also have arrestor hooks but I am not sure these were present of the Malta gladiators, If I can get any info on a conversion set or something similar that would be greatly appreciated. -Cam
-
 After nearly 2 years in build, I'm calling it done. Here's a couple of photos. Base kit was the Airfix Mk XIX but with grafted-on Seafire Mk46 wings. Build/conversion can be found here - Work In Progress. There's also a copy of the write-up published on my website - Vexillum Militaris It's not quite what I was hoping for. Lots of room to improve (there always is!). Paul. Supermarine Spitfire Type 356, Spitfire F Mk 21 of 600 Squadron (County of London) RAuxAF, Biggin Hill, 1947. Almost 100% Airfix. (If only they'd produce and decent Mk XIV/XVIII). [Ed: Ha! Which they now do! Released in 2019... https://www.scalemates.com/kits/airfix-a05135-supermarine-spitfire-fr-mkxiv--1168098]
- 33 replies
-
- 62
-
-
-
I'm going to start with this, despite all my previous thoughts. It's an old kit, early 60's I think. The plastic doesn't look too bad but apart from a basic seat and pilot there's no interior. The wings need trimmed but the instructions do show this. The airframe is well riveted in vintage Airfix style, but I believe that the outer wing panels should be fabric, so I'll attend to that and put some basics in the cockpit but apart from that it will be straight from the box. more later.
-
 The long awaited Airfix Supermarine Walrus Mk.I Model Kit has just been released and is now available. Place your orders now for this excellent model of Supermarine's distinctive, amphibious biplane reconnaissance aircraft.
 -
New tool Airfix 1/48 Stuka B-1 finished as an Italian R-2 captured/stolen by the RAF in 1941. The B-2/R-2 propellor, exhausts, and bomb rack are all in the B-1 box. The B-2 engine cowls though are not, which is why they aren't on the model The guns were removed from the captured aircraft, so the wing gun fairings were drilled out to remove the barrels, and the mount and ammunition cans left out of the rear cockpit. Decals by LF Models (which turned out to be a little too thin, I'd probably paint the white cross on the tail if I did this again), and some of the more prominent piping added to the engine with solder. The kit is mostly brilliantly engineered (there are poorly placed sprue gates and ejector pin marks in a couple of places, and a few sink marks) and is one of the best fitting kits I've ever built. There are a couple of missing instructions though. There is no instruction to add the rear gunners back support strap despite it being included as a part and shown fitted, and there is no guidance at all on fitting the bomb cradle with the cowls off. Aside from those minor criticisms it was a really enjoyable build.
- 24 replies
-
- 52
-
-
-
Not sure if this is really fit for an RFI but... Bought the kit "slightly started" and "all parts believed to be there". Understatement on both counts. tail wheel, gear doors (4 parts out of 6) missing. Fuselage glued along with (seriously) bent tail. Wheel hubs missing. wings glued...oh the bullet type shape aft of the tail just gone. And broken arrestor hook... Anyway, for 7 quid you takes your chances. And I forgot to chop of 4.2mm from the wing tips so this is in effect an FAA machine in RNZAF wings..... Ho hum.... For some reason it would NOT take a wash (oil or MIG) - think it may be down to a very skimpy application of the gloss coat.... Still - I'll hide it at the back of the shelf - only swmbo and the dogs look at it - and I've already told the dogs that's how an FAA corsair SHOULD look..... (PS the paint around the canopy is still drying - honest!)
- 10 replies
-
- 22
-
-
 Hi all Having spent many an hour browsing through the top quality and thoroughly inspiring builds on display on Britmodeller, I thought I would take the plunge and share my recently completed Airfix 1/350 scale Trafalgar class submarine, HMS Tireless. I converted this to a waterline display, which took a little fettling to get right (well, to my eyes anyway ). The sea base was made by following the technique of another Britmodeller member (Thanks to Swordfish Fairey), which utilised an A4 photo frame stippled with Vallejo "water effects" and then some "Foam snow" for the white water. Many thanks.
- 25 replies
-
- 27
-
-
 After throughly enjoying the first Made in Britain GB, I'm back for the sequel. I have the Gloster Gladiator mk1 starter set to build, just waiting on eduard etch to arrive. The starter set is purely to help me as the new man cave is not ready to use, in fact everything is still packed from the house move. Having trouble finding my modelling supplies. I have a kitchen pass for Saturday, free use of the table all day, so hope to make some good progress. Photos to follow soon.
 -
 I realise I've already got a diorama and a plane as works in progress but they've both gotten to a point where I need to go top up my paint supplies. So... I've dragged another kit out The intention was to just make it as it comes but first steps have been to: - Steal some suitable pilots from the spares box and fashion sprue ejection handles - Section off a bit of nose to hold some ballast - Download pictures of the underbelly tanks to try and scratch them - Order a fresh batch of other potential distractions
 -
Hi I succumbed to the recent Airfix 17 Pounder for a fiver offer. I scratch built one of these in 1/72 in the 1970s and have a soft spot for it. The latest issue box: The crew is I believe the Airfix multipose Airfix infantry set: the gun is on three sprues: It's not a great moulding - loads of sink marks, distortion and flash. I spent this afternoon making up sub assemblies. The parts needed a fair bit of preparation before assembly, and I see a fair bit of filling and sanding in my future too. It's quite frustrating - all the rectangular parts are slightly trapezoidal to aid mould release. The multipose figures are well modelled, and someone at Airfix took some trouble to suggest how to assemble them to look more like a gun crew. They will need more work to look convincing. But it's a 200+ part kit fof a subject I like for a fiver! Thanks for looking, Adrian
-
Alright I'm in with a second build for this one, could be a risky proposition as quite often I don't finish one build in the time let alone two! I'm doing the old Airfix Sopwith Pup in 1/72. Picked it up for $5 on Ebay, only slightly more than the 99c price tag still on it. Lovely little kit, will be adding details, either scratch build or spares box. I would love Airfix to update this but not sure that would happen in the near future, HR do a very nice looking tool of the Pup in 1/72, it's little pricey and not very common on this side of the pond. Anyway, I have the warpaint book, Pheon decals set and the Wingnut Wings instruction sheet, one of the best references out there I think! Cheers
- 15 replies
-
- 6
-
-
- airfix
- sopwith pup
- (and 1 more)
-
Friend of mine has started building the Airfix 1/48 Gnat. He is very puzzled by one of the parts, no.1, which doesn't appear anywhere in the instructions. I have had a look at it myself, but it still remains a mystery to both of us. Any answer out there? TIA
-
Afternoon all, I've just finished the Airfix 1/24th. Typhoon, which I purchased at Perth this year for the princely sum of £50. Here's some pictures for you to gawp/marvel/laugh (delete as appropriate) at. IMG_1549 by simon_rw, on Flickr IMG_1550 by simon_rw, on Flickr IMG_1551 by simon_rw, on Flickr IMG_1552 by simon_rw, on Flickr Thanks for looking!
-
 Hi all! Been some time since my last creation, but finally found time to complete this: I built the older version of the kit some time ago, which I thought was pretty good. This has more detail, particularly in the cockpit. Let me know what you guys think!