Search the Community
Showing results for tags '75th Anniversary'.
-
U.S Air Force 75th Anniversary Carrera Revell 1:72 (05670) The USAF was formed as a separate branch of the US Military after WWII under the National Security act of 1947. Previously it had been the US Army Air Force. This set from Revell has been brought out to celebrate the 75th Anniversary of the USAF and features three different aircraft from its history, the F-89 Scorpion, F-16 Fighting Falcon, and F-117A Nighthawk. Some paints, glue and a paint brush are also included in the box. The F-89 Scorpion. This is Revell's own tool kit from 1991 which has stayed in the catalogue ever since with a fair number of releases. This is a modern tool with recessed panel lines, this time offered in a silver/grey plastic. The moulds have held up very well with no flash or other issues. The kit can either be built as a D model or a J model, however only J model decals are provided in this set, Construction starts in the cockpit with the right panels being selected for the J model. Instrument and side panel details are provided as decals. The ejection seats are then built up and added into the cockpit tub, these were quite basic seats back in the day and Revell have replicated them very well in this scale. The instrument panels and control sticks can then go it. The cockpit can then be inserted into the main fuselage halves with an engine front piece also going in before the fuselage can be closed up. Underneath the main fuselage a large insert goes in, and at the front this is followed by the intakes. To finish up this work on the fuselage the exhausts are assembled and added. Next we move onto the wings with are conventional left/right, upper/lower configuartation. The appropriate holes for pylons etc need to be made before closing the wings up. The wings and tail surfaces can then be attached to the main fuselage. The nose cap, and rear air scoops are then added to the fuselage. The modeller now moves to the undercarriage. The twin nose wheel is assembled and added to the front along with the twin nose gear doors. A large single main wheel fits to each wing along with its retraction strut. The main bay gear doors are then fitted. The appropriate wing tip tanks, and underwing pylons then go on, along with armament if wanted. Genie rockets and Falcon missiles are provided. To finish off the canopies are applied. The F-16 Here Revell have re-released their own tool kit which traces it's history back to 2000. Construction starts in the cockpit which has a 3 part seat, side controllers and an instrument panel with the details provided as decals. A pilot figures is supplied if the modeller wants to use it. The completed cockpit is the then installed into the upper front fuselage part. Moving to the lower fuselage the main wheel bay is built up and added. We then can assemble the main fuselage with the main and front top sections being joined to the lower one. At the front of the fuselage the main engine intake is assembled and joined on, and at the rear the exhaust nozzle is also added, with the tailplanes, ventral fins and e arrestor hook following. Flipping back to the nose the nose cone and front bird slicer IFF antennas go on. Work now moves to the undercarriage. The main gear legs and their retraction struts go in, these are followed by the main gear doors and the wheels. At the front the nose gear leg and its retraction strut are added along with the nose well bay door. To finish off the model a variety of small airframe fittings such as pitot tubes, nav lights blade antennas are added. If the canopy is to be posed open then the strut to open it needs to be fixed in to the frame in the middle of the canopy. Pylons can be added. A wide array of stores are provided with this kit, however most of them won't be used The F-1117A Here Revell have re-released their own tool kit from the early 90's. The shape and the angles of the Nighthawk seem to be well captured by the kit. In a break to most kits where the canopy is the last thing on, here it is the first with the canopy being fitted inside the top fuselage part. Next up more conventionally we move to the cockpit. The tub is one large part with everything including the ejection seat being moulded in. A pilot figure is supplied if the modeller wishes to use it. The cockpit is then fitted into the upper fuselage half. With the heavily framed canopy not much will be seen inside. Next up to the lower fuselage part the large internal bomb bay piece is added. Now that essentially both fuselage parts are complete the wings can be assembled and added to the lower fuselage. Large tabs hold these in place, The fuselage parts can be joined and the V tail added. Next up the front and main landing gears are made up and added into the aircraft along with the gear bay doors. The model only offers the option to have the weapons bay door open with the weapons deployed. If these were wanted to be closed then the kit parts would have to be cut up. If fitting the weapons then the two main doors attach to the central bulkhead for the weapons bay. Trapeze launchers are provided for the two LGBs provided. Decals The large decal sheet is printed by Cartograf so there should be no issues with it. Markings are provided as follows; F-16 90-829 52nd FW, 22nd FS Spangdahlem, Germany 91-362365th FW, 366th FS, Mountain Home AFB F-117A 680-0788 49th FW, Holloman AFB 2006 F-89J 22143 61st FIS Ernest Harmon AFB, New Fiundland 1957 32470 59th FIS Goose Bay AFB, Labrador 1857 Conclusion This is great set of kits to celebrate this anniversary for the USAF, Recommended. Carrera Revell model kits are available from all good toy and model retailers. For further information visit or
-
Happy new year guys, read an article on Bodenplatte earlier thought it would be a cool topic for a GB, having said that stevehnz suggested to make it A Battle of the Bulge 75th Anniversary GB, which I think is a good idea and it gives the GB a broader appeal. Some interest now with: Blitz23 (myself) Brad Corsairfoxfouruncle jrlx Ozzy TEMPESTMK5 franky boy Valkyrie Arniec Sabre_days stevehnz SimonT modelling minion Plastix Badder Atom.uk SleeperService Cookenbacher nimrod54 Hockeyboy76
- 71 replies
-
- 4
-

-
- Battle of the Bulge
- 75th Anniversary
-
(and 1 more)
Tagged with:
-
Today marks the 71st anniversary of the end of the Battle of Midway. As with my post of yesterday commemorating the Normandy landings; let us remember and honor the men and women who made the victory possible(Dennis the Bear mentioned the people behind the victory(factories, etc.), as well. That goes for this one, too.).
-
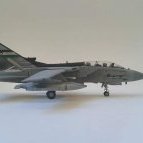
Hi everyone, and welcome to my first ever WIP thread. Its a return to modelling, after making and painting in a day or two - about 25 years ago! I am not going to make any apologies, but this is probably going to have a lot of photos in the thread, not only to document my progress as a first proper project, but also to allow myself to keep a record to identify areas I can improve upon, and develop further for future builds. So, onto the first details, the obligatory (from perusing the forum) box and sprue picture: Excuse the picture quality, I am going to blame photobucket for that. I am going to do an out of the box build on this, as its mainly, hopefully, a bit of a test run for doing my next project. Therefore this will be painted up in the colours as per the instructions, and decals will be the provided 27 Squadron 75th Anniversary markings
- 54 replies
-
- 1
-


