Search the Community
Showing results for tags '3D print'.
-
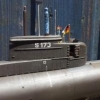
The very first Kliment Voroshilov tank, tested in the winter war of 1939-40 on one of my usual mini vignette bases.
-
Evening all, A Quick and dirty paint job of a free 3D print from Thingiverse, done during my lunch half hours, 4 in total, all painted in Scale 75 Acrylics and FW inks Thanks for looking Sean
-
 EL-5A Mouse Droid 1/12 3D Print I've recently bought a 3D printer (Elegoo Mars Pro), and have been slowly finding my feet with that and Fusion 360. I wanted something fairly simple as an initial print, and there's very little that's simpler than Nigel. He objected to a digital doppelganger though, so this initial print has become EL-5A who's now betrothed to Nigel in some kind of weird mouse droid arranged marriage. The print came out fairly well, although there are some things I need to tweak, both with the printing and with the original file. The upper body was done at 0.05mm layer hight, while everything else was done at 0.025mm, and there's a marked difference as you'd expect, so I'll be trying the body again at the higher rez. The one thing I wasn't sure would come out okay was the top greebles. I didn't know if my design would be beyond the printer's capabilities. As it turned out, they printed fine and are the bits of this model I'm most pleased with. They certainly showed just what the printer is capable of. She's not as heavily weathered as Nigel, which seemed only fair, and she's had the white stripes to reference her name and her status as the future bride of Nigel. Since I'd got the basic file for the body, I also printed up two more without the side panel details, so I could make up the Mouse train that was originaly envisaged for ANH, but never used on screen due to the unpredictability and general uselessness of all Mouse Droids. EL-5A, being an all-round better class of rodent, can handle them easily. Thanks for looking Andy
 -
I thought I would share some progress on a current side project... First I should explain that as co-designer of a prototype Human Mk 1 – currently at early testing stages, a long way off even taxiing, mainly focussed on the exhaust system at present – I am limited to 10 minute essential dashes into the attic, so my conventional modelling is basically on hold. However between 5.30 and 7.30am I do have a window where I can combine infant care with some laptop action, and have been developing some planes on CAD for DLP resin printing. I find it strange that there are not more single engine GA aircraft available in kit form in 1:72. Yes you can get things like the Bulldog or Chipmunk, but even the Cessna 172 I think is limited to one hard to find resin issue. I guess that the people that dig these planes are those that fly them, and have neither the time nor the inclination to bother with them in model form. But they are such ubiquitous aircraft, and fly over us all the time. I’ve been tinkering with quite a few, but here is the Grumman AA-5 Traveler: Because of the print area of machines like the Elegoo Mars, my trusty steed, these sizes of planes work well, anything bigger would have to be highly modular. In this case, I can break it down into fuselage, wings, prop and wheels. As a print, I am quite pleased. The resin is standard Elegoo grey, printed in 0.02mm layers with a 8 sec per layer exposure. The layer lines are still visible, of course, but not nearly as obvious as they would be with FDM printing: The fuselage is printed with supports on the bottom, which will obligate some finishing work: The wings are printed standing on their end – this makes the print rather tall, and long (ca. 14 hours) but means the finish is better. That said, the mating surface is not quite square, so there may be some sagging going on: Details can be done, but as a lessons learnt prototype, I will resolve to increase the size of panel lines, as these luggage doors barely register and will disappear with sanding: Also, I have printed the horizontal stabilisers and fuselage as one, but there seems to be a tendency for these to warp (I have seen this on other models), so will probably benefit from separation: There is also the matter of transparencies. I have been trying to print these too, using Monocure clear resin. These of course have layer lines too, which is not ideal for transparency. This isn't from the Traveler, but shows a part straight out of the printer after clean up with IPA: One possible solution is to brush with extra resin and expose to more UV (a nail gel lamp): A smoother finish, but some manual polishing will definitely be required. I am comforted however by a Mach 2 clear part I have to hand – I am just about at Mach 2 clarity! Also, I think those lumps in the surface are doobreys that found there way onto the part, so general modelling hygiene is a must. As I say, I'm working on a few, really as a learning curve. Here is a Cessna 152 (yes I know there's a resin kit on the way!) All in all, exciting experimentations with learning points and a bit of an insight into the realities for those that actually design proper model kits. My hat is permanently doffed in their general direction! Circumstances dictate that I probably won't be sprinting to a quick RFI (poor form for a 9cm long model!) but I hope some of the above is of interest. There'll certainly be a reprint so if any eagle eyed Grumman afficianados spot any doosies do let me know, I am aware the top of the cowling is too flat. All best, Harry
-
I have been pondering this whole drydock idea for quite a while now, so this is as much a KUTA for me as it is a build blog. It won't be fast: I'm back at work, and that means little free time for a while, but I'll keep working on it whenever I can. So the specifics: I have a Tamiya 1/350 KGV with a Big Ed PE kit (so much brass!), and thanks to fellow member and all-round good mate AndyP, I now have a Trumpeter Warspite to play with. Originally I planned just to have the King George in Drydock, looking all messy and tired at the end of a long spell at sea. All of the buildings and fittings will be 3D printed with FDM being used for large components and resin for the small stuff. With the addition of Warspite, I have decided to make it a bigger diorama, so I now need to make a sea wall on the outside, so much 3d sculpting will be needed for that, so ZBrush will become my friend in the near future... So here's where we are so far. kuta_render by DaTinz, on Flickr dock_render by DaTinz, on Flickr The models were made in 3ds Max. I usually use Maya, but I tend to get better quality STL exports from Max. I am not using Fusion because I usually need an in-built UV map what will literally allow me to sculpt detail into the surface, so bricks, rivets, etc. The components were modelled seperately, with the main dock structure being printed on my trusty Anycubic Mega-S, and the stair sections on my Photon resin printer. An Ikea picture frame made the ultimate sacrifice for the base, and I got my print on! boat2 (2) by DaTinz, on Flickr boat3 by DaTinz, on Flickr As you can see the print process wasn't entirely successful, but it works for me. I slapped some paint on and have put a really grungy wash on the surface ( don't worry, I will tidy it up a bit!) Here's the layout as planned: boat1 (2) by DaTinz, on Flickr boat4 (2) by DaTinz, on Flickr I have already started on the KGV, but she's been through a couple of moves, so she's a bit the worse for wear. Some of the railings have been crushed, so I will have to either print replacements or but some new railing PE. Also, the deck is lifting, so I may bite the bullet and remove it, clean up underneath it, and put a new one down. None of the superstructure is glued down, so disassembly will be easy. So that's where we are at right now. And yes, the steps really are that tiny. steps by DaTinz, on Flickr
-
here you find a very interesting topic: from Iceman 29
-
As per: Built as the ill fated WG236 using a donated 1/72 Novo FAW2 Sea Vixen revised by reshaping the cockpit, 3D printing a new nose, fuselage plug and parts of the booms. Few odds and sods of sanding, reshaping and scratching elsewhere. Decals cobbled together from spares
- 10 replies
-
- 16
-

-
Squirrelled away in the “They also serve” GB but repeating myself here as it is too interesting an oddity to not share widely Drawn in Fusion 360, printed in sections on Creality Ender 3 Pro and finished in a what-if scheme. Looking like something even Burt Rutan would consider a bit of a stretch
-
“If you wish to make an apple pie from scratch you must first invent the universe” so... starting from a couple of 3 view drawings and b&w artist’s impressions let’s see where they lead us
- 32 replies
-
- 2
-
-
- 3d print
- proposed /cancelled project
- (and 1 more)
-
Just a test run of a basic model so the decals are all from spares and I’ve left the serial off rather than waste my stock on a first try Designed in Fusion 360 and 3D printed
-
My brother is a huge Star Wars fan and quite an accomplished cosplay crafter as well. For his 47th birthday, I'm creating a small First Order Stormtrooper bust for him. Since I'm still learning how to sculpt in Zbrush, I purchased a 3D model online and will be modifying it into a customized 3D printed model. The model I purchased features a classical sculptural base. It looks nice, but I have an idea for a base that features the First Order emblem. First, I created the base in my favorite NURBS modeler and added a 1cm hole in the center. The Aurubesh text is my brother's name and age. Next I turned to customizing the model in Zbrush. First, I trimmed off the original cylindrical base and add a 1cm wide post. The space between the helmet and the torso is pretty tight, so I separated the geometry at the neck and add a mounting post with a matching recess in the helmet. I tried to align the separation between the folds of the neck piece as best I could. Then I imported my custom base and checked the alignment digitally. Next, I sent the geometry to my Form 2 SLA printer and waited for nine hours for the print to complete. After an isopropyl alcohol bath to remove residual resin, the model parts were ready. Here are the parts still attached to their printing supports. I did a little clean up of the parts and put them together for quick test fit. Surfaces that have a gradual slope that ends in a horizontal surface tend to have faint stair step lines from the printing process, in this case they were 0.05mm layers for the model. The sanded portion on the top of the helm is where I lightly sanded the layer lines away. In the photo below, the horizontal lines that are visible are actually completely smooth. I'll be performing additional sanding and clean up in the morning, then onto priming and painting.
-
So I actually managed to make a start in my 3D printed lightsaber hilt today Today was spent disassembling, a little filing and dry fitting. Everything does already fit together, but not massively well so I’m cleaning all of the join points. the calculator ‘bubblestrip’ is Especially problematic, I need to lose a good 2mm from the overall width as well as around half a mm from the thickness. The plan is that mask all of he joins and then give it a good couple of coats of high build primer from Halfrauds before an eternity of rubbing down and wet flatting before I really start to do things properly. Still can’t decide if I’m going to build this as a rusty relic, used or mint condition. I think I’m going to settle on it having had some use (because I’m not yet able to do rust effects etc to a level I am happy with).
-
I'm finished with moving into my new modelling room, so I can now finally join in with this GB! My project for this group build will be using an old Dragon Kugelblitz kit from 1999. The Kugelblitz turret from this kit however has been earmarked for another build (Flakpanzer E-25) so I'll be using the leftover hull along with new 3D printed parts to make a Panzer IV Ausf.K. In 1943 during the development of the Ausf.H Krupp proposed changing the Panzer IV's hull to a new sloped armour layout. This change would have required production to stop while factories re-tooled for the new design, this came at a time when production of the Panzer IV had been ordered to increase though so the new design was cancelled & the Ausf.H instead only received minor upgrades. Krupp also proposed a new simplified turret design for the Panzer IV in 1944 that would have greatly decreased the the time & resources needed for production while increasing protection. Production of the Panzer IV was ordered to be stopped though, with only the Jagdpanzer IV continuing so development of this new turret was cancelled. The combination of Krupp's Ausf.H sloped hull & simplified turret is what is known as the Ausf.K, which is an unofficial "what-if" name used to help differentiate this design from the other Panzer IV variants. Before I start work on the kit I first have to design the the new parts for the conversion & 3D print them, so it might be a few days before the next update.
-
About a year ago, I backed a crowd-funded 3D printer/laser cutter/CNC mill on a crowdfunding website. Mine arrived on Saturday and I’ve been learning how to make the 3D printer work. The test print? A Space Marine! Thanks to Thingiverse, I was able to find a suitable candidate & scale it. Progress so far: Only a 30-hour print!
-
 Looks like I’ll be doing an accidental companion build to @Enzo Matrix‘s Saturn V with my focus being on the splashdown/recovery. Old 66 Sea King & the module I’m armed with Airfix HAR 3 Sea King to be guddled about with as per the excellent Tailhook resource and have been playing with tinkercad to get a splashdown module which I’m currently planning to 3D print at my local library
 -
 Hi, We are in the process of putting together a kickstarter for a collectible kit and/or miniature for tabletop gaming. We are here to get you guys involved and give us some useful feedback on these our first pass ideas at a Mecha/Vehicle Our initial aim is to produce a 3D printed kit, modular build, with a range of accessories, weapons, add-ons etc to make your choice as customizable as possible. At this stage we haven't decided on 15mm or 28mm, but we would like to go as large as we could to carry across some serious detailing in the print Attached are our first passes; very loose ideas, and we would appreciate opinions and feedback from you guys as to which you find the most appealing.. which aren't and why ? Are we swimming against the tide by not going for the standard Mechwarrior blocky design or are you guys crying out for something a bit more steampunk, outlandish and exotic?
.thumb.jpg.3c5b41eb004e624ff9bdf837868ecbb6.jpg)