Search the Community
Showing results for tags '3D print'.
-
Hello everyone, My latest WiP will be a model of a TACR2 fire tender in 1:35 scale. It is a 3D printed kit and is produced by Pete at PHD Designs. RNAS Yeovilton 1986 cheers, Mike
-
Finally got this guy through the post! Been looking forward to getting this started, and this is a monster from the Flesh of Gods series of 3D printed miniatures and as such the scale is slightly misleading because he's pretty big compared to a human! IMG_20240309_192150478 by Nick Frost, on Flickr The good thing is as its bigger in size it actually has a much more detailed base than the other 3D printed figures I've done IMG_20240309_193154763 by Nick Frost, on Flickr Had to do quite a bit of cleanup with this guy where some supports needed to be removed and sanded, but he also had a couple of tips of the fins on his forearm missing so I just used some greenstuff to resculpt them, and while I had the greenstuff out there were a couple of small dips on his feet that needed sorting too so filled them over with it as well. IMG_20240310_142153017 by Nick Frost, on Flickr IMG_20240310_174715863 by Nick Frost, on Flickr IMG_20240310_140545493 by Nick Frost, on Flickr IMG_20240310_141043672 by Nick Frost, on Flickr Then with that done I sprayed the whole thing with chaos black primer IMG_20240317_190936248 by Nick Frost, on Flickr IMG_20240317_190950225 by Nick Frost, on Flickr The first decision I made straight away is that I am not painting the rocks grey, I want it to be different but also its underwater so want to give them a croal reef look so instead they will be purple and for the Fishman I'm going to paint him a bright greeny turquoise blue with bright red fins. For both I'm not doing a zenithal blast of white paint because there are a lot of nooks and crannies so I want to preserve the shadow areas as pure black in case I miss anything and there aren't lots of little details that need bringing out anyway. The only thing I've done so far is to mix 50/50 with Night Lords Blue and Xereus Purple and brushed over the rocks as a base coat for the shadows. IMG_20240317_210112058 by Nick Frost, on Flickr So now its underway the next thing I'll do is build up the purple colour of the rocks, I really like the base so for this one I'm doing base first then the figure. Thanks for looking, more soon
- 22 replies
-
- 10
-

-
- Flesh of Gods
- 3D print
- (and 1 more)
-
Really very lovely 3-D printed Ripley bust, about 12cm in height, bought as a kit (all of two pieces:) ) Before paint
-
 The story: This is a new 3D project initiated by friend Roland Grard and myself. Roland, who lives in Le Havre, has been in contact over the last few years with Australians who are interested in the sinking of the coaster Blythe Star. The ship sank very quickly without a distress message being sent out, but the ten crew members were able to get to safety in an inflatable raft. One of his Australian correspondents wrote a book about the tragedy, and was able to send them photos and plans of the boat. Other plans were "unearthed" from the Australian archives by another of his Australian correspondents who was also passionate about the Normandie liner. Last month he received a photo from her showing him with the last survivor of the sinking posing in front of a model of the Blythe Star. Roland knew that he had modelled the plans in 3D but was unaware that he had undertaken to make a model, and he was surprised to discover that this model had been partly made by 3D wire printing. Nicolas in front of his model and Mick Doleman on the left, last survivor of the Blythe Star. The model has been on display at the Tasmanian Maritime Museum in Hobart since the end of October 2023. https://www.facebook.com/MaritimeMuseumTasmania/ https://www.maritimetas.org/ He kindly sent her his various print files to produce another copy. That's when he asked me to print the ship. The problem is that the coaster is at 1/50 scale and it would have been complicated to print a ship of this size with a resin printer as I only had the final STL files at my disposal, which would have been difficult to modify in order to split them correctly. What's more, the printing technique is not the same between wire and resin, which is its own constraint. So I suggested to Roland that he redo the 3D drawing from A to Z with more detail, but at 1/100 scale, using the same plans he had available. The ship will be as she was in 1973. An extract from the plans: I've made good progress on the project since 28 November, a good week ago, I'm already at 50 hours of drawing, putting paid to my good resolution to finish the current projects, but at the same time I'm continuing to finish the battleship Bretagne. This project should be completed very quickly, a 'Flash' project. Here is some progress from the first 3 days:
- 146 replies
-
- 11
-
-
- Blythe Star
- 1:100
- (and 1 more)
-
Right onwards and upwards, time for another figure! I wanted to try a non human one for something different, so this is a 75mm 3D printed figure from the Flesh of Gods series, the actual name of the character is "Grumpy Goblin" which I think is a bit too fairytale sounding for how he looks! I've referred to him as a Frost Goblin because I'm planning on doing him with blue skin and white hair for something different, and in actual fact none of these 3D prints give any mention of what colours what so its all open to interpretation anyway. I'm still on the fence about a couple of details, I really want to make his swords "power swords" by which I mean they have lightning going up up them with a blue glow effect, but I'm not sure if that might be a bit too much blue, and I may put some actual ice effects on his hip armour. But thats all for much later on so plenty of time to think and see how it looks. So this is him IMG_20240212_163102109 by Nick Frost, on Flickr For now all I've done with him is the first step of a zenithal prime, so I sprayed him black with some citadel chaos black from a rattle can, before spraying him with a blast white laquer paint to bring out the details and give a reference for my light source direction. IMG_20240212_165121428_HDR by Nick Frost, on Flickr IMG_20240214_193515018 by Nick Frost, on Flickr IMG_20240214_193526850 by Nick Frost, on Flickr Everything on him is easily accessible so I've already glued him to the base to make my life a bit easier when holding him. Not a lot of progress yet; I've been waiting for a replacement to come after the first one broke in the post so I'm impatient to get the ball rolling with the topic! Next up I'll get the base coat of dark blue on all his fleshy bits and get his eyes sorted. Thanks for looking, more soon
- 33 replies
-
- 9
-
-
- Flesh of Gods
- 3D print
- (and 1 more)
-
 My latest project will be to build this 3D printed kit which has been designed and produced by Peter Harvey of PH Designs. My intention is to build the model as a representation of a vehicle I used in the mid-1970s, whilst deployed with a Forward Air Control (FAC) team in Norway. First off, I've needed to make a test print of the body, to check that I have the supports in the right place and that everything printed correctly. With the supports removed and sprayed with grey primer, this view shows up the detail nicely. Looking much better with a coat of green. I shall check this test print for any areas that need fine-tuning and do any adjustments as necessary before I make another print for the actual build. There are over 50 parts to this kit, some only 2.5mm in size, so this will not be a quick build. I hope that I can make a good model from the beautifully designed components. Further details about the kit and information of availabilty can be obtained from Peter at PH Designs cheers, Mike
 -
Earlier this year whilst working on designs for a 1/24th Westland Wasp, my hand was forced into learning how to cast aluminium (using vacuum processes) on a small scale, on account of the part(s) concerned needing to be much stronger than white metal was capable of providing. On the principle that the problems specific to modellers rarely feature in Youtube tutorials for such processes, it may be useful for others how this process can be adapted to our hobby on a cheap, reliable, but most importantly, safe, basis as home. In relation to scale and detail, the species of metal-casting videos in closest proximity to our craft tend to be those made by jewellery designers and from which you can form the misleading impression that you need to drop €2-3K on kilns, furnaces and the like to even get started. Those guys are working with precious metal on a market-volume routine basis so necessarily need consistent, professional gear to run their practice on a daily basis, unlike those of us needing only small volume or occasional metal parts. Before proceeding any further I cannot stress the safety factor enough - foundry work (even at this small scale) involves materials and equipment working in excess of 700°C, so as a minimum you require: A well-ventilated outbuilding or outdoor area (with a concrete or stone floor), with the casting area itself well away from any flammable materials. Safety equipment: protective footwear, along with a thick industrial apron and foundry-type gloves like these: Protective goggles are also advised. If you have neighbours right next door as well, in terms of noise pollution/public nuisance, be aware that the furnace emits quite a roar at operating temperature, as well as fumes when the wax resin is being burned out. Metalworking gear sold online with the word 'jewellery' appended is as a rule wildly expensive for the home user, however, much of what you need can either be made or adapted cheaply yourself with only basic DIY-level skills. For clarity, the following is split into three sections regarding tools, materials, and then the sequence of events involved in producing the parts. Tools 1. Casting flask & base. These flasks are just a stainless steel cylinder and go for silly money online. I bought a cheap length of 3" wide stainless steel exhaust (for a Mini) from a local car-parts seller for the price of a single flask and cut it down to produce as many flasks as I need: The rubber base you see it sitting on is one of these, again, an inexpensive item. 2. Foundry tools. The melting crucible is a 1kg carbon graphite job. You can pick these up cheaply enough online from the likes of Amazon however many of them come without a pouring lip which I found made pouring the metal awkward so you can see at the 3 o'clock position on it tbar I ground out my own lip (easy enough using the Dremel). Both the black crucible tongs and flask tongs (yes this latter are really just a big BBQ pair) can also be sourced cheaply online. Ensure your tongs match the size of both your flask and crucible though - in my case the black tongs work fine with the crucible but don't open wide enough to lift the flask in and out of the furnace, hence the second pair. A large screwdriver is useful for digging the part out of the mould after casting, whilst the tool on the far right is simply an old BBQ spatula folder over in the vice to produce a handy item for scraping slag off the top of the liquid metal whilst it's in the furnace. 4. Furnace. You'll find plenty of rather costly gas propane furnaces online for blacksmithing, jewellery etc., and an equal number of cheap knockoffs. I sought advice about the cheaper alternatives from a sculptor friend with experience working a range of metals: his verdict was that they were too cheaply built to last, plus also noted that on H&S grounds you still had to spend time making them safe to use in terms of treating the thermal blankets from spewing off fibres. As I had already had one of these roofing torches from previous building works, the heat source for the furnace was already taken care of. If you need to source a burner yourself, there's a lot of simple cheap furnace torches of the venturi type available online, or even build your own. Whichever route you follow, you're working with gas and high temperatures, so be careful. There'd been an empty Calor gas cylinder knocking around in the garden ever since we moved in about two decades ago; I'd never thrown it out thinking 'it'll come in handy one day' and sure enough, this turned out to be its hour of glory, being transformed into a furnace using Brian Oltrogge's impeccablly concise beer keg method: Not needing such a large furnace as Brian did, I cut the middle 25% out of my cylinder's original height, whilst the handles were simply recyled from an old airbrush compressor: Not needing such a heavy amount of heat as a larger furnace to get up to operating temp. (typically 732°C for flask burnout / approx 700°C for melting the aluminium in the crucible.*) I also replaced the original nozzle of my propane torch with a smaller bore version and made sure that the diameter of the tuyere opening matched it during construction so that it would fit comfortably into the opening like so: For the refractory lining of both furnace body and lid I followed Lionel Oliver II's homebrew mixture to the letter and it works superbly, as long as your initial warming and firing process to cure it follows Brian Oltrogge's curing steps of air, heat lamp, then steadily increased the burner temp over several hours, which he outlines in his tutorial videos. Vacuum chamber/table Unluckily my defunct airbrush compressor was a diaphragm rather than piston version, otherwise I would have had a go at converting it to a vacuum pump along the lines used by Tariq Curtis. That said, Vevor sell a decent, inexpensive pump/chamber combination that provided plenty of scope for modification along the lines required here. It didn't have to be pretty, just work consistently, and was modified thus: The chamber comes from the manufacturer with the connection and gauge mounted onto the lid, so as I needed to be able to swap the lid out for a casting table (which I made from that circular steel plate you can see hiding behind the pump), the side of the chamber was drilled out and the connection repositioned to there, with the original hole in the lid being sealed by that highly professional and sophisticated method of sticking a 50p piece over it using JB Weld: That then gave me the means to both de-gas the liquid investment inside the chamber when casting the 3d printed pattern, and then by swapping the lids over, use it outside as a vacuum casting table. By no means is that combination an original idea on my part (it's a well known and widely used process with some beautifully-engineered equipment produced by others) but has the virtue of being quick and cheap to produce in this instance. If buying a similar pump/chamber, go for a pump with the higher flow rate as you will need that extra speed at the metal pouring stage. Casting 1. The 3D print and investment mould. The initial casting step proved the most expensive part of the process as, in experimenting with both resin and homemade casting mixtures, you pretty soon find out that there is a reason that specialist materials exist. You gets what you pay for! After satisfying myself that tens of thousands of people around the world weren't lying about the fact that standard resin doesn't cook off when subjected to extreme heat but just turns to ash: - I realized that it was necessary to buy one of those printing resins especially formulated for metal casting. After going square-eyed from reading brand-comparisons (as well as bug-eyed at some of the prices!), I settled on Siraya's well-known 'Tech Cast Purple' as a compromise between quality and cost. It's been around a while, is well spoken of, and gave excellent print results first time out: Did I say compromise? Actually there's no compromise here in quality terms, the surface finish being on par with anything I've got from Elegoo's standard grey: the only issue I found in regular use was the occasional apparition: This particular blend of resin does require a more elaborate cleaning and curing cycle post-print, however if you're prepared to pay a bit more then I undertand the newer Blue version simplifies this step. Prior to obtaining the vacuum gear and a custom investment powder I explored some of the cheaper options for investment casting first, having several goes at using a 50/50 mix of Plaster of Paris and silica sand and just the effects of gravity to get the metal into the mould. Many people have routinely gotten great results from such inexpensive materials but for producing larger chunkier parts than what I required here, so it was no surprise when I was unable to get the proccess to produce more than a 70% complete print on such small parts. Remarkable however that it yielded that much! A brief reading up on the chemical composition of investment materials rapidly convinced me that for 3d printed materials at this scale, the use of a professionally-produced powder was necessary. Digging around online I was able to find a supplier in Spain who was able to ship a box of Ransom & Randolph's 'Plasticast' blend, specifically formulated for using with 3d printed materials, at a reasonable rate: It has a lovely creamy texture and performs consistently well, plus you get to sing Mud Mud, Glorious Mud whilst degassing it: When it comes to the actual mixing and casting process, George on Makerspace gives a far better demonstration of this visually than I can ever hope to achieve in written for. Essentially follow everything he does here and you will get good results. Hat tip to you George. One crucial difference is that he uses a kiln to fire his flask whereas as I use the gas furnace: This obviously lacks the precision of a digitally-controlled thermal environment so aside from a handheld thermal temperature gun (which will only give you an approximate understanding of the internal temperature due to confusing reads off the hot gases emerging at the top) you have to work old-school and judge the required temperature by the colour of the steel flask. This is not as hard as it sounds once you get your eye in. One issue I balked at when humming and aahing about buying an expensive investment powder initially was the multi-hour temperature-control cycle the manufacturers recommend for baking your flask. No way would this be practicable or affordable on a gas furnace. I was heartened though to read in Tim McCreight's Practical Casting (a superb handbook to have) that there was a 'quick and dirty' 3hr bake you could use instead (essentially the same routine followed by George in his video). Certainly this has worked fine in my case, despite the difference in equipment. As to the actual metal pour, this is the setup I use out back, with plenty of leg room between furnace and vacuum table in order to avoid tripping over anything: The black cylinder is an old airbrush tank cut down and insulated (so that I can stick the baked flask under to keep hot whilst melting the metal down) whilst that silicone gasket on top of the vacuum table is just a cheap piece of catering sheet cut out with a hole in the middle for the flask to sit over. A fresh pour: Surprisingly the vacuum setup exerts a stronger pull with hot rather than cold items, I've no idea why. You want to avoid the flask shedding too much heat whilst out in the open on top of the table as the chamber evacuates and you fetch the crucible of metal over, so I bung a couple of large rocks into the chamber to drastically reduce the volume of air the pump needs to remove. The subsequent cooling and cleanup cycle again follow what you see George doing in his video, whilst the net result of the above has remained pretty consistent from cast to cast. Here are copies of the parts in question - the forks which hold the main rotor blades on the Wasp - neither resin, plastic, or white metal capable providing the required tensile strength to hold the blades without making these fork elements grossly oversized: These are all still in their raw state out of the mould so the next task of course is to begin cutting them off the sprue and give them a sand and polish - hopefully I can start that over the next few evenings. Is this work going to make any jewellery designers feel threatened? Hardly. But it is capable of reproducing features down to about 0.15mm in size on parts that need to be stronger than more commonplace modelling processes can provide. And that's all that was needed in this instance. I'll post up a photo of the forks in the finished condition in a few days. Kind regards, Tony *This Vietnamese foundry produces the best guide I found anywhere online about the temperature ranges for pouring aluminium, in terms of balancing strength with surface detail.
- 3 replies
-
- 5
-

-
-
- metal casting
- vacuum
- (and 1 more)
-
As soon as I saw this miniature I really wanted to get it! Its from a range of printable figures called Undercity Exiles, and I used to be a biker so I always have a soft spot for two wheels, especially when they are as cool as this. IMG_20240118_194555888_HDR by Nick Frost, on Flickr Started off by priming her in black and then used some white laquer paint through my airbrush to do a zenithal prime once I'd figured out my light direction. Although just as a sidenote, I dont do this just for that, the whole thing will get at least a light mist of white to bring out the detail to help me see it when painting. IMG_20240120_144146278_HDR by Nick Frost, on Flickr IMG_20240120_150643707 by Nick Frost, on Flickr IMG_20240120_151003219 by Nick Frost, on Flickr The only laquer paints I usually use are Mr Hoby brand, but for this one I actually ran out but didn't have to wait for an order as I found some Tamiya white laquer paint in Hobbycraft and man can I tell a difference. The Mr Hobby laquer white covers way better than the Tamiya one, so it took me longer than usual to build up the colour. After that I started on her face and fleshy bits, of which there is not much which makes a change from all the muscles of the last miniature i did! So on the wet pallet I got some Bugmans Glow (dark), Cadian Flesh (medium) and Kislev flesh (light) and put down my base coat of Bugmans Glow as a first step. IMG_20240121_114502156 by Nick Frost, on Flickr IMG_20240121_115158673_HDR by Nick Frost, on Flickr IMG_20240121_115143734 by Nick Frost, on Flickr Next up was the transition shade of a 50/50 mix of Bugmans Glow and Cadian Flesh which will cover all but the deepest shadow, you can see on the pallet pic below I also mixed up the transition colour of 50/50 Cadian Flesh and Kislev Flesh just so I had it ready for me. IMG_20240121_115422281 by Nick Frost, on Flickr Her face is about half in shadow and light with the way I've organised the light direction, so I moved between these shades and made sure it stayed fairly dark on one side of her face building up to the brightest highlights on the other which ended up with a 50/50 mix of Kislev Flesh and some white. IMG_20240121_122225038_HDR by Nick Frost, on Flickr IMG_20240121_122230043_HDR by Nick Frost, on Flickr IMG_20240121_122235506_HDR by Nick Frost, on Flickr At this point I thought maybe the darkside was slightly too dark so I brightened it a little using some bugmans glow with a bit more cadian flesh mixed in and I also highlighted a little the bits of skin you can see showing through the bottom of her leotard style top. IMG_20240121_122420826 by Nick Frost, on Flickr IMG_20240121_122420826 by Nick Frost, on Flickr IMG_20240121_123544909_HDR by Nick Frost, on Flickr And after tweaking the highlights and smoothing some of the transitions I got here to a point where I was happy with the bright and dark side of her face. IMG_20240121_131645783 by Nick Frost, on Flickr IMG_20240121_131653755 by Nick Frost, on Flickr IMG_20240121_131701749 by Nick Frost, on Flickr Oh forgot to mention there is also a small bit of flesh showing through the back of her gloves which I gave similar treatment. So then the next step is here visor, now my vision for this to have it as if its lit from the side edges of the headset with a bright neon light from each side. To do this I used some fluorescent magenta paint from Vallejo Game Color, which is good for glow effetcs and such. Now I'd heard a lot of people say this paint was too thin and you need lots of coats to build it up, so I thought great I can make that work in my favour to good effect as I can hopefully paint over the eyes to make it look like they are just bathed in light. So I started by painting the eyes with bright white whites and dark grey centres, I want this whole thing to be monochrome ready for overpainting with the thin fluorescent magenta paint, so I also used shades of grey to adjust the shadow areas. IMG_20240121_132212388_HDR by Nick Frost, on Flickr IMG_20240121_133026720_HDR by Nick Frost, on Flickr At this point I gave the area the first coat of fluorescent magenta IMG_20240121_142129851 by Nick Frost, on Flickr Man obviously you cant tell but it is very thin, and is just the opacity I'd hoped for. I gave the whites of her eyes and the parts at the side a coat of white to restablish the bright points for the next coat before brushing it on. IMG_20240121_143008913 by Nick Frost, on Flickr IMG_20240121_144249401 by Nick Frost, on Flickr Then I gave just the side bits where the light is coming in another coat of white before the next magentas coat. IMG_20240121_144940558 by Nick Frost, on Flickr IMG_20240121_144954080_HDR by Nick Frost, on Flickr IMG_20240121_145003085_HDR by Nick Frost, on Flickr Oh and there was something really bugging me about her face and then I realised I had made her lips the same colour as her face so I gave them a brush with some of my midtone mix and used the base colour to restablish the lip shadows IMG_20240121_145335817 by Nick Frost, on Flickr IMG_20240121_145624635_HDR~2 by Nick Frost, on Flickr Very pleased with that, I think it will look even better when I have painted the headset to box it all in and neaten it up. Thats what I will do next before starting her hair which I have decided to do a dusky lilac, as that seems like a cool "biker-girl-of-the-future" colour! Thanks for looking, more soon
- 47 replies
-
- 19
-
-
- Undercity Exiles
- 3D print
- (and 1 more)
-
Hi folks, originally I had asked my son to print me an Apollo Astronaut as a size reference for my 1/48 Dragon Lunar Approach. The first try came out way to big, about 1/24 scale ... so I made a little vignette out of it, as the print was just to nice to throw away (anyhow, no modeller throws anything away!!). The second try was perfect for the Dragon kit .... Then I got cocky and wanted ANOTHER print, this time 1/72 for my Dragon LM and CM (they were "leftovers" from the Saturn rocket, as I build that in one piece without the interior showing - yes! I chickened out looking at all the modification the insides would have required). However, in several tries the figure never came out correctly out of the print. For one, the posture is different. As it is the exact same 3d file, I have no clue why that happens. Though it does look a bit more dynamic. But it was always missing the top half of the helmet???? I finally took one of those "headless" tries and molded the rest of the helmet on there with putty. It came out alright, I think. Thanks for looking, as always. Cheers
-
 Hello. Please check out my new project finished few days ago. It is 3d printed model that you can purchase on cgtrader. Enjoy.
 -
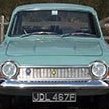
Hello everyone, I am teaching myself to use CAD and I thought "what better way to put anything I learn into practice than with a WiP?". I have chosen a couple of subjects to practice with, namely a military low-bed trailer, which is part of another ongoing WiP, and this Leyland Hippo 6x4 10 ton truck. I shall start with the chassis, as I have been able to find and download a good set of plans from the Mick Bell archives. To start with, I uploaded the plan into Fusion 360, as a canvas template, and then resized it to 1:144 scale. Following that, I was able to start drawing the chassis frame. Then, I was able to add some of the cross-frame supports. Note that I am only drawing half of the chassis, doing this has two benefits for me: - it save time as I will make a mirror copy once I have completed the drawing and match it over to the other side to make a complete chassis. - I find it difficult to draw identical lines and curves for each side of a drawing, this method helps to eliminate such errors. Next to go on the drawing are the suspension and drive-unit components. Please excuse my lack of the correct terminology, I know very little about vehicles. Here we have the front leaf springs and the two differential units, plus supporting brackets The petrol tank is situated on this side of the chassis so that was next to be drawn up. And this is where I have managed to get to so far. All the components described above have been brought together. I shall spend a little time working out what else is needed and where etc., although the prop shafts will probably be my next task. Some areas still have me befuddled, such as the two items just inside the front wheels on the bottom left image of the diagram I am using. Thanks for looking. Mike
-
Hello A few photos of my newest project. It is a resin model printed on an Anycubic 3d printer. Cheers.
-
 All of these CAD renders have been taken periodically over 2022, each vehicle has been modeled from separate parts items like the engines and gear boxes have been designed as single items, chassis frames, suspension, drive shafts, axles, door and other parts are separate parts (80 parts make up one of the vehicles) all designed for 3D printing. The parts and the vehicles were designed according to workshop manuals and individual component drawings, and a lot of help from owners of the real historic vehicle owners. Some are designed as conversions for the Italeri 109" Kits and before anyone asks Yes Mike @bootneck is aware of these and has helped me with the Series 3 Ambulance conversion. The next stage is to start test prints of the parts and once I'm happy with everything I am planning on making the files available for purchase buy others A full 17 CH 4 cylinder petrol engine Mike was happy when I sent him these images. Yes a full 3.5 Rover V8 engine Yes I have modeled the body door handles on the finished doors. The radio and vampire vehicles are void of any internal parts as I could not able to get anything on the equipment and considering it is still in service quite right too. The series 3 Ambulance body will be a conversion to the Italeri base Kit. I will post updates as I proceed with the test printing. Pete
- 20 replies
-
- 15
-
-
-
My second project for the GB, After making the Czech TNH 57/900 I'm still in the mood for some obscure paper designs & came across this while looking for ideas/references. The 16T Panzer "Laupen" was a 1950's Swiss project to design a new light tank based on the Hetzer/G-13 hull. The upper hull was redesigned & fitted with a cast turret equipped with a 90mm gun, the engine was also replaced with a more powerful diesel powerplant. Development of tank didn't get very far & the Swiss decided to buy the AMX-13 from France instead. There are no model kits of this very obscure tank available so I'll being designing & 3D printing the whole thing. I've started with making the basic shapes for the hull & turret, I'll work on getting the basic suspension & wheel parts done next. Then its adding all the smaller details, some of which I'll have to be a bit creative with as the blueprints doesn't have much detail.
-
 Hi BM'ers! I've been a little lacking in posts over here in recent years - bit tied up with moderating in another place that focuses on Large Scale Planes. However, I've recently acquired a copy of the 1:32 Hawker Siddeley Andover from Toshihiko of One Man Model in Japan and thought, being a British type, I really ought to share here too... Very occasionally you log on to the Interweb and spot something that immediatedly shouts 'what the...' Well, this was one of those moments. And it proceeded to create a 'disturbance in the force' - or at least my model building plans. Forum member Anthony Galbraith had spotted that Toshihiko, of 'One Man Model', was drawing up the Hawker Siddeley HS780 Andover C.Mk 1 with a view to 3D printing in 1:72 and 1:48 scales. Anthony asked if this could be printed in 1:32 and the intial answer was a no. However, a few weeks later the answer came back as a yes - and Anthony posted on the LSP forums asking if anyone else would be interested in a 1:32 print of the Andover. Two immediate positive responses - and a slightly delayed yes from me - subsequently followed up by a fifth - and the project was on! Oh, and beware, it's a fair size - here are the fuselage parts, taped together, compared to HK Models 1:32 B-17: I put together a review here. Plan is to build mine as a 115 Sqn E.Mk 3 from the mid/late '80s as we used to see them a lot in the skies over Oxfordshire. Back in a mo... Iain
- 86 replies
-
- 12
-
-
- Andover
- One Man Model
- (and 1 more)
-
I'm joining in the GB with a 3D printed Panzerhund from the game Wolfenstein. I originally printed the parts for this build about 4 years ago but quickly lost interest & they have been sitting in a box since. Time to blow off the dust & finish removing the remaining supports. Starting at lunch time & seeing how far I can get today & then hopefully finish with painting tomorrow. Here is a live action trailer for the game showing the little puppy in action 😋
-
Deadpool is now finished! He was a 3D print I bought about a year ago, not sure on the scale, it was sold just as being 28cm high, but to look at I'd say he probably is around 1/6. I brush painted him with enamels, except for the sword which was sprayed with Mr Crystal Moon Pearl and the gun wich was an alclad mix of steel and jet exhaust then dry brushed with silver. Shading/weathering was mostly done with graveyard dirt mig pigment. Heres a link to the wip:- This was a pleasure to do, I've done a couple of 3d prints now and always enjoy doing them, thanks to everyone who followed along and here are the pics IMG_20230822_175252794_HDR by Nick Frost, on Flickr IMG_20230822_175308021_HDR by Nick Frost, on Flickr IMG_20230822_175327699_HDR by Nick Frost, on Flickr IMG_20230822_175340699_HDR by Nick Frost, on Flickr IMG_20230822_175357101_HDR by Nick Frost, on Flickr IMG_20230822_175413418_HDR by Nick Frost, on Flickr IMG_20230822_175424000_HDR by Nick Frost, on Flickr IMG_20230822_175441484_HDR by Nick Frost, on Flickr IMG_20230822_175458300_HDR by Nick Frost, on Flickr IMG_20230822_175515099_HDR by Nick Frost, on Flickr IMG_20230822_175538950_HDR by Nick Frost, on Flickr IMG_20230822_175545383_HDR by Nick Frost, on Flickr IMG_20230822_175719166 by Nick Frost, on Flickr IMG_20230822_175841139_HDR by Nick Frost, on Flickr All comments and questions welcome, thanks for looking
-
I picked this little figure up on eBay, as I like Ahsoka, and her appearance in The Mandalorian and The Book of Boba Fett was impressive, so I thought I'd get one to go with the Clone Troopers I've got. She had to be younger and in her Padwan days, so this is it. Now I've seen that Fantasy have just released an injection-moulded kit of her for the game Star Wars Legends. Such is life I got it from 3D-Argent, and like all of their miniatures they're well-printed and packaged, but the wrap was a little tight, bending the lightsabers a little, and rather than ruin the figure trying to use heat to bend them back, I clipped them off and replaced them with lengths of 1mm brass rod, which I'd chucked into my Dremel and shaped with a file, then polished with a sanding sponge, narrowing the back end so it would fit into a small hole I drilled in the handle. Getting the drill to stay in the centre was tricky, partly because of the layers, and the fact that the resin is quite brittle at this scale, but I managed it in the end. I've also painted the base and "litter" that came with the figure, which is half of a B1 Battle Droid that she'd presumably just sliced in half. I added a few lead wires hanging out of the cut, which is highly unrealistic, but looks fun anyway Ahsoka is going to get some primer shortly, and then I'll have to research her colour scheme, as I can't remember off the cuff.
-
Hello! This is a pretty simple build/paint. Someone over on Starship Modeler gave me the bug to build a TIE Defender. I'm a big fan of SW Squadrons, and the Defender is a playable ship in that game. The 3D model is fairly well detailed, and I bought the files from ModelWerks here. After reviewing all the parts, I was able to get things printed out pretty easily on my Elegoo Saturn, and everything fit nice and tidy on one build plate. Then I ran into a hitch. The way that this is designed, the ball is split vertically into two halves. I didn't think this would be a problem, but after printing, support removal, curing (and resulting shrinkage), the two halves didn't exactly line up. That cockpit consists of 5 pieces, and there was just too many things going on for it all to fit together well. SO! Back to the computer I went. I brought all 5 files into MeshMixer: And combined them all into one part: (MM makes the preview of the model pretty low-rez. The actual model is fine) With that, it was saved out as a new STL file and brought into ChituBox, with supports being added: This might not be the most optimal way of printing/supporting a sphere, but it printed perfectly on the first try, with just a few support marks on the back of the ball to cleanup. You can see a few layer lines in there, but I think between primer and a bit of sanding, those'll go away. It still blows me away that you can just print stuff like this. Here are some closeups of the cockpit and pilot: (and remember, this is all one part now): This will all be painted black shortly. I cleaned up the supports on the wings and the engine tri-section, and those got a layer of Tamiya fine surface primer: Here is a group shot of all the pieces together. A simple build, really. I'm going to wait for some warmer weather (maybe...) before I prime the new cockpit section and the rest of the parts. Now on to color.... I know that the close Tamiya paint for the ANH TIEs is TS-32 Haze Grey, but I think that that is a bit too blue for my liking for this build. I am going to reference the SW Squadrons image at the top of this post for paint color: more gray with a dash of blue, rather than the other way around. Anyway, that's all for now. I wasn't going to do a build thread on this one because it is such a simple build, but I thought I'd show some of the 3D stuff I did in MeshMixer in the hopes that it'll help someone else out someday. Stay tuned for more! SB
- 13 replies
-
- 17
-
-
-
I have a project that's nearing completion, at least it will be once I get my mojo back. It started out as an ICM OV-10A Bronco in 1/48 scale, and I've done some conversion work using scratch building, 3D printing and vacuform. Here is the model as of tonight: (note: if you don't see the image it's because your browser is blocking it. It works on Firefox.) The build was coming along nicely until I hit some bumps in the road. The first bump is that the propeller blades are set at the wrong angle - they should be in flat pitch (blade angle = 0). No manufacturer of OV-10 kits has ever got this right, so it's hard to fault ICM for this. If I squint I can pretend they're at flat pitch. The other road block was the decals. I really should sand them off and re-do them, but I don't have enough mojo left for that. From a distance they look fair. The most arduous part was building the kit without the sponsons. This required sanding and filling the recesses for the sponsons, then scribing over them. 3D printed parts are: jet engine pod, ILS antennas, 230 gallon external tank, main landing gear, winch operator's seat, and a mold for vacuforming a clear cargo bay door. To do: install winch operator's station, finish and install cargo door, finish decals -- Dave
-
 Transport Box with Panzerfausts (P48001 & P72003) 1:48 & 1:72 Special Hobby 3D Print The original Panzerfaust was a WWII invention of Nazi Germany that gave the power to take down a heavily armoured tank to a single soldier, in the shape of a disposable launcher tube that could project a shaped charge to a target over a short range. The operator needed little in the way of training, but some bravery or foolhardiness was required to get close enough to the tank in question due to the limited range. When used properly however, they could be highly effective in disabling or knocking out many an Allied tank or other armoured vehicle. They were even attached to aircraft on occasion, which must have been quite an experience. These two sets from Special Hobby’s new 3D Print range both arrive in orange-themed blister pack with card hanger on the rear and the instructions sandwiched between the two parts. Inside are the resin parts, with decals safely separated behind a piece of clear acetate at the back of the blister for the 1:48 set. Other than the smaller set not having decals, both sets include the same components, consisting of four Panzerfaust 60s in a printing frame, plus a transport box that is printed in two sections, set slightly apart and held to the small base by delicate fingers. An additional tubular riser with an array of fingers supports the interior structure of the case, which has slots to receive the weapons once everything is cut free from the base. The layout of the boxes is different between the two scales, but the design is essentially the same. For extra realism you can add some wire or thread from your own stock to represent the carry-handles at each end of the case. 1:48 (P48001) Note the decals included in this larger set 1:72 (P72003) Note that there are no decals in this set Conclusion 3D printed aftermarket parts are incredible in the level of detail that they can provide with a relatively low part count, and these are no exception. The trigger mechanism alone would have taken several PE parts before now, and preparation of the parts is a breeze. Highly recommended. Review sample courtesy of
 -
Panzerfaust 3 Modern Recoilless Anti-Tank Weapon (P35007) 1:35 Special Hobby 3D Print The introduction of light-weight anti-tank weapons such as the original German Panzerfaust, the British PIAT and the American Bazooka during WWII, led to a new way for infantry to combat armour with at least some prospect of success. During the 1980s the German Bundeswehr requested a replacement to their ageing weapons of a similar type, resulting in the Panzerfaust 3, which was semi-disposable and capable of firing a number of types of round to give it a wider utility to the troops. The rounds differ slightly from the exterior, but most have a probe on the front that varies in length, but gives the weapon different functionality, as follows, with the codes corresponding to the legend on the support frame: Panzerfaust 3T Tandem HEAT grenade with day and optional night sight Panzerfaust 3IT Improved Tandem grenade with 900mm penetration and optional laser guidance system Bunkerfaust intended for hardened shelters, soft targets or unarmoured vehicles up to 300m away Panzerfaust 3 – probe gives the HEAT grenade a 700mm armour penetration capability at 3-400m The set consists of a launcher suspended from its print-base by a number of tendrils and towers, plus a frame of the different round types mentioned above, a few of which had fallen off the frame in transit with no harm done. There is also a small sheet of decals of stencils for the bodies of the grenades. A series of scrap diagrams show each munition type in combat ready and transport modes, and which decal should be applied to the sides, and although the parts are shown in colour diagrams there are no colour call-outs, so a quick Google might be necessary. Highly recommended. Review sample courtesy of
-
 I have for the last few years been thinking of and experimenting with the new possibilities that technology brings us. We are now able to design a model with a CAD program (with relative ease) and then use CNC routers and 3D printers to turn out the parts. However, as with all scratch building it is quite time consuming. That is why I thought I would post here and see if any skilled scratch builder(s) would be interested in a joint effort. I am fairly competent in a free CAD program called Blender, I own a CNC mill and 3D printing is readily available online. I would create the computer model, CNC mill and vacuum form large parts. Smaller parts would be 3D printed online (shapeways, imaterialise). I will then send the parts your way and your task would be to build the actual model! Some parts will also have to be scratch built. We should of course document our progress here at the forum. We could go super accurate and detailed or just try the actual concept. So I am hoping this will interest some of you. This will be a great opportunity to build an unusual aircraft or at a particular scale (no point doing it if we can just pick up the airfix box). Let me know what you think! What aircraft would be fun to make? I will be up for any aircraft as long as we can find decent references to work from. As a bit of inspiration I have posted two pics of a Swedish Saab J21A that I have been playing with in my CAD program.
- 135 replies
-
- 5
-
-
- scatch build
- vacuum form
- (and 4 more)
-
 Hello everyone! Last year I completed a build of three Fine Molds 1/72 X-Wings (one of them being a rescue after a botched attempt from my teen years) as Red-2, Red-3 and Red-5. Given that Fine Molds provide extra parts for a landed version with an open canopy and extra decals to build several markings, I had a lot of spare parts, even after using some in my rescue of poor old Red-2. With such a large pile of parts and decals available I decided they shouldn't go to waste and decided to try and build yet another one, the caveat - this one is mostly 3d printed on my cheap, sub-$200 FDM Tevo Michelangelo printer! I know there's a lot of debate if 3d printing scale models is possible and given the entry-level equipment I have, I hope I can prove resoundingly yes. It won't hold to scrutiny at a very close inspection compared to Bandai or Fine Molds' fantastic kits, nor win a contest, but as something to sit nicely on the shelf it would do. A big, big thank you to the creator of the absolutely fantastic 3d models I am using for this print - 1/24 X-wing by Simhopp and Cockpit and pilot for 1/24 X-Wing by Simhopp! They're free, to boot! Scaled down to 33.3% it's very close in size to the Fine Molds kit; however, to exactly match the spare parts I had to resize the wings with some changes to their STL files. At 33.3% the main fuselage (comprised of four main sections) is about 2.5mm shorter than the FM kit with the rear section being just a tad shorter; barely noticeable even if they're side by side but if you want the exact length, print the forward fuselage halves at 34.3% and the rear at 35.5%. I printed the main parts from white PLA and then switched for the gun barrels to a sturdier white PET using a 0.2mm nozzle at mostly 0.1mm layer height. As I assembled the trio in flying mode, this one will be landed in a mini diorama displaying Red Leader. What I'll be using from the FM kit as spares will be: clear canopy (in fact, the spare one from my oldest kit, after polishing it with Tamiya polishing compound) top engine covers engine nozzles (short versions; what remained as spares) landing gears spare pilot figures and R2 droids The main parts printed and assembled: Engines with nozzles as test assembly: Gun barrels: Pilot figure; yes, it's 1/72 and 3d printed! Photo taken before I painted the helmet using Red Leader's markings: Panel line scribing details; not only am I not great at scribing but PLA is porous and keeping an even line is quite difficult... The first couple coats of primer revealed tons of impurities in the print. Tedious amounts of sanding, rescribing, repriming, and then some more all over again, followed. I'll spare you photos, it was boring and the kit is still waiting for a final primer coat. There are still numerous small detail issues I am not fully satisfied with but at this point it's about equal in detail level with the quality of pre-2010s Eastern Europe garage kits that I grew up with, so I guess it will do!
 -
Mojo went walkabout, so required a mojo restorer, One of them there new fangled 3D printing jobbies of the main character from Prey. Really nice print with very little clean up required, FYI I didn't print it,I bought it as a kit.


.thumb.jpg.ad2b820bfdebfdb8541e9255a05f38c7.jpg)