Search the Community
Showing results for tags '1/72'.
-
Here all. Here is my recently completed build of a Savoia-Marchetti S.55 Torpedo Bomber of the Regia Aeronautica Italiana using the Dora Wings kit in 1/72 and was built as part of the World War 2 Twins GB. Built out of the box with only a figure and rigging added and mounted on a sea base. Build log here: This thing is big for me, taking the space of 4-6 of my 'normal' sized subjects... Stuart
-
Although the Special Hobby kit is a better option, the Sword F84F is quite buildable. I 3D printed a correct ejection seat as the kit only includes the early seat. The incorrect wheels were replaced with some new ones I designed and printed as well. The build saga is here.
-
A two-for-one with this post. I was given two of the same Heller kits (from 1993) and told I could have them for free if I returned one in its completed state. As with any Heller kit I've made, there was no issue in part fitting and the only (minor) issue was that the decals had to soak for a little longer than usual. The Polish version is painted in Vallejo's Model Air line (a brand of paints I've had almost exclusively bad results with) in German Braunviolet, and the Romanian in AK's Real Colors' Grau (1941). I haven't been able to find any colour photos of the olive drab that Poland painted their planes in, but I've read that it was very similar to the Luftwaffe's Braunviolet (which on its own is hard to track down a match for). This is also my first attempt at making a staging setup for my photos. At the time of this photo, it was a work-in-progress, and it remains so. ----------------------------------------------------------------------------------------------------------------------------------------------------------------------------------------------------------------------------------------- The Polish PZL.23 Karaś, (translated as the Crucian Carp) was a light bomber and reconnaissance plane. Another two-for-one post, this time one is done in the Polish paint scheme and decals (drab) and the other in those of the Royal Romanian Air Force (olive and yellow). The Karaś was produced after the Polish-Soviet war of 1919-21 after the importance of aerial reconnaissance became evident. A new light bomber was also required, so PZL combined the two roles into the Karaś. At the time of its production, it was quite advanced, but the 1930s saw rapid improvements in aviation, so it was nearly considered obsolete by 1939 and the outbreak of the Second World War. At the time of Germany's invasion of Poland, the Karaś was Poland's primary light bomber and recon craft. It was a single Karaś that conducted the first bombing raid on a German factory on September 2nd, and columns of Karaś bombers were responsible for taking out nearly 30% of invading land vehicles. Unfortunately, they had minimal fighter support and their light armour ensured that they suffered heavy losses. After Poland's capitulation, many of the remaining Karaś craft were shipped to Romania to use against the Soviet Union in Operation Barbarossa.
- 16 replies
-
- 34
-

-
- PZL.23 Karaś
- 1/72
-
(and 1 more)
Tagged with:
-
My first kit in over 50 years. Thoroughly enjoyed it. Made some mistakes but all part of the fun! For a starter kit I was impressed by the quality of the fit.
- 10 replies
-
- 32
-

-

-
Well, the weather here has been up and down like a toilet seat, with 2 inches of snow a couple weeks ago, sunny and 17C yesterday, then torrential rain and 10C for the next couple days. Net result, ….. modelling season has been extended!! To take advantage of this unexpected extension (and corresponding delay in my softball/golf season), I picked up this Master Box 1/72 Mark I and decided to build it out of the box. The fit was pretty good, the rubber band tracks are a bit poorly moulded in spots, and the instructions are positionally a bit vague, especially given the lack of any locating pins, but all in all, a fairly enjoyable build so far. Here’s where I am after paint. Not being that familiar with WWI subjects, I’m a bit suspicious of the accuracy of the paint call outs, but I followed them and the box art religiously. Lots of weathering left to do, and I suspect painting, weathering, and installing the tracks may be problematic. Hopefully completed within the next week or two. Thanks for looking.
-
Nice kit, new mould from 2016 I believe, went together really nicely, a very enjoyable build, painted with Xtracolor enamels.
- 14 replies
-
- 46
-

-
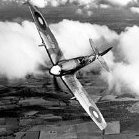
When Italy joined NATO in 1949 she was still flying sleek and shiny Spitfires. As part of my "Spitfires-by-the-Seas" project, in which I am building a pair of Spitfires in the markings of countries bordering five seas, I will build an Italian Mk IXc as part of my "Ionian Sea" pair for this GB.
-
Hello Britmodellers, Here's my take on the Airfix MiG 17. I wanted to build a slightly different machine than the famous '3020' so I did some decal juggling there. A few grainy pics show '3012' in a heavily weathered condition. It took me two tries before I ̶g̶o̶t̶ ̶f̶e̶d̶ ̶u̶p̶ ̶w̶i̶t̶h̶ ̶i̶t̶ / got the effect somewhat acceptable. Other modifications were the KK-2 bangseat, reshaped inner wing leading edges and brass gun barrels. Thanks for watching! Luka
- 11 replies
-
- 42
-

-
I dug through the stash and found the Williams Bros Boeing 247 kit. I am not a fan of either scheme in the kit, the racer or flight test article. I will see if I can find some other decal options on the net.
-
With Eduard's newest 1/72 109F releases, a question has resurfaced for me once more regarding the tall pilot's seat. I've only seen this covered by Aires years ago with their 1/32 set, but no real explanation as to when it was used. Fine Molds includes a tall seat in some of their 109 kits, but I do not recall anything in the instructions regarding the using of it. Seems that most 109F and later kits all use the 109G type pilot's seat. I'm looking for information on this tall seat. Which 109Fs was it used in? the early Fs (F-1, F-2)? or was it also found in the later F-4? and if so, was there a serial number "cut off" where it had been stopped being used? Would any of Marseille's 109Fs used the tall seat? Thanks to all in advance for any input.
- 4 replies
-
- 1/72
- Messerschmitt Bf.109F
-
(and 1 more)
Tagged with:
-
Hi all, Here is my Tamiya 1/72 Thunderbolt Razorback, a kit that requires little introduction I guess: great fit, with lovely detail all around. I just added a few details (PE seat belts in the cockpit, brake lines on the main landing gear, vacform canopy, brass gun barrels and DF loop antenna on the spine). The drop tank is from a Pavla armament set. The model represents an aircraft from the 1st ACG, that provided close air support and resupply operations to British troops (the so-called "Chindits") that were dropped behind Japanese front lines in Burma. For this "Operation Thursday" aircraft, I used the DP Casper decal sheet. The sheet provides fuselage stripes and theater bands in both dark blue and black. Reading through Squadron's "Thunderbolt in the Pacific Theater", the fuselage stripes are described as dark blue and the bands on wings and tail surfaces in black, so I settled for this combination. First time I used DP Casper's decals: these are very thin and break easily, so care is needed in handling them but they give a nice result. For the NMF I used a few Alclad shades, other paints are mostly Tamiya acrylics. Weathering was done with oils and pigments. Here is a Wikemedia picture of the real thing: United States Army Air Forces, Public domain, via Wikimedia Commons Credits background picture: freepik, https://www.freepik.com/free-photo/beautiful-scenery-green-tree-forest-cloudy-sky_9185373.htm Hope you enjoy the pictures, thanks for looking! Best regards, Patrick
- 17 replies
-
- 54
-

-

-
This is my initial entry to the GB. It is well on its way and has been languishing on the Shelf of Doom for some time. I started it almost 2 years ago and was last touched in September 2022. My aim is to finish it this time around, I have until 17 Jun to complete it as I will be away in Europe when the GB finishes. It will be finished as 140111 as it appeared at a Fincastle competition. I started with this. Made a started the CP-140 mods to the kit and did the cockpit I have completed most of the assembly and am using an Eduard etch set for the wheel wells and exterior It now is at this stage, now to find the rest of the etch set and parts to finish it off!
-
Hi. Bit of a late entry here, but I think there's still time. I've been mulling this over for a few days because, depending upon one's world view, it is either very ambitious (for me) or totally stupid. Guess which the wife thinks it is ....... I was gifted 2 of the Brengun kits a while back but at that time I'd never heard of them, being mostly familiar with the "bigger" kit names and they've been in the stash for a while. But the time has come ..... So we start from here There is a resin intake included, which looks an improvemnet on the plastic version. The decals look a bit bright to me, but no matter. The kit offers these schemes shown for completeness, but I will be doing a different finish - if we get that far. I've also been doing a bit of reading around BM and t'interweb. It appears that there are no current 1:72nd scale P-51a/Mk1 Allison engined kits which truly reflect the “emaciated” fuselage lines displayed when compared with the later Merlin versions. [Having said that, one will probably emerge now! ] The consensus seems to be that most kits are too deep in the fuselage and don’t reflect the 3” lower vertical distance between wing and cockpit sill than the Merlin engine variants. There’s also the wing root leading edge droop on the earlier versions (pre 51C) that is not represented often either. Britmodeller discussions are several on this. For my purposes the best collated notes are the builds by @opus999 - link here https://www.britmodeller.com/forums/index.php?/topic/235088418-when-adequate-has-to-be-good-enough-condor-172-a-36/ I'm not doing a kit review, merely establishing a starting point, but a specific comment about the Brengun kit was "The Brengun kit was a no-go for me, as the sprue shots I've seen appeared to have an AZ P-51B fuselage smoothed into an Allison-esque shape at the front rather than being shallower along the full length of the fuselage. " That's encouraging ..... So we have a challenge - but that's the fun of this hobby I think. Keeps the old mind working, discovering new things, and hopefully extending skills. OK, we have to do a bit of work. Whilst some kits appear better than others, they'll all need something doing to get a better "look" to the model, and I have what I have. Now, I'm not an absolute stickler for detail. My skills and patience will not allow me to create a totally accurate replica and I'm prepared to compromise. I'm happy if the overall "look" is ok but having said that, I like to know what it "should" be like so that I can adopt a standard of "informed inaccuracy" **. So if I do perpetrate an error or need to extend my knowledge, then please do shout up and we can talk it through. [** - I think this came up in a discussion with ME @ModelingEdmontonian, but I could be wrong] The fuselage depth thing seems to me the most challenging. BUT 3" is only a shade over 1mm in 72nd scale, so is it worth it? I think so, yes Thinking about this and looking at all the info in the threads and photos around, it might be possible to take out a sliver on the kit along the line from the spinner to the beginning of the rear fuselage after the upcurve from the intake. Then · fill and sand/file the nose profile · fill and sand the rear upslope from the intake · flatten the panel in the side walls in the region of the exhausts · re-scribe panels and access hole flap/covers Taking it further, for the wing inboard leading edge · backfill the root region to allow sanding · sand as per Opus999 to create marked “droop” on upper surface Would also want to check · spinner profile and fit with “new” nose · undercarriage and doors · guns · prop · radio mast Other things to consider · wheels · cockpit interior, IP etc · exhausts So, "Simples" as a well known Meerkat is wont to say (Sorry that's a UK advertising reference). Thanks for looking. I've outlined what for me is a complicated kit-bash plan but hope you will stay along for the entertainment. The next instalment will look at the intended subject aircraft as well as marking out where the cuts need to be for the plastic surgery cheers Rob
-
Another more recent completion of an old kit--this Airfix kit was from 1970 and I finished it in July of 2023. This may be the oldest kit I've built and there were no issues in the build quality. Unfortunately, one small piece was missing from the bag it came in (see if you can tell which one). I painted this in the pre-war Splittertarnmuster scheme using AK Real Colors' line (RLMs 61, 62 and 63 with 65 (1938) underside) The lines came out extremely smooth and better than I expected. No issues with the decals either, though this kit did not contain any swastikas for the tail. I don't have a place near me that sells these either (and shipping to Canada for anything is outrageously expensive), so I've left the space empty right now. Maybe one day I'll pick up a sheet of swastikas (there's a fun sentence) and throw a nice red banner on the tail. ----------------------------------------------------------------------------------------------------------------------------------------------------------------------------------------------------------------------------------------- he Hs 123, designed by the transportation company Henschel, was a German dive bomber and close air support biplane, used during the Spanish Civil War and much of the Second World War. Though originally intended as a dive bomber, the Hs 123 was overtaken quite early in this role by the Junkers Ju-87 Stuka, the latter having much better range, and larger bomb capacity. Due to this, the Hs 123 was transitioned into a close air support role, where it did quite well. Production was short-lived however in favour of the Stuka. The Hs 123 was used during the initial invasion of Poland where it could drop bombs very accurately, and the sound of its engine was apparently quite terrifying to hear (if the threat of being bombed wasn't enough, I suppose). It was considered a very effective aircraft and would be used by the Luftwaffe during the Blitzkrieg and later on the Eastern Front. Apparently Colonel-General Wolfram von Richthofen requested they be put back into production as late as 1943 due to their reliability in poor weather conditions which could ground more advanced aircraft.
-
Republic RF-84F Thunderflash AG52, 1 Staffel (yellow trim), West German Air Force Erding Air Base,1963 Many years ago I bought 2 Italeri 1/72 RF-84F kits. They came to life recently after I came across a German ‘F-40’ publication that I had forgotten about, while sorting a stash of reference books. They were decent kits in their time, but they are of that 70s or 80s period when all kits had raised panel lines and minimal detail so would need some work to bring them to a passable standard. Thing is, though, I just wanted to see what one of these would look like built up, so I took the decision to build the first one old style, straight from the box, including the weird interior – pilot and all – and kit decals. I used the Italian markings provided. I’m glad I did that because a) it provided a good reference for what needed working on and b) I probably wouldn’t have wanted to done all that work twice! Should I have just bought the recent Sword kit? Probably, but what would I do with two Italeri kits if I didn’t build them? Anyway, I decided to build this one, from the F-40 book: A couple of pictures of the finished model before I write any more words: Here are the two models together: This is a summary of what was needed to turn the Italeri kit into something acceptable: Panel line rescribe Addition of spoilers to the wing top surface just ahead of the flaps, which I cut off and repositioned in the down position. Italeri had completely ignored the complex spoilers – I used a photoetch set from Airwaves designed for the Airfix F-84F. New wing fences added from thin plasticard. The marked positions for the fences on the kit wings were far too outboard. Air intake reshaped in plan view – see photo: Machine gun ports added to the front of the reshaped air intakes (something else ignored by Italeri). Cockpit detail scratch built and resin Martin Baker seat fitted (German RF-84Fs had their early Republic seats replaced sometime before camouflaging) Airbrakes replaced by the Airwaves photoetch set for the F-84F. They really didn’t fit the Italeri kit so I was pleased to find photos with airbrakes slightly open. Drop tank pylons shortened and rebuilt to give a better sit to the drop tanks. Tailplane hinge added to show the drooped position with hydraulic power off. Nose camera windows increased in size – see photo for comparison: Wingtip pitot tube replaced with a sewing needle (I did this on the Italian one also as the kit version is ridiculously fragile). Paint was Xtracolour enamel over Tamiya acrylic primer, then Klear coat before and after decals and Xtracrylic ‘Matt’ varnish (Matt in inverted commas because it actually gives a semi-gloss finish, which looked just right in this case!) Decals came from some old Superscale sheets for German F-104, RF-4C and G-91s, with stencils from some Modeldecal RF-84F and F-84F sheets. An enjoyable project but I would go for the Sword kit if I wanted another one….
-
I'd built the Airfix Valiant quite a while ago and it was interesting to note the advances made by the company in the 5 years or so between the two kits being released (2011 - 2016 according to Scalemates): a clear step up in refinement and build quality, which they've continued pretty much ever since. Next on the production line is the Vulcan so I'm looking forward to see how it stacks up against their much more recent releases. The size & shape of the Victor makes it hard to photograph, let alone display but I'm quite pleased with how it turned out. Thanks for looking, J.A.
- 19 replies
-
- 78
-

-

-
Hello all. Here’s my latest from the shed, not my usual fare, but a change is as good as a rest they say. The SR.A/1 jet flying boat fighter concept was brought about because of the success of Japanese water borne aircraft during WW2. In 1943 the Air Ministry funded the development of three Saunders Roe designed aircraft which were completed after the war had finished. The first flight being in 1947. After evaluation the aircraft was not deemed capable of matching the performance of land based aircraft and was not ordered. Two of the aircraft crashed during testing and were lost. The pilot of one was rescued by the occupant of a support launch who dived into the water fully clothed after the aircraft suffered a landing accident. He pulled the pilot free from the cockpit of the sinking aircraft saving his life. That pilot was Eric ‘winkle’ Brown who became one of the most famous test pilots of the time. The kit was typical short run, taking a bit of work to get it together. I replaced the supplied flimsy PE nose grill with silver nickel rod, other than that it was built from the box. It was finished in a mixture of Humbrol 27001 and 27002 and sealed using Xtra color varnishes. The base is from coastalkits. A nice change from the norm I enjoyed the challenge of this build. Here are a few pics, hope you like it. Thanks for looking. Pete
-
This is the Italeri kit (Testors boxing) built as an LC-130F of the United States Navy. It represents 148321 which crashed in 1971 at an ice runway 860 miles (1,380 km) from McMurdo Station as a result of two JATO bottles ejecting improperly and striking one of the aircraft's propellers. In 1987 the aircraft was dug out of the snow and had temporary repairs carried out allowing it to be flown out to McMurdo Station and thence to Christchurch, New Zealand. It re-entered service and spent several more seasons doing antarctic work. The aircraft was retired to Davis-Monthan AFB sometime after 1998 and still resides there as far as I know. I used the Cutting Edge ski conversion as well as some scratch building of antennas and the fairing behind the nose wheel well. The flaps are from Attack Squadron and I replaced the engines with units form Ron's Resin. The decals came from the Max Decal sheet.
- 12 replies
-
- 40
-

-

-
- 1/72
- Conversion
-
(and 1 more)
Tagged with:
-
Although the Wallace was fine, after the trouble I had with the Shark both in terms of the wing struts and also the poor location points, I am a bit hesitant to try another biplane but as this is the last viable Frog kit I have I will give it a try - I have a Sea Fury and Master that I have been using for spares and a Gloster Whittle that is so inaccurate that I can't be bothered making it until I am desperate for something to build. It is a Donetsk Toy Factory offering which I bought many years ago, but fortunately in this instance they seem to have been rather better at moulding the plastic than they were with the blurry box art! There is not a lot of flash for once, likewise ejector pin marks, and all the bits are there and intact except for the "axle" pins on the landing gear legs which have broken off. That is not a problem anyway as I have decided that I will build it as a pre-war floatplane. This will be the 4th Swordfish I have built starting with the ancient and not very good original Airfix offering from about 1958, followed by a Matchbox one and another of the Frog kits, all with wheels. As you can see Frog went for the "frame" type strut arrangement this time which should be a lot easier, although that can cause a slight problem in terms of appearance with the non prototypical horizontal troughs and frames, but a bit of work with a file should minimise the visual impact. Also, there is not as much rigging as I expected as, other than one wire from the cabane struts to the inner wing struts, only the outer bay and the floats will need a full set of wires. Another reason why I decided to risk it is that I have found 2 sets of original Frog decs for the floatplane version. This will be OOB except for the cockpit interior and the forward firing gun which Frog missed, and an Aeroclub Lewis for the rear seater - it seems that both the Lewis and Vickers K were used and I am not entirely sure what the kit part is meant to represent - probably a Lewis! If I am lucky it may end up looking a bit like this one from the Cocardes Frog site. Though with rather less extra detail added! Pete
-
I had forgotten I had this. I have built a few Mustangs over the years starting with the original Airfix 1958 D release, followed by the Revell 1963 D version with the spurious red upper surface to the fuselage, and the Monogram B from 1967 with a Malcolm hood, which I may still have somewhere. I certainly have the Airfix B from 1978 and the Hasegawa D from 1978, and back in 2012 I picked up this new Airfix D which I may do in different markings, but more on that another time. Pete
-
Hello everybody, This year's theme for my local club display will be the Lockheed Shooting Star in its many incarnations, so my carefully planned Group Builds for 2024 were totally upset by the new priority. I set to work immediately and only later thought that my first choice would nicely fit in the rules of this GB, so let's start with the kit box: This is the very first issue of the Heller kit going back to the early '80s. I got it new to build the Thunderbirds scheme, though the decals were a disappointment and it remained in the stash for some time (40+ years!). Now it was finally time to build it! I have an Xtradecal sheet for multiple countries and will use the Luftwaffe part, this was the starting shot: Thanks for looking!
-
This Tamiya 109 is my latest build, and I have to say one of the nicest kits I have ever built; the fit is perfect and no modifications or putty were needed. This was also my first time doing mottling, I had to redo it at least 3 times but, I am pleased with the result. I used Ak real colors acrylics. The only aftermarket items used were Eduard Photo-etched in the cockpit, a master pitot tube and cannons, and Decals from Aeromaster, Eduard and Italeri. The sand filter, which wasn't included in the kit was taken from an Eduard 109. I used Abteilung 502 oils to wash the model and Tamiya weathering powders for the exhausts. Happy modelling! Anna
- 13 replies
-
- 44
-

-
DHC-6 Twin Otter, 440 Transport Squadron of CAF
- 14 replies
-
- 51
-

-

-
I've just finished this in the FROG GB and thought it might be of interest to a wider audience: The aircraft is well-photographed example from 60 squadron, based in the North-West Frontier (present-day Khyber Pakhtunkhwa), some time before 1930 (leading blue stripe on rudder). I picked up the kit for four quid from a vendor at SMW in 2018, and the conversion was inspired by an article in the May 1966 edition of Meccano Magazine by Doug McHard. A few notes: The engine is an accident. I expected to have to source one from elsewhere and I just started messing around with the kit one and some scraps for fun. It ended up looking too good for me to throw away (but unfortunately not much like a Jupiter) so it stayed... The bombs are left over from a Airfix DH4 kit. They look longer than the 112lb bombs in the photos (don't know whether they are a different earlier type or simply not accurate) and as a result I've put them side by side instead of in tandem on a single rail. There is such a lot of extra detail that could be added to these inter war general purpose machines (bomb rails for instance); it's sometimes hard to know when to stop when you find yourself in a rabbit hole. I don't have any figures appropriate to the period or location to pose alongside. Shorts and solar topees were the order of the day. I need to build a DH4 to go with this, my DH9 (Airfix conversion) and 9A (KP) so I can pose them for a family group photo. Apart from giving the tyres a sandy dusting, I didn't do any explicit weathering. The model got handled and touched up so much when I was rigging and adding all the detail that it ended up looking pretty well used without any extra help! Another inspiration for this build was @hendie's magnificent 1/48 CAD design and 3D print scratch build of a 28 Squadron Wapiti here on BM. It was interesting to me to see how different the three builds were to each other, driven by the different modelling eras, techniques and starting points. The WIP for my build is here if you are interested, and the Doug McHard article can be found here. Thanks for looking, Adrian
- 47 replies
-
- 85
-

-

-
My latest effort - am quite happy how it turned out. I decided to do a little ekstra in the cockpit area and to dress up the turret a bit. The build was quite uneventfull, allthough the decals was a bit 'challenging'! Thick and demanded a lot of decalsoftener, but it looks alright now - as you would say - a good 3-footer! A couple of things: My reference (B-25 Mitchell in Action and Google) Didn't show any ventral turret on this one. I couldn't find any pictures of the top turret, and Google provided a lot of different types of B-25 turrets, so I went with the - to me - most interesting one, which wasn't painted. I hope you will like it anyway! Cheers Hans J


.thumb.jpg.2c282efcc138b7cf7f1e1586a9c534d2.jpg)
