Search the Community
Showing results for tags '1/72 Airfix'.
-
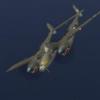
Hello Everyone... Fresh out of the P-40 STGB. I present an 1/72 Airfix Tomahawk. I have built it to represent a 3 Squadron RAAF Tomahawk in Palestine summer of 1941. Not a bad kit i can see more of these in my future. Without to much discussion i present my build to you. Please feel free to ask questions, comment, and or give your thoughts. Here is a link to the build if anyone would like to take a look. Dennis
- 7 replies
-
- 19
-

-
- 1/72 Airfix
- Tomahawk IIb
-
(and 1 more)
Tagged with:
-
Hello everybody... This was built in parallel with my 3 Squadron Tomahawk. It is the 1/72 Airfix Hurricane Mk.I. I removed all of the fabric detail on the wings. Then I re-scribed them so that i could represent a later Mk.I with metal wings. I built this one to represent a Mk.I with 401 Squadron RCAF during the Battle of Britain. They were stationed at RAF Northolt circa August or early September 1940. This was a build i decided to undertake to honor those few that are left that fought during the B.o.B.. Please feel free to ask questions, comment, or pass on your thoughts. Dennis
- 11 replies
-
- 24
-

-
- 1/72 Airfix
- Hurricane Mk I
-
(and 1 more)
Tagged with:
-
I am working on a 1/72 Airfix Tomahawk with markings for 73 Squadron in the P-40 STGB. I have only found this ⬇️ one photo of them. https://www.asisbiz.com/il2/Hawk-81A/RAF-73Sqn/pages/Curtiss-Tomahawk-IIB-RAF-73Sqn-AK490-Wykeham-Barnes-Egypt-1941-01.html I have seen plenty of Hurricanes both in the Battle of France, Battle of Britain, and in Palestine in 73 markings. Does anyone know how long they operated the Tomahawks ? Does anyone have more than the single photo ? How accurate are the markings ? Otherwise i may just go with one of my backup options 3 RAAF or 403 RCAF. Dennis
- 4 replies
-
- 73 Squadron
- Palestine
-
(and 1 more)
Tagged with:
-
Hello everybody... Some of you know I've gone a bit Daffy lately, and started a long term project. Im building all of the major variants of one my favorite pilots Josef "Pip's" Priller. I have started with his first mount with JG-26 the Bf109-E7, white "8". It represents a time frame sometime in the late spring of 1941. For this build i used the newer Airfix 109E4 kit in 1/72. I modified it by giving it a full spinner, and used a spare drop tank mount & Eduard tank from a BF-110D kit. The antenna snapped when removing it from the sprue do that is just a piece of plastic strip cut to length. Questions, comments, or thoughts are welcome ? My next Priller build will be his Fw.190A3, so if you're curious please check in on the link from time to time. Dennis
- 9 replies
-
- 34
-

-
- JG26
- Pips Priller
-
(and 1 more)
Tagged with:
-
Hello everyone this is my build of the airfix 1/72 P-51D Mustang. This was part of the Dedicated group build where everyone started with the same airfix kit. I built “Run, Rabbit, Run !” Which is from the 20th F.G. 8Th Air force. This is also part of a larger project i am doing about the 8th fighter command. Without further talk i present my Mustang. These two photo’s show the 3 builds completed out of 15 needed for the project. They’re the 4th Fg. Center, 20th Fg. Upper left, and 356th Fg. Upper right. The P-47 was built in the P-47 group build at the same time as the mustang. The 4th Fg was an older Academy build i did last year. I have built “Rabbit” before. I rebuilt my Brother in laws 1/24 scale airfix mustang from 1977 in 2015 as Rabbit also. Please feel free to Question, comment, or joke ? Here is a link to the build Dennis
- 3 replies
-
- 14
-

-

-
- 20th Fg
- 1/72 Airfix
-
(and 1 more)
Tagged with:
-
I know I shouldn't participate in another GB, but how can I say NO to building the iconic Me 262 The aircraft I build is one of the two mounts from Major Rudolf Sinner, Gruppenkommandeur (CO), III./JG 7 in its attractive striped camouflage. All drawings of this aircraft show the stripes in a diagonal pattern across the whole aircraft. I couldn't find from where this originated, but based on the picture below, I paint the stripes in a V pattern With the exception of the nose, all other stripes do line up reasonably well. Of course it could be a third aircraft in this camouflage, but I find this rather unlikely as III./JG 7 had only six aircraft on its strength. And if it is a third aircraft, my model will represent two aircraft - one on each side. I chosen to build the 1/48 Tamiya kit and will add some Aires resin goodies. In addition, I will also build the new 1/72 Airfix kit OOB, also in the colours of JG 7, once again an aircraft from III./JG 7. It is yellow 5 which flew into Fassberg from Czechoslovakia on 8 May 1945, piloted by Unteroffizier Anton Schlöppler. Cheers, Peter
-
Well it's been 5+ years but it's finally done....hope you like the pics! I'm still finishing the dio base and will update this post when it is done.
-
Evening everyone, I decided my next model had to be a Spitfire. I love this aircraft - it was the first plastic kit that I built with my dad when I was eight or nine and seeing them fly over from Duxford every weekend reminded me how much I enjoyed making model kits when I was growing up. I'm sticking to 1/72 for now (though might treat myself to an Eduard 1/48 Spit for Christmas) and couldn't decide between the Airfix mk1a or mk22, so decided to do both, which I thought would nicely bookend the development of this amazing plane. I'm going to build them pretty much ootb but will try to make them a bit "crisper", with better joins and filling, clearer canopies, etc, than the p51 and b17 I returned to modelling with here: So far I've got the cockpits painted up, fuselage halves and wings joined, gaps filled (sort of) and undercoat sprayed on. The mk1a (newer kit i think) had a bit more detail in the cockpit and fit together better than mk22, though no major problems with either. I tried to fill the seams with Vallejo plastic putty which has a really fine nozzle and goes on nicely. However, on sanding it back it sort of chips rather than going smooth and flat. I kept going at it (before and after spraying the undercoat) and reasonably happy with the finish now - it feels smoother than it looks in the photos so I'm hoping the first color coat will leave no visible line - we'll see! Any pointers on this would be great, thanks!
- 24 replies
-
- 6
-

-
- spitfire mk1a
- spitfire F mk.22
-
(and 1 more)
Tagged with:
-
Hi Folks There have been a few top class builds of the recent Airfix Jet Provost posted in RFI of late so I decided to post my humble contribution. I give you the recent Airfix 1/72 Jet Provost T3 finished in Light Aircraft Gray(from the Mr.Hobby range) and decals from the Xtradecal set for the Airfix Kit. The hi-vis markings were for the most part ok to use but getting them to follow the curve of the leading edge of the wing was less than successful with the solid areas of dayglo decals being quite rigid and brittle which resulted in cracking and splitting of the decal. I patched up the dayglo as best I could and touched up the damaged decals with some dayglo paint. I did attempt to add some of the vents/air scoops to the fuselage but did not correct the canopy as I had finished painting before I read about the canopy framing being an internal feature, for noting on the next one. Thanks for looking
- 11 replies
-
- 31
-

-
- 1/72 Airfix
- Jet Provost
-
(and 1 more)
Tagged with:
-
G'day people, Well, this is another stalled build that I am attempting to progress. I started this build over at ARC for their "Far out, far East GB" http://www.arcforums.com/forums/air/index.php?/topic/292978-nakajima-b5n2-kate/ I have decided to try and kick this one into touch now that I have the opportunity for some bench time. This is basically where I got up to: I have cracked on a little and the rest of the camouflage has been applied I have decided on a less tightly defined distemper type upper colour over tightly defined squiggles. There seems to be a great deal of variation between the various embarked squadrons. Period pictures clearly show that the ground crews has access to spray equipment but the pics seem to indicate the the patterns were random and not tightly defined. I am just happy to get on with finishing this one so not too fussed if it is not 100% accurate. Likewise the gear well colour, I opted for an 'aotake' type finish, but in reality this was probably just the underside colour or natural aluminum. I am not claiming that it is accurate, I just like the contrast. Of course just as things were just going smoothly I happened to apply a blob of silver with a wayward finger! I sanded off the blob but this area of the fuselage will need to be re-sprayed cheers, Pappy
-
Hi everyone With the P-47 dragging its feet, I'm thinking maybe I should try and squeeze in 'quick one' with this 'near miss' carried over from the recent GPW GB. Despite my best efforts, I couldn't get paint to adhere to the 'vac-form' canopy. No matter how carefully I tried to remove the masking, it always left a torn and jagged edge to the 'framework', so now I'm going to use the (terrible) kit glazing fixed with PVA or something equally temporary, so I can call it finished for now, but with the option to revisit at a later date! The auxiliary fuel tanks have disappeared from the face of the earth, so I'll be adapting it to take some Eduard spares. I may also try and use the vastly superior Eduard main gear wheels & tyres and there are some other odds and ends to add/fabricate - pitot tube, aileron mass balance weights, aerial wire, but nothing too taxing. Cheers for now Craig
-
Just got of the work bench, build oob. Very nice kit with good fit. with a interresting story http://www.worcestershireregiment.com/wr.php?main=inc/vc_w_l_robinson_page6 cheers Jes
-
Hi everyone Not the most original choice of subject or kit, I admit, but if I don't grab it, someone else will.... ....a weekend build? - I'm not so sure about that! This will be the scheme... ....an attempt at a 'winter white-wash' is the whole point of this build Cheers for now Craig
-
Hi Guys, with Harrier in the paint shop and P-47 on hold waiting for a delivery of paint, I need to keep the momentum going and this looks interesting... Apologies in advance for stepping on any toes by duplicating a build - if I can locate alternate decals for a 'rag-wing', then its identity will be changed! Cheers for now Craig
-
Hi Guys, Here are my progress shots of the airfix aew.2. I found the plans in an old airfix magazine. Any comments are helpful. Brian
-
Let’s give this What If thing a try….. I am not a What If builder at all, so this is something new for me. However, my (late) entry is based on a study if it could be done – converting a Grumman Widgeon to turbine power. Most of Grumman’s amphibian models have been converted to turbine power; the Goose, Mallard and Albatross come to mind. The Widgeon being the smallest though makes a bit of a challenge, as Turbines in that power range are not all that common. On the low end of the spectrum are the PT6A and Walter 610 engines as options, that are usually used for that purpose. Both are about 3 times as powerful as the original piston engines installed. But then again, it is all about more power…. Converting an aircraft from piston to turbine is not all that simple as replacing the engine. Balance is an obvious problem, but there are control and power effect problems that need to be considered as well. The concept that I came up with is this: Stretch the fuselage ahead of the wing to make up for the slightly lighter engines, but also stretch the rear fuselage a bit – to increase control authority of the tail feathers. Or increase the “tail volume” as it is technically called. The trick is finding a balance between the two. Increasing the tail authority is required due to the increased power, to allow controlled flight with one engine out and to also counteract the now increased aerodynamic forces the extended nose will give. Also a fin root extension will be given for the latter reason to help in cross wind landings. The engine nacelles have to be extended a bit to fit the turbine engines. And also to keep the prop discs ahead of the flight crew stations in the now extended front fuselage. To start off with, first some calculations: I created a simple 3D numerical model of the fuselage that could be stretched at arbitrary points. The resulting moment generated by the new fuselage and relocated engines was calculated and compared to the original intended moment around the wing. I played around with these variables till I found a solution that I was happy with. See the picture below that compares the original (short) fuselage to the new extended one. Front extension is 1.00 metres and the rear extension is 0.4 metres. That together with the slightly lighter engines on an 0.65 metre extension give a balance around the original balance point. Then for the kit: I had this old Airfix kit lying around, built many, many Moons ago and in a sorry state. It was used as a paint test bed and then forgotten. First thing I did was give it the brake fluid treatment to get rid of the thick layers of paint and dissolve the glue joints. Here the parts after the treatment: Next up is cutting the fuselage on the stations where the extension pieces will fit. R
-
This is my last work for this (modelling?) year. Well-known kit from Airfix, very nice itself. It's hard to spoil but I've almost managed to do it! I've added only seatbelts, rear head armor plate, gunsight and antenna wire. Happy New Year, guys and girls!
- 13 replies
-
- 20
-

-
- 1/72 Airfix
- Spitfire
-
(and 1 more)
Tagged with:
-
Seeing as my Hellcat is on finals and the Javelin is in the paint shop I thought I would start another kit I have been itching to do, the Airfix 1/72 Mustang. I had previously picked up (very cheap) the Academy Mustang, which when I opened it up had a surprise of some extra RAAF markings. I decided on 76 Squadron SV-Z, A68-768 (incorrectly identified as A68-766 on the decal sheet) in Japan, circa 1946. With some help from the forums (see http://www.britmodeller.com/forums/index.php?/topic/234927776-raaf-p-51d-question/?hl=simonl#entry1143403), I found that as a Dallas built P51-D: - a cuffed propeller was OK - general consensus was that the wings would have been filled The filling of the wings I must admit filled me with some trepidation, it seemed somewhat unnatural to be filling what looked like fine detail. Once I had filled the requisite panel lines using some images I found on the web as a guide, I must admit I wondered just what I done. I used Tamiya filler, thinned with some Tamiya thin cement and painted on with an old paintbrush. To take my mind off the mess I had made, I started on the seat and the cockpit, which went together pretty well. Very soon I was sticking the fuselage and wings together. I must admit after all I had heard of this new kit I was expecting less trouble than I got - maybe I was just a bit negative after the experience of the filling. Anyway, I got work with various grades of wet'n'dry and then primed the model with Tamiya Primer from a rattle can - and was pleasantly surprised by what appeared.
-
Here is a 1/72 scale model of the Republic Aviation RF-84F Thunderflash jet reconnaissance aircraft serving with the United States Air Force. This is an older Airfix kit and I think this has been re-boxed by others, too. The Thunderflash used wing root intakes so the nose was free for a full camera outfit, but the new intake position caused a number of headaches until everyone (and most especially the jet engine) was satisfied with the new arrangement. The end result was a good-looking and effective camera plane and this one was used by a bunch of operators. All that may have been missing was a cardboard sign that dropped down to the target and which said "Smile and say "cheese" for the camera ! Photo Series 10-22-12 007mod4XCZ by mikedetorrice, on Flickr F-84 mod3XCZ by mikedetorrice, on Flickr Photo Series 2-10-11 014mod4XCZ by mikedetorrice, on Flickr Photo Series 2-10-11 020mod2XCZ by mikedetorrice, on Flickr Photo Series 10-22-12 009mod3XCZ by mikedetorrice, on Flickr Mike
-
This is the last model I built before changing job and moving two months ago-I packed the camera in with my stash so I was unable to upload it earlier . The kit was built out of the box and brush-painted with Humbrol enamels and Xtracylix varnish. The colours were based on information from Nick Millman's blog on American aircraft for the RAF, though I was unhappy with the Dark Earth. The green is a mix of Humbrol 149 and 91, and the brown of 29 and 119. The canopy framing was retouched with Tamiya XF-26 because the Humbrol 149 had gone off by then I apologize for the poor lighting as the weather in Switzerland was lousy before i left, and I couldn't use the flash because the roundels would look all white then. As an aside, I managed to not break the gun barrels or the pitot once that was installed. Thanks for looking! Comments are welcome.
-
This is a 1/72 scale model of the Dassault Super Mystere fighter-bomber from the mid-late 1950's. It generally was a successful French interpetation of the F-100 supersonic jet formula, which was then serving with the USAF and Dassault's craft became the first Western European supersonic fighter to go into full-scale production. Beside the French air force, the Israelis also used this attractive fighter-bomber. The 1/72 model is one from Airfix released a number of years ago and it can make for a nice display with earlier French jets like the Ouragan and Mystere, as well as the F-100 Super Sabre. Photo Series 12-28-12 006mod5XCZ by mikedetorrice, on Flickr Photo Series 12-28-12 003mod3XCZ by mikedetorrice, on Flickr Dassault Super Mystère 3-8-11 006mod5XCZ by mikedetorrice, on Flickr Photo Series 3-30-12 008mod2XCZ by mikedetorrice, on Flickr Photo Series 3-8-11 003mod4XCZ by mikedetorrice, on Flickr Photo Series 3-30-12 013mod2XCZ by mikedetorrice, on Flickr Photo Series 12-29-12 002mod2XCZ by mikedetorrice, on Flickr Mike
-
Hello everyone, hope you all had a nice weekend. Posting my latest build for you. 1/72 Airfix Spitfire, was going to be a quick clean build but after I dropped it and broke both the aerial masts I changed my mind and roughed it up a bit, not sure if roughing up this particular aircraft is historically correct but hey ho. I've used the 3D-Kits Rotol Spitfires MkI & II set, it included a new seat,control column plus the decals and Rotol prop, they all seemed to work very well. This aircraft was from 54 Squadron, Hornchurch in March 1940. Paints used were a mix of Gunze, Citadel, Tamiya and Vallejo plus washes from Flory models, Mig and Citadel. Hope the pictures are ok, using google web albums for the first time. Thanks for looking and all comments welcome. Cheers...
- 20 replies
-
- 3
-

-
- 1/72 Airfix
- Spitfire MkI
-
(and 1 more)
Tagged with:
-
Built straight from the box, with only a slight reworking of the blade aerial on the spine. Model Decal No.17 was used to represent a Draken from the RDanishAF. Brush painted with Humbrol enamels. SAAB F-35 Draken No. 725 Squadron R. Danish AF Karup 1971 Nice simple build over a couple of weeks inbeetween other projects, all comments welcome, Sean


