Search the Community
Showing results for tags '1/48'.
-
This is the very nice Tamiya kit used along side the Cutting Edge Crossdressing Stormbirds decal sheet. Yellow 17 was flown by Lt Hans Dorn of 1/JG7 and was captured at Fassberg by No 616 Squadron RAF in May 1945. I could find very little information on Dorn, I suspect he was a replacement pilot and fairly new to JG 7, seeing little or no action in his time there. As for yellow 17, she was designated AM-52 and ferried back to England for evaluation before being declared surplus and shipped off to Canada. From there, she was sold along with 300 other surplus aircraft and scrapped. As I said the Tamiya kit is a real pleasure to build. Painted with Gunze RLM 82/83/76 with weathering kept pretty light as this machine looked almost brand new when captured, in all likelihood it was.
- 15 replies
-
- 36
-

-
Hello everyone. I continue show my old models. Today this is De Havilland Venom from Classic Airframes. This model was build four years ago. Best regards. Michael.
-
Hi All New sets for ordering and one coming soon. There is a detailed Sea Fury Engine 1/48, Sea fury gunsight and navigation lights 1/48, Cessna O-2 landing gear 1/32, and coming soon all being well replacement P-51 Canopy set 1/32. Go to http://www.aerocraftmodels.com there you will see all the details.
-
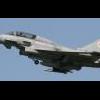
 Hi, my other cat in the collection. This is a machine from the Desert Storm operation this time. I used the decals from Fightertown, wheels and RBF from Eduard, Chairs and ChinPOD from Aires (Quickboost) I hope you will like it
- 25 replies
-
- 62
-
-
Hi all Here is my take on the 1/48 Kinetic Harrier T.4 Finished it a few weeks ago but haven't got round to taking any pics until today. Its built straight out of the box with the exception of the scratch built intake blanks. and while the suns shining I took a pic of the T.4 with my other 48th Harriers. Enjoy Harrier T.4 XW927 by Scott Clayton, on Flickr Harrier T.4 XW927 by Scott Clayton, on Flickr Harrier T.4 XW927 by Scott Clayton, on Flickr Harrier T.4 XW927 by Scott Clayton, on Flickr Harrier T.4 XW927 by Scott Clayton, on Flickr Harrier T.4 XW927 by Scott Clayton, on Flickr Harrier T.4 XW927 by Scott Clayton, on Flickr Untitled by Scott Clayton, on Flickr Comments welcomed ScottC
- 12 replies
-
- 28
-
-
Afternoon folk's,I did say in Chat that I wanted a bi-plane to make up the trio to give me three main stages of the RAF's development so looked out for a WW1 subject then remembered that I'd often eyed up Roden's Gladiator when I discovered it includes marking's for a 607 (County of Durham) Sqn aircraft so it fit's in nicely with that short period between the service of the Gladiator/Spitfire and Meteor really short of ten year's that transformed the RAF in term's of capability,just laying a marker for now as Iwon't start till the other's are progressed enough,for now here's a review. https://modelingmadness.com/review/allies/gb/cleaverglad.htm
-
Hello folks. Today i introduce my model, build 3 years ago. This model full resin kit & vacu canopy. Assembly is very difficult. Finish work with tamiya paint & MIG weathering. Best regards. Michael.
-
Hi all, this is a bf 109 g-2 trop of 6/jg53 based on sicily early 1943. The kit used was the eduard bf 109 g-2. All flying services, flaps tropical filter, cockpit & wheels have been replaced with self cast items ( as in the work in process) Masters gun barrels Eduard superfabric seatbelts Extracolor paints were used rlm 78,79,89 Decals were aero master for the balkenkreuz and code numbers. Extradecals for the swastikas Thank you for looking, comments are welcomed. Nick
- 11 replies
-
- 19
-
-
Greetings Folks, Its been a while since i posted anything following the Matchbox GB. Here is my latest effort, Academy's Thunderbolt Nose Art Edition. The option i chose was the one on the box top the well known Big A$$ed Bird 2 flown by Major Howard Parks. Although this is not as perfect a kit as the Tamiya version it built up without any problems whatsoever IMHO a very nice kit. I built it OOTB but used a set of Hobbyboss decals i had in the stash as Academy's aren't the best in my experience. The entire model is brush painted using Revell acrylics. Masking was a bit of a chore but it appears to have been worth the effort in the end. Here's the pics... IMG_2736 IMG_2732 IMG_2734 IMG_2735 IMG_2733 IMG_2731 Well thats it for now, see ya later, and thanks for looking. Cheers Greg
- 11 replies
-
- 27
-
-
Hello Everyone ... This is my latest build. Its a Hasegawa F-18C. I used Wolfpack wing folds and Hasegawa Bombs. It represents the CAG bird from the 1997-98 Med. persian gulf cruise. Hoping everone likes this please feel free to comment ? question ? Or joke. Dennis
- 22 replies
-
- 30
-
-
Time to stake my place in this GB with kinetic's excellent new 1/48 2 seat Harrier. I don't need to give much of an introduction to this kit as there have already been some great reviews and builds here on Britmodeller so you will already know that it is a very nice kit indeed so no doubt any problems or mistakes will be my own. Here is the ubiquitous box top shot; And the sprues all tightly packed inside and still sealed; The options available from the kit; And the very comprehensive decal sheet; As you can see there are markings for every operator of first gen Harriers on there and pretty much any one built can be made from it, which is good as as per usual I will not be sticking to an out of the box example and want to do something a bit different and having a liking for winter camo schemes have found this; Now if I can find a picture or serial number of one of the T4's which went with 1 squadron on one of there Norway deployments and received a proper wrap around job I will build that one instead. And here are some of the references I will be using; Hope to make a start on Saturday so hopefully won't be too long before the next update. Thanks for looking in. Craig.
- 68 replies
-
- 16
-
-
Hi Guys. Now that I recently finished 2 projects (one Bearcat and one Lavochkin), it's time to move on with another one. My next client will be the Bf109D in 1/48 from Academy. I intend to use the Eduard zoom set for this kit also. Because I want to convert it to a Bf109 A, I bought myself also the Kagero Top Drawings edition dedicated to Bf 109 early (A to D) series. I hope that it will guide me in order to obtain a decent 109 Anton replica. First, I present you the mandatory pics with kit box and its contents. Hope I will be able to finish this one. It will be a long-term project anyway, because I'm such a slow builder... So, I'm thinking about Spain...1937...
-
Couple of HobbyBoss Yak-38s from two different theaters. Begemot decals had good paint reference that helped with the colors (which were AKAN) and the pattern. I find the kit to be a relatively easy build, definitely look the part but in are need of lots of aftermarket assistance. I used plenty of Quickboost resin replacements, Dream Model PE to name a couple.
- 20 replies
-
- 46
-
-
- 1/48
- Camouflage
- (and 1 more)
-
Hi all, as I'm about finished my Zg1 bf 109 e's. I thought I would start a g-2 in the markings of the g-2 trop yellow 6+ - of 6/jg53 sicily 1943 (on the rear of the kagero bf 109g/k vol 1).as I usually add resin cockpits and wheels( I have cast) and seat belts. Paints used will be extracolor and Humbrol, pastels will be used for weathering. These are the extras I started with (yellow parts are home cast). Seat belts are eduard superfabric. Thanks for looking. Nick. Here I go.... These are what I have done so far cockpit painted fuselage sides thinned for the resin, prop painted and weathered Radiator fronts painted black and dry brushed with model Air alumimum Until next time nick
-
 The Gloster Gauntlet was the RAF's last open cockpit figter. This is Aeroclub's 1/48th Gloster Gauntlet offering, I believe that they had a 1/72nd version too. The box Parts I haven't tested them, but the decals look to be in good shape. The decals are for aircraft from 46 Sqn or from 74 Sqn. I haven't made a final decision on which I'll build yet: the 46 Sqn aircraft had squadron markings on the top wing, while the option is present in the kit for 74 Sqn wing markings, there is a question whether they got around to painting them. AM stuff The seat belts and instruments are left over from earlier projects, while the Vector engine was bought to replace the kit's white metal parts.
 -
Calling this one done. About 3 months ago I started work on Eduard's 1/48 109E-3. I got as far as doing the cockpit and engine, then moved house... Which - unsurprisingly - spelled trouble. Somehow in the move parts went missing. I lost the tail wheel, a few of the individual exhaust parts, and had put the decal sheet in a book that was knocking around my desk and has since gone awol... As the kit was already started I decided against spending more money on aftermarket decals / replacement parts. So this build is something of an improv project. It is infuriating me that the parts are missing - but I am telling myself it's undergoing some field repairs! The kit is - as I am sure most people on here know - beautiful in terms of detail and quality. However - I did have a few issues with fit - all my own fault it should be noted. My usual Tamiya approach of doing things in my own order really didn't work out with a kit of this higher complexity. Anyway - I decided on doing this as a Condor Legion aircraft. Mainly as I love the look of them, but also in part as it would make painting markings a lot easier than most others. I used Eduard's photo etch in the cockpit. The only decal on the kit is the engine serial - which as I am sure many here will note is not actually an engine serial - but adds some interest. The kit was primed with 3 shades of Citadel rattle can primer - white, grey, black. And then the main colour used was Tamiya rattle can Ocean Grey. Kit was then weathered with oils. Antenna is stretched sprue. And I used styrene rod for the rudder cables as the PE was driving me up the wall! Thanks for looking!
-

1/48 A-4Q skyhawk Falkland war update Finished 02-05-2018
Arniec posted a topic in Carriers Ahoy! GB
Hi guys, I will be building a A-4Q skyhawk in 1/48 scale from Hobby Craft. There are some decals to build a B, but also decals for a Q version that where operated at the start from the Falklands war at the aircraft carrier Veintcino De Mayo There are some different schemes in the box. I could do a original painted one with grey and white in high visibility scheme or later in the war when they were operated from land base. Here are the pictures of the box and it's content. The content of the box the decals and the colour schemes. These are all schemes for the Q. And a extra seat for the cockpit. If I am not mistaken then it was from verlinden. It will be mainly be build out of the box. That is it for now. Cheers,- 31 replies
-
- 11
-
-
Hello all, It has been a while since I posted here, mainly trying to keep momentum to finish projects. This is my last one, started some 2 years ago (I know, its been slow). This is my second tank in some 30 years. I used Tamiya's 1/48 Firefly, with Eduard's photo-etched detail set and most of the Black Dog stowage. The figures are from Tamiya's infantry set. Not 100% about the historical accuracy, I was mostly focused on applying techniques as best I could. You can probably see this is influenced from Pat Johnston's work. I would probably make some small corrections but that is for the next project. I am glad I completed something!
- 12 replies
-
- 19
-
-
I recently moved house - and accordingly my 'model-zone' has been reduced in size by half... I am looking at this however as a good reason to take more time, work more carefully, and try out new and more compact techniques. As a first build for the new work bench I got a second hand 190 off ebay - which was intact, though the decals had been partly used. I didn't intend to do this kit as a WIP, but was quite happy with how it was going, and as I was taking my time with it I guess it felt worth doing. That said - I missed out some stages, so this will be a WIP-in-brief! One thing to be clear on from early doors is that this is going to be non-historical, and mainly a test-bed for me trying to nail some new-ish techniques, and refine some others I have been trying. So apologies to all for infuriating inaccuracies. One thing I am hoping to do is cut down on my use of rattle cans, which I have primarily used as I don't have an airbrush. So for all lots of small parts of this kit I just primed them with a rattle can, then brushed the rest. I will still be using rattle cans for the top side camo, but plan to try mottling using oil paints... we will see how that goes! The tub was painted with a variety of vallejo greys, then dry-brushed with neutral grey. The only non-kit part was the belts which are rolled flat solder wire. I have never really tried riveting before - and this was my (very tame) first attempt. I just added some lines of rivets along the existing panel lines, using them as guides. It went OK and I think that next kit I might be more adventurous and start filling in the gaps... The various sub-assemblies I like to do while not attached to the main body, as I always break them off before the kit's complete. So I did the canopy, fuel tank, engine, prop and legs already. The fuel tank was painted with a rattle can of Belton grey-green paint, then weathered with oils. The nose was brush painted with valejo grey black and a various lighter shades were then sponged on to try and create the image of light wear and tear, with a very light bit of aluminium last for heavier scrapes. I used some rolled flat solder as the 'belly band'. The prop was brush painted with a mix of valejo paints to try and achieve the dark green that seems to be normal for 190 props. I then made various paler shades and dry brushed each blade's leading edge before scraping on a bit of valejo aluminium with a toothpick. The spinner chipping was sponged on. The latest stage was doing the wings' undersides. A bit risky doing this without them attached to the body, as errors / filling later might destroy this work, but it being Tamiya I am banking on minimal headaches. I painted the undersides with rattle can Tamiya bare metal silver, then masked it before painting the remainder with the Belton grey-green spray. I then mixed a yellow/aluminum shade and a grey-black/aluminium shade of silver from valejo and brush painted some panels to break up the metal areas. I then cut my own masks for the first time (using kit decals as a guide) and sprayed on black markings. I brushed on some valejo aluminium to wear these a bit. Finally I weathered it with oil wash, and raw white oil paint in panel midels to break up the grey-green areas. Next we will paint up the torso before marrying it to the wings! Thanks for looking, and all tips / comments very welcome. Bruce
- 2 replies
-
- 5
-
-
- 1/48
- NON-HISTORICAL
- (and 1 more)
-
 I picked this up as an impulse buy a few years ago as I really fancied the silver SEAC aircraft. Several times during the build I wished I hadn't. Horrible fit, trenchlike engraving on the newer parts. I actually set it aside for over 2 years before doing a "quick finish over the last couple of week so by no means my best work at all, very much a view from a distance model. Build thread can be found here. For all that though, it still looks pretty attractive. The markings are for an aircraft of 648 Squadron in India, 1945. Thanks for looking.
- 31 replies
-
- 58
-
-

-
I have had a number of Monogram F-105 kits of various marks in the stash for several years and finally managed to start work on one of them, the F-105G. I wanted to do something different so I am doing it as a RAAF Wild Weasel being flown in support of a Canberra Strike mission. It is going to be in Gray/Green camouflage as the Canberra's were for a period of time. I am going to arm it with a pretty standard weapons load as it is in the kit. I have only added an Eduard PE set for the instrument panels and everything else in OOB at this time. It is a relatively straight build with just the canopy being a little upsetting as it can't be put in the down position as it won't fit, the canopy is too narrow for the opening.
-
Hi guys, So this is my first post as a newbie on here, it's my Hasegawa P40e Warhawk that was purchased as a Easter present from my lovely lady. I'll put some photos of bits and bobs that I have done up to now as I'm nearly finished so it's not that detailed a walk through I'm afraid. I would say I think she paid about £20 for it and it's a great little kit to be fair and has been an enjoyable build. The detail is good especially the landing gears. I had a lot of filling and rubbing to do on the fuselage as the tail end is separate, in highnsight I probably should have glued half the tail onto each fuselage half first then put them together but there you go. Hopefully you'll see these pictures: As you can hopefully see I have painted the shark mouth rather than go with the decal and the aux tank and gears are on, just a few more bits and pieces and a little weathering and it should be done. Thanks for viewing. Phil
-
 Hello everyone. Today 25.04 ANZAC Day, and in honor of this day i introduce my old model PV-1 Ventura in RNZAF colors. Model was build 5 years ago. Best regards. Michael.
 -
Hello folks. I introduce my Corsair, this model was built last year. I used TAMIYA kit & XTRADECAL for RNZAF scheme. Best regards. Michael.
- 12 replies
-
- 33
-
-
-
Hello folks. Today i introduce my new model, was built in this year. Best regards. Michael.

.thumb.png.6e11fc11af5645499ae76cb59fcfb788.png)


copy.thumb.jpg.d8f94c146f5d2da12880c4799901d6dc.jpg)