Search the Community
Showing results for tags '1/48'.
-
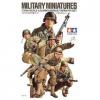
 It's been quite a while since I completed anything, but I did finish this little lot over the weekend. Finally the sun came out this afternoon, so here's my effort at the Airfix Ready For Battle set. This set really is a bargain at around £30 on evilbay and all the kits go together beautifully. I could quite happily spend the rest of my days building Hurricanes... Paints are all Vallejo model air, background is from Gaugemaster and the base is made from some off-cuts sprinkled with static grass, applied with my own home-made static grass applicator. Airfix 1/48 Ready For Battle Set by Andy Moore, on Flickr Airfix 1/48 Ready For Battle Set by Andy Moore, on Flickr Airfix 1/48 Ready For Battle Set by Andy Moore, on Flickr Airfix 1/48 Ready For Battle Set by Andy Moore, on Flickr Airfix 1/48 Ready For Battle Set by Andy Moore, on Flickr Airfix 1/48 Ready For Battle Set by Andy Moore, on Flickr Airfix 1/48 Ready For Battle Set by Andy Moore, on Flickr
- 17 replies
-
- 31
-

-
After a battle with and stalling on the Fly 1/32 Wessex, moving condos which damaged the work on the Wessex I needed a nice subject to get the mojo back.. http:// So what better than a Tamiya 1/48 A-1H skyraider completely out of the box.. No PE.. No resin.. No paper.. no fancy stuff just back to basics.. http:// Paints from Mr Color (Mr Hobby) and Tamiya.. Grey was a mix as did not have the right colour http:// http:// http:// http:// http:// http:// But life is good.. A view from my balcony work bench area.. http:// Thanks for looking..
-
Finally got chance to take some final photo's after working 15 days straight..... Nice kit, with only a few little minor niggles, but just what I needed after a few problems. Painted with Mr Color laquers. Work in progress thread is available here Peter
- 14 replies
-
- 40
-
-
Hi all Here are a few shots of my Hungarian Bf 109E-7 made using the Tamiya 1/48 kit. I got a big chub to finish a 109 in this scheme after I saw it in the Mushroom book on Hungarian fighters. The markings are as featured in the wartime aviation film Magyar Sasok (Hungarian Eagles) made in Hungary in late 1943. As I am an out-of-the-box builder, or one who only makes minor enhancements to my builds, I performed the following minor tweaks. Fuselage - kit seat replaced with Ultracast seat - antenna wire made from stretched sprue - upper cowl intake opened - cowl gun barrels drilled out - engine starter crank opening and lift points drilled out - kit propeller and spinner replaced with Ultracast resin parts - exhaust replaced with Ultracast resin exhaust Wings - wing gun barrels drilled out - kit wheels replaced with Ultracast resin wheels - tail planes modified to eliminate the anhedral Paint and Decals airframe painted with Xtracolor X384 Kaki, X602 Su 27 Light Blue and X213 Gelb RLM04 - all markings are a combination of Repli-Scale 48-5050 and Aero Master 48-056 - model is weathered with chalk pastels References - Model Art No. 375 Messerschmitt Bf109B-E - Aero Detail No. 1 Messerschmitt Bf109E - Hungarian Fighter Colours 1930-1945, Volume 1 A big thanks goes out to Scott of SnJ fame, who supplied me with a set of tailplane support struts, after I lost mine. Cheers Randy
- 29 replies
-
- 31
-
-
Hello, I would like to build a Hawker Hurricane Mk Ia equipped with a DH propeller - not the "standard one", but the "Spitfire one"; apparently that's the configuration of the 12 machines delivered to Romania. The Hurricane propellers story was covered in detail here: http://www.britmodeller.com/forums/index.php?/topic/234980181-hawker-hurricane-propellers-and-spinners-a-modellers-guide/& and it's not my intention to go over it again. I'm more interested in how to replicate that on a 1/48th scale model starting from the kit that I have - Hasegawa Hurricane Mk.I TRop, ref. 09682. It goes without question that the kit does not contain this configuration. I've bought the Quickboost (QB 48 625) DH Spitfire propeller intended for the Airfix kit, but the spinner is hugely oversize compared to the Hurricane cowling. - is the Quickboost part (QB 48 268) intended for the Tamiya Spitfire I & V kit different from the one above (smaller spinner) and consequently suitable for what I want to do? - is there a difference between the two Quickboost parts (QB 48 400) and (QB 48 425) - both identically labeled as "Hurricane De Havilland Propeller for Hasegawa kit"? - is there any known kitbashing option? Thank you very much for any useful hint or suggestion. Regards, Iulian M.
-
Ok. This is my first work in progress post and , after a lot of thinking about it and putting it aside for another day, my first Canberra build. I have a cupboard full of Airfix Canberras acquired cheap when Modelzone passed away. They seem to be nice kits, basically accurate but to my eyes let down by deep trench lines and simplified detail. No worries, that what’s modelling is all about. The beauty of these Airfix kits is that they have nice thick basic shells that can take a lot of butchery. Top of my list for a long time has been WH793. This was a PR7 that was converted into the aerodynamic prototype of the PR9 - essentially a PR7 with PR9 wings. Following early trials it was converted into a high altitude research aircraft with a long tapered pitot boom and a great silver and dayglo finish. It is featured in Adrian Balch’s book ‘Testing Colours’ and it was those images that finally spurred me to make a start. It is a subject that has already been covered on this site by Canberra Kid, here is my take on it. I have been researching this as much as I can and have identified a lot of unique features which hopefully will make for an interesting build. I will also attempt to add detail where I think it will make a difference. I do not aim for perfect accuracy, I am more interested in adding ‘realism’, the types of details that add interest that maybe the injection process can’t quite capture. So on top of the conversion features I intend to remodel the wheel wells, flaps, vortex generators and the moving tail. I did say I had been planning this for a while. So fine words, let’s see how I get on……. First steps. Here is the PR9 fuselage with the B2 nose added. The vertical mark shows the join line. Bits of B2 fuselage have been used to close the upper fuselage. The join was reasonable but needed a good rub down. Halfords Heavy build primer is great at filling up the bits that weren’t too smooth. I have also filled all the panel lines. You will also see that I have amended the wheel bay where it meets the fuselage, again using a spare piece of the B2. On the real thing the inside face of the bay is the side of the fuselage. More on this later. I have also opened up the flare bay. I might regret this later. I am using the Alley Cat replacement canopy. This is a nice add on and does a lot to sort out the mangled Airfix effort. It is a little jam jar like but responds well to a gentle rubdown and a dip in Future. I have also filled the rough panel lines around the nav’s roof windows with Mr Surfacer. Came up nice… These are very clear and give a good view into the interior, so a bit more effort needed here. WH973 was a one off and the interior was obviously an adaptation. There does not seem to be any photographs available so after a lot of head scratching I asked for help on the Canberra Sig website. The redoubtable John Sheehan, aka Canberra Kid, quickly came to the rescue. What you see here is the result. As said previously I don’t pretend that this is 100% accurate but I am trying to recreate what it might have looked like (and if no one has any pictures no one can say it is wrong!). Key points: Big black box at the rear of the Cabin with cables emerging beneath. A weather radar to the right of the pilot, this was cannibalized from a Flightpath Buccaneer etched sheet that was never completed several years ago General cockpit details adapted from the Eduard set. A Pavla pilot’s seat with added wire pull handles. The interior of the Alley cat canopy needs painting on the inside before fixing , very dark grey over a black undercoat. Silver decal strip to represent the canopy supports ( if that is what they are) . After painting the inside of the canopy I discovered that the light into the interior was drastically reduced and much of the detail inside disappeared. Lesson for next time. I did brighten up the interior to add a bit of interest. Cables under the ‘black box’ were painted silver and green. Bits of detail such as red and yellow spots livened up what could be seen and the radar screen was painted with an orange glaze. No idea if it was really like that but it did add a bit of focus to what was an important bit of kit on this aircraft. Not fictitious I prefer ‘alternative facts’. The Pavla seat was worth every penny, the wire handles worth the effort. The Nav seat was the Airfix offering with wire handles, these are all that can be seen once it is all closed up.
-
 Finally...... AMK Микоян МиГ-31, Саваслейка Air Base in 1/48 scale with Eduard Interior. A superb kit of a beautiful russian aircraft! I hope you gents like it, thanks for watching! Oliver
- 56 replies
-
- 40
-
-
Hello modellers, Here you are my last job, the beautiful Tamiya Sturmovik. It's a great kit that it's a pleasure to build (even if a bit expensive). The model is OOB just with few additional details on landing gear and cut of control surfaces in angled position. Paint, as well as glue and finishing spray are all Tamiya. Enjoy the pictures and feel free to comment. Cheers Andy P.S. Apologise for the quality of the pictures... I made them with my mobile phone instead of camera.
-
I am going to attempt something a little more exotic than my first WIP build. And back to my preferred scale. This kit caught my eye after I saw a very impressive build of it on this very site, here. Though I doubt I will be doing as good a job as that, I will give it a crack, and it's nice to have something to aim for. I plan to finish mine with some worn away winter camo over-paint. There don't seem to be a lot of photos of the SU-2 with this scheme in action, but a quick google threw up a few examples, albeit very small and pixel-y ones: I had a look in Osprey's Russian Aircraft 1875-1995, and though there are some nice photos of the SU-2, they are in what looks like one-colour schemes: In what might seem a rather perverse move I finally took on an enormous He111 that's been hiding under my table for a year now as a practice run for the winter camo on the comparatively small SU-2. I had never tried the hairspray technique before, and was rather daunted by the idea of it. Turns out that, as promised, it's remarkably easy - and very rewarding. My only problem was that it was so satisfying seeing the white coat chip away that I had to really force myself not to rub all of it off. Anyway - He111 is below. And with the hairspray technique demystified I will now plod on with the SU-2.
-
Following on from my Canberra, this was my 4th Lightning in 48 scale (the previous 3 being an F.1 and T.4 built last year as a Firebirds duo, and an F.6 prior to these for a GB a while ago) but following the recent release of a half engine by CMK in resin, I was inspired to build this. I decided beforehand that I'd open a few panels up myself, wanting to stretch my skills beyond my norm, so with the timely publication of the Daco book "Lightning Uncovered" I purchased a donor kit and several resin items (I'll post a link to the WIP photos later) including the aforementioned engine, and cockpit, undercarriage bays, and (what CMK call) "electronic boxes" which in fact comprise of the rear spine gubbins ahead of the engine bay, plus two resin boxes that fit into the port side of the fuselage that don't really hold electronics, but hydraulic pumps and pipes... Also, the CMK instruction sheets are not very helpful, or accurate. Be warned if you use these sets. Aires provided the exhausts, as I always use them, Master the pitot, Eduard a few bits and pieces from a leftover set plus the RBF tags, Montex the paint masks, and Model Alliance the decals. The painting was my trusty Alclad shades, with Humbrol and Xtracolor providing other colours. The weathering was various Humbrol and AK sets of washes and powders. Please refer to the build pics for the scratch built stuff, I think most of it should be covered in those photos. All of the piping and wiring you can see I added from either copper wire, fuse wire or plastic rod. The shock cone wasn't really long enough to be displayed off, so to build up the "base" I glued a core of acrylic rod then wound very thin plastic strip around it til it sat flush with the end of the cone, before painting with aluminium. The Ferranti AI.23 I made from plastic strip and rod, and again more strip would around solid rod for the aft section. The dish is made from the end of a pipette. Some of the wiring and details is even too small for me to add so it's more a representation than 100% accurate. The individual small panels I made from very thin sheet, cut to size by tracing them through off the plans provided at the back of the Daco book. The corners were rounded off and fastener holes made with a metal point in a pin vice. In the last pic I have laid them out in the positions they would be on the airframe. Below is the build log, I hope you can see it Also I apologise for the amount of pics here, but I usually can't decide which base or background looks best so I present a selection of each. Many thanks for looking
- 42 replies
-
- 50
-
-
- Airfix
- EELightning
- (and 1 more)
-
Yep Hobby Boss got the shrink ray on Trumpeter's 1/16 T34/76 and in a few versions too. Here winter's bone and I am starting the year in green with this amazinginly detailed kit, with some truly small parts. My biggest gripe with the kit is despite the clear instructions and lovely painting guide sheet the instructions for painting details in and around the tank are too few. While the detail in these 1/48 kits is funtastic, I have to say I think I'm still more of a fan of vehicules in 1/76 and kits with figures and interiors in 1/35. Let's see if I can get this one to a decent standard.
-
Hi What was the preferred RAF tug vehicle in late 70s / early 80s for the likes of the Phantoms and Tornados? I have seen the USAF 1/48 kits with a Harlan tow tractor, but I doubt the RAF had them - wonder if they made it to UK USAF bases like Lakenheath & Bentwaters (if so were they yellow or green?)? I have a feeling I have seen yellow Ford 5000 tractors as RAF tows from this era. If so that is roughly do-able for 1/48 via 1/43 o-gauge models. Cheers
-
Hi,here's the latest build. Had some difficulty with the canopy to nose section which I think can be quite typical of Italeri helicopter kits! Added a little scratch building in the cockpit - the kit cries out for some etched brass and resin updates. Painted in a mix of Tamiya greens, weathered with some pigments, a little paint chipping and some random gloss black spots on top to represent oil drips. Anyway it was a challenging but enjoyable (in the end) build of something that's not often built from what I can see. Cheers Italeri 1/48 OH-58D Kiowa by bryn robinson, on Flickr Italeri 1/48 OH-58D Kiowa by bryn robinson, on Flickr Italeri 1/48 OH-58D Kiowa by bryn robinson, on Flickr Italeri 1/48 OH-58D Kiowa by bryn robinson, on Flickr Italeri 1/48 OH-58D Kiowa by bryn robinson, on Flickr Italeri 1/48 Bell OH-58D Kiowa by bryn robinson, on Flickr Italeri 1/48 Bell OH-58D Kiowa by bryn robinson, on Flickr
-
 Hi all! Just finished this project several days ago. For the full build please see here - http://www.britmodeller.com/forums/index.php?/topic/235005084-vought-v-173-flying-pancake-special-hobby-148 Some general view photos: Some more detailed photos: And with his brothers (or maybe with her sisters?). Always confused about english genders: cousins (thanks, Dennis!): Edited Jul 09 - all images links changed from greedy Photobucket to OneDrive
- 28 replies
-
- 34
-
-
- flying pancake
- 1/48
- (and 1 more)
-
Hasegawa's F-4s have been around for a while now, but I think they are still beautiful kits. I'm building mine with an Aires cockpit and exhaust set. I also have a Wolfpack nose correction set for the EJ variant. I'm still undecided on the color scheme. Tempted to finish it as a colorful 'Okinawa Phantom', but it might end up as a simple low viz bird. I really enjoyed working on the Aires pit. This is my first resin cokcpit set. Painted with Tamiya acrylics followed by an dark oil wash. Unfortunately most of this will be hidden once in place. Exhausts More to come (hopefully). Thanks for looking.
- 22 replies
-
- 10
-
-
Way back in April 2005 Steve Zaloga built up the Tamiya Pershing with Accurate Armour's conversion as the T26E1 Pilot modified by the 33d Armored Regiment of 3d Armored Division. A year later Tamiya down-sized their 35th kit to the One True Scale. I started a project. Soon afterwards Steve Faxon issued a conversion kit that helped! Then I got more reference, couldn't get the resin gun barrel to stay straight, lost interest and put it way. This is what it looks like today... I've disassembled the lower hull and removed the suspension arms to alter the sit to the very nose down look of the original. The pathetically short dampers have been removed as well. I had added the underside detail as I do that sort of thing see the other project for the bare original which offends my sensibilities. I've found that an old credit card fits the slots the dampers leave behind perfectly so they're filled and hardening. There is a lot to be done but as things are slowing down at work now we've got the shops filled I'll have regular bench time. Apologies to Shermaniac for not doing the M4A2E4 I had definitely decided to do yesterday!
-
Here's the Spin Sage 2; I have a 'work in progress' article on this unique aircraft in the 'wip' area. Rigging done with fishing line and ceramic wire. Am thinking for the moment I 'might' have the only one of these built in Omaha. Here's a history of the Sage 2. http://www.aviastar.org/air/england/sage-2.php
- 23 replies
-
- 19
-
-
Just finished the 1/48 Special Hobby Nieuport 10. Use the kit's decals, rigging done with ceramic wire and fishing line. Added the hole in the top wing for the observer to get access to a machine gun mounted on the front spar with the exception of the prototype photos in the Datafile and a few books I can't find where the MG was ever mounted here on the production types. The hole shows up in a number of photos of the aircraft in service so I added as I wanted an early war Nieuport. Lots of discussion on various web forums as to th color of the tapes on the fuselage and wings. Some say black, brown with the latest theory being in the blue-gray camp (same color as the Adrian helmets) so throwing caution to the winds I went with the blue gray. I initially laid down an Amtrak blue (Microscale) on the wings and then brush painted to blue gray over the top. I then got the idea of painting the blue gray on the decal sheen and cutting out the tape - which worked out perfectly (but needed Walthers Solvaset to get the decals to lay completely flat). Castor oil staining done with water based oils. Same with the mud on the tires and under the wings. I do have a 'work in process' on this subject if interested.
- 8 replies
-
- 16
-
-
- Special Hobby
- 1/48
- (and 1 more)
-
 Hi all, a slightly misleading title in that only one of these Spits is a desert bird but the meaning will become clear momentarily! I used to post here until about 5 years ago when I took up a new job in the middle east and modelling had to take a back seat. Having recently moved into a bigger place and my stash grown to excessive proportions I decided it was time to get building (and posting) again. Here are my first few across the bench! Eduard Spitfire IXc early (weekend edition), EN354 of the 4th FS, 52nd FG based in Tunisia 1943. What a beautiful kit, so good I went out and bought two more IXs and three VIIIs! Built OOB. Hasegawa Spitfire VI, BS111 of 616 Squadron 1942. A nice kit but not the best fitting. I added some Eduard seatbelts, scratch built pressure bulkhead and DV window. Since the canopy on this version was removable and did not slide I had no idea where to put it(!), so I tacked it to the wing with some white glue as if the erks had placed it there. ICM Spitfire VII, MD187 of 131 Squadron 1944. This one fought me a lot of the way! Scratch built pressure bulkhead/canopy rails, Falcon transparencies and decals from the spares box. Spare Eduard elevators and Airfix tailwheel plus shortened oleos to improve the sit. Had a lot of trouble painting the invasion stripes, I'm passing their resulting roughness off as being hurriedly applied!!! Tamiya Spitfire I N3290 of 92 Squadron, May 1940. What else to say about this beautiful kit? OOB with Xtradecals markings. And I should have removed the crowbar and the seat should be green and not plastic! Academy (Hobbycraft) Hispano Buchon, Spanish AF. Have to say I love this scheme! Looking at photos these aircraft seemed to be immaculate hence no weathering. I added a Eduard Bf109 cockpit set. Paints used were a mix of Vallejo, Tamiya and Model master. Flat finish by Windsor and Newton. I've decided to build one last Spitfire before I decide to change subject for a while. I've never been a fan of the Airfix Spitfire XII, to my eye it seems too chubby and does not capture the hot-rod look of the real thing. I had a spare Hasegawa IX fuselage in the spares box so I corrected the length and grafted the Airfix nose onto it, reduced the Airfix wing chord using an Eduard wing as a guide and added a spare Eduard rudder. Although I still wonder why I did this (especially as the Airfix bits fit together so well!) the result looks OK to me. Its currently waiting on some paint masks for the codes, which I should receive this weekend. I am at the end of a fairly long supply chain!!! I hope you've enjoyed looking at these as much as I have enjoyed looking at and being inspired by the work on this site over the last few years. Please do let me know what you think and also any constructive criticism is most welcome! cheers, Chris
- 16 replies
-
- 47
-
-
Hello folks, This is the Heller Mirage 2000C turn into a 2000-5F version. The nose and the vertical fin are from a Kinetic box, the cockpit too. The seat is from Palva. The aircraft depicted here was based in Crete undertaking CAP missions during Libya operations. Cheers
-
Hey Guys. I finally finished with this one. It was a nice kit to build, although it has some faults and is kinda basic. Anyway, this is the result. It's a Romanian marking...representing a Yak 23 Flora belonging to the first squadron, 135 Fighter regiment, circa 1955. This was the first jet fighter of the Romanian Air Force. WIP here : http://www.britmodeller.com/forums/index.php?/topic/235000412-yak-23-flora/#comment-2319309 Any comments welcomed. Thanks and regards,
-
Heya Guys, Since I have at least 2 ongoing and unfinished projects, it seems like common sense to start another one. I guess that this is what happen when one is running out of steam with unfinished projects. Anyway, I just couldn't stop myself so here we go...after some rummage through the pile of plastic boxes, the winner was the Yak 23 from Bilek. I don't know why I choose it...maybe because of that vintage look of the early jets, which the little Yak captures very well methinks. Ok, so first of all the classic presentation of what's in the box:
-
 If Monty Python had written a script on going after a Zeppelin flying over London I'm positive the crew would have been given a Sage 2 as their aircraft. Only one prototype built and it crashed. Two questions come to mind 1) why did Spin even do this kit and 2) what on earth was I thinking to even buy one? I'd ordered this from Hannants and was working on the Nieuport 10 when the box arrived from the UK. I looked at the low number of parts, the nicely cast thin wings and thought 'why not' let's give it a "spin" (bad pun). After a Google search for "Spin 1/48 Sage 2' all I saw were in-box reviews with no one actually building this kit (or at least posting photos of the completed model) so there was yet another a challenge - can it be built? The parts are actually well cast although the detail is a little soft in places around the sides near the engine. The clear sheet wraps around the cockpit and after several dry runs I think it's going to fit perfectly. I initially thought of using Canopy glue to attach it but am now going to use double faced tape so I can pull it back and reposition it as needed. I spend considerable time painting the cockpit but after attaching the top wing I might as well painted it in pink and purple dots as no one will see it. The Gnome engine, if actually seen, I'd replace, but the huge spinner hides it so am going with the kit's casting. Not much rigging on this little bird either so that's another plus. The casting on the top wing has a lip on the bottom to mount the window structure into. I removed the lip in the front of the wing and narrowed the 'V' casting in the back of the wing to get it to sit inside the cockpit area. Normally I use acc but used 5 minute two part epoxy to attach the wing as I feel the epoxy will hold better in the long run and I wanted some time to get the wing on straight which acc sets up too quickly. As you can see some of the detail parts aren't all that bad and the flash is thin and easy to remove. Here's the Gnome, several casting bubbles between the cylinders and tubes. Once the huge spinner is attached this will be hidden.
- 47 replies
-
- 11
-
-
At the present I am unable to model (not the catwalk variety!!) due to recovering from an operation on my hand, nothing too serious I'm glad to say. The last project before this was the build of 4 Bf109s, all 1/48 (my scale), 2 x Eduard new tool, 1 x Eduard original tooling, 1 x Hasegawa and I've also included another Eduard original tooling that I built when first released. Can you identify the kits? No prizes I'm afraid ( living on a pension!!). (1) Messerschmitt Bf109G-6 (sub type unknown) Red 1 2./JG300 26/6/44 Germany This is one of the Eduard 1/48 new tool kits built with the addition of Brassin cockpit, Eduard photo etch and Eagle Editions decals. All these models were painted with the Vallejo model air paints which give a very good match to the RLM colour reference I use by Michael Ullman. This particular aircraft was painted in one of the many schemes trialed by JG300. The main upper airframe colour was a 50/50mix of RLM 74 & 75 to which was added mottle of a mixed grey in my case RLM 66 toned down with white. Undersurfaces RLM76, fuselage band I painted RLM 45 Rotbraun (primer). I do not add an awful lot of weathering to my models as their service life was probably not that long. I really found these new tool Eduard Bf109s a joy to build especially with the brassin cockpit, my only criticism being the exhausts and openings which are very slightly oversize but can be reduced with a little work. I did not make this alteration to the two new tool builds here as the exhausts are covered. (2) Messerschmitt Bf109G-6 White 7 W. Nr163269 4./JG51 June1944 Bulgaria Again the new tool Eduard kit finished with same accessories as Red 1 above. Typical RLM 74/75/76 scheme with full stencil markings, again machine in fairly clean state. (3) Messerschmitt Bf109G-2/R-6 Yellow 10 W. Nr.14800 6./JG5 April-May 1943 Russia This is the first of the Eduard original tooled 109s. This is the 109G-2 from the Royal Class boxing,as the main problems with this kit was fuselage too long, wings overspan, u/c at incorrect angle.I modified all the problems (my article over on Aeroscale a year or two ago described the methods used http://www.aeroscale.co.uk/modules.php?op=modload&name=features&file=view&artid=5612 . The cockpit was detailed using the kit components plus a few extra details, the underwing gondolas were the Brassin parts that were included in the Royal boxing with barrels from a hypodermic syringe. Colour scheme for this machine was very interesting, originally intended for topical operations the paint scheme was RLM 78/79. It was however delivered to JG5 operating in a northern theatre of operations where it received a coat of washable white paint and RLM 70 mottle. However patches of the original 79 still showed through giving the aircraft a tri colour scheme. Decals were sourced from several different sheets. I note that Eduard have just released the Bf109G-2 and that one of the schemes is the aircraft that this one replaced!! (4) Messerschmitt Bf109G-5 Yellow 11 W. Nr.27119 9./JG54 Spring 1944 Germany This is the original tooling of the Eduard Bf109G-6 and the kit I modified shown over on Aeroscale. I built it as a G-5 version simply because of the scheme in the Eagle Editions decal sheet I had. Scheme is originally standard RLM74/75/76 uppersurfaces were then sprayed over with RLM 76 leaving the original colours showing through. (5) Messerschmitt Bf109G-2 White 2 4.JG/54 Autumn 1942 Russia Now for the odd one out, this is the old Hasegawa G-2 released way back and purchased when Hasegawa kits were reasonably priced and not the stupidly outrageous prices they now charge even for kits this old and way below the standards that we have come to expect from manufacturers these days.If Eduard can retool!! Mind you if Hasegawa did retool their 109 family what PRICES enough of my thoughts on 'Hasedearer' pricing. These 109s when first released were the most accurate around even though they suffered with incorrectly shaped spinners, short fuselages and incorrect profile on the rear fuselage, they were the best around. I added a fair few to my stash over the years, some I actually built I replaced the spinners with the Fusion resin replacements but attempted no other modifications other than adding Aires resin cockpits. Then recently after the first tool Eduard kit and my fix thereof, I decided to re-examine the Hasegawa offerings. I decided the incorrect rear fuselage I could live with, however I decided to add the missing 2mm of length in front of the cockpit with plastic card and sand to shape after reattaching the nose I had previously removed with a saw. I then proceeded to add detail to the kit using the large amount of spares from the Eduard kits;- I used the wheel well walls with a little surgery, the wheels (far superior to Hasegawa's) replaced the nose intake (because I could!!) spruced up the intakes rubbish on the Hasegawa kit and used the Eduard tail wheel. Then added Fusion spinner & blades and Aires G-2 resin cockpit. You see above the end result, thus modified I don't think it looks too out of place with the Eduard 109 family! The colour scheme for this machine was easy to choose as I wanted to show the varied schemes used by JG54 especially the use of the mixed browns they used, mine was mixed from the various recognition colours red,blue,yellow,green & white eventually almost coming out similar to RLM 79. other colours used were RLM 70/71/76. Decals came again from a variety of sources. Well that was my last pre-op project now waiting for my hand (right one had to be didn't it) to be able to hold a scalpel again I've been thinking about future projects. One I'm considering is bringing all my Hasegawa 109s up to standard, we shall see. Hope you enjoyed perusing my post. Regards Andy
- 15 replies
-
- 22
-
-
hi this is my new project first one on britmodeler the mig 23 from trumpy with additional headache aires ! hope to get some more work before moving in to new home (where finally i can get a room for my hobby?