Search the Community
Showing results for tags '1/48 scale'.
-
- 53 replies
-
- 85
-

-

-
- 1/48 Scale
- OOB Build
- (and 1 more)
-
Here is my recently completed Great Wall Hobby 1/48 Sukhoi Su-35S Flanker E. This kit has to be one of the very best kits I have ever had the pleasure to build and the biggest too. It sat in my stash for 5 years as I was too intimidated by it's size and apparent complexity but in reality it was actually a lovely kit to build and comes highly recommended, it is big though! I started this in April last year and finished it a few days ago so 10 months or so but I wasn't speeding along. Everything you see came out of the box although I did add magnets to the weapons and pylons so I could swap them around and I have plans to add some aftermarket air to ground weapons in the near future. The only other additions are also some lovely 3D printed compressor faces and intake guide vanes that were kindly supplied by a fellow Flanker fan. The main camouflage was painted using Mr Paint colours. The metallic areas used various shades of AK Interactive Xtreme Metals and various other paints and weathering compounds. Although this colour scheme is included in the kit decal options I used Begemot Decals. Due to it's size I struggled to get a good lighting set-up and to pose it without things appearing in the background so my apologies for that, there are lots more photos on my Smugmug page if you want to see more. Enough waffle and on with the photos. Duncan B
- 62 replies
-
- 105
-
-
-
- Great Wall Hobby
- Sukhoi Su-35S
- (and 1 more)
-
 My 'What If' scenario is: Paint a standard Spitfire XIV to look like an unarmed PRU aircraft, and fly decoy missions at high altitude. Build thread here According to the WHIF scenario in my head I want to build the best looking (well, as a highback kit bought off the shelf) Spitfire XIV in my favourite colour (PRU blue) with standard elliptical wings and cannons. There is nothing more aggressive looking to my taste, at this time. I think the exercise was worthwhile, and I hope you agree? If not, I'd still like to hear your thoughts too, as this tends to enhance knowledge on these topics. The excuse to build this Firstly, I've envisaged the aircraft operating with RAF Second Tactical air force 2TAF. To counter PRU losses due to fighter intercepts, 2TAF has agreed to take some of the pressure off PRU colleagues and assign 2 unmodified Spit XIVs (for one month only) to fly decoy PRU flight missions to find and engage enemy fighters sent up to engage PRU spitfires. The hope is the enemy would adapt tactics to become cautious every time they encounter a PRU Spit, and therefore stem the current loss rate (I read the average life span of a PRU Spit was 14 missions at one point). Both Spits would be temporarily painted PRU blue and fly solo missions with a footprint near-enough to a high flying PRU mission, once within German radar range. Fuel range limitations of standard XIV This information was presented by knowledgeables in my WIP thread, for which I'm grateful as this 'setback' added contextual background. However, the revelation also meant I had to rethink my original scenario. I didn't want anything as practical as drop tanks on this model! Standard fuel range of XIV is listed as over 400 miles according to Wikipedia, which as 'everyone knows' can be a semi-reliable source. This range should do for operations over Western Germany, taking off from Belgium. The XIV range limitation really focuses the timing of my one month trial to 'not before' mid-September 1944. Use of Advanced Landing Grounds in Belgium From September 1944 my scenario becomes viable with the standard XIV, and no drop tanks. Advanced Landing Grounds are now established in Belgium. Close enough to the German industrial Ruhr valley and I'm guessing other typical PRU flyovers. Most likely, the ALG named A-74 Florennes in Western Belgium could have been quite an attractive regular ALG for these missions. However, this is also a guess because I wasn't successful in tracking down information about RAF activity from the mainland Europe ALGs. American historical details are plentiful, with unit names and aircraft types operated. Equivalent research down to unit level for the RAF doesn't seem to be available? Happy for anyone on the forum to jump in here with their own research on ALGs. Taking off from Florennes airfield with full internal fuel should allow the Spit time to climb to a 'just-high-enough-to look-realistic' altitude - certainly over 30,000ft - taking say between 10 and 15 minutes all the time flying over Belgium, before appearing in range of enemy radar screens still known to be functional at this time in the war, was my thinking. Maybe to assist, RAF 2TAF could target Wurzberg radar sites close to the border, but obviously how far are we heading into this scenario? 🤨 Cockpit un-pressurized? Ideally, I thought the standard XIV would need to be modified to feature a pressurized cockpit typical of PRU variants. However, back to reality briefly, I couldn't make any of the 3 beautiful vac-formed canopies I ordered to fit my model. I literally had to bin that concept 😳 In retrospect, it's fanciful to imagine there would be enough time and resources available to overcome the inevitable British bureaucracy standing in the way of modifying two existing XIV aircraft in the field, during wartime! Especially as the assignment was short term in nature and wouldn't be a major consideration of the RAF 2TAF in this period. Long story short long story short - my - WHIF - standard Spitfire XIV painted PRU blue, fully armed, no cameras. Hope you find the result worthy of interest or debate. A dive into history on a specific mission-type is never wasted' and generated great contributions on the WIP thread, so thank you for those contributions. The knowledge - or even just added insight - gained will come in useful on future projects. Most of the build decisions I made along the way can be found on the WIP thread. I've used the only high back XIV kit off the shelf, from Academy in 1/48. Not very accurate in some aspects obviously. It's my second one and both are well-engineered and fall together brilliantly. I used AM exhaust stubs, AM cannons (the longest ones for maximum shock value 👽) and PE belts. Edit: and the lovely AM Props and spinner I hope this 'Ready for Inspection' and story has stimulated the grey matter. I'll certainly be thinking about creating more monotone Spits in the future. Thanks for looking in WP
- 9 replies
-
- 26
-
-
- 1/48 scale
- Academy Spitfire
- (and 1 more)
-
 As I come close to the conclusion of my HMS Wren build over in the Maritime section, I'd like to drop a place marker for the next project. On the night of 10/11 November 1940 21 Fairey Swordfish Mk.I's launched from HMS Illustrious and Eagle in two waves on a six hour round-trip to attack the Regia Marina in its harbour at Taranto. The mission was the culmination of a highly coordinated operation by the Royal Navy involving six separate Forces and two convoys. The total RN units engaged was three carriers, a battle squadron of four vessels led by HMS Warspite, a destroyer squadron of 12 destroyers, plus another 33 vessels of varying types. The plan of attack was elegantly simple; two waves were sent an hour apart. Approaching their targets from the west, two Swordfish were tasked with dropping flares along the eastern side of the harbour creating backlighting to sillouhette the target capital ships at anchor in the Mar Grande. Each wave comprised both torpedo and bomb armed aircraft - those with torpedoes attacked the capital ships and those with bomb went after the cruisers and destroyers in the Mar Piccolo. The attack was a success, aside form the not inconsiderable damage caused, it had the additional effect of pinning the Italian Navy in its northern ports for the remainder of its involvement in the war. Two of the attacking Swordfish were lost, one of the crews was picked up and made POW, sadly the other perished when their Swordfish sustained a direct hit hit from shore-based AA fire. I am building the Tamiya 1/48 scale Swordfish Mk.I more or less out of the box for this project. I haven't decided which of the attacking aircraft I will mark mine up as, but I'm erring towards either L4M flown by Lt H. Swayne of 815 Squadron off HMS Illustrious or L5F flown by Lt. E. W. Clifford of 819 Squadron also off HMS Illustrious. For reasons I'll touch on later, both of these pilots had epic nights, even more so than their squadron-mates if that were possible. I'll likely begin the build in a week or so I expect. I know we have a lot of FAA experts on board, I look forward to my continuing eduction of all things FAA with this build. Cheers.
- 174 replies
-
- 25
-
-
- Tamiya
- 1/48 scale
- (and 1 more)
-
HI All, This is my second entry for this GB My Wife stated this many moons ago - she wanted to be involved in sharing my hobby, but now ill health prevents her from building, but she loves it when I do build my models, and enjoys it when I share my progress with her. She has a new toy though, which I foresee having a great impact on my model building a 3D Printer. I can see helping immensely for printing parts, and my daughter can do the CAD drawing so life is looking sweet Anyway onto the kit - Technically this and the F4U4 Corsair I will build, could have squared off in the latter stages of WWII, but the Corsair will be a Korean War bird Box Art Sprue Shot - Not a lot of parts - will scratch build a basic cockpit (3D printer is still being set up/calibrated) Clear Parts (read canopy) Monogram provided 2 ??? Kit Instructions - pretty basic Kit Markings - Not a lot - not sure whether this is a "Mitsubishi or Nakajama" produced Air Frame As a bit of back history, the RNZAF scored a "Zero" as a War Prize, but this was/is a A6M-3 Photo of the Zero (eventually NZ6000) at Hobsonville after being shipped to New Zealand (RNZAF Official - Air Force Museum of New Zealand - used with Permissions) The Zero now resides here in Auckland, at the War Memorial Museum Thanks for looking in, see you at kick off tomorrow Thanks/regards Alan
-
Hi everyone I’d like to join in the fun with a Tamiya E-4. I’ve only built this kit once before and that was back in the year 2000 but I remember it being up to Tamiya’s usual high standards in terms of fit and so on I I had another in the stash so here goes. I haven’t decided on a colour scheme yet and have an Xtradecal sheet with a few good options on its way in the post so we’ll see. Anyway here’s the box and the sprue shots. C0BC5F03-7D9C-4647-8327-2180A8EC3992 by James Halls, on Flickr 5BF353E4-014E-4E10-B586-7C6FE6CD087E by James Halls, on Flickr Thanks for looking and see you at the first update. James
-
 Still struggling with a pair of Mk XIV's but can't not be in this. This will be my contribution: Still haven't decided on a subject yet, but likely Geoff Wellums QJ-G. Or a DW-K from 610 Squadron. Or .... hmm Not intending to do too much to this one, but that is always an ominous thought. I do have some aftermarket that may be thrown at the model:
- 80 replies
-
- 6
-
-
- QV-B
- 1/48 scale
- (and 1 more)
-
Tamiya's new-ish T-55 in 1/48 scale. This model was built more or less out of the box with the only changes are sanding the tabs off one of the fuel tank brackets so I could leave one off and I added a piece of chain and a tarp made from tissue. Finished in Tamiya and Vallejo acrylics; decals from Star Decals, AK Interactive and Mig washes; and Mig pigments. Comments and criticism welcome!
-
Fascinated by the exploits of Leutnant der Reserve Werner Voss during his short but active life flying various German scouts on the Western Front during 1916/1917, I decided some time back that the appearance of a 1/48 scale model of the pilot reflecting the well-known photo of him in front of the early Fokker Triplane in which he met his end offered 2 interesting departures for me in my erratic modelling hobby. First it gave me the chance to try to improve my figure painting skills (poor at best) and secondl,y it offered me the chance to buils a trio of the scouts he flew, decorated with my interpretation of their colour schemes and markings. The Albatros DIII flown by Voss (while he was comanding Jasta 5 from May 1917 to end July 1917) has been well documented and modelled over time. I've no doubt that Voss flew the earlier Albatros DII, as well as the Halberstadt scout, but I was unable to find sufficient research data on their appearance to warrant adding theses to the project. Nevertheless, I decided the DIII was a worthwhile starting point, since he made claims for as many as 10 Allied aircraft while flying this machine and a replacement after the first was damaged in combat. This was my first experiment with wood grain decals which turned out reasonably well after a few false starts. After researching the contemporary photos of this a/c for clues to the actual colour patterns on the wings, I decided to follow the general and learned opinion of Dan San Abbott in this area, interpreting as I went along, so it ended up as my view, right or wrong. I had intended to use some GasPatch turnbuckles to add to the detail in the rigging department. Sadly my fingers and eyesight prevented this, and my rigging thread was too thick to connect through the eyeholes, so I did without. These 1/48 scale Eduard kits are generally pretty good all round, despite fumble fingers like mine being prone to snapping or losing some of the more delicate parts. However, one gripe that I've aired before with some of the German kits with wing radiators is that no effort was made to include the coolant pipework to and from the rad and the Mercedes engine. A strange omission for a part of the structure that's very viisible on the real aiircraft, so I decided to correct this with some 30 amp fuse wire, suitably bent and glued with cyano. More amusement to follow in Part 2. Comments and criticisms always appreciated. Paul
- 9 replies
-
- 10
-
-
- Model Cellar figure
- 1/48 scale
- (and 1 more)
-
HISTORY Under the MDAP (Mutual Defence Assistance Program) the Royal Navy received , from 1951 onwards, a total of fifty Douglas Skyraiders AD-4W. The Royal Navy changed their designation into AEW. Mk1. (Air Early Warning mark one.) Tasking was mainly providing over the horizon radar coverage to protect the British fleet from attack. By doing so they became the first dedicated frontline AEW system. The AN-APS 20 radar was placed in the dome and weighed about one ton. If working properly, it had a range of more than 100 nautical miles. Although , they provided sterling service, they actually saw only combat service during the Suez Crisis in 1956. Normally a "flight" of four Skyraiders were assigned to one carrier. Crew: Pilot, in the Back Office radio/radar assistant and the LT. Observer. THE KIT AND CONSTRUCTION The Esci model (1979) is very basic. I chose the option to build the Royal Navy version in the Suez Crisis paint scheme. Furthermore ; I decided on folded wings and the port (left) side of the Wright Cyclone motor clearly visible. I started with separating the wings on the folding line with a dental instrument (probe). This task is taking a long time, but the outcome is promising. By using a diamond saw , you will lose too much plastic detail. With Evergreen plastics, I filled the four ends of the separated wings. The Waldron punch and die set provided the nuts and bolts. This job done , I focused on the cockpit. Mainly adding 3D vision with the help of Waldron switches and clear plastic covers for the clock instruments. The sides went together quite well. The AN-APS dome was a real problem. There was no alignment of the two parts, so I placed a strut broad-wise, just to make a sturdy contact with the main frame. Glued in place and hardened out , I welded a rod from Evergreen with micro weld into place. This made the whole connection extremely smooth and sealed all the gaps at the same time. The same finishing touch was given to the bulge on the upper deck. All parts were sprayed separately in silver (Revell 90). This gave me the chance to see any mishaps in alignment. Continued with Xtra colour number 121 (Gloss Sea Blue). With the help of Tamiya Tape (6mm), I sprayed on the yellow and black Suez recognition stripes. Decals in the box are good enough to be used. They took set and sol from Microscale The simple engine in the box was updated with wire and Evergreen bits and pieces.. Exhaust pipes were connected to the cylinder system. I added the “firewall and connected the engine to the firewall. The Wright Cyclone in place I turned my attention to the “open hood”.. The plating surrounding the engine was divided on the centreline. The starboard side was glued in place and the port side was opened with a thin metal hinge. Finally, I added the landing gear. Factory fresh build, with no weathering. ready to be delivered to the Fleet Air Arm. During the Suez Crisis the A Flight was stationed aboard HMS Eagle. The flightdeck of the carrier was marked with the identification "J" as from Juliett. The Skyraider did sterling service, but was replaced by the Fairey Gannet after a very short career in the Royal Navy. Specialists on this forum are maybe willing to answer the following question: What was better- The Skyraider or the very complicated Gannet. Regards, Orion / The Netherlands.
- 21 replies
-
- 44
-
-
- 1979 Edition
- ESCI
- (and 1 more)
-
Dear Readers, This model (The Truck) I encountered during my visit on saturday 02 juni to the Belgium Scale Model Convention in Putte. Anybody out there knows some more history behind this (excellent) model? Regards, Orion.
-
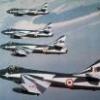
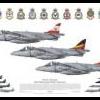
Hi Guys I have just started production on some new sets for the Airfix Hunter First is a new undercarriage set in brass and a new nose wheel in resin. https://aerocraftmodels.bigcartel.com/product/hawker-hunter-brass-undercarriage-set-airfix second set is Ailerons, Flaps and Air Brake, note although not easily seen the trim tab is added to the one aileron https://aerocraftmodels.bigcartel.com/product/hawker-hunter-ailerons-flaps-and-air-brake-set-airfix third set is new inboard and outboard stores pylons, note new parts shown with kit parts https://aerocraftmodels.bigcartel.com/product/hawker-hunter-underwing-store-pylons-airfix Limited quantities of the first two sets will be available at the Scottish Nationals in Perth (Scotland) tomorrow and Sunday the 27 and 28th April 2019.
-
Hello. I have been away for quite some time. Now, let me present you my first build of 2019. A 1/48 scale A-6E Intruder from Hobby Boss upgraded using Eduard's PE color cockpit set and exterior set. Hope you like it. If you are using Facebook, please follow my page: https://www.facebook.com/myanmarairmodeller/
- 30 replies
-
- 54
-
-
-
Hello All, Having got a Special Hobby Albacore for Christmas, which comes without a torpedo, I was looking for assistance on the size. Is it a 21” that should be put in the crutches? Do I need to rob a Swordfish kit? TW
-
Good afternoon......I seek help with the @###*@*@ Airfix Bucc in 1/48! As is well known this is not the easiest kit out there (esp straight after a Tamiya Tomcat!). I've almost finished making the beast but have now at the slipper tank stage. My question is this, does it always need the b****y things???? I ask as they come in three parts designed by Lucifer herself. I am arming the beast with the included Sea Eagle. Did it ever fly without tanks? Any info will be gratefully received, especially if it's to say that they didn't.
-
Hi do any of the F 18 Hornets in 48 scale come with foldable wings in the box?
-
Hi all. I've been given this old kit wich, needless to say, it's not up to today's standards. Anyway, there's something around those old Hobbycraft kits that make me like them, surely fond memories from long ago, when I used o get them at a local hobby shop, long gone now. I'd like to build it using the kit decals, but don't know nothing about their accuracy. Seen some colour profiles online, but as a matter of fact, I don't use to trust them, unless a picture confirms me they're OK.... According to my info, this was a Hurricane MkIIb, deployed with USSR 609IAP, and piloted by Lt Ivan Babanin. It was exRAF BM959, and sported these colours during April, 1942. So now the question... was it a standard Mk.IIb, with eight guns wing, or was it one of the russian modified subjects..???? TIA and best regards....
-
Okay, so here's the background. Having returned to modelling as an adult - a mature/vintage one at that - I have been enjoying learning new techniques (thank you internet) and building various aircraft. WWII aircraft mainly. But with the odd exception. Having not built built a Spit since childhood, I got to thinking increasingly about adding Spit to the collection. One thought quickly led to another, and on searching for a suitable candidate, this 1/48 scale Dogfight Double from Airfix caught my eye (see pic below). Just £25/£26 for two aircraft (newly tooled); the Spitfire Trop Vb and the bf109e. Airfix also throw in a nice wee stand to display the aircraft together 'in flight'. I'll be making use of this, as I am definitely going for an in-flight double piece here. A few words about the display stand. It has two spines, one for each aircraft obviously, and also two small plastic articulators that - in theory - will fit on the top of each spine, allowing you to alter the attitude of your dueling pair as you see fit. After some inspection and trial fitting, I thought that the use of these these was pretty much an accident waiting to happen. It's a shame, because it's a good idea. Anyhow, I have binned the articulaters and will mount the aircraft in a more conventional - and safer IMO - manner. Airfix also throw in some little pots of Humbrol acrylic paints. With all the main exterior colours catered for. I will not using these, because I like to stick with the brands that I do know work for me. But, handy for a starter modeler so well done Airfix! AND...you get a couple of decent paintbrushes into the bargain. Given the 'package' element of this deal. There is one wee limitation. You only get the choice of one insignia/decal option for each aircraft. Fortunately, I loved both of them! See both below. Today, I completed the bf109e and attached it to the stand. Pics to follow. The '109 was a dream fit - a pleasure to build. I'm hoping for the same kind of experience with the Spit. Anyway, enough of my yakkin! here's the pics of the 109. So, onwards and upwards. I'm looking forward to building this 109's sparring partner.
- 1 reply
-
- 6
-
-
- Airfix
- 1/48 scale
- (and 1 more)
-
Hi all...after a long time away from modelling, I've resumed my hobby with the challenge of finishing my pile of started models, an evergrowing pile that, at some point, became overwhelming.... The first of that pile is this P51D, built OOB with some leftover decals from an old Airfix kit....Painted with Vallejo Metallic colours Hope you'll like it...and best regards from Tenerife..!!! 20171205_194717 by Arturo Navarro, en Flickr 20171205_194820 by Arturo Navarro, en Flickr 20171205_194854 by Arturo Navarro, en Flickr 20171205_194840 by Arturo Navarro, en Flickr
- 9 replies
-
- 21
-
-
- ICM
- 1/48 scale
- (and 1 more)
-
Hi there, I wonder if my fellow BM colleagues can help point me in the right direction. I want to build a 1/48 scale Me 262 posed in an 'in-flight' wheels up configuration. I bought myself a Tamiya A1 kit which looks beautiful. But it is not designed to be built 'wheels-up' and has some lovely options for open gun bay, engine cowlings off etc. I do not want to cover up all this lovey detail, so I will build this one as intended in due course. i was wondering if anyone can point me in the direction of a 1/48 scale Me 262 kit that either comes designed with a wheels up option, or is not blessed with a ton of internal detail so I don't feel bad about manually re-configurating it to a wheels up configuration? Also, can anyone provide point me in the direction of some detailed photos of the underside of the Me262 in flight. Either model or real pics would be useful. Hope you can help.
-
I have been a big Javelin fan for over 30 years. I guess you can easily imagine my enthusiasm when Airfix announced their new 1/48 scale kit a couple of years ago. Actually this will be my second "big" Javelin and fourth to my collection. This kit is one of the best Airfix has ever released. It's very accurate in detail. This project actually started some 20 years ago when my friend visited Hendon and brought me this. It's a post card originally painted by Dugald Cameron. It has been hanging on my wall ever since. The "Tiger Stripes" of 60 Squadron looks very good along with the black wing tanks with lightning flashes painted on them. So good that I built the Airfix 1/72 scale FAW.9 without further references. But did this paint scheme really exist? We have all heard about "artistic freedom"... Thanks for the Internet I have been able to collect a reference library about the Javelin. Couple of years ago I found a small photo on Key Publishing's aviation forum that showed eight Javelins on the ramp at RAF Tengah. Some aircraft carried these specially decorated wing tanks. Unfortunately the photo is so small that no details can be verified. I then contacted the gentleman who shared his photo but no better quality prints existed. I also contacted 60 Squadron and their archives have three more photos on the subject. It became clear that Dugald Cameron was right all the way when he stated that 60 Squadron Javelins carried these black tanks at 1967 and after. Finally this year a new book about Javelin was published by Michael Napier. There is one photo in the book where the Javelins are taxying at Tengah after a fly past. Now I had all the "evidence" I needed and it was time to choose a particular aircraft. So this build will be XH766 "E" of No. 60 Squadron some time between June 1967 and May 1968. I chose XH766 simply because I have enough good quality photos of her from every angle. This will be very much "straight forward" build as the kit is excellent. I will show you also some extra detailing that is missing from the kit. So wellcome aboard everyone I started the work with the front fuselage. There are two round holes on the nose gear well walls. Photos show that they were covered with round panels which I cut from thin styrene sheet and drilled holes around the edges (0,3 mm) to replicate the screws. Note also the two small "bumps" on the panel just forward of nose gear bay. These are the base plates for "Violet Picture" azimuth aerials and missing from the kit. I also used my Tamiya Pin Wise to drill holes around the AI bay hatch edges. The radome was filled with 9 mm pistol bullets. They are good for modelling purposes because you know their weight exactly. Mine are 10,4 grams each. Instruction booklet suggests that 25 grams is enough but I loaded the nose with some 40 grams; surely 25 wasn't enough. Eduard provides a PE set for Airfix Javelin. I used only the pilot's instrument panel. As you can see this is the last cockpit version (the extra ILS on the left corner). This goes well with kit's cockpit which has five large knobs for cockpit lightning under the starboard side wind screen panel. I decided to sand the instrument panel to bare metal and paint it with RLM 66 (a mixture of Humbrol 33 and 34) but leave the actual instruments as they are. An interesting detail is the yellow pipes running between the pedals. Something that is visible on preserved aircraft. Javelin's cockpit is a pretty black affair. Most of the knobs are either dark brown or satin black. So be careful with red and yellow... The cockpit was illuminated by UV lamps and all markings were painted with fluorescent paint. Because this is a FEAF Javelin I also removed the "Gee" indicator from the rear cockpit and replaced it with scratch build ADF set. Here are the starter "bullets". The compressor blades are pretty crude but they are only visible with a torch so I didn't replace them. However I added the starter's exhaust pipes from plastic rod. When viewed from front the starboard side pipe should point at "four o'clock" and port side at "eight o'clock". Or other words: they should point slightly down and towards the service bay below the rear cockpit. Thank You for reading so far and see You next time Antti
- 78 replies
-
- 17
-
-
- Javelin
- No. 60 Squadron
- (and 3 more)
-
15th September 1940 Sgt Ray Holmes flying Hawker Hurricane Mk.1 from 504 Sqn rams Dornier Do 17z F1+FH from KG 76 in a last ditch attempt to bring the bomber down before it can make what he believes is a bombing run on Buckingham Palace. ...... and now a couple of shots of each aircraft without the prop blur. Both kits are 1/48 scale, the Hurricane being Airfix, while the Do 17 in ICM. Thanks for looking.
-
Hi all, Does anyone know if I can still get my hands on the Model Alliance 1/48 scale retirement decals from a retailer at all?
-
How exciting it is for me to submit my first build to Britmodeller. Apart from introducing myself last night this is my first submission. Oh my goodness, I'm putting one of my works in the public domain for inspection. Please be kind to me, but be honest as well. If you think it's bad then say so, I've got my hanky out in case. I'll try and be a man and take it on the chin. As they say, if it doesn't kill you it makes you stronger. I have built several kits over the years but I wouldn't say I'm a prolific builder, I build about four aircraft or AFV every year of scales 1/72, 1/48, 1/35 or 1/32. My latest build is Revell's 1/48 scale De Havilland Mosquito B Mk. IV. Kit no. 04555-0389. Since I returned to modelling about 25 years ago when I was 26 years old, I have tried to improve my knowledge and skills in the hobby. Of course, the hobby does not stand still as manufacturers have continued to turn out ever more impressive kits in recent years, and techniques and skills on how to model them, especially simulating certain effects and weathering that are on the real things, continue to develop and move apace. I have always tried to pick up on some of these ways from here and there and apply them to my models but with my Mosquito build I took this a stage further by following an article in Military Aircraft Monthly on building the very same kit. My inspiration came from Tony O'Toole's article in MAM February 2010 called 'Malta's Maritime Mossies'. Tony's modelled a silver coloured Mossi with the Royal Navy in post-war Malta. Due to the fact I couldn't obtain some of the aftermarket items he mentions I wasn't able to copy to a tee what he's made, but otherwise I followed everything else. I think it's a good idea to follow a build that's been published in a magazine or on the Internet by an experienced modeller as it gives confidence to lesser developed modellers that they are following a good path. Although I've heard other experienced modellers say there often is no right or wrong way in this hobby and instead it's a matter of preference and finding out what works best for you. My build was going smoothly but, wary of what I was reading in the article, I dreaded coming up to the undercarriage as the author had issued warnings about its frailty. I didn't help myself when I failed to follow the sequence in the instructions when I glued both halves of the main wheel wells together before inserting the u/c legs. The instructions show clearly in stage 45 that the u/c is attached to the wheel well floor before gluing the two nacelle halves together. As a result I couldn't apply pressure to the legs to make them stick in the holes in the wheel well floor. Due to this the u/c was weak and wobbly. I tore them off, they broke, and I had no spare u/c. I had no choice but to change plan and model the Mossie with its u/c closed. What a pity because I was looking forward to the icing on the cake of gluing the entry ladder to the hatch as my very last work before finishing the model. As is common with all kits pretty much these days, Revell did not supply a display stand to model it in flying mode. I used a Tamiya silver rattle can to paint the main colour as per MAM article. As with some previous projects, I've failed to get washes to stay in the recesses to give a more 3-d effect and show weathering. I first tried water paint thinned down, let it stay for about 10 minutes, then used a damp cloth to wipe it off the surfaces and leave it only in the recesses. When this didn't work I tried the same with thinned Humbrol oil paint, with more failure. I couldn't get the wash to sit in the recesses but it adhered too well to the surfaces. With this my silver bird lost much of its shine. Whilst I'm trying to represent a working military aircraft that isn't likely to remain looking as good as knew after several uses, the oil paint was not dirtying my model though in a way that looked realistic. Instead it was leaving stains and blotches that didn't imitate anything that would be on the real thing. So I carefully rubbed this off as best as I could without rubbing off the decals. I didn't manage to avoid this entirely but luckily I had spare decals. Another problem I got was that the stains from the exhaust on the side of the engine nacelles is over done. Tony O'Toole used MIG pigments powder and advises not to over do it as less is more. I don't have MIG pigments but I have Humbrol weathering powder which I was guessing is similar. I am happier with the stains on the top wings as they are lighter in tone and I used my finger to smudge the powder (with a drop of thinner) and draw it in the direction of the airflow. I'd already done the sides of the nacelles and when these were over done I was unable to undo it. Despite using Future floor polish to try and make my clear parts as transparent as possible I think the result is disappointing. I also found some of the clear parts were a poor fit. [I'M GOING TO HAVE TO LEAVE IT FOR NOW AS I CAN'T FIND HOW TO LOAD MY PHOTOS FROM MY INHOUSE PICTURES FILE. WHEN I CLICK ON THE TAB 'INSERT OTHER MEDIA' THE CHOICES ARE 'INSERT EXISTING ATTACHMENTS' or 'INSERT IMAGE FROM URL', AND NONE OF THESE SEEMS TO WORK TO GET TO MY PICTURES. MAYBE THERE ARE INSTRUCTIONS SOMEWHERE ON BRITMODELLER TELLING HOW TO DO IT BUT I DON'T HAVE THE TIME NOW TO GO LOOKING, IT'S ALMOST TIME FOR MY BED]. I'LL RETURN SOON.
-
Here`s my 1/48 scale dio of an RAF Hercules carrying out an air drop in the 1980`s. It`s not particularly accurate in some areas and just built for fun with the old Italeri kit. The Landrover is from the Airfix Snatch kit, (I mutilated it a bit.. ), while the MSP, rigging and drogue chute are scratch built. All WIP details and a lot of great information about Herc drop ops from members far more in the know than I, can be found in the link below. Anyways, on with the finished pictures and I hope you like.


.thumb.png.6e11fc11af5645499ae76cb59fcfb788.png)