Search the Community
Showing results for tags '1/48 Tamiya'.
-
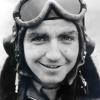
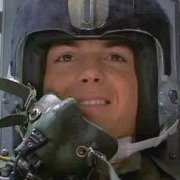
Evening all, a consistent interest of mine over the years has been aggressor and adversary aircraft in all their flavours, really ever since I got the Osprey Aggressor book on the very early 90s, and their Superbase series that followed. The former book had pics of 86-272 in its original Flogger colour scheme...having been through about six schemes, and having spent the entirety of its life with this unit, she was finally retired to AMARC in December 2023. This is the last scheme she wore...the v.attrarctive Fullback scheme of gunship grey over blue, with fake dielectric areas in light grey and with a black radome. Could be a modelljng project in its own right just to cover this one airframe! For this project used the superlative-and still the best- 1/48 Tamiya F-16c Aggressor boxing, which has the ACMI pod and 'dead gekko' ECM pod necessary for this airframe. I used modelcolour paints, Tamiya reinforcement plates and Two Bobs decals, which all performed v.well. It took me longer to finish than anticipated...Two Bobs would have you put the light grey dielectric areas on both sides of the fin, and I was 99% finished when I saw from pics it's only on the starboard side...hence a long while before I mustered up the courage to carefully mask and respray the offending area, with minimum reapplication of decals. Oh, and I also updated the ACMI pod to reflect thd configuration seen on pictures with stock plastic rod. There is something just 'so right' about the F-16; hope you enjoy the pics!
-
After losing a bit of mojo in the early part of the year, I was cajoled encouraged into an informal group build with @Dunny and @AliGauld with the humble Brewster Buffalo as its subject. It served its purpose and I ended up thoroughly enjoying it, despite being quite rusty and making some very basic errors. Nonetheless, I was quite happy with the result. I actually finished it several weeks ago but just now got around to taking some glamour shots. The WIP is linked below. The short version is that this is the 1/48 Tamiya kit and I built it right out of the box with zero additional enhancement. I wanted to build a Singapore defender and settled on RAAF 453 Squadron's AN204 as my subject. P/O Robert William Drury scrambled in AN204 on 22 December along with 11 other Buffaloes to intercept a force of 15 Zeros escorting an attacking force of Japanese bombers flying towards Kuala Lumpur from the north. During the widespread dogfight Drury's aircraft was badly damaged and he crash landed back at Kuala Lumpur sustaining serious injuries. He died later that evening. I was unable to find the airframe code letter for Drury's aircraft so I went for D as its his initial. I mixed the colours; my versions represent the equivalent US colours to the RAF standard (this US-built airframe was donated by the RAF to the RAAF for the defence of Singapore) and they look reasonable to my eye. We can never really know, can we? I painted all of the markings except for the roundels and one fin flash (the other was lost to a masking tape mishap). Anyway, the who story in all its detail is here.. ...and the photos here. Cheers.
- 15 replies
-
- 56
-

-

-
- 1/48 Tamiya
- Brewster Buffalo
- (and 1 more)
-
 Hello Gents !! SMW.... and I'm not up there However, I'll show you my solidarity... In having a RFI today !! What about going in Germany... 1952... The 36 FBW was commended by a well known pilot.... And, his F-84E 10RE was painted accordingly.... As a kid, I read his book and in some way, I pay a tiny tribute to the Col Robert L. Scott jr.... Wooops, I said shiny and colorful.... Here we are... This time, I used AK extreme metal instead of the usual Alclad.... Not too bad but I still have to learn about.... There has been some conversion to do to turn the Tamiya F-84G into a model E.... I let it very clean since the plane was oftenly presented in airshows and competitions.... That's also the reason for the JATO bottles.... Jato take off was and still is a show stopper.... Note the airbrake padlle is a scratched one.... I don't feel eager to fill the original tamiya one.... The sunny day helped for the pics..... Not too bad.... Okay gents, comments are welcomed.... Bantering is mandatory !! Cheers to all my friend in Telford !! Be sure enough that I'll have a white Chimay with you all in my mind !! Special thank to @Brandy for the SMW pics !! It warms my heart !! Sincerely. CC, back in 2 minutes....
 -
Hi all It has been a while since I posted anything, so I thought it time to share my latest finished project. This is an F-51D Mustang, based at Bowen Airfield, Port-au-Prince in the Republic of Haiti, circa 1963. I performed the following minor mods to the kit. Fuselage - perforated cowl vent panels drilled out - antennae wires made from stretched sprue - all lift points and vent holes drilled out - exhaust pipes drilled out - True Details resin cockpit installed - canopy brace and pilot’s headrest removed - tail wheel doors removed - antenna mast replaced with ADF antenna Wings - raised rivets in the area of the landing gear above and below wings removed - landing light replaced with MV Products lens - gun barrel openings faired over - F-86 Sabre drop tanks installed - scratch built pylons and sway braces Landing Gear - oleo torque links drilled out - new tow rings added - wheel hubs drilled out Paint and Decals - airframe painted with Xtracolor X15 BS627 Light Aircraft Grey and X103 FS11136 Insignia Red - all markings are from Xtradecal X48177 North American Bubbletop P-51 Mustang Collection Cheers Randy
-
 Since I have a bunch of Japanese aircraft kits in the stash just begging to be built , a bit of "free time', and here's a fine GB just made for my little accumulation of plastic bits. I think I'll start off with Tamiya's Kawanishi N1K1 Kyofu Type 11 Seaplane. There's not a lot to this kit and most of the good stuff is hidden I can relax and REALLY do an OOB. Right now simple is good. All comments, suggestions, and the usual goof ball antics are always welcome. Who knows maybe I can best my record of 4 completed builds. Let the gluing begin!
- 25 replies
-
- 7
-
-
- 1/48 Tamiya
- N1K1 Rex
- (and 1 more)
-
Fashionably late as usual, but as the title mentioned Never Unprepared. So I would like to throw my hat in the ring with Tamiya's 1/48 Hawker-Siddeley Harrier FRS.1 attached to HMS Hermes With the exception of the decals, this will probably be OOB(yeah,Right) So, onwards and upwards!
- 22 replies
-
- 6
-
-
- 1/48 Tamiya
- Hawker Harrier
- (and 1 more)
-
Hello Ladies and Gentlemen.... The Corsair is my one and for all favourite aircraft, I equally like the story of the VF-17.... They did great in SoPac at the time being... And a lot of firsts indeed... First to use the Corsair in and from a carrier for a war mission... aka, the attack on Rabaul (I mean the first one) Let's talk about another first here... First for a U.S Navy unit and first official.... The Leathernecks did it before but sneaky mode.... "in my fractured french, this capper is Chatte Flambee. I'll translate when we get back. For your protection, I won't explain the purpose of the mission until after we get back here. If it works as I think it will, the japs are going to be very, VERY mad. If you get knocked down, and are taken prisoner, Honest lack of foreknowledge might save your skin.... John Thomas Blackburn 02/26/1944 Soooo the kit is Tamiya with some modifications As usual, I changed the engine for a resin one The bomb rack is a field made one and the bomb came from an accurate miniature set. The first in question was the first official use of the Corsair as a Fighter Bomber, first of a long serie in fact... Paints are from the Ammo Mig U.S Navy air set, weathering is Flory and oil paints... Weathering should have been a bit heavier, when looking at the pics of the real things.... Let's consider that we are now back from that mission.... They got words through the locals in Rabaul, that there was a huge building on the hill overlooking Rabaul harbor... This building used to be the british officers club house.... The japaneses put the building in good use and renamed it "The house of the flowers" High ranking japanese officer and most specially the japanese pilots used it as a "R'n R" place.... I suppose that you've understand what I mean ??? So the mission started before dawn, they came in over the house of flowers just at dawn... At a moment when party goers are either asleep or too intoxicated to do anything useful.... All the bombs hit bullseye and the defense forces of Rabaul have been beheaded for a while.... And a good lot of officer's cars have been blown up for good.... More pics will follow... This one is my 2021 Corsair... So still, I must finish a Corsair this year !! Hum, for outside sunny pics, I need ...well.... Sun.... It's not for tomorrow for sure.... Up to you friends, remarks are welcomed, bantering is mandatory !! Stay safe !! Enjoy Modelling !! CC
-
Happy Christmas, All! Trying to get a couple (read several) projects running during my winter break. I had pulled several longtime denizens of the stash down, one of them being the 1/48 N1K1 George, which I had done a little noodling on - cleaning parts etc. Started it in earnest when I discovered I had the Hasegawa kit of the same subject in the stash as well. So down the rabbit hole I go! Cockpit colors are my interpretation and I believe the instrument panels were actually black, but here's the action so far: Tamiya cockpit Hasegawa cockpit:
-
Hello Dears, I know, I should have waited tomorrow for having a good daylight pic ! But can't wait to share her with you !! I started her and decide, in the making, to dedicate her to a great militaria collector And an avid modeller, I mean the late Lemmy Kilmister ! As a great fan of the gentle peoples from Motorhead.... The kit is the Tamiya Focke Wulf 190F-8 with Eagle cals decals EC#10 Let's have a look at this unusual paint scheme for a german Aircraft ! Yes, she is left almost unpainted, the painting on the wing has been crudely applied with brush and whatever was at hand in April May 1945 I tried to depict this fact with a not airbrushed paint job purpotedly barely finished ! Not really easy to have a good effect but I'm glad about this one The plane was flown by Fw Eugen Lörcher at the 5/ SG 2 He did a belly landing in Aufhausen to escape the russians with his fiancee riding in the rear fuselage. Seemingly, they came back every year at the same spot to celebrate their escape to liberty with a bottle of Champagne !! More to come soon.
-
 Like many I’ve been looking forward to this GB since I spotted it. As a child the “David and Goliath” aspect of the battle raised it above comparable events straight into mythical status, helped of course by the classic 1969 film, along with many others. The battle is up there with Rorkes Drift, Arnhem and Thermopylae, but has the added bonus that it was in the air. What made it stand out from those listed was the fact that the battle was using new types of planes, tactics and technology in a unique scenario, and on a scale and intensity not seen until then. I had no clear idea of what I was going to build at first, I mainly dabble in 1/700 ships, and although Operation Medium was an anti invasion operation, a model of HMS Revenge wasn’t going to be right for this, the 80th anniversary Of the Battle of Britain ( if you haven’t read about Operation Medium, it was a classic RAF/RN op, involving a stealth battleship, go on, go and have a look....). I had a look round the merger stash, a couple of Hellcats, a Barracuda and a few Seafires definitely didn’t fit the bill, so I had an excuse to buy a new kit! Drifting around tinternet got me nowhere, I think I looked at just about every kit that could fit into the timescale (really came close to buying a 1/72 Condor), and so I decided not to look for a kit, but a person or story, I was looking for inspiration... I then started hunting on the web, with no goal in mind. Just reading stories, re-discovering events, being amazed by new finds and generally getting into the mood. It was whilst I was looking at a list of RAF squadrons and their codes that something caught my eye. 74 squadrons wartime code was ZP. These are my wife’s initials, intrigued I started looking into the pilots, and the squadron in general. Now I’d heard of Sailor Malan, and I think I’d heard of John Freeborn, either of who would be more than worthy subjects of a build, but I was still unsure. A bit more digging around lead me to a pilot who was an ace, had been drawn and painted by Kennington and Orde, served with 74 squadron throughout the Battle, and went on to be it’s CO. John Colin Mungo Park DFC and Bar. I’ll cover more about his service in another post but for me, he kind of sums up the experienced RAF Pilot at the time, the fact his story is tragic leads a poignant edge as well. But more on that later, on to the kit. Now that I’d done a 180 from potential off the wall builds to a Spitfire, which kit? To be honest, it took me no time a all to decide on the kit. The latest Tamiya 1/48 had caught my eye when it came out and this all seemed to be the perfect excuse to grab one and do it some (in)justice! So that’s what, and why, I’m going with this, ZP E of 74 squadron RAF August 1940 . With some research materials This could be a long build as I never seem to get the time to build anything, but hey, we’ve got till October! Good luck in the GB all and thanks for looking in! Geoff
- 47 replies
-
- 17
-
-
- 1/48 Tamiya
- spitfire
- (and 1 more)
-
Done.---John
-
Here is my redo of the old Tamiya A6M2b Zero. I will be doing Saburo Sakai's V-103 plane from his time in the Dutch East Indies in early 1942. I am using the kit decals except I am replacing the blue stripe on the tail with a red one. I should be able to start painting tomorrow.---John
-
Let me introduce you to Tilly. Tilly looks so cute, I didn't want to do a military version, so I've done it as something that a tradesman may have used in the 50's or 60's. 'Jack' was my dad. He didn't have a Tilly, but that's only in this imperfect reality. It isn't intended to be an actual representation of a real vehicle, it's more 'in the spirit of', in the memory of the army of tradesmen who put all the war scarred countries back together. I know there has been endless debate about whether or not there were any Austin Tillys in the RAF. Even if you are someone who spends all their free time tracing the every Tilly built, and still insist there were never any Austin Tillys in the RAF – I don't care. But if that really is your hobby, thanks for making us modellers look like we are doing something worthy with our time in comparison. My Tilly is ex RAF war surplus, hence the main colour. I've seen photos these old vehicles with some body parts painted in whatever paint was available over the panels that showed signs of it's previous life. There have been many people who have been very forthright in their views that I never had a father, I honestly did. This is my dad (in his National Service gear) – although I knew him when he was in colour. Yes, I did inherit my dads looks - I keep them in a box in the loft. He was an electrician and invented the electric blanket… sort of. As his car didn't have a heater, he rigged up a heated pad for the seat. It worked well for a few weeks until it caught fire. Rather that earn millions he ended up with a scorched behind, which pretty much sums up my family. He died in 2017 aged 81 and I still miss him, even though he was a miserable old bugger. He may not have set the world alight with his electric blanket (just a few scorch mark on his bum), but he virtually invented social distancing. Shame he didn't last long enough to see it become popular. I know the cable on the reel in the back is overscale, but I wanted to use it because was from a wooden reel of silver wire he used in the 1950's and 60's, that I found in his shed when he died. The lettering is done free-hand with a white Uni Posca pen – it didn't have to be perfect, knowing my dad he would have painted it himself in this particular alternate reality. His granddad was a signwriter and coach painter, and besides that, he was tight careful with his money. I added the rear cab wall and number plates. And finally, Tilly shown posing with my last build (which is the same scale - 1/48). Thanks for having a ganders. It was a fabulous kit which I recommend. Gorby
-
I just received this yesterday and already have some cockpit detail painting done. I am going to do it as Gregg Boyington's 1A either side number 883 or the last plane he flew 915. I am hoping to get Fundekals but if not 915 will be easy as all I really need is some white numbers of the correct size and font. Easy to find and those planes did not have a lot of anything but the basic stars and bars and a few numbers. I don't think 915 had nose art or kill markings as the planes were usually shared by multiple pilots and squadrons.---John
-
 Sometimes a picture seeds an idea. I found this photo when I built my Marine Corsair, and it inspired me to try and model this gun carrier as a companion. Tamiya's 1/48 Jeep was the perfect kit for this task. I used the Eduard PE set and Verlinden wheels, and scratch-built a new radiator grille to represent the early front, and a wooden box to hold the .5 cal Browning M2 machine guns. The box can be removed to have the Jeep perform other duties if needed. The picture below demonstrates the difference between the early radiator grille guard (vehicle in the front) and the more common pressed sheet-metal face (rear). The Jeep's official designation is Willys-Overland Model MB or ¼ ton 4x4 truck. My model served in the Solomons in early 1943 with VMF-124, part of Marine Air Group 12. Six machine guns, each weighing some 84 lbs, and a crew of two are an adequate load for the dogged Jeep, which has in fact a maximum paylod of 800 lbs. I hope you like this digression from my usual aircraft modelling theme, and you are invited to visit more airfield vehicles here. Thanks for viewing - Michael References Pacific War Eagles in Original Color, Jeffrey Ethell / Warren Bodie, Front Royal, 1997 Jeeps 1941-45, Osprey New Vanguard 117, Steven J. Zaloga, Botley, 2005 Pre-Standardized Jeep, Walk Around 5711, David Doyle, Carrollton, 2008 Willys-Overland MB and Ford Model GPW Jeep Technical Manual, Washington, 1947, reprinted by PeriscopeFilm 2011
 -
Hi all This is my most recently completed model. It had been languishing in a painted state for a couple of years, so it feels good to get it out of the way. Like my other Tamiya 109s, I only did the following to the model. Fuselage - kit seat replaced with Ultracast seat - antenna wire made from stretched sprue - upper cowl intake opened - cowl gun barrels replaced with Master brass barrels - engine starter crank opening and lift points drilled out - kit propeller and spinner replaced with Ultracast resin parts - exhaust replaced with Ultracast resin exhaust - ETC50 bomb rack and SC50 bombs added from Eduard Bf 109E Wings - wing gun barrels replaced with Master brass barrels - kit wheels replaced with Ultracast resin wheels - tail planes modified to eliminate the anhedral Paint and Decals - airframe painted with Xtracolor X202 Hellblau RLM 65, X201 RLM 02 Grau , X205 Dunklegrun RLM 71 and X213 Gelb RLM04 - all markings are from Aero Master 48-248 Marauding Emils Part 3 - model is weathered with chalk pastels Cheers Randy
-
Hi all I would like to present yet another Emil. This model is a BF 109E-4/B flown by Leutnant Friedrich Wempe, of 6/Jagdgeschwader 77, in Russia, July 1941 If you have not figured it out by now, I really like the Tamiya 109E's. The following was done to the model. Fuselage - kit seat replaced with Ultracast seat - antenna wire made from stretched sprue - upper cowl intake opened - cowl gun barrels replaced with Master brass barrels - engine starter crank opening and lift points drilled out - kit propeller and spinner replaced with Ultracast resin parts - exhaust replaced with Ultracast resin exhaust - ETC500 bomb rack added from Eduard Bf 109E Wings - wing gun barrels replaced with Master brass barrels - kit wheels replaced with Ultracast resin wheels - tail planes modified to eliminate the anhedral Paint and Decals - airframe painted with Xtracolor X202 Hellblau RLM 65, X205 Dunklegrun RLM 71 and X213 Gelb RLM04 - all markings are from Eagle Strike 48-146 Barbarossa 3 The Invasion of Russia 1941 - model is weathered with chalk pastels Cheers and thanks for looking Randy
-
Hi all This is another model I finished last year. It represents the Bf 109E-3 flown by Oberleutnant Hans Schmoller-Haldy of 3/Jagdgruppe 88, in Spain during March 1939. I keeping with my minimalist approach to modelling, I did the following to the kit. Fuselage - kit seat replaced with Ultracast seat - antenna wire made from stretched sprue - upper cowl intake opened - cowl gun barrels replaced with Master brass barrels - engine starter crank opening and lift points drilled out - kit propeller and spinner replaced with Ultracast resin parts - exhaust replaced with Ultracast resin exhaust Wings - wing gun barrels replaced with Master brass barrels - kit wheels replaced with Ultracast resin wheels - tail planes modified to eliminate the anhedral Paint and Decals - airframe painted with Xtracolor X202 Hellblau RLM 65, X201 RLM 02 Grau and Model Master Classic White - all markings are from Cutting Edge 48-215 Bf 109E The Augsburg Zoo - model is weathered with chalk pastels Cheers Randy
-
Hi all Here is a 109 I finished last year It represents a 109E-4 of 1/Jagdgeschwader 51 while in Northern France of August 1940. As I usually do, I performed the following minor mods. Fuselage - kit seat replaced with Ultracast seat - KMC resin cockpit sidewalls installed - antenna wire made from stretched sprue - upper cowl intake opened - cowl gun barrels replaced with Master brass barrels - engine starter crank opening and lift points drilled out - kit propeller and spinner replaced with Ultracast resin parts - exhaust replaced with Ultracast resin exhaust Wings - wing gun barrels replaced with Master brass barrels - kit wheels replaced with Ultracast resin wheels - tail planes modified to eliminate the anhedral Paint and Decals - airframe painted with Xtracolor X202 Hellblau RLM 65, X201 RLM 02 Grau , X205 Dunklegrun RLM 71, X213 Gelb RLM04 and Model Master Classic White - all markings are from Hussar 48D005 Messerschmitt Me 109 E3A/E4 - model is weathered with chalk pastels Cheers Randy
-
Alright, I already have the Macchi MC.72 up on the board, but I've decided to start with this one first. It should be a pretty straight build. I'll be adding some Yahu PE for the 'pit and I will wire the engine a bit, but for the most part I'm going to stick to the instructions and go by the numbers. Doing this one first, I think will help the MC.72 as well as the S6B I'm already doing. There are the cuffs for the struts that I need to do for both, and rather than getting into plunge molding I'm going to try and cast resin copies of the ones on this plane. Maybe it'll work, maybe it won't but I'll give it a shot. 😉
-
I started this as the A6M2a is just about done and the A6M3 Hamp is about 3/4 done. I am doing it as a Mitsubishi built plane from the 332 Flying Group at Naruo Air Base in 1944. The colors will be Tamiya AS-21 IJN dark green over Tamiya AS-29 gray green. Here is the cockpit so far.---John
-
 Hi! Here's another one of my builds - a ww2 corsair, heavily used with exposure to sun, sand and salty water.
- 6 replies
-
- 15
-
-
- WW2
- 1/48 Tamiya
- (and 1 more)
-
Almost done. I just need to find the right decals for the tail code. I am doing Q-102 and Tamiya printed the tail code in black, I was shown a color picture from WWII and it should be red as Hasegawa did them. Any one have a set of Hasegawa Q-102 tail codes in 1/48th they want to sell? I also need to scrounge up the red wing walk warning stripes, none came with the kit.---John
-
On 16 February 1945 US Navy Task Force 58 launched a strike against Japanese airfields in Chiba Prefecture. It was the combat début for the Hellcats of VF-12 and VBF-12 aboard USS Randolph (CV-15). Over the Kantō Plain, Mitsubishi J2M3 of the Imperial Japanese Navy's 302nd Kōkūtai intercepted the formation and claimed eight Hellcats destroyed. 302 Kū, a veteran IJN unit, was based at Yokosuka to defend the industrial region south of Tokyo. Difficult to handle for a rookie Mitsubishi's 'Thunderbolt' was a formidable foe in the hands of an experienced pilot. Fast-climbing and heavily armed (with four to five 20 mm cannon) the J2M3 was one of the few Japanese fighters that could successfully intercept the B-29 at high altitude. Unfortunately, due to the tight casing of the engine, the 14-cylinder Mitsubishi Kasei was prone to overheating which hampered operational effectiveness. My Tamiya model is a veteran, too. I originally built it in 1977 and made an all-out restoration two years ago. It represents a squadron leader’s aircraft (yellow fuselage band) and was most likely assigned to Lt Junrō Teramura, leader of the 1st Buntai. This Raiden was lost on 19 April 1945 while flown by Lt(jg) Ei Fukuda. The victory was claimed by P-51 pilot Maj James Trapp, squadron commander of the 78th FS. Cockpit: Aires (#4538) and Eduard (#48201) Wheel covers: Quickboost (#48399) Exhausts: Quickboost (#48383) Decals: AeroMaster (#48-286) The colours are home-mixed following the excellent 'Mitsubishi J2M Raiden Colour Notes' by Nick Millman (Aviation of Japan) I hope you see why this is my favourite Japanese Navy fighter. ハッピーモデル構築 - Michael References Navy Interceptor “Raiden“, Famous Airplanes of the World No.61, Tokyo, 1996 Mitsubishi J2M Raiden, Mushroom Model Magazine Special No.6110, Sandomierz, 2004 Mitsubishi Navy Interceptor Fighter "Raiden", Mechanism of Military Aircraft No.4, Japan, 2011 Mitsubishi J2M Raiden, Model Art Profile No.11, Tokyo, 2011 J2M3 Imperial Japanese Navy Interceptor Raiden, Zoukai-mura SWS No.VI, Kyoto, 2013 J2M Raiden and N1K1/2 Shiden/Shiden-Kai Aces, Osprey Aircraft of the Aces 129, Botley, 2016
-
Seems i have been working on this for ever .Resin seats ,and those decals that you stick on for the radio sets .I managed to scrape most of the backing paper off . The bomb bay ,could do with a bit of touching up .Notice the missing bit on the right hand `top bit of the fuselage