Search the Community
Showing results for tags '1/35th'.
-
This is my build of a Sherman Firefly 1c of the 3rd/4th County of London Yeomanry, 4th Armoured Brigade. I’ve taken some liberties with the stowage as I don’t actually have a photo of the tank, so it’s basically just my interpretation. The WIP can be found HERE. Thanks for looking and thanks to all those who followed the build and commented. John.
-
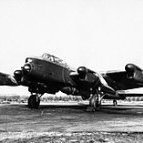
TAMIYA 1/35th TIGER I (Frühe) FRIULMODEL TRACKS (ATL-25) EDUARD ENGINE GRILL PE It took me 4 hours to find this GIF and work out how to get it on this page, so you'll forgive me if I don't provide well lit, nicely framed and focused photos of the following: In truth I was having a bit of a laugh, I can't compete with the photos some of you provide, so I've deliberately gone the other way! The glares on the kit box, Eduard package and sprue bags took a good deal of setting up to achieve. Photos of the box of Friuls to come, when I can remember where I put it! Hmmmm. They were in the log basket by the fireplace! I'm guessing they were on the mantelpiece and one of the cats knocked them off! A bit of slug damage will add to the realism. Let's not forget how German Tigers often slipped their tracks, due to excessive slug slime! BTW, If you compare the detailing of the Friul track links to the details on Tamiya's rubber bands, there's barely any difference - the only notable one being that the guide horns on the Friuls are open. (they have holes in them, in other words) Of course, metal tracks hang better and the individual links don't bend (like rubber) around the sprocket and idlers, but possibly the Friuls aren't worth the extra expense. (Whereas my Nashorn's Winterketten Fruils were worth every penny) Waits for the fun to begin. Badder
- 333 replies
-
- 11
-

-

-
- 1/35th
- Friul tracks
- (and 1 more)
-
This is the Italeri kit of the M4A1 Sherman which I’ve depicted as a Sherman lla of the 2nd Dragoon Guards, The Queens Bays, in Italy in 1944, crossing the Rabbi river. I've added some foliage to the hull and turret. The WIP can be found here; Thanks for looking. John.
-
In an attempt to actually finish something for a group build, I thought that I'd have a go at this Academy kit and build it straight out of the box. I don't have any etched brass or resin for this kit, so if anything needs changing/detailing, it'll have to be scratchbuilt. I'm not putting up any photos of the sprues as I'd only be repeating previous posts from others who are doing similar Academy kits. So basically, what's in the box is much the same as Glynn has posted in his M60A1 Blazer, with a few additions, such as the turret armour and the side skirts. Just one set of decals on a small sheet are included so the choice is, take it or leave it. BTW. If anyone needs some reference photos, there are some good walk arounds on this site; http://svsm.org/gallery/walkarounds See you next week when I have something to post. John.
-
I haven’t finished anything since the Tilly, so I dug out some of my early builds. This one is from about 10 years ago and is the Italeri Crusader Mk.lll. I did a bit of detailing on it such as replacing the slats at the rear with thinner card, adding the fuel line from the auxiliary tank and used the etched set from Eduard. I also replaced the main gun with one from RB models. It’s painted in a plain G3 green (I think) using Tamiya paints, and is based on a tank of the 17th/21st Lancers in Tunisia in 1943. Thanks for looking. John.
-
I believe that this was Bronco’s second issue of an A13, and as such, it had the individual track links which were a whole lot better than the original (too short) rubber band offerings. I never did get around to correcting the engine deck, but I will with the two others that I’ve got in the stash. All in all, it’s quite a nice kit to build with not too many surprises. I finished it as a tank of the 10th Hussars, based in France in 1940. As far as I can remember, it was built OOTB and finished with Tamiya paints in a G3/G4 greens camouflage. The figure is from Hornet. Thanks for looking. John.
-
Here's what I'll be attempting for this build, a change from aircraft, although I have never finished an AFV in a GB 🙄 IBG's 1/35th Marmon-Herrington armoured car, with resin 'clutter' by black dog. We'll see how it goes, I may add some figures, not my strong point!
-
Because of an extended enforced break from modelling at the moment, I've not been able to post anything for a while, so the number of shelf queens that I've got has increased. Therefore the only things that I can post here in the RFI thread, are some of my older models. This one is the Bronco kit and if my memory serves me right, I built it about seven years ago. It's not a bad kit to build although, as this was the early release, there were one or two items that required changing. The tracks are Bronco's workable tracks, the main gun came from the barrel store and I used Eduard's etched set for the Comet. The early issue has a mantlet without the canvas dust cover, so I sourced one from Accurate Armour, along with the return rollers and the main gun muzzle brake. Celerity also had field replacement front track guards which were squarer than the rounded kit supplied items, and these were made from plasticard. I do remember that this was quite and enjoyable build, so I hope to pick up another one of the later issues and build it again. That will then free up this one for the “butchers” table, as some of the components will go into making SKP's A30 Challenger into something better than what you get in the box. Thanks for looking. John.
-
Well, the M1 Super Sherman is finished and waiting for a base to sit upon, the Tiran 5 has been glossed and is awaiting it's decals and the M4A3 Champagne is also waiting on a base being made, so I thought that it was time to dig out the next project. I've had this sitting in the cupboard for some years now, and have been putting off building it as just about every review that I've read about it says that it's a “dog”. I'm talking about SKP's A30 Challenger. The box that I have states that it's an “upgraded kit”, which means that it has some replacement parts in resin and workable tracks as opposed to the original clickable ones. I've assembled a set of these so called workable tracks before to use on a late welded Cromwell, so there was no way that I was going down that route again. They are a RRPITA to assemble and when finished and laid out flat, they form an arc, which is difficult to get them to mesh neatly with the road wheels and sprockets. So therefore, I ordered a set of 15.5 inch tracks from IMA in Hong Kong and hope they will be a better bet. They are more of the link and length variety. There is also a small etched brass sheet included, but I'm don't know if that was in the original issue or is part of the upgrade. The problems that will arise from this build will be those of a fit nature, from what I've read of this kit. I've got a load of left over parts from Tamiya Cromwell kits, and a Bronco Comet which will become donor parts for anything that proves to be troublesome in the SKP kit. Failing that, there is always good old scratch building. Colour schemes are a little limited. To paraphrase Henry Ford “you can have it in any colour that you want, so long as it's SCC15”. It will probably be a tank from 11th Armoured Brigade, same as the one that I did in 1/48th scale. So I will be back from time to time with updates on the build (providing, that is, that I haven't thrown it against the wall). These are the books that I will be using for references, along with a couple of magazine articles that I've read. ....................and the tracks. I'll show some more photos of the kit as I go along, but for now, it's a Full English and then a day in the modelling room (after all, it is Father's Day). Thanks for looking. John.
-
This is a mini WIP combined with an RFI, as I built this around 10 years ago, and some day I may get around to replacing the sand shields with some etched ones, but given the number of unfinished models that I have at the moment, that's not going to be any time soon. A Brief Intro. Operation Battleaxe was the first time that Crusaders were used in any significant numbers, and they didn't exactly cover themselves in glory. Thin armour, an ineffective main gun which couldn't fire HE and reliability problems were three of it's drawbacks. On the plus side, it was fast. I'd built Tamiya's 1/48th version of this, and decided to do the same in 1/35th, using the Italeri kit as a basis. Although the kit is for a Mk.l/ll, it didn't cover the version used in Battleaxe. There were some alterations needed, but nothing too drastic. First job was to add the prominent rivets along the sides of the lower hull. This early kit from Italeri omitted them, but the AA version included them. In all, there were approximately 300 rivets, but a day and a half saw the job done, and my sanity intact. I was going to finish this tank in the marking of 6 RTR, and their vehicles had different air filters to those supplied in the kit. They are a simple box shape and I made them from different thickness’s of card. The pipework leading from the filters to the engine deck was altered by removing the 90 degree bend and making new pipe from tubing. The track guards were also of a different configuration, so I cut away the kit part where it bends downwards, and made new track guards and glued them into place along with the new air boxes. Along the back of these Crusaders was a rack for 2 gallon POW cans. The rack was made from 10thou strip and filled with cans from Accurate Armour. The kit's right front track guard has a box shape on it which is for the spare tracks, but again, not applicable for this version, so it was removed with a chisel blade. A length of track was glued to the left track guard and a 10thou strip of card was added as a retaining bar. Turret. To my eye, the mantlet protrudes too far forward, so I sawed it in half, thinned it by about 4mm, and then reattached it and blended it in with Mr Surfacer. The main gun barrel was replaced with an aluminium one from Jordi Rubio. The searchlight was detailed with a bulb and lens and some etched bass from Eduard. On the other side there is a pot shaped item (it's purpose eludes me) which I made from a piece of dowel, fixed it to a square of card and glued in place on the side of the turret. There was no blanket box fitted to the rear of the turret, so a number of rivets had to be added along with a pistol port, new hatch bump stops and some detail to the aerial mount. Painting and weathering. I painted the tank in the Caunter scheme of Portland or Light Stone, Silver Grey and Light Grey. I mixed my colours from Tamiya paints using Mike Starmers mixes. Markings were minimal, being just the census numbers on the turret and rear hull. Weathering consisted mainly of chipping along exposed edges and dust courtesy of Mig's Beach Sand and Light Dust. The rest of the photos are RFI. I've included one of the original photos which I took years ago, to show what the colours should look like as the ones that I took recently give it a rather grey appearance. Sand Shields. As I said, I should replace these as they haven't lasted as well as I hoped. I cut them from thin card and scored the back so that they could be bent to shape. I glued thin rod into the groove to try and get it to keep the correct shape, but over the years, they have flattened out, hence the need for replacement with etched brass items. Thanks for looking. John.
-
This will be my entry for the 10th Anniversary GB. It's Bronco's offering of the British Cruiser Tank A10. It'll be a struggle to finish it as I'm doing another in the M3/M4 GB, so having said that, I'm going to go against the grain for me, and build it (almost) out of the box to save time. I haven't decided which version I will build yet, I'll decide once I get started. John.
-
Building a Tamiya Panther Ausf. A model, scheme I'm building is a winter tank started painting before I realised I didn't have the side skirts. Looked at aftermarket ones only ones I've found are by Eduard for a G model, would these work on the A model? My knowledge on armour is limited, so thank you in advance.
-
The Meng version of the Abrams M1A2 Tusk II became available while I was working on Tamiya's effort which had a few issues associated with it. Its been in the stash a while and I decided to give a go while taking a break from an F-16. I'll spare people the pictures of the box and parts as there's already a good review of those at http://www.britmodeller.com/forums/index.php?/topic/235003243-m1a2-sep-abrams-tusk-iii-135/#comment-2372771 Its a good kit with rich detail on the parts and clean mouldings without flash. Its a step up in detail from the Tamiya offering and was about the same price. No need for Eduard or other aftermarket extras. It does suffer from a couple of Meng issues. The ejector pin marks are like a bad rash but generally are on the hidden sides of parts. The sprues connecting fragile parts are way to thick and the fit of parts in general is so precise that a layer of primer is enough to throw things off. Some of the brass that's to be fitted looks a bit "chunky". I'll see how that goes when I get round to it. Having no flash on the track bogies is a joy. As both kits came on the market within a year of each other they should be of similar quality however I'm guessing that Tamiya went for the easy option and upgraded an earlier model with a few extra sprue for the Tusk II. The track on this kit is made from individual links. Bit like Friuls but plastic. Meng supply a jig for track assembly which is rubbish but its not necessary. A few nights of old fashioned track bashing is required. Basic hull assembled easily and here it is waiting for some sandy type colours. It includes a working suspension although whether that is any use is debatable. The suspension arms are rather fragile and I've already broken one of them with the Frankenhands. The rear of the engine deck was a pig to fit and requiring copious filing and swearing. Unexpected as most of their parts generally have a good fit. This kit is an Abrams M1A2 however extra parts in the box and some markings on holes to be drilled would suggest that Meng are also planning an M1A1 at some time or other. Last night I completed the first track using 80 blocks, leaving a few over. I wish I'd had a proper look at the link with the earlier review of the kit. The tracks are omnidirectional. After I saw this I went back to my effort and yes I've managed to mix them up....grrr! I'll cover that up with sandy looking stuff. Pity Meng made no mention of it in their instructions. My fault really, if I'd looked at the link pins properly I'd have seen my mistake earlier. Painting the tracks is mind numbing and best done when you want to switch off. Meng suggests an all over colour for the various parts however in reality that's not the case and the individual rubbers need to be painted a different colour from the metal blocks they are fixed to. That's 640 in total. I'm half way.
-
I built this a couple of years ago, number three in my list of Cromwells and Centaurs. It's basically the Tamiya Centaur kit with a few modifications, most notable being the substitution of Tamiya Cromwell wheels for the Centaur perforated tyres. I rebuilt a lot of the rear of the tank. The rear of the air box had a first aid box moulded onto it, but I was fairly sure that this tanks didn't have one. I could have just cut it off and filled the resulting hole, but I like to do things the hard way. So I made a new rear for the air box from thick card and detailed it with bolt heads from Calibre 35. I also replaced the rear track guards with ones from Aber. Many Cromwells had parts if not all of the sand shields ripped away, so I replicated this using the kit parts but thinned down by scraping with a blade. I used the Normandy Cowl from the kit, but replaced the sides with ones made from thin card. The lids on the stowage bins were replaced with ones made from thin pewter sheet. Stowage was a combination of Accurate Armour and Black Dog and the etched brass was curtesy of Aber. The base colour was sprayed on using Tamiya paints for the SCC15 and the disruptive cammo pattern was brush painted on with Vallejo acrylics. The tank that I was depicting belonged to the Czech Independent Armoured Brigade and this unit spent most of it's time after D Day keeping the German garrison in Ostend penned in, and the 95mm howitzers of the Mk.Vl's were used to shell the port. The decals I used were the rub down variety from SKP. The 95mm shell boxes came from Accurate Armour and the empty cardboard shell tubes I made from plastic tube. The figures are Miniart with Hornet heads. The base was built up using balsa wood onto a photo frame from Wilkinsons. Thanks for looking. John.
- 16 replies
-
- 15
-
-
Finished today - lovely kit. Painted with Tamiya acrylics, weathered with Oils, Oilbrushers and Pigments Peter
-
These look really good, but BH! the price of them. $25 for the track pads, $25 for the end connectors and then $15 to ship worldwide. That's the cost of the kit in the first place. Don't think that I'll be ordering any of these any day soon. http://www.panzerconcepts.com/html/tracks.html John.
-
I built tis model a few years ago after having the kit sit in my stash for a few more yeas prior to that. The kit was labelled as being Italeri, but in reality, it was originally released under the Zvezda brand. Because of it's ancestry, the detail wasn't as crisp as say, an offering from Miniart, but with a bit of work and a sheet of Eduard etched brass, a reasonable could be produced. The load in the back is from a set by Miniart, and consists of some 85mm ammunition boxes along with an oil drum from Tamiya. The markings on the boxes are decals which are included in the kit. Russian trucks were painted in a colour known as ZK, which is a lighter shade of green than the armour colour 4BO. I used Tamiya NATO Green. The decals weren't much use so most of the markings were hand painted with oils, the exceptions being the circle on the tail gate and the red stars on the doors. The beam on the lower rear was painted white to help drivers keep station whilst in convoy at night. The figure came with the kit and I adapted him to appear that he was working on the engine. Miniart Russian truck kits are sharper moulded, but this is still a worthwhile kit to build. John.
-
This is the new Tamiya AMX-13 French Light Tank. The model was built straight out of the box, the only additions were the aerials. Painted with Tamiya paints, weathered with a Flory wash and a Tamiya weathering set. Thanks for looking. Here is the link for the WIP
- 25 replies
-
- 18
-
-
I built this a couple of years ago for a magazine article to mark the centenary of the outbreak of WW1. It's the Roden kit of the 1914 Pattern a/c. Not bad, but as I was constrained by time, I had to build it virtually OOTB, and if I was to do it again, I would change a few items, namely the poorly moulded Vickers gun and the headlights and searchlight. Roden do supply etched brass for the wheel spokes so that problem is taken away. I finished it using Tamiya acrylics and I tried to match it to the box art. An article that I'd read on these a/c's said that they were painted in "Service Green" or "Daimler Olive Green" which apparently is a bit darker then the tone that I have used, but with fading, who knows? One thing that was pointed out to me was that the two small roundels on the bonnet shouldn't be there and that there should be a large roundel on the turret roof. Thanks for looking. Regards, John.
-
IMA have got a load of British "goodies" on their website including the A30 Challenger and Avenger along with several armoured cars and light tanks. They also have the 15.5" tracks and drive sprockets as a separate item. http://www.imaco.com.hk/kits/ John.
-
Sturmgeschutz III ausf. G. 1/35th Dragon Imperial Series. My first (successful) 'Down and dirty' AFV, with heavily weathered winter camo, wear and tear, and a little bit of battle damage. A loyal fan of Tamiya between 1975-1980 and sticking with them upon my return to modelling just over a year ago, I have been made aware of the rise in popularity of Dragon kits. So whilst visiting my LHS, I was tempted to give Dragon's 'Imperial Series' StuG III a go. I wasn't to know that the kit had been sitting on the shelf for 21 years and wasn't a patch on Tamiya. Perhaps I should have guessed. The shelf was so high it took a step ladder to reach. Never mind, I thought, it can't be THAT bad. Well, it wasn't GOOD. The kit had many fit issues, badly designed moulds, parts with locating pins that didn't align with the locating holes in adjacent parts, one part that was clearly designed with an angle in it when it should have been straight, drive wheels where the teeth on one 'rim' are spaced very slightly differently to those on the other 'rim' so that the teeth go out of synch and the tracks end up at a slant' and the same issue with the spokes on the idler wheels, an unhelpful and vague instruction sheet, and sprues which quite frankly confused the hell out of me, with 3 'B' sprues (Two identical, but the third different!) and several sprues which had TWO letter designations! Another annoying feature or should I say non-feature, was the lack of any figures. Still, there was no problem that I couldn't overcome, even with my limited skills. I even managed to the upgrade the 'debris screens' on the rear air intakes, cutting out the solid 'grills', retaining the frames and fitting sections of gauze obtained from a local Haberdashers. Apart from the debris screens, the StuG is OOB and painted using Tamiya Acrylics, Humbrol Enamels, Humbrol Weathering Powders, and Winsor and Newton's water mixable Titanium White Oil Paint. Gloss and matt varnishes were also from Winsor and Newton. Snow effect achieved with my Japanese 'Grit Paint' White. Exposed metal effect/burnishing achieved with a graphite stick. For WIP, here's the link: This StuG will feature in a diorama which will be based loosely on a Francois Verlinden diorama that I saw in a Tamiya catalogue some 35 or more years ago. Only mine will be set in winter, not summer, in the Ardennnes during the Battle of the Bulge. Meanwhile, I have just commenced building Tamiya's StuG IV Sd.Kfz.163, which already looks to be faultless. Anyhoo, here's the pics. Below: Top and bottom halves not fixed, hence gap in front armour plate. (I will need access to fix a figure inside, just visible through the open hatch) Yep, forgot to matt the spare wheels and I can see MG needs tidying up. Thanks Macro. Cat hair on spare wheel replicated using real cat hair. TFL All comments, positive or negative, welcomed. Rearguards, Badder
-
 So, I finally got round to starting this GB. Although I've completed 3 dios in the past year I've not taken part in a GB before, so a vignette is a good starting point. Leaving things a bit late, I plumped for something small and quick, that being the motorcycle in the title. It comes with a total of 4 figures, so that made complying to the rules easy, although I may not use all of them. With such a small vehicle, I am left with more room for 'scenery' and have opted for making a tree or two, using my 'fishing line' method. This method was 'invented' in my 'Carry on Regardless' WIP, in the diorama section, but I've since improved it and will show the method here also when I get to that stage. In the meantime, I have purchased a suitable base, from Hobbycraft at less than 2 quid. It's a deep box frame and I've replaced the glass with a thick 6x6inch photo-frame backing to ensure a nice solid/stiff base to work on. Unfortunately, I've photographed the whole thing upside down, so what you see below is the rear/bottom of the box frame. I am intending to do a 'frosty or scattering of snow' scene, where the trees are still in their late Autumn colours. I may make a section of wall/building as well, and hopefully there'll be a bit of humour somewhere. Anyway, work on the bike has been rapid. Stupidly, I have erased some of the WIP photos and only have the following left. Side-car dry fitted. I airbrushed the whole lot Field Grey and used blu-tac as a mask around the tyre prior to spraying it black. TFL Badder
 -
I am very, very, excited to have received my Nashorn, courtesy of Yuki Hirota, Japan. Oh and Amazon. In fact I'm so excited that I just have to post pic of the box in the WIP section, when I have no intention of starting the build for a while. But then, maybe I won't be able to resist. Of course, I've had a peek inside and everything is in order. I was surprised to read on the box that the gun uses metal parts for authentic movement, and then disappointed to find that this consisted of a length of wire cable used for disengaging the gun's travel lock and two metal rods for the gun's hydraulic damping system.. I expect Eduard Photo-etch floor panels and ammo boxes to arrive in the next day or two, which amounts to the minimum 'upgrade'. The full photo-etch kit is a penny short of 50 quid, nearly 50 percent more costly than the Nashorn itself! Anyway, this beauty will end up in a winter woodland scene, either in Russia, or in the Ardennes. I have yet to research the theatres in which the Nashorn was deployed. [/url] I won't post on this topic again until I start the work, so if you check the 'last poster' and it ISN'T me, then you can save yourself some time and not bother to view. Rearguards, Badder Update.... PE arrived. Kit instructions suggest that Nashorns were deployed in Italy and on the Eastern front, the surviving few banded together to form one battalion during the final months of the war, but where they were deployed then, it does not say.
-
Hi guys. I've now commenced making the diorama for the Tamiya 1/35th Churchill MkVII featured in my 'Saving a Churchill MkVII from the bin' WIP post. In that WIP, I originally intended to 'hide' most of the tank by submerging it in a ditch full of deep water, as I thought it would disguise the fact that I had messed up the paint job, but I did, in the end, 'save it'. I liked the idea of a ditch, or stream though. I have never tried to depict water in a diorama, and as this is my 2nd diorama since returning to modelling after a 35year absence, I thought it would be a suitable challenge. After all, why build a model and diorama, if you aren't going to push yourself and try new things? I had considered driving the tank across a ford, but the crew supplied with the kit are clearly chatting to someone beside the tank. I doubt they'd be doing that if the tank was actually moving. So the tank has stopped momentarily. Besides, the tank is dry and dusty, and I didn't want to have to do more work on it trying to make it look wet (not after all the problems I had trying to get rid of the original 'satin/gloss finish it had! - all that repainting, only to end up giving it a satin/gloss finish again!) I had a play around with the additional figures, the farmer, the motorcycle dispatch rider and the infantrymen, trying to fit them all in the space I had... and decided to leave out the farmer (this may change) The kit suggests that the crew are chatting to him, and that he is passing up a bottle of wine in gratitude to their liberating his farm/country/wife. I thought that the tank riders and the following infantry might have had something to say about the present. (Like 'Where's ours?') So, I'm going for the crew stopping the tank to chat to a dispatch rider, asking for directions as they are in 'bocage' terrain and a bit disorientated. Not exactly thrilling, I know... but I might be able to add some humour or intrigue at a future point. So... I started on the diorama yesterday and progress has been relatively swift as I had all the materials to hand already. These include: A chopping board. Polyfilla. 2 carrier bags full of twigs, roots and other assorted (and secret) plant parts. Static grass (though unfortunately, still no applicator) Astroturf. A small bag of cat litter. Bottle of 'realistic water' Pouches of assorted crushed brick/stone. Jars of herbs and spices. Several sheets of white plastic of varying thickness. PVA and CA glues. Acrylic, enamel, and watercolour paints. Galeria acrylic matt and satin varnishes and Galeria matt medium. Other stuff I've forgotten about for now. I took my chopping board and models and played around with the position of the tank and figures until I found one that I was happy with, then I marked out their positions directly onto the board with a marker pen. Then I played around with the positioning of the hedgerow, stream and other features and did the same. BTW I really likes these chopping boards, sourced from The Range and costing £7.99. They aren't too big or too small, and are sturdy and thick and nicely heavy. They are constructed from glued batons of hardwood, are around 18mm thick and will never warp. They will also withstand deep gouging. I say this because rather than build up a surface in which to create a stream/ditch, I have instead, gouged into the board to gain that depth. I then added a skim of polyfilla to the rest of the board, having scoured and gouged the surface to remove the coat of varnish and improve grip. A liberal scattering of cat litter was then applied to the 'road' surface, and ruts created with the tip of a lollipop stick. (I want the ground to be hard and dry, so there are few visible signs of tank-track impressions.) This will take some time to dry fully, so in the meantime I cut up strips of astroturf, clipped away at the 'blades' of grass to get some variation in length and then stuck them to the banks of the stream with CA. I then pushed the still-wet polyfilla up to the astroturf and blended it in with a dinner fork. Much more work will be done to this in the future. A thinnish coat of PVA glue was applied to the bed of the stream, and a thinner coat near the banksides. A sprinkling of cat-litter dust was applied along the edges of the stream while larger pieces of cat litter were placed in the deeper channel. I am still in the process of gouging out the rest of the stream and will add a very small wooden 'footbridge'. Photos to follow shortly.
-
Just saw this, must say that it looks very nice. http://www.network54.com/Forum/47208/message/1460561540/As+seen+on+Facebook Cheers Dan