Search the Community
Showing results for tags '1/35'.
-
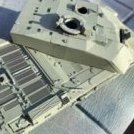
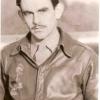
OK so the first of my slightly pushing the rules builds (as approved by the GB gods) is something that doesn't float and doesn't fly and land on something that floats... Where is the naval connection? Well it's going to be ridden by this little resin chap... A member of the USN playing with it, based on several famous photos of Utah Beach on D-Day (or just after), one can only imagine what the guys thought of a remote controlled drone/mine in those days! It should prove a good exercise for me in doing figure painting, something I haven't done a lot of in about 30 years, I plan to do a tiny vignette/diorama with it, I have a tiny base that should suit it and hopefully I can model a bit of sand - not too many parts which is a blessing (given how many other GBs I have on the go currently), but a first for me in using resin. I'll put up some parts photos later, though as I have 3 GBs needing my attention this is more of a holding page for now!
-
Hi all. Having a break from jets. And moved back to tanks. Just purchased the Tamiya. 1/35 challenger 2 Desertised but it has not got the. Standard pointy side armpit skirts in it. Not really wanting to buy another kit just for 2 parts. Can you buy separate. Anywhere ??? Help please. Thanks and stay safe at these times
-

Trumpeter Russian T72A with kontact armor
BlackMax12 posted a topic in Ready for Inspection - Armour
I will consider this pretty much complete. Sort of a fictional camo scheme but whatever. -

Valentine Mk.IV [Tamiya 1/35 scale]
ScootyPuffJunior posted a topic in Ready for Inspection - Armour
Tank, Infantry, Valentine Mk.IV Tamiya | 1/35 scale Tank, Infantry, Valentine Mk.IV in 1/35 scale from Tamiya with RB metal barrels and Masterclub metal tracks. Painted with Tamiya acrylics; weathered with, Vallejo acrylic weathering effects, Ammo and Mig Productions enamels; Ammo pigments and dirt from outside. Comments and criticism welcomed!- 13 replies
-
- 25
-

-
Hallo again This is my Kettenkrad from DAS WERK. Actually it was a challenge to build the smallest vehicle on track. Beside my tanks and half tracks. It was not so complicated. Most headache caused the instruction. After corresponding with the team of DAS WERK yesterday, they told me the instruction is already revised. Fine. Other instructions like for the FAUN and SdAnh are not. Be carefully when reading them and cross check the plausibility. Not more to say. Happy modelling
-
As I wait for a couple of bits to arrive so I can finish off my LAV III build I began to ponder the next build. Sat in the shed looking at my stash, these two popped out; Flak 9 by phil da greek, on Flickr Flak 8 by phil da greek, on Flickr These were both gifts from my brother in law when he finally decided to concentrate on wingy things and I've had them for a few years now. I'm not really into WWII German stuff, not because of anything political just I find their uniforms near impossible to paint, but the spotter on the half track had a pretty simple outfit on. But what to do with them? Then stumbling around on Wikipedia (how much trouble does that get you into?) I came across a picture of a huge flak barge, which while it wasn't what I was thinking about it id make me think........... That was some days ago, so here's some photos. Flak 1 by phil da greek, on Flickr Inspiring huh? But it's the starting point, time for some measuring and cutting. Measure twice cut once? Yeah, not in this model shop. Flak 2 by phil da greek, on Flickr Flak 3 by phil da greek, on Flickr Flak 4 by phil da greek, on Flickr Flak 5 by phil da greek, on Flickr Flak 6 by phil da greek, on Flickr Flak 7 by phil da greek, on Flickr And hey presto, from some plastic card, a straight edge and new knife blade a waterline flak barge begins to take shape. Some blood was spilt.
- 16 replies
-
- 7
-
-
- MainlyTamiya
- February1945
- (and 1 more)
-
Here it is all done, there is a WIP if you haven't seen it already. This was a Christmas present from the girls along with the update kit. This was supposed to be a summer project following my holiday of a lifetime after retirement, but hey ho. I started building on the 1st Feb and finally called it finished last week. LAV 1 by phil da greek, on Flickr LAV 14 by phil da greek, on Flickr LAV 37 by phil da greek, on Flickr So here we go, this doesn't represent one particular vehicle but rather is an amalgamation of several hundreds of LAV photos I've discovered on the internet, but the pose of the figure does come from one particuar photo of the Canadians in Afghanistan. I'm pretty happy with it overall, but the figure disappoints me as I found the CADPAT particularly challenging, the sharp digital pattern has turned into a series of dots and blobs. LAV 78 by phil da greek, on Flickr LAV 79 by phil da greek, on Flickr LAV 80 by phil da greek, on Flickr LAV 81 by phil da greek, on Flickr LAV 82 by phil da greek, on Flickr LAV 83 by phil da greek, on Flickr LAV 84 by phil da greek, on Flickr LAV 85 by phil da greek, on Flickr LAV 86 by phil da greek, on Flickr LAV 87 by phil da greek, on Flickr LAV 88 by phil da greek, on Flickr LAV 89 by phil da greek, on Flickr LAV 90 by phil da greek, on Flickr LAV 91 by phil da greek, on Flickr LAV 92 by phil da greek, on Flickr LAV 93 by phil da greek, on Flickr LAV 94 by phil da greek, on Flickr LAV 95 by phil da greek, on Flickr LAV 96 by phil da greek, on Flickr LAV 97 by phil da greek, on Flickr LAV 99 by phil da greek, on Flickr LAV 100 by phil da greek, on Flickr LAV 101 by phil da greek, on Flickr There we go, an enjoyable build of a good kit. Thanks for looking in!
- 13 replies
-
- 22
-
-
Here's a small 1/35 diorama I started a few months ago; the resin 25cm schwere Minenwerfer is from Vargas Scale Models and comes with shells, wicker shell casting, tools and wheels. It was painted with MM German brown as the base and brush painted with various Vallejo colors. Outlining done with a Micron pen. The two guys enjoying a smoke break are resin figures from Model Cellar. The logs are also castings from Vargas. The bottom layers of sand bags are made from clay the air drys over night and the top layer are resin bags from Value Line. Figures, logs and sand bags painted with AK and Vallejo acrylics. The dried leaves around the corners are just that - dried leaves from the backyard in a coffee grinder and used the small bits around the floor and dugout area. Hope you enjoy... Charlie Duckworth Omaha, Nebraska img]https://i.imgur.com/4dTDJNI.jpg[/img]
-
Hi guys, Started this build some time ago, but unfortunately didn't take any photos so far. Nothing exciting till now anyway, built OOB. Perfect fit Tamiya kit (I find this one even better than other Tamiya kits I built so far). I'll go with vinyl tracks as they will be mostly covered by sidescirts anyway. Primed with grey Mr. Surfacer 1500 (I love this stuff, creates perfectly smooth finish) and painted with AK Real Colors. Not sure how accurate they are, but you can see yourself. Painted with 2:1 (thinner:paint) ratio, in three passes. This was my first time using AK Real Colors (usually using Mr.Color and Hataka), so actually, there was something exciting at this point. First Portland Stone layer went crap, gritty like a sandpaper. So I had to sand everything and repeat. Had to do some practice to figure out how to use this AK Real Color stuff successfully and ended up with really nice smooth and flat finish. I am starting to like them, although they do perform a bit more unpredictable compared to Mr.Color. I used AK High Compatibility thinner, but then switched to Mr Leveling Thinner as it's easier to work with it, at least for me. Masking it was quite fun actually. It's like unwrapping the gift And here's the result. Will hopefully continue this weekend. Cheers!
- 27 replies
-
- 8
-
-
- Caunter Scheme
- 1/35
- (and 1 more)
-
Hi all! Here is my 1/35 Dragon M1A1 Abrams SEP, built up as an ~early OIF tank. Although the base kit from Dragon is excellent (and was for many years the best Abrams on the market) I have added a lot of extra details to this build since the tanks used carry so much on them In no particular order I have added Mine plow (from the early Tamiya Abrams) Stowage from Eduard, Real Models, Legends Productions and the kit itself Scratchbuilt tarps, sand bags & straps Bottles from Real Model Spent casings and links from RB models (and someone else who I forget) It's not representative of a particular tank - rather I used a lot of reference photos of multiple early invasion tanks to build this and all the little details are taken from photos of the real things. Despite being from a much earlier kit the Tamiya plow is still pretty detailed, and at least at the time I built this it was the best out there. The rear tow cable is a copper one from Karaya which helped it bend and form more realistically. A tank has to have a funny name, right? Duck tape fixes everything, even in 1/35 world The crushed bottles are resin pieces from Real Model (I think) The .50 cal casings are brass items from RB models, and the links are resin items, but I forget who from. The M4s are both from Live Resin The IFF panel on the front glacis plate is scratchbuilt from plastic card and foil, and was damaged similar to reference photos "Caution Restricted Head Clearance" Thanks for looking, comments appreciated. Enjoy the long weekend!
- 14 replies
-
- 20
-
-
M4A3(76)W HVSS "Easy Eight" Tamiya | 1/35 scale Tamiya's fantastic offering of the M4A3(76)W HVSS, commonly referred to as the "Easy Eight." Aftermarket goodies: Friul tracks, RB Model metal barrels (main gun and machine guns), Panzer Art antenna mount (I forgot to drop the actual antenna in the mount), Value Gear stowage. Painted with a combination of AK Interactive Real Colors, Tamiya, and Vallejo paints; weathered using Ammo of Mig, AK, and Mig Productions enamels, 502 Abteilung oils, and a touch of Vallejo acrylic weathering effects. Comments and criticism welcomed as always!
- 16 replies
-
- 27
-
-

-
Hi all! Here's my latest 'lockdown' quickbuilds - started the 9th of May. It's the good old Tamiya kit OOB with only straps and a tarpaulin added. First up is the 'beauty' shot: As with all my 'lockdown' builds - don't look too closely - keep your distance! Cheers Hans J
-
 Hi All Here's the lockdown build. This is an old kit with rubber band tracks that are about 5 links too long so fruils are the only real option. The extras in the fighting compartment are all Tamiya as is the badly painted figure. Strange looking vehicle, part of a large number of captured French tanks modified by a Major Becker in France prior to D Day. The high superstructure and thin armour made it pretty vulnerable apparently. The base is my first home made effort which has given me the confidence to try bigger and better things. Usual C&C welcome - stay safe all Cheers David
 -
Folks, I've been lurking on here for a while and decided to take the plunge and show my latest model for inspection. It's the Trumpeter T-80BV in 1/35 OOB using Ammo Modern Russian Colours to paint and oils for weathering.
-
This is Meng's new tool jeep with the Wasp flame thrower as trialled (but not used) by Popski's private army. The kit's a decent, if unspectacular, rendering of the jeep with some areas of nice detailing, while other areas seem a little basic. The original was a one-off utilising a flame thrower taken from a Canadian Wasp Universal Carrier. For fairly obvious reasons it never went further than a few trials, and was never used in combat. Meng seem to have based the kit off the the modern replica Wasp jeep and, as such, some of the details may be off from the wartime original. It looks convincing enough though and, given the scarcity of decent reference photos of the original, it's probably as accurate as they could have made it. The only things I needed to add were some extra hoses and plumbing to busy up the build. The full build can be found here Thanks for looking Andy
- 22 replies
-
- 52
-
-
-
All hello! I will build Jagdhfnzer 38 "Hetzer" of infantry division "Шарнхорст". To the west of Berlin, May 1945 Here content of box. The old plastic of Italeri lies in the box of Revell. Some details of complete set I plan to replace or improve. Volodimir.
-
 This is my 1/35 scale Tamiya King Tiger Tank , kit number 35164 - for the Eastern Front, February 1945. The GD Epaulette is original and 100% Genuine Wartime - to the GrossDeutschland - my favourite German Army Division History The German King Tiger Tank was introduced in early 1944 and was the most powerful tank during World War 2. With its powerful 88mm gun and an almost impenetrable front armour, it was one of the most feared weapons of the war. Up to the end of the war, the allies had not introduced any effective means to counter the threat. The Tiger II combined the heavy armour of the Tiger I with the sloped armour of the Panther. The design followed the same concept as the Tiger I, but was intended to be even more formidable. The very heavy armour and powerful long-range 88mm gun gave the Tiger II the advantage against virtually all opposing tanks. Construction The Tamiya kit was supplemented with many after-market items and scratchbuilt details. The main additions were: Eduard photo-etched detail set for the King Tiger Aber turned aluminium 88mm barrel for King Tiger item no. 35L-15 Fruil Model all-metal tracks for Tiger II ( made in Hungary - Highly recommended !! ) Echelon Decal set number AXT 351001 Zimmerit applied using an out-of-production Aftermarket set that used resin sheets on sticky paper that I applied using epoxy resin glue on the Tamiya King Tiger . Scratchbuilt details included the following: The track changing cable is fine electrical cable with the plastic insulating cover removed. One end of the bare wire strands was clamped in a pin vice, while the other end was twisted until the desired effect was achieved. The headlight cable was replicated using fine solder. All hatch handles were replaced with copper wire. The Commander's hatch pivot guard was added from plastic card. I used the KingTiger II FruilModel all-metal tracks which you assemble using a special jig supplied, and assembled each track individually, link by link, linking with brass wire, until you have two sets of tracks, you can adjust them to have a realistic sag as well, plus you can scratch the paint showing some metal to come through and they just look great - easy to assemble if you take your time and use a good reference source to make sure you have them facing the right way! The Fruil spare track links were used, with holes drilled through the interlocking teeth. Several were pinned with brass wire for variety. The crank handle guide ring hanging from the bottom of the right exhaust cover was fabricated from drilled plastic rod. The radio antenna is shaped brass wire. Gun cleaning rods are aftermarket brass rod. The King Tiger II kit Exhausts were replaced by using out-of-production Moskit Hollow metal Exhausts found on eBay. The Kingtiger, like other Panzers had the distinctive zimmerit coating applied in the factory. Zimmerit was designed to defeat magnetic antitank charges, and resulted in the tanks having a rippled texture on the covered surfaces. This rippling reduced the contact area for the magnetic mines to adhere to and when combined with the tank’s vibrations made it hard for the charges to adhere to the tank. On the Kingtiger the zimmerit had a pattern of closely spaced horizontal ridges. The Zimmerit was applied using an out-of-production Aftermarket set which had them printed in very highly detailed plastic or resin sheets onto sticky paper with strong glue fixing them to the tank - I can’t remember which manufacturer made them, but they have been a wise investment and were dead easy to apply, and I didn‘t have to cut them either ( don’t use photo-etch zimmerit, it never looks right - too perfect looking ! ) Painting, Markings and Weathering All camouflage colours were applied with the Testor Aztek A470 airbrush. Tamiya paints were used: XF-64 Red Brown XF-59 Desert Yellow mixed with XF-2 Flat White mixed 50:50 Equal parts XF-13 JA Green, XF-65 Field Grey and Gunze-Sangyo H312 Green The wooden handles of the tools were painted XF-59 Desert Yellow. Weathering The entire model was sprayed with Tamiya acrylic X-22 Clear Gloss. When dry, a thin wash of Tamiya enamel X-18 Semi Gloss Black 60% to XF-64 Red Brown 40% was applied. Mud was added using Faber-Castell Pastel Chalk (9286-179), powdered and mixed with Mineral Turpentine. The resulting slurry was painted onto the tracks and the wheels , I used “ green-line “ grass for the Diorama , and the angled Brass Name Plate ID Holder was made by AMTEC Industries , 1 West End Units, "Charles field", St. Boswells to my own design. Note - that I originally thought to buy a ' Dragon ' King Tiger for my Model - If you're thinking of buying a King Tiger in the future think long and hard about what you want from a kit and balance up what they offer you for the money. Lets face it there are enough out there to choose from now. For me , the Dragon King Tiger has a retail price around the £50 mark in the UK and I know that if I paid that much for it I would be both angry and disappointed. As a kit it's nothing special in regard to features. It's a pretty basic King Tiger . With the Tamiya kit at least you know it will fit together properly , and I stress that adding the aftermarket Fruil tracks , Brass Barrel . resin Zimmerit , Moslit Exhausts and etch set you get a lovely looking model , that is a joy to build and also is accurate - and user-friendly . David Walker
 -
 Another one I finished some time ago: The (very) old Dragon Pz III M/N kit no. 9015. This one is finished as an Ausf.M at the time of the Battle of Kursk. German armour is not really my thing but I've always liked the look of the Pz III's and IV's with the Schurzen fitted. As ever, hope you like it and all comments/criticism welcome. Bandit 1250
- 11 replies
-
- 23
-
-
Hi all, I felt like I needed a new project to help get through this period in which I'll be spending much time at home. The kit I've chosen to work on is Tamiya's brand new Renault R35 in 1/35th scale (pictured below). I'm pretty excited to get going on this one once it arrives in the mail. If there aren't too many delays due to the lockdown, I should be ready to go next week at the latest. This gives me enough time to do research and choose the particular vehicle I'm going to build. In the meantime here is how I've decided to breakdown my project. PHASE 1: CONSTRUCTION Part 1: References Here I'm mainly going to compile a selection of images taken from internet as well as a few "walkarounds" I know are available. Also, I expect to use a book called "French Tanks of WWII pt.1" from Osprey Publishing. Part 2: Removing parts from the sprue & part preparation It might not be the usual way of doing things but I'm planning on detaching and sanding all parts before actually gluing any of them together. This being a Tamiya kit, I really don't expect much trouble in the way of mould marks etc.. Part 3: Basic exterior assembly Here I assemble all the parts that will be painted in the base colour, in other words the core of the model excluding certain details that are easier to paint individually. I'm not sure how often I will post updates during this part but most likely every 3-4 "steps" in the instructions. Part 4: Textures This part is something I guess I'm going to experiment with. The R35 was made mainly of 3 large casted pieces bolted together. The Tamiya kit tries to replicate this cast texture but from what I've heard it isn't pronounced enough. If this ends up being the case I'll redo it myself as well as the various weld lines. Part 5: Battle Damage I haven't decided which particular R35 I'm going to represent but it is possible that I might add some light battle damage to the model depending on what the real one went through. Part 6: Exterior Detailing Finally, I'll end the build phase by constructing the metal tracks I'm going to purchase to go along with this kit. This is also where I'll add any extra details or accessories if I feel the need. Well, there's the plan. Now to execute! I'll post again once the research is completed. Cheers, Jack
- 8 replies
-
- 4
-
-
- R35
- French WW2
- (and 1 more)
-
I started this kit back in 2008 and it ended up on the 'shelf of doom'. Took it down a week ago and decided to finished it. Fireball had the storage bins modified with sheet metal to keep small items from falling through and received a piece of angle iron on the front to allow for extra storage. Mostly OOB build with resin tarps and personnel storage added. Star on front was eliminated by the crew as it was too much of a target.
-
Morning all, Its the bank holiday weekend (as much as that means anything nowerdays!) but just in time my next kit has arrived; the Takom Flakpanzer Panther. In addition this will be my first build on Britmodeller so let me know if I've goofed the photos or get anything wrong on the way. As with all of my builds this will be an OOB build, as I make kits for the joy of the hobby, and to help fuel my passion for military history. That said I try to get things accurate where I can... Here we go with first attempt at photos:
-
So the longest project finally finished. Quality of model itself as usually Hobby Boss or Trumpeter. I'm sure I've made some mistake and missed few things, but by the end it is only piece of plastic, isn't it?
- 12 replies
-
- 20
-
-
-
- T-28
- Hobby Boss
- (and 1 more)
-
Right then, having retired early just before Christmas I should now be on a holiday of a lifetime, but obviously I'm not, this was going to be a project for my return but i thought i might as well crack on with it now. This was a Christmas present from one of my girls and the other girl got me the add on. LAV 1 by phil da greek, on Flickr LAV 14 by phil da greek, on Flickr The kit gives you a couple of options to build, with nice clear instructions and a concise pait guide (it's green). LAV 2 by phil da greek, on Flickr LAV 3 by phil da greek, on Flickr LAV 4 by phil da greek, on Flickr LAV 5 by phil da greek, on Flickr LAV 7 by phil da greek, on Flickr More to follow........
-
Giddey to all, here is one of my few armor kits, the body, wheels, tracks are from the TAMYIA panzer IV and the casemate & gun are from Dragon. I bought the Dragon StuG IV at eBay because i like this tank. (It kind of reminds me of a woodlouse!?) But it was an old mold - Dragon releases a terrible mix of variants of one tank. The same happens with the kits of the German destroyers. the woodlouse! Hope you like it! All comments are welcome as I normally do not build tanks, especially if you can suggest something I can do better! Cheers Andreas
-
Hey guys, here's my ISU. It was a fun kit to build, the instructions were just one sheet of paper. I replaced the plastic grilles with microdesign PE. The replacement tracks are trumpeters workable tracks and they go together quite nice. I think about making a vignette for this one with some angry Russians on top but that won't be anytime soon so I leave it here. Cheers, Ernst.
- 27 replies
-
- 21
-