Search the Community
Showing results for tags '1/32'.
-
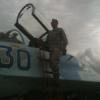
 Greetings all, An Easter holidays completion from me - Revell's 1/32nd scale Hawker Hunter FGA.9 more or less OOB, other than some aftermarket decals from AeroMaster and some home-made FOD guards. This kit is really under-rated in my humble opinion - it has lots of detail OOB and beautiful surface detailing from a time when Revell were at the top of their game. I had no issues whatsoever with the build - it's about as close as you can get to building Lego - and it went together in a few days. Paints were Xtracolur enamels with a splash of Humbrol Matt Cote to finish it off. Some light weathering was done with Mig pastels. All in all a very enjoyable build - and it only cost me a tenner under the table at a show! All the best, Tom Hawker Hunter FGA.9, XG207, 58 Squadron, RAF Wittering, mid-1970s.
- 21 replies
-
- 49
-

-

-
- Hawker Hunter
- Revell
- (and 1 more)
-
Here's my recently completed Kotare Spit. You don't get many parts for your near-£100 quid but you do get great accuracy, meticulous research and no loss of building enjoyment. The detail in the casting is exquisite - you can't quite see the raised rivets at the back of the fuselage in my photos for example, but it is there. Of course you could pay a bit more for a Tamiya Spit and get a much higher parts count and a full engine if that's your thing, but it won't be an early version - you pays your money and takes your choice. Both are a joy to build in their own way. Thanks for looking J.A.
- 15 replies
-
- 35
-
-
-
Happy Easter folks! Here is my attempt at Revell's new(ish) big Hurricane. Decent enough kit for the price, although some quite clever design in places is let down by the soft plastic as the pieces aren't as sharply moulded as they might otherwise be. Nothing a bit of effort can't overcome though. Thanks for looking, J.A.
- 10 replies
-
- 33
-
-
 I've not been idle for the last 6 months or so: this has been on the bench, and now it's finished. Here are a few photos until I get out and do some "beauty shots". The model is Italeri's 1/32 GR4 in one of the box schemes, the Tornado retirement scheme for IX(B) Sqn. This squadron was the first RAF operational unit to be equipped with the Tornado GR1. IX Sqn flew several types in WWI, and was briefly disbanded in 1919. It reformed as a bomber unit in 1924 - hence the "(B)" in the title - and starting with the Vimy, flew Virginias, Heyfords, Wellingtons, Lancasters, Lincolns, Canberras and Vulcans, before reforming on the Tornado. Italeri's GR4 builds up quite well: it needs a little work to make it fit, but in the end it is a solid construction. I did use rather a lot of aftermarket, to whit: Eduard canopy masks; Bandit Resin Factory empty Sidewinder rails; HGW safety ("RBF") flags; Jet Passion 1500 litre tanks, exterior detail set (partly not used as not needed imo) and replacement back seat monitors (scrapped and reverted to kit parts for reasons I won't bore you with); Master pitot tube; Scale Model Developments (SMD) seats; Tradewind67 (eBay trader name) intake and Jet pipe covers, other covers, and back seat grab handles); and home-cut masks for the roundels and serials. And until I get what I call the "proper camera" out, here are a few quick post-finish bench shots. Comments and feedback welcome, thanks for looking.
 -
My modelling interest in this period lies mainly with Naval Aviation, specifically the Silver Wings of the Fleet Air Arm and the Yellow Wings of the US Navy. Going with the Yellow Wings, previous GBs saw me build in 1/32 the Grumman F3F (Revell) and Boeing F4B (Hasegawa). For this GB I will be building the Curtiss BF2C in 1/32 from Hasegawa. The BF2C had a short service life, 1934 to 1937. Withdrawn in 1937 after it became apparent the wings had become weakened due to the stresses caused by dive bombing. The kit decals look like they have seen better days, so will be using an aftermarket sheet from the appropriately named Yellow-Wings Decals to build an aircraft from VF-5B, USS Ranger. I believe this was the only squadron that flew the BF2C.
-
Phew, broke my duck for 2024. I was very pleased to finish this one, not least because it was an xmas present from my Dad. The kit was pre-owned and included quite a lot of aftermarket – the Ali Cat canopy set, Quickboost propeller and exhausts and the Master brass gun barrels set (this being particularly appreciated as the forward-firing MG17 in the kit seems to be a 30mm upgrade from the diameter of the barrel). I had another beef with the kit, in that it seems to be designed to be built with the wings folded and all the engine panels open... as a result the wings seem to be lacking the wing-root fillet at the top if you build them unfolded (it could have been me, but I couldn't find any such part or any part that looked like it might fit the bill) and the engine cowling panels don't fit at all well if closed up. Still, I made it in the end and as it's unlikely anyone else will produce an injection-moulded Ar 196A then you either build this one or you don't build any. I did add the HGW resin seat and fabric seatbelt set, and the Quinta instruments sets, as the kit's moulded seat belts weren't all that impressive and there were no decals for the instrument panel. The model was finished in the Maritime Scheme, with Colourcoats ACLW04 - Grun RLM 72 & ACLW05 - Grun RLM 73 over ACLW03 - Hellblau RLM 65, with the interior in ACLW12 - RLM Grau RLM 02, the propeller blades in ACLW02 – Schwarzgrun RLM70 and the bombs in ACLW11 - Dunkelgrun RLM71. Detail painting was mostly Vallejo acrylics with Tamiya Clear Red and Green for the navigation lights. I used the kit transfers, they were good but I did ditch the large stencilled laurel wreath marking which commemorated 100 catapult launches from Tirpitz – I didn't like the way it was sprayed over the hand-hold ropes and there must have been a time when it didn't have that marking applied (the first 99 launches, for example). I finished it with a mix of satin and matt varnishes, it still came out shinier than I expected but them's the breaks. Thanks for your patience, apologies for the verbiage Cheers, Stew
- 11 replies
-
- 53
-
-
-
Hi all. First up from me will be my attempt to create the 'ultimate' 1/32 Le Mans Bentley Blower, by using the best bits from each of these two kits . Generally speaking, the Pyro is the better of the two, but is let down badly by Pyro's decision to simply use the body parts from their Bentley Straight-Six kit, rather than create new ones for the Le Mans So basically, I'll be using the Airfix bodywork/chassis and the Pyro bits for everything else. I actually started this project a couple of years ago, but progress is well below 25%. When I'm finished, I'll still be left with one complete, un-made kit, but unfortunately comprising all the worst bits! I'll be open to offers . Cheers
-
This is the Piper PA-48 Enforcer I'm planning to build for the GB. Although not a true Mustang, this has been approved by Patrice @TEMPESTMK5 and will be the Halberd Models resin conversion for the Revell P-51D-15-NA kit in 1/32. Here's the raw materials... The very nice Revell 1/32 kit. This is the later edition with the fin fillet to complement the earlier -5-NA. It's not as finely cast as the more expensive versions, but it goes together really well. Great parts breakdown, especially in the cockpit. Enables much finer detail than the traditional moulded sidewalls. Lots of armament options as well, with two drop tank variants, 500lb bombs, and 5in rockets. Three canopy options, including the required blown Dallas canopy for this aircraft. This is the ludicrously good Halberd Models conversion set for the kit. As @trickyrich will tell you, the quality and fit are superb for a resin/3D conversion, especially considering the size of the parts. As you can see this is a very extensive set - two replacement fuselage halves being the most substantial parts, plus the tip tanks, prop and spinner, cockpit floor, ejection seat and lots of pylons! On with the show... Cheers, Alan
- 10 replies
-
- 10
-
-

Austin Healey 'Frogeye' Sprite - +++ Finished +++
CliffB posted a topic in Baby Boomers GB 1946-1964
Hi. Here's another one from me. The Frogeye Sprite (aka the Bugeye in the States), was produced between 1958 and 1961, and utilised the 948cc engine from the Austin A35 and Morris Minor 1000. Whilst the A35's engine produced around 35 BHP (the clue's in the name), for the Sprite this was boosted to 43 BHP. This gave a top speed of 83 mph and a 0-60 mph time of 20.5 seconds. For its time, the car was pretty nippy and went on to provide an affordable way into motorsport on both sides of the Atlantic. The Airfix kit was first released in 1961, but mine's a '90s release. All my parts are still factory-sealed, so I'll open things up for a closer look, once I get started. Where possible, I like to base my car builds on real, preserved examples and I'll be using this beauty for this one. Cheers- 37 replies
-
- 20
-
-
_opt.thumb.jpg.be9c1e22e34c329b51268dfacc8614e0.jpg) Hello fellows, Let me show my last project. The Tiger Moth DH82 A- British Training Aircraft -1/32 from ICM. This model has been fun to make, and everything went well, until the time to put the wiring, where it was not possible for me to get the result I wanted. The rigging were loose, after several attempts to put them in tension. In this sense, the difficulty has exceeded my skills, and I have finally let some rigging loose. I hope that the next model with rigging will be better...🤞 Anyway, I leave you these photos of the finished model. I'm quite happy with the painting, camouflage scheme and the installation of some small magnets to be able to remove the cover and see the engine. Here, a link to WIP: As always, thanks you guys for your comments. Cheers! Josep
Hello fellows, Let me show my last project. The Tiger Moth DH82 A- British Training Aircraft -1/32 from ICM. This model has been fun to make, and everything went well, until the time to put the wiring, where it was not possible for me to get the result I wanted. The rigging were loose, after several attempts to put them in tension. In this sense, the difficulty has exceeded my skills, and I have finally let some rigging loose. I hope that the next model with rigging will be better...🤞 Anyway, I leave you these photos of the finished model. I'm quite happy with the painting, camouflage scheme and the installation of some small magnets to be able to remove the cover and see the engine. Here, a link to WIP: As always, thanks you guys for your comments. Cheers! Josep- 4 replies
-
- 19
-
-
- Tiger Moth DH82 A
- 1/32
- (and 1 more)
-
Hi all, This was my last build of the year, finished on 30 December just in time for the deadline of the I Feel Deserted Groupbuild. This is a perfectly serviceable kit with very good decals. It goes together very well with few problems and contains some very nice options like Vokes and Aboukir filters and a slipper tank. It was originally going to be a pristine show model but I just couldn't do it 😂 The kit comes with a basic facsimile of the Merlin engine but I built a replacement engine from the Tamiya Mosquito. I borrowed a genius idea from the excellent GWH P-40 and built two complete nose sections which are held in place by magnets. This means it can be displayed either fully open or fully closed up without needing ill-fitting panels or fiddly magnetic bits The kit is finished in Colourcoats enamels and using the kit decals, which were of superb quality. I grafted a corrected forward canopy from a Revell Mk IX as the kit contained the older Mk.I/II type. I also added the armour panel over the fuel tank using Tamiya tape, and the IFF wires from the stabilisers to the roundel. I also replaced the wheels with Armory resin ones to get the treaded tyres and avoid using the kit vinyl ones. The cropped wingtips were modified to reflect the locally-produced wooden ones that were common with 244 Wing aircraft at the time. I really enjoyed this build and was very relieved that the detachable nose idea worked! All it takes is to scratchbuild a new bulkhead in the recess so that both nose sections have something to grip onto. I was so pleased with it that this could become my signature gimmick from now on ☺️ Well, thanks for looking, and a very Happy New Year to you all 🍻 Alan
-
Hi all, Looking forward to this GB, I'll be starting with this excellent resin/multimedia kit from MDC and designed by Radu Brinzan. Let's have a look in the box! A surprisingly compact box for a 1/32 WW2 bomber. Some nice documentation and parts guide in the box. Unfortunately I am missing a couple of bits Nice inclusion here of the canopy glazing and frames. A lot of decals are provided for the framing! Decals for 6 options (4 bombers and 2 recce variants.). Loads of PE and some additional detailing wire, which is nice to see. And of course, there are a lot of bits! All washed and drying. The casting quality is among the best I've ever seen. Creamy smooth resin parts with minimal casting blocks. Very few pinholes for bubbles. This stuff is amazing. The fuselage halves are very well cast. Both were slightly warped, but a nice hot bath and some reshaping sorted them out. This upper canopy part was quite significantly out of whack but again it survived a hot bath and I was able to shape it back to something useable. The eagle-eyed among you will notice there is only one main gear wheel. There's no sign of it in the box, bag or round the bench, so unfortunately it would appear to be a manufacturer error. There is an AMS Resin set but the only one I could find was from Sprue Brothers in the US. Item cost: $17.99. Shipping cost: $60.71!??? Are you having a freakin' giraffe, Sprue Bro? So I was just about to cry and resign myself to an inflight model when I remembered I had some Halberd wheels for the Do 335 - I wonder if they might be around the same size? Well lucky old me, they're close enough! So that's my new plan. The other missing part is the tail unit for one of the 250 Kg bombs Luckily no shortage of aftermarket options for those. Hey ho. The resin casting detail in this kit is excellent. Engine intake and 'bullet' Recon cameras Main gear bay, even though it's practically invisible Surface detail is very fine as well. Well, that's your intro - hope to start mangling resin and making superglue splodges everywhere soon! Alan
- 28 replies
-
- 17
-
-
- 1/32
- Ar234 Blitz
- (and 1 more)
-
Hi all. I've finished this last week and it's taken me a couple of months slow time. It's out of the box bar the data pod on the wing tip. There is no more to do to the kit, but I am going to put a pilot in it when I get one. I've chosen to model it engines running, hence the aux doors open and as intended from 1979. It's a simple kit enough and a design of its day. There's not much out there if you chose to detail it up. Kit decals were fine but I had a torrid time with the gloss varnish (W&N) I use. Perhaps it's going off. I glossed the model and putting the decals on, once dry it was obvious there was silvering. I've done the usual remedies which worked to a point. However we lost our 2nd dog within 12 weeks of the 1st, to cancer again so my heart wasn't really in it. This kit must be my nemesis as I've tried to build one twice before and it beaten me. Anyway it's done and never again. Thanks for looking Steve.
-
Hi All, This is my last one of what has been a quiet year output-wise, ICM's CR42 LW in Luftwaffe service, Italy 1944. A nice, straightforward but well-detailed kit with no fit problems. And to finish off, here's a couple including the figures supplied with the kit which I actually painted quite a while ago: As always, thanks for looking. Season's Greetings, J.A.
-
 No secret that this is my favourite aircraft, and the IDF operates probably the most advanced and combat capable variant currently flying. 1/32 is 'my scale' and we are currently spoilt for choice with four great kits of the various marks of this 5th Gen jet. Italeri got there first with this fully licensed kit and I snapped one up as soon as they were available. I started it back in 2021 but it soon got lost amid the wreckage from covid but I was able to complete it for the Go Large Or Go Home GB this year. The GB just finished so go grab yourself some big-scale goodness over in the gallery and build threads! So, here she is! The pilot represents 'Captain Shin' or simply Captain S., the Deputy CO of Sqn 116 'Lions Of The South' based at Nevatim in the Negev. Tricked it out in full Beast Mode IDF-style, with Python-5 missiles and Spice-1000 guided bombs plus GBU-39 Small Diameter Bombs, GBU-38 laser JDAMs and AIM-120D AMRAAMs. Cockpit details were Eduard panels, Metallic Details wiring and upgrades, and Anyz knobs, placards and switches. The decals were a mix of kit, IsraDecal's set for this squadron plus the incredible 1-Man Army stencil set. I made two pilot figures which came from an Etsy seller, so they're probably knock-offs of a more reputable producer (sorry!) The 1-Man Army stencils were astonishing - everything here is painted on. I used Colourcoats FS36170 enamel paint for the main colour, with MRP FS36170 Camouflage Gray lacquer for the panel joins. The enamel was applied over an Alclad aluminium base to provide the slightly reflective sheen. The weapons bays were the biggest challenge - I used Metallic Details upgrade set to add detail. I'll never build open weapons bays again in this scale!!! They look great with the Eduard GBU-39s and kit AMRAAMs plugged in! Pleased that everything fitted! All the bombs are attached using small neodymium magnets for ease of transport, if I should ever need to transport it! The entire canopy section is also detachable for protection when transporting. The entire nozzle and engine section is a resin replacement from Metallic Details. I also used Reskit wheels. This kit goes together very well, unless you want to try an drop the flaps or do anything else not in the instructions! It all looks very symmetrical and balanced out of the box. The wonky bombs are just because of the magnet attachment points and they got a bit knocked with me handling the model for photos! The armament was a big part of the build and came from Academy (Python AAMs), Eduard (GBU-39 SDBs), IsraCast (Spice-1000), Wolfpack (GBU-38s) and the kit (AMRAAMs). I called this a bit of a kitchen sink build, (in that I threw every bit of aftermarket I could stash bar the kitchen sink) and I'm really pleased it turned out more or less how I'd hoped. It's also a big ol' beast in 1/32! Here's how it measures up against its predecessor! Anyway - the GB is finished, and this goes back on the display shelf - hope you enjoyed a potted tour of the build and I wish you all a very merry and happy Christmas break All the best and happy 2024, Alan
- 37 replies
-
- 79
-
-
-
 Hello gents, here's my eighth (and no doubt final) completion of the year – my second Kotare Spitfire I, this one the 'Brian Lane' edition. It's OOB apart from the ASK 3D Printed exhausts and their canopy masking set. Having already built the first release of this kit I got a bit complacent and thought I could just use the instructions as a rough guide and reference, consequently I didn't initially remove the cockpit door rims (as you need to if you are planning on not having the door open) and then wondered why the closed door did not fit properly; I didn't install the prop shaft before joining the two fuselage halves, which means I don't have a successful model – i.e. the propeller does not spin. I also managed to slightly misalign the spine part but somehow only on one side. However these things aside I enjoyed building it as much as I did the last one, indeed I'm slightly more pleased with this one. The next one should be great The paints used were Colourcoats of course - for the 'apple' green cockpit colour I used ACRA08 Verde Mimetico 53192, uppersurface camouflage was ACRN09 Dark Green over ACRN10 Dark Earth and the undersurface camouflage was done in ACRN01 - Sky "S" Type. I painted the spinner yellow as per the instructions; in the most widely-reproduced picture of this aircraft it looks white ...but Brian Lane's fitter John Milne apparently told Dilip Sarkar that it was yellow and I didn't feel I could really argue with that. I did use a paler yellow than RAF trainer yellow so that there is a difference from the roundel surround as the original photograph suggests, but in the photos I took of my model it looks exactly the same shade There is also this photograph, apparently of the same aircraft. Doesn't look like a white spinner there (and it does prove Kotare's assertion that it didn't have doped covers over the gun muzzle openings, though I imagine they would have been applied after the first time it was armed up, I'm pretty sure it was standard practice by September 1940). TLDR, I went with a yellow spinner; it's your choice what colour you do yours The markings are from the kit transfers, they are beautiful to use (they're made by Cartograph) and can take repeated applications of decal softener (and you may well need it to get them to settle down over the bumps on the gun covers and the rivets on the rear fuselage). My only gripe is that the grey for the codes looks far too light, the side-view photo linked above shows nothing like that level of contrast between the camouflage colours and the codes. The final touches were a coat of AK Varnish (Satin with a little bit of Ultra-matt mixed in); an RT wire from Infini lycra thread – slightly underscale I suspect but I prefer the wires not to be too obvious; some wing-root chipping with Prismacolour pencils in a mid- and light-grey; a little exhaust staining from a brownish-black mix; navigation lights in red and blue Tamiya Clear and some staining from the cartridge ejector slots using black-grey pastel powder as this appears to be present on the original aircraft. Apologies for all the verbiage, thanks for stopping by Cheers, Stew
- 14 replies
-
- 48
-
-
I just hand carried home a 1/32 Tamiya Mosquito from Japan. It’s a steal at 15000 yen tax free price. I had resisted the purchase from past 2 trips but decided to get it before it gets difficult to find one. I would like to ask the mossie experts here what are the mosquito books good for modeling? Is there a kit out there to convert this Tamiya plane to one with the window at the nose?
-
Hello all, This is my first WIP post. I am not much for typing so this will be more pics then text. I started this a couple of weeks ago and so far one of the best Trumpeter kits I have built. Paints are AK Real colors. I have added the Airscale photo etch, wheels, 30.cal, prop and ANYZ knobs. I have also done some minor scratch building. Getting close to paint. More pics soon. Rod
- 12 replies
-
- 16
-
-
Hi All No way I can find space for the full kit, so this'll have to do. Its WnW heritage is obvious, with quality and detail at least matching Tamiya's Mosquito. Shame that there is no way of displaying the interior though as the double-skinned fuselage means a clear section (as per HKM's otherwise vastly inferior version) isn't feasible. Photos will have to do instead. Only problems I encountered were that the instructions are a little vague in places as to the the locations of some minor fittings, and the decals are the thinnest I've ever come across - while usually a good thing, it meant that the larger ones were prone to curl and stretch, hence the wavy lines of bombs on the mission tally; and I completely destroyed the one of the "Phantom of the Ruhr" text which meant I had to hand paint it instead. The duplicated flight deck in the foreground is my own resin cast of the Border one with a heavily modified/scratch built seat, which I'm going to use to try to bring the HKM version a little closer to representing the actual thing: Thanks for looking, J.A.
- 10 replies
-
- 43
-
-
-
Here's my latest completion, the Dragon 1/32 Bf110D-3 (or D-0 as listed in the gruppe paperwork), it is marked as one of the aircraft used by Erprobungsgruppe 210 in the summer of 1940. ... and a whitewall tyred tailwheel. I'm not sure if it was prototypical, there aren't many pictures of the original aircraft but it does look like there might be one and it was reasonably common: I used the same aftermarket as for my recent Bf110c-6 (apart from the AIMS conversion set obviously). Paints were Colourcoats ACLW12 - RLM Grau (RLM 02) for the interiors, ACLW03 - Hellblau (RLM 65) for the undersides and the top surface camo was ACLW11 - Dunkelgrun (RLM71) and ACLW12 - RLM Grau (RLM 02) - again it's hard to be sure from photographs but the D-0's of Epr.Gr.210 look to have quite a soft demarcation so may have been repainted at unit level. The blue on the prop spinners was a mix of Citadel acrylic blues mixed as close as I could to the blue on the aircraft code letter. Markings were a mixture of decals from the Revell re-pop of the kit and the squadron markings were from the Kagero Battle of Britain decal set kindly donated by our late forum-buddy Silver Fox. Thanks for dropping by Cheers, Stew
- 11 replies
-
- 44
-
-
-
Talk softly and carry a big gun. Here's my latest completion, the Revell (ex-Dragon) Bf110C, with the AIMS conversion set used to modify it into the C-6 version with the 30mm MK.101 cannon and marked as one of the aircraft used by Erprobungsgruppe 210 in the summer of 1940. To the base kit and conversion were added the Quickboost exhausts, Red Fox Studios 3D instruments and radio gear fronts,the HGW seatbelts and interior/exterior mask set and LF models mask for the camouflage pattern. Revell re-jigged the Dragon instruction sheet which made it easier to follow but included quite a few errors, omissions and just-plain-headscratching assembly choices; I did my best with it and deviated where I thought it prudent and I pretty much got away with it I think. I found building the kit to be absorbing, at times a bit frustrating, but overall I enjoyed it to the extent that I have started on a second one, and now have a third in the stash (the Hobby 2000 Bf110D). Mistakes were made. Some of my work was down to its usual shonky standard and the camouflage pattern on the port side is just wrong, I made the mistake of thinking it would be possible to fit the wings right at the end and only realised then that I had obviously misplaced some of the camouflage masks. Still, in the end I got it finished and that's a long-awaited one off my 1/32 bucket list. Paints were Colourcoats ACLW12 - RLM Grau (RLM 02) for the interiors, ACLW03 - Hellblau (RLM 65) for the undersides and the top surface camo was ACLW02 – Schwarzgrun and ACLW11 - Dunkelgrun (RLM71). The blue on the prop spinners was a mix of Citadel acrylic blues mixed as close as I could to the blue on the aircraft code letter. Oh yes, one more for scale: Cheers, Stew
-
Well, the scale fits so here we go. This is a fairly recent release. I figured how hard could it be? One main sprue, two small duplicate ones for the rims, a small PE fret, and four tyres...
- 8 replies
-
- 2
-
-
- Thunder Models
- 1/32
- (and 1 more)
-
My (part) set, bought second hand, many damaged, based on: The ARMED FORCES Of WORLD WAR II ISBN 0-85613-296-9 - Illustration 263 Private, British Commandos, 1942. Light raiding order, as worn on the Boulogne raid. A woollen cap comforter, battledress, 1937 pattern web equipment, inflatable lifebelt, toggle rope for scaling cliffs, and instead of ‘ammunition’ boots wears plimsolls. US M1928 A1 ‘Thompson’ sub-machine gun.
-
Hello fellows! Here, my new project: the Tiger Moth, British training aircraft, from ICM in 1/32 scale. This is the boxart: : And a pic of the sprues: According to the instructions, I opened several holes in the fuselage and wings, in order to put the rigging. I passed through the holes standard sewing thread. After this, the fuselage was painted in green cockpit: Here, the two halves glued together: After, I assembled and painted the engine: Also, I added a couple of wires...I want this part be visible. For this, I'm going to use small magnets to fix the cover in place, without gluing, but allowing to remove it if desired. This other side, will be closed after assembly: A couple of pics of the engine and the cover open. The black arrow shows the place where the first magnet is glued: And here, the magnets in the cover side: Here, notice the magnet put in the front part. Finally, I needed four small magnets, in order to fix the cover properly: And this is the final result. The cover can be easily removed to show the engine: And close after. That's all for the moment. I hope you like it, and thanks for watching! Josep
- 19 replies
-
- 10
-
-
- Tiger Moth DH82a
- 1/32
- (and 1 more)
-
Hi folks. I've finished this today having started it on the 19th June. It's OOB with the exception of a couple of wires here and there and mesh for the open apertures around the boom area. The seats were give sheep skin effect by using a sponge when it was tackle. A fire extinguisher from the spares box for the rear of the RHS. I edged the cabin wooden flooring with tamiya clear red, which worked quite well. I didn't want to load up the aircraft with a full load, so just chose the gun option only as I quite like the clean look. I scraped out the ammo box holder so it looked more like the real thing and opened up the moulded flash eliminator on the barrel. The stretched wire is a EZI line alternative. It's a single piece and with my razor saw I cut a groove and ran the wire through those antennas and filled the fillet afterwards. Now those pesky intakes. The kit clear parts are the best they could do I suppose with the budget. I tried mesh but it still looked way oversize to thee real thing. Which unless you're up close it melts away. So I've used a cut up tea bag, yep you read right. Up close it does have the holes. Now I know it's going to be marmite but unless I take the notion to make paper machè for guards, it'll do. The rear wheels were set at 27.5 degrees. The blades are correct as I used to overhaul them so have done both variations of the colours and stripes etc.... Not overly weathered. Tamiya paints for the main colours and kleared halfords primer for the darker/shiney head. Followed by a Windsor & Newton Matt varnish. I used Tamiya clear blue for the tints and tonned it down with smoke, but I think it could go darker. The blades are correct and I've done the 2 main differences as they went out of Bay maintenance. The biggest gripe is the instructions. They refer to different number on the sprue, but picture the bit to be assembled and would have you try to fit the orange crop parts on opposite ends to where they should be. So if you have the kit dry fit and check references!. So during this build one of our labradors (Finlay) lost his life to liver cancer aged 8. He'd lie down beside my modelling chair every time waiting for me to move. So he was alive when I started but gone at the end. The modelling was a bit of medicine whilst my wife and I adjusted but equally its not my usual standard as at times I couldn't be bottomed. So a few photo's. This last photo is on my Boscombe Down base. Both the sandy and grey are to 1/32 scale. Steve.
- 13 replies
-
- 43
-
-