Search the Community
Showing results for tags '1/24'.
-
Hello fellow modellers! Here is my interpretation of the Trabant Universal. Chassis is nearly finished, pictures of the body will follow. It is a little bit beaten up and dirty, but the engine is still in good shape Thanks for having a look! Dieter
-
Hi All, This is the first of five projects I have just started. I am titling it 'Promise made, promise fulfilled' This is the enormous Revell AEC Routemaster bus. Revell just call it 'London Bus'. Trying to avoid licensing issues maybe? I don't know why, since the box top picture has 'Routemaster' on it. One initial observation: It is BIG. On the box, it says 38.1 cm, that's about 15 ½ inches in old money. Anyway, pictures: The box of bits: It's rammed full of parts. The sprues on some of the parts, notably the floor-pan, was attached to massive sprues, about 6mm in diameter! Probably, to stop the floor-pan from warping. I recently re-discovered a fantastic solvent cement. Cellulose thinners. It smells a bit, is rather hot, but does weld styrene together well. It's biggest advantage is that it's cheap! The engine starts here. Revell offers the original Leyland engine or a new Scania engine. Now, I have read somewhere (maybe here) that the Scania engine was not fitted, but a Cummins. However, I have opted for the Scania engine, wrong or not. After a bit more fettling, we get here: The fit of the parts so far is very good indeed. I am impressed. Next is priming and painting the chassis. Thanks for looking. Alan.
-
This one feels like it's been going on a long while but I've finally got it finished. Actually, it was only 5 months, but as I tend to do one build at a time that has been 5 months of a grey car where Revell have done a much better job than the real thing warrants. If you want to read the build thread, the link is below. The design of the kit is excellent, probably the best designed kit I've done so far (including Tamiya kits) with the only minor issues being a misplaced tab on one of the side trims and the washer bottle perhaps could have done with a more obvious placement. But that really is it for design issues. The moulding wasn't quite up there though with some flash and mould lines to clean up. And I'm not convinced that the instructions really give you the best order to built it in - certainly towards the end I pretty much ignored the sequencing as I couldn't see how it would work following Revell's instructions. The build itself isn't perfect, but I think it does give a pretty good indicator of where my level is at the moment. But, enough waffle. On with the pictures (sorry, but there are quite a few). First up, as the roof doesn't have to be cemented in place I left it loose so I can show the interior. The kit also comes with a very nice representation of the two-stroke engine, including the fuel tank mounted right on top of it! Here's a couple of shots of it with bonnet open and roof off: And finally, at the risk of being a bit repetitive here's a few shots from all angles of the car as it is displayed. Hope you like it. All constructive comments (good and bad!) are welcome.
- 17 replies
-
- 18
-

-
Completed this one end of last year, so it's my most recent completed build (I build slowly, even though I build as the kits come). The kits goes together pretty well, apart from a few minor bits which I'll mention as I go through the pics. Hard to believe the kit is over 30 years old - it's much better than the Corvette I did before it. I'll start with the engine bay. Sadly, this is the only time it will be seen as there were 'negative clearance' issues with the lid so I had to superglue it down to stop it popping up half a millimetre or so. I'm not sure whether that is down to an issue with the kit or with my building skills. Certainly it was also a tight fit getting the body over those exhaust pipes too. IMG_6328 A couple of pics of the interior, because this is where a lot of the careful painting is needed with those seats. The seats and that red in the engine bay were my first attempts at mixing paint so I'm quite pleased with how that came out. Unfortunately, in getting the body on, I managed to dislodge the right-hand-side glass, so had to stick it back on using a paintbrush handle through the windscreen hole as that goes on later. All things considered, I can live with that small gap near the A-pillar (it only shows up on the camera anyway). IMG_6329 This pic below also shows the line around the rear spoiler where it joins the boot (bonnet?) lid. I was in two minds as to whether to join the spoiler and fill the join before painting and risk having poor paint coverage in the gap, or to fit the spoiler after painting and have that line between the two which doesn't exist on the original. If it had been silver as most of these seem to be then I would probably have gone for the first option, but as I'd chosen a dark colour I figured the join wouldn't show as much. But if anyone has any tips for this sort of thing, I'd be glad to hear from you. IMG_6342 Finally, a set of pics from around the car. The original plan was to use Revell's matt anthracite, but I ended up with a can with almost no internal pressure so it just spattered on the side. I had to sand back the paint on the side of the car and on the (front!) bonnet, then reprime. With the colder weather approaching, I decided to change to Halfords paint for the colour coat for time reasons which has given me the effect I was after. IMG_6335 IMG_6336 IMG_6339 IMG_6340 The view from the front. The Tamiya instructions call for a silver surround to the headlights, and show that on the box so I followed the instructions. But, they should really be body colour so that is a little bit annoying. Not the end of the world though, just wish I'd checked first. IMG_6344 And the view from the back with the engine cover fitted. So now, the engine is only visible from underneath or through the grille. IMG_6345 And finally, this is it when the sun gets on it. IMG_6366 I bought the kit because it was a car I like, and as an added bonus it's also cheap so it wouldn't matter if I messed it up. Looking inside, I was expecting a quick build as there didn't seem to be too many parts, but the interior painting slowed me up a bit. However, in the end, I'm happy as it represents another step forward for my modelling skills. Hope you all like it too.
- 15 replies
-
- 17
-
-
It seems as though there is a lot of Dodge Chargers around this section of the board, and as luck would have it that's what my next project is However, this one isn't quite the same as most of the others around. Generally, when you say Dodge Charger, most people would think of the classic muscle car similar to the General Lee. A few may well think of the modern version, but either way you're probably thinking of a big V8. What you're probably not thinking of is a 2.2 litre 4-cylinder hatchback from 1982, but Monogram's version of that particular version of the Dodge Charger was my very first 1/24 car model built way back when I was about 9 or so, I seem to remember buying it because it was a) bright yellow, and b) cheap because even back in the mid-80's it was obviously not seen as a desirable car and so was reduced to the sort of level pocket money could afford. Being a snap kit, it was relatively easy to build, and for my parents had the added advantage that I wasn't going to get glue all over the kitchen table. Fast forward 30 years, and it's showing signs of age and being built by a child. The decals were definitely not on straight (where they hadn't disintegrated on me), the chrome was degraded in places, particularly the front left wheel, at least one part (the gear lever) is missing, it doesn't sit straight and when I took it apart I remembered that was because the front subframe and wheel are held on my blue-tak. at some later date (I guess when I was early to mid teens) I decided being American it should get some chrome bumpers and mirrors not appreciating that it had virtuallyno chrome on at all. And the interior almost looks like there is carpet in there with 30 years worth of dust. Basically, I've decided it's time to try to get this looking shelf-worthy and do it justice. But first, this is the starting point: So over summer I set about getting the body and chassis sprayed while the weather was ok. First job was to dip it in the IPA to get rid of that silver paint, which unfortunately put paid to the decals too - the bonnet one at least would have been nice to keep but it just wasn't to be. Then it was on with the primer, which didn't completely block out the yellow of the plastic but as the car will end up yellow that didn't matter too much. (Just realised you can see when I did the various stages by the S600 and bits of Trabant in the background of all of these photos). After that, it was on with the yellow paint which looked a lot better than yellow plastic did. The paint is Halfords Ford Signal Yellow. This one is my first two-tone paint job, so a couple of weeks after that the car was masked up and ready for the black. Initially I airbrushed this one but after a bit of operator error (basically leaving too long between coats and blocking the nozzle) I finished off with the car with a rattle can meaning the black is a bit thicker than I would have liked. There was a little overspray but nothing too unmanageable and it was cleared up without too much bother, Since then, I've redecalled it (decals were from Rays Kit Decals in the Netherlands) and given it a clear coat, but didn't grab a shot of that stage. It's part way though being panel washed, so the next body pic will have to wait. And then it was onto the engine, which was all just yellow apart from the chromed engine top end and exhaust manufold. That's been dechromed, and the engine taken apart. When I first built it, I hadn't filed any of the bits where it came off the sprue so these needed tidying up. So far, the remains of the sprue attachment have been remarkably tidy, especially as I think they were removed using kitchen scissors. I think I must have had parental help! With the washing going on, I have done minimal work on rebuilding the engine, but did get the block stuck together (the sump is on now too) ready for painting. One of the tabs holding the two sides of the engine together had snapped, and the other didn't go in as far as it needed to, so both were trimmed down prior to gluing the two halves together (hence the clamps). Hopefully tomorrow I can show off a completed body and main part of the engine.
- 25 replies
-
- 4
-
-
- 1/24
- Restoration
- (and 1 more)
-
Hi All, Finally calling this one done. It was not without its issues! Over the years, I have had trouble with Hasegawa kits. I actually binned a 1/24th Ferrari 189, because of several mistakes that I made putting it together. It rather put me off them for a while... If you look at the build log, you'll see that I had problems with the steering (steering rack too short) and front suspension (one wishbone decided to detach itself... twice!) In a moment of clumsiness while trying to put the body on to the floor, I dropped the body on to the floor (A hard laminate floor...). At first, I didn't see anything obviously wrong, until I looked a bit more closely at the rear of he body. A large piece had broken away! Luckily, I found the broken piece, and was able to re-cement the part on without any really visible line on the bodyshell. Also, while assembling the bodyshell onto the floor, one of the front springs dropped out. I thought, "stuff it, no one can see it..." and no one can. So, here are the pictures: I managed to get a good shine on the paintwork using Halford's polishing compound. This stuff is a foam that you spray from a can. I then used a very soft cloth to gently rub the compound in, followed by a gentle rub with a soft cloth. Quite a shine came up. It's not perfect by any stretch, but I am very pleased with the outcome, despite the problems. I will be building more Hasegawa kits in the future... I has joined the car park. Any comments are always welcome. Thanks for looking, Alan.
-
So after an 11 year break, this was my first model that I had a go at and luckily it got me back into modelling, but I made so many mistakes whilst making it. My biggest problem is rushing near the end of completion and not letting things dry, but I have learned my lesson and on my last model which was the Pirelli Golf it turned out really well. I was really pleased with the paintwork on this, but I reckon by the time I had finished its had 2 full rattle cans on it, but it had a lovely shine once I polished it up, and the decals sat pretty nicely on it. So this is not perfect by a long way, but it made me fool in love with a hobby that I had been doing on and off for over 40 years.
- 8 replies
-
- 22
-
-
- revell
- startsky & hutch
- (and 1 more)
-
So made a star on the 1/24 scale kit, this is a resin sculp of a bit of art work by Shunya Yamashita. I'm painted it very similar to the original but with a few tweecks https://www.google.com/amp/s/www.pinterest.com/amp/pin/479492691550596236/
-
 So I thought I needed to challenge myself next and start something that had plenty of decals, so thought this Celica would be a good start: And so to one of the bits I wasnt looking forward to....spraying the body. I only use automotive rattle cans so picked up a tin of Toyota White, warmed it up and once I had primed the body I gave it a couple of coats, and must admit I am pretty pleased with the outcome. And now to the bit I am not looking forward tp, painting black around the windows etc...but I cant wait to start on the decals.
 -
Not usually my thing to 'Pimp' a street car, but just couldn't help m'self... Aoshima kit, not a straightforward build but pretty good. Tamiya TS44 Light Gunmetal overall, A Pillars, skirts & air dams all Tamiya enamel (standard) Gunmetal. Decals plucked from an unsuspecting Revell Mitsubishi Eclipse. Wheels are after-market Aoshima's - Rays 19" GT-C's. As ever thanks for taking the time to look, all comments, abuse and questions are welcome. Next, something very, very small. Ian.
-
Hello All, This one has also been on the 'shelf of doom' for some time. Probably about 4 or 5 years... It's the Hasegawa Ferrari 348 tb. It'll go well with the other Ferraris that I have been working on. What with the 308 having been finished, and the 288 GTO nearly complete, I thought that I would clear the decks of old builds and add this one to the list of 'in progress'. The box. A pretty car, if not quite so beautiful as the 308 & 288... The sprues. It doesn't look a lot, but the engine is already built and almost ready to be put aside. ... and, the instructions. I'm hoping that this Hasegawa kit will be a bit more successful than a couple of others I tried... I tried to construct the 1/24th Ferrari F189, but it went completely pear-shaped on me and the body work would not fit. I binned it! I also tried the 1/24th Jaguar XJR8 (or was it the XJR9?, I can't remember). That was going well, then I managed to split the rather large wind-screen! That ended up as spare parts... On the other hand, the 1/32nd F-16 seems to going rather better. Anyway, more pictures... The body has been painted with Halfords acrylic spray paint. I can't remember the colour. But I don't need any more (unless I screw up with the cement!). If I do, I'm pretty certain that I can mix up the right cocktail of (Tamiya) colours to get a near enough match. The engine, not quite fully assembled. Again, I have added ignition leads. No engine looks right without ignition leads, except a Diesel. Actually, my wife's Meriva is a petrol, and the ignition leads are nowhere to be seen. Each spark-plug is fed by it's own coil in an ignition block that sits on top of them. Anyway, utterly irrelevant in this case, as the 348 has separate leads to each plug, and they go ... somewhere! (More on that later!) The wheels. Matt chrome seems to work on car kits. I always thing the the high-chrome finish looks too toy-like on 1/24th scale! (Actually, I built the Revell 1/8th scale Jag, and the chrome on that looked too bright and toy-like!) The windows, door-mirrors and the engine cover. That's it for the moment. Thanks for looking, Alan.
-
My next one for 2017. Must be the third, I think. I handed it over to my daughter last night, and she was well pleased! The smile on her face said it all. (She's 20 by the way) So, here are the images: I like the 'arty' 'up-hill' look. Actually, it was me with the camera at a skew angle! On the whole, a very pleasant build. I had a few problems during the build. Some of them were my own (The clear-coating being the major one) and one was the kit (The wheels!). I have just noticed that on these pictures, the little 'sting' aerial is a bit off straight. I corrected that after the pictures were taken. Any comments, positive or negative are welcome. Thanks for looking, Alan.
- 15 replies
-
- 16
-
-
 OK, so I decided for my next project to have a go at the legendary 956. Namely though the Jacky Ickx/Derek Bell Rothmans sponsored No 1 car. This one: I used to live near the Rothmans Factory in Spennymoor, Co. Durham as a kid and a couple of times in the 1980's they brought these cars down to the factory ( with the Bikes ) for their open days. They'd close off a bit of the industrial road and run the cars and bikes up and down showing them off. Of course as a youth I was totally in awe of these machines, the noise, the raw power, the smell. I can still hear and feel it like it was yesterday. I even had my own race tuned NS125 in the Rothmans livery which I'd ride around the town in my Rothmans racing jacket thinking I was king. I also raced ( not that successfully I will add ) the bike in a couple of amateur races so it's definitely going to be fun building one of the Porsches. Now I know this has been done in threads before here, but I'm not going for a standard build, I'm going for this: Basically the bodywork off, up on jacks, pit in version of the car. Thing is though the Tamiya kit is very basic so I'm going to have to scratch build a ton of it ( especially the front end frame work which basically doesn't exist in the kit ) I know that this super detail kit exists that was a collaboration between Scale Motorsport and Tamiya ( a more in depth look at the kit here ) and I've managed to track down one ( for a price ) if I want it but I just thought: you know what, where's the fun in that? So I've decided to see if I can scratch-build all the parts I need myself. So I started to do so a month or so ago armed with zero knowledge of working with styrene In at the deep end again. I however have the small photo etch parts kit that is commonly available to add some detail. So armed with some styrene profiles and sheets, the Rothmans decals and the Tamiya Porche 956 Canon kit here's where I'm at: The kit: All pretty basic stuff really. First job was to lop off the front and doors from the main moulding: All good. Then these awful looking moulded into the bodywork exhaust manifolds came off. I'll be replacing them with 1mm solder. Out came the Dremel for some hacking. Then some filler and sanding: Then I turned my attention to the front end frame and bulkhead build: First some paper cutting templates Cut out in styrene and test fitted Then I cut the holes and formed some rivets by pressing on the reverse with my scribe Then made a rough bulk head piece And primed and painted up with some alclad airframe aluminium Added the tiny brake, clutch and water reservoirs to the bulkhead using various bits of styrene and a cut up plastic milk carton for the bottle caps ( needs a bit of cleaning up ) also need to add clear tubing and wiring to complete the piece: Made the front end brake duct inlet frame from styrene. Bit of a headache this one, took ages to get right at this scale and I hummed and harred for hours over an actually design from the original walk-around pictures which don't show enough detail. Plus how it was going to actually fit onto the car, again the walk-around pic revealed no secrets here. I bought some clip on magnifying lenses for my glasses which are really helping with work at this scale. Ms Borez says that I look like a mad professor. I made and scrapped three others before I finally arrived at this design: Added the aluminium top frame and painted it up. I'll be adding some styrene hex bolts to the top for detail and obviously the brake ducting. The original piece on the car: Next up is priming and painting the car undertray and to start work on the actually frame which shouldn't really give me any issues as I have aluminium tubing of this size left over from the C9 build. The front hook is one of the photo etch parts I have too. This bit: Then I'll start fitting all of these pieces together before concentrating on the rest of the front end i.e. suspension and brakes. And that's where I'm at right now. Pretty pleased with my bits so far, all going to plan. Thanks for looking
- 306 replies
-
- 4
-
-
- Rothmans
- Porsche 956
- (and 2 more)
-
I wasn't going to post this one up until I started it properly, but here goes anyway. At the moment, I'm just doing the spray painting bits while the weather allows. The build will be later in the year, but with my spray booth in the garage I have to do the spraying while it's warm and dry enough. So first job is to decide on the colour. The instructions are for the car in beige, but I wanted to try another of the factory colours. Unfortunately, the choice of colours from Trabant demonstrate the wow factor you would expect from the Eastern Bloc - as well as beige the choice is Invalid Carriage Blue, Dirty Off White, Pale Grey, Baby Sick, and two shades of green, one of which resembles the glowing stick of uranium from the Simpson's opening and one of which resembles dying grass. I decided to go with the grey as I think it might suit the car. The kit is Revell's Trabant Universal. On first glance, and from what I've read, it looks a nicely detailed kit with lots of parts... and also lots of steps to the instructions (46!). The body looks pretty nice apart from some sink marks front and rear on each side so those have been filled, and the mould lines are hidden behind what will be a trim line from front to rear with only small lines on the front of the car. The door lines are also quite shallow so I scribed them too. There's quite a lot of bits which are body colour, which means quite a bit of spraying with this one. I'll only put up the chassis and the body for the spraying, the rest would just be repetitive. The pic below shows it very early on, and I've put the roof panel, bonnet and boot in place to give an idea of how it will look. This pic is after the scribing and the first attempt at filling the sink marks, the ones at the front needing quite a bit of filling. The spoon in the foreground shows what I hope to be the final colour - this one is Revell's USAF Light Grey, which being a matt paint will need a couple of goes with the clear where there are decals. As usual, the primer showed that this wasn't the best filling job, so all the sink marks needed filling and sanding again before it got another coat of primer. And here we are with the body finally complete and wearing it's coat of primer. Meanwhile, the chassis paint was running in parallel to the body. This one is mostly in matt black and I managed to get it painted relatively easily. However, the rear wheel arches should have the finish in body colour, so I had to break out the foil and the masking tape in preparation for colour coating them. Two weeks later, after adding the colour coat (directly over the black), I added the clear coat and then removed the masking. I have to say that I am quite pleased with the result. There is some detailing required to parts of this (principally the handbrake cable), but that will come when I reach that stage of the build. And then my paint woes hit. First of all, that can of spray paint which was fine for the chassis wheel arches decided to lose pressure two weeks later. And the other can I had ran out very quickly only doing a few larger parts and a mist coat and a half on the body before running out. So this is where it is now: So I'm out of spray paint and have a very unfinished car. Fortunately, I've just got myself a new, but cheap, airbrush which I was only planning on using at first on areas where it wouldn't be that visible. Having managed to extract about 20ml from the low pressure can I guess I will have to try with that. Would I be right in thinking that the paint from a spray can will go straight through the airbrush ok without thinning? And has anyone any experience of spraying with Revell acrylic paints from the tub if I need to go down that route? Would I be better off just getting another spray can if so required?
-
Hi All, Finally, my second RFI for 2109. This is the Nissan GTR R33 that I had literally completed bar the decals and licence plates. Until tonight. I also tidied up the black around the window frames. Some had bled under the masking and needed to be carefully removed. I used a micro-brush dipped in Mr Color Levelling thinners to soften the excess paint, and a dry micro brush to mop up the dissolved paint. Since the gloss lacquer is the Zero Paints 1K lacquer, it is resistant to the Mr Color thinners. On the whole, I am pleased with the result. There are obviously things that I would like to improve, as always. However, here are the pictures: I really need to sort out a proper background. Perhaps I can construct a photo booth as my next project. I used my tripod and a narrower aperture (F13), so that I got a much better depth of field. However, the background id not so blurred out. Maybe I can correct that in the future in photoshop. Thanks for looking in. Cheers, Alan.
-
Since I started modelling again nearly fifteen years ago, I’ve kept a spreadsheet of my stash and my builds, and it turns out I recently completed my 99th model. Obviously, my 100th has to be something of significance, so I returned to an idea I had a couple of years ago. Way back in the mid seventies, for my tenth Christmas, my Uncle John bought me the Airfix 1/24 Stuka as he knew I’d been making models for a couple of years by then. I owned the grand total of two tinlets of Humbrol Authentic Colour, dark green and black, and my Dad suggested that for such an expensive kit I ought to buy some paints and “make a good job of it.” I duly traipsed to the more distant of our local paper shops, the one “over the iron bridge” and spent some of my Christmas money on a selection of Airfix Enamels – M1, M2, M6, M17, M20, M22, M25 and so on. 17p a tin, as I recall. The model was built, probably fairly averagely, and went to reside on the top of my wardrobe due to its size. Over the next few years, the rough and tumble of a child’s bedroom saw it dinged, damaged, and eventually broken up. But although most of the airframe parts ended up in the local landfill, for some reason I kept the engine, propeller and cockpit parts in my spares box. Fast forward a decade, and I’d been off to college, got my degree, and was languishing around on the dole waiting for the right job opportunity to come along. One day I was firkling around in my old stuff and came across the old bits of Stuka. To relieve the boredom of unemployment, I dug out my old enamels and repainted the cockpit to the best of my (then) ability, along with the propeller and what was left of the engine. The instrument panel was tricky without the online reference sources we enjoy these days, so I simply made a lot of the detail colours up. They sat on a shelf as models in their own right for a while, and then got packed away later when I moved house. Fast forward another thirty years or so, and I’ve recently retired, and finding myself with a lot more time for modelling I dug out the old Stuka bits again. I went online, and with the help of the Echo Bay Trading Company I managed to find a copy of the original issue Airfix Stuka, complete with swastikas, and the same registration T6+KL as my original build all those years ago. It’s now sitting in my hobby room. So the plan is to do a nostalgia build, incorporating into a single airframe: The original cockpit I built as a child; That same cockpit I then painted as a graduate; and That same painted cockpit installed into an airframe I built as a retiree. Child – before career – after career… three stages of man, geddit? I’m intending to do this out of the box, including Airfix’s erroneous colour scheme of all-over dark green for the topside, as that’s how I built the original. Here’s the box: Here’s the original parts I have, which need a good clean: The instrument panel shows a bit of imagination in the colours used, and the instructions were a bit vague as to where the gunsight glass went: If you’ve stuck with it during this lengthy preamble you must have some interest in it, so feel free to tag along… Cheers, Dean
- 40 replies
-
- 28
-
-
I've been pondering what to make my first build of 2018 and this is something that's been near the top of the pile since I bought it not to long ago. As seem obligatory these days the box shot. A brief look into the a kit that I've made in the past with relatively good result. This was completed in January of 2016/5 I think so the experience has improved since then I hope. From the above kit I am now pretty aware of the areas that need a little more care and also areas where I myself can improve. So for this current attempt at this model I managed to pick the kit up rather cheaply from eBay as it had no decals but as it was the same kit as the finished fina car above I still have the majority of the decals left with only the rear gtr one and 1 other missing. Right so then it was the mindset of I have this kit now what to do with it? Test car? Another race version to go with the fina car and soon the be made gulf version? I couldn't make my mind up, then as I was half way through the Liberty Walk Nissan GT-R I came across a set of carbon decals that cover the whole exterior in a carbon wrap. So that the plan. A full carbon McLaren f1 gtr, possibly with the yellow and pink decals on aswell but I won't make that call until the body is finished. The set includes 4 sheets of pre printed templates to cut of that from what I can see covers most of the car in carbon, there are a few bits not on the sheets(or maybe I just haven't found them yet) but these bits will be easy to make myself with the leftover parts of sheet. Now on to the plastic. The shell is as nicely moulded as it was the first time with no really bad bits to clean up. I need to decide if I should just glue the rear parts on for the engine cover or maybe detail the engine bay a little. And then finally for the first update I need to decide whether or not to cut out the front hatch to show the details underneath that incuded in the kit. I guess if I do the rear it would be silly not to do the front and vice versa. Also in this picture you will notice that I have started to clean up the few mould lines that are on the body and filled the small dips with ca glue ready to be sanded off very soon. I think body work wise this kit will move pretty quick as it is only going a gloss black after primer with then the whole raft of decals to put on. More soon Shaun
-
Hi All, Finally. I'm calling this one done. I managed, after some considerable time just sitting in the 'to complete' pile, to finish this at the weekend. The build wasn't without its problems. Like the fitting of the wheels was a bit of a nightmare. They kept falling off! In fact one fell off this morning! I finally finished all the little bits, like the roof-rack and mud-guards and so on. I was trying to think of the best way to attach these to the car. I considered CA glue, but I didn't have any and I don't like CA glue very much. I seem to stick the thing to myself rather than the intended destination... So anyway, here it is. The 'Monte Carlo' plate is a lot wonky. The problem was I used Mr Setter setting solution, and by Jove, did it set it! It wouldn't budge. So I gave up and left it where it sat! It's even more obvious here! On the whole, I am pleased with the outcome. Another one to add to the car park. Sorry about the background. I need to set up a proper photography set up, but don't really have any to put it. Thanks for looking, Alan.
- 14 replies
-
- 19
-
-
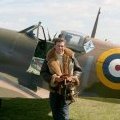
Hi Chaps. Firstly, just wanted to say hi, I'm new to the forum and just back in the modelling game after a rather lengthy break of 35 years, one build in and loving it. So here is my question, I pushed the boat out and purchased the Airfix 1/24 Mosquito in the black friday sales. Really looking forward to getting started. Doing a little research on schemes and I have fixed upon The dark grey scheme with yellow spinners from the original 1/24 release (sorry I can't find a reference to which squadron etc) Does anyone know where I can purchase decals for this? Looking forward to your responses. Thanks again Simon
-
If the gear on this Huge Harrier remains unchanged (I mean you keep it OOB and retractable) does the nosewheel stand properly like a Harrier nose wheel should? Or does it suspend completely down so the tyre is almost touching the fuselage?
-
Hi guys, well I got this bad boy finished, not an easy build but I am happy with how it turned out for my first truck build. I weathered it up a bit to avoid the truck looking like a diecast model, also I scratch built the airlines and the air unit to add some realism and airbrushed over some of the decals to tidy up the lines a little. I've also added a few winter snow shots of the Scania. Finally, you can see my work in progress of this build in the box below.
-
After finishing my two Chaparrals (see them here: https://www.britmodeller.com/forums/index.php?/topic/235043149-texas-roadrunners-chaparral-2c-and-2d/ ) I wanted to do one more automotive subject before moving on to some aircraft sitting on my "To Do" shelf. The Chaparrals were supposed to be a quick "out of the box" project, but they turned out to be more complicated than expected. What to do? While researching the Chaparral 2D coupe I found this photo from the 1966 Daytona 24-hour race: Ford's GT-40s dominated that race, earning four of the top five positions! I found a Revell boxing of the winning car, #98, on eBay and chose that as my new project. The Revell kit is, in fact, a Fujimi GT-40. Good news is that the Fujimi GT-40 builds up very nicely. The bad news is that Revell simply added new decals to a generic Fujimi GT-40, leaving out details particular to the #98 car. As a result, this project wasn't exactly the "out of the box" build I had been hoping for. I would have done better to purchase Fujimi's version, which is more accurate: More on that, later... On to the pics! U As I mentioned earlier, Revell's kit requires some modifications to better model the Daytona #98 GT-40. For starters, two air scoops on the rear deck need to be removed, as well as a "blister" on the roof over the driver's head: Also, I had to re-build the radiator outlet to replicate that on the #98 car: I replaced the front grill with some wire cloth left over from my Chaparral project: There are other inaccuracies in the Revell kit that I didn't attempt to fix. For example, the fuel filler cap is on the wrong side, and there should be blisters on the body over the front tires. The Fujimi kit fixes all of these errors, thus my statement that I should have bought that kit instead of Revell's. If you've followed along this far, let me show you a few more in-process pics: All in all, this was an enjoyable build. Aside from correcting Revell's errors, the only problems I encountered were of my own making. I foresee building a few more Fujimi GT-40s in the not-too-distant future!
- 11 replies
-
- 17
-
-
Hello, It's been a long time since I post something new. Well, may be because I am not a big producer! 😒 😁 So, here is my Ferguson Petit Gris from the 1/24 Heller kit. Very fine in details, Heller released a very nice kit. As I am fan of weathered models, when I felt on this picture, I knew that this one will inspire me. And with my VW Split panel And here is the link (in french) to the little WIP: WIP Petit Gris Thank you for watching and keep modeling! Lolo
- 16 replies
-
- 18
-
-
This one is my build of Tamiya's Honda S600. The car itself is very small, so naturally the kit is likewise. I was quite pleased with the end result apart from a couple of relatively minor issues, and this seems like a decent kit. I had been concerned that the bonnet was going to detract badly from the model, but now that I have the brightwork on the car the bonnet sort of fades into the background. But, if you want to read more about it, this is the link to my build thread: The build is completely stock apart from being a non-factory colour so I'll just go straight off an post up a load of pictures. Hopefully this isn't too many! As with any of my builds, comments and (constructive) criticism is welcome. Quarter shots: The interior - I know it's a bit of a sea of black, but this is the correct colour scheme for the silver version of the car so I figured it was appropriate for the car finished in grey: And under the bonnet, unfortunately I used the wrong part for the top of the radiator but I suspect only the real Honda afficionados would notice. Incidentally, the windscreen isn't really on wonky, that's just an artefact from the angle of the camera. And finally just some shots from front, rear and side on: Hope you like it, despite a few small issues with it I'm pleased with the result and hopefully will continue to progress as I build more models. (Picture in the sun added)
-
Now that the Cuda is finished, it's time to move onto my next project. I'm not sure if there will be much interest in it - my MO is to build straight from the box and take a long time over doing it. So this weekend, I made a start on Tamiya's Honda S600. Well, that's almost correct as since the weather warmed up I have been doing the necessary spraying of the body and other body coloured items. But this was the weekend when I made a start on assembly, albeit a very slow start. From what I can gather, the kit has a good reputation, and I can't really disagree. But what really strikes when you first open the box is that this thing is tiny. To demonstrate, both the Corvette and the S600 in the pic below are 1/24, and the rear end lines up on both cars. IMG_6396 Closer examination reveals very little in the way of mould lines, so I presume they are concealed within the chrome strips which will run along the body. What mould lines there are are generally pretty small and not very noticeable. So not noticeable in fact that I completely missed one that runs along the corner of the boot lid until after I'd primed the body. Having resanded that bit, I had to respray the back of the car which has meant that instead of having the body in the intended colour, that and the bonnet will have to wait a couple of weeks. Other body colour items have the colour coat on now, so hopefully I can get the clear on before too long. IMG_6395 This is where things stand at the moment, very early days. I still haven't even got the second coat of aluminium paint on the enginem and only have the block glued together. Not a lot else really, so I guess this is a good point to leave it.