Search the Community
Showing results for tags '1/144'.
-
There are so many reasons why I shouldn't enter this GB but as has been said, You can never capture Africa's heart, but it will capture yours; so he I go... Roden's Bristol Britannia with the markings for African Safari of Kenya; a short-lived operation that did flights between Europe and Nairobi Maintaining may usual standard for GBs I won't be starting for a week. Once I do though it'll be straight OOB, because my New Year's Resolution is to keep it simple. But that's not to say there can't be some sprue fondling first I'm not a fan of clear windows so something will have to be done; not sure what for the cockpit, but there's time yet. Not too shabby, bit of flash to take care of, and I'm mighty relieved that I don't have to fit individual blades on the propellors because that really bores me and I don't see the point of it! No detail in the u/c bays but that doesn't bother me. What does bother me, but I knew this would happen is the size of that decal on the tail, especially as I don't hear glowing reports about Roden decals. But I'm looking forward to the ride.
- 43 replies
-
- 15
-

-
Kit : Learjet 35 Brand : Stransky Scale : 1/144 Decals : Kit Decals I picked this little kit up in Telford 2018. The minute I saw it I just know I had to get it and build it in the Finnish Air Force colours. The kit is not bad for the scale and size. I just found some of the landing gear and gear doors a little thick, but it’s down to the limits of injection molding. I could have used the parts to scratch build my own parts, but I didn’t. I did change and correct some parts of the kit. The first thing I done was to drill out the cabin windows. That was simple because they were molded into the inside. Then I filled some of the panel lines as they are filled on the real aircraft. The tail cone had to be changed, because the Finnish aircraft have a different tail cone, again this was simple. Just remove some plastic from the tail area and replace it with a bit of sprue. The real aircraft has a lot of reinforcing and extra aerials. I added these with some plastic card. I mix some Tamiya paints to get the two greens as I could not find the correct colours, the grey is Tamiya XF-80. To see the build, click on the link. Link to Build I would like to thank Antti for his help. If I was to build this kit again, I would open the cabin door. Thank you for looking Ken
-
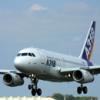
 This is my recent build of another Airbus. I had actually planned to finish it in the BA anniversary year but for some reason I had only a slow progress on this model as I chose other models to finish first. Well,now I finally managed to get this little Airbus over the finishing line. Not much to say about the kit and the build,as its the well known Revell A319 wirh British Airways and Germanwings markings. Troublefree build all around. The decals come from 26decals and worked great. The details come from the extensive Revell decal sheet. Paints used are Revell white 4 for the upper fuselage and Testors aircraft grey for the lower fuselage,engines and wings,coroguard panels are Revell grey 374 with a few drops silver. The red for the lower wings is Tamyia gloss red. Sealed with Gunze Premium Gloss to give it a nice shine. Cheers Alex
- 27 replies
-
- 51
-
-

-
Unusually for me I planned my years intended builds by looking at the Britmodeller group builds for the 2021 and worked out which ones I wanted to join. So here is my second non injection GB entry - a F-RSIN resin kit of the lovely post war Languedoc airliner in Air France colours. My plan hopefully coming together later in the year with another 144 airliner for the French Fancy GB, again in Air France colours. So here we have it - simple looking kit with minimal number of parts Box and decals Fuselage and winds - two pieces - bonus! # And lastly white metal props, brass tube undercarriage and resin tail plane. The fuselage and wings are fine smooth resin and hopefully I will add some subtle panel lines to add interest. Done no real research yet but hoping to put this recently acquired kit together quickly and test out the new airbrush on the all important paint scheme - all silver, so preparation is everything! Cheers JP
-
I finished this little Mark 1 kit of the HS 748 last weekend as part of the Australia and New Zealand Group Build. The kit was built as it comes in the box with some scratch detail added like the APU housing on the starboard starboard engine and the addition of a couple of missing aerials. The GB was also dedicated to fellow Britmodeller Silver Fox who had passed encouraging comments on several of my builds previously, so there is a little nod in tribute to that fine gent who will be sadly missed. Hawker Siddeley 748 T.2 A10-603, School of Air Navigation/No.32 Squadron, RAAF East Sale Air Base, Victoria, Australia by John L, on Flickr by John L, on Flickr by John L, on Flickr by John L, on Flickr by John L, on Flickr
-
This is Revell's AN-225 kit "light" It has no interior and no landing gear. Compared to the original release,it also features the old paint scheme. When I saw that kit in my local modelshop,I had the idea of building it together with the Buran,as the AN-225 was origially planned for. Ark Models recently released with the Buran their first own tooling and as its also in 1/144,I ordered it right away. The second issue features a large decal sheet with all markings and the distinctive paneldesign. I can highly recommend this kit. The parts are crispily molded,no signs of flash or sinkmarks. The fit is absolutely perfect. It offers 2 cargo door options,open (2 parts) or closed (1 part). I slightly modified the latter part to be removable to offer a view into the Shuttle. I build the whole Buran in just one evening...painting and decalling it was another matter though😉. The decals are superbly printed as well and are great to work with and fit perfectly on the model. The only downturn of the otherwise top notch kit are the decal and paint instructions. No hints on colors on the instructions make painting the model correctly a tricky task. The decal placement is also not shown clearly and some decals have to be guessed where they belong. Thats the only criticism I have on an otherwise great kit. The build of the giant AN-225 was also pretty straight forward. Fit is good,the only problem is the construction of the model. Revell's way of designing the kit makes a segmented build impossible. Except the engines,the whole aircraft has to be build completely before painting,otherwise seams and gaps would be visible. Due to the dimensions,it was impossible for me to paint it with the airbrush as it doesnt fit in my paint cabin at all. Here I used Revell gloss white from rattle cans for the all white fuselage,sprayed on my balcony.It was equally challenging... The engines are airbrushed with Revell gloss white 04.Metallic parts are Gunze metallics. As I wanted to mount the Buran on top of the AN-225,I had to scratchbuild the suporting mounts. Search for decent pictures was not easy and required a lot of time. I used leftover parts from a Revell 747 SCA and Evergreen plasic tubes strenghtened with wire. As the AN-225 wore CCCP registry and the USSR flag back in 1989,I had to raid my decal and kit stash to find those bits and pieces to create the Combo as it appeared at the Paris Airshow in 89. Revell's decal set offer the old livery but with new ukranian flag and registration. It was a time consuming build,also my first scratch build experience,but also interesting and fun. The next problem is finding a place for it...Its just huge ! Cheers Alex
- 22 replies
-
- 43
-
-
-
Hey, This is my first post and first model, please don´t be too hard to me. I will build a Beoing 777-300ER in the livery of Air India. My Camera is damaged , so picture will follow in future. Yesterday I mad my first airbrush layer, some mistakes included, but I think I will figure it out how to improve my airbrush skills. Decals: 26 Decals Kit: Boeing 777-300ER Zvezda Colours : Humbrol Gloss Ivory 41 Xtracolor Canadian Vodoo Grey x150 Red: I am still trying to find the best match
-
Hi, I've been reading here for quite some time now and looked at some fantastic builts, that really inspire me for my modelling. Let me present you my SAS A320 NEO that I finished yesterday. It is not the new Zvezda kit, as this wasn't yet released when I started the model. It's the Revell A320 neo, with wheels that I ordered via Revell's fantastic replacment part service. Decals are from LN decals and for sure one of the best I ever used. It also has few parts (cables on the wheels + antennas) from a Metallic Detail set. Windows are obviously from Authentic Airliners that are a must for me. Colours are Mr. Hobby H5 for the blue and everything else was mixed. SAS's new grey is pretty light and at first I had the bad idea of starting with Mr. Hobby H338 and trying to make it lighter...a pain. I quickly found out that starting with white and then making it darker withg the grey is the MUCH easier way. I hope you enjoy the photos and looking forward to Feedback Julien
- 10 replies
-
- 17
-
-
I have quite a few builds on at the moment and very little time BUT it would be so rude not to join in to this GB especially with so many interesting subjects being built. Looking through the stash I didn't have an awful lot that qualified but I did have this from the Mig section of my stash. As its 1/144 it should be a relatively quick build - famous last words. All the kit marking are metal finishes. This is the Egyptian marking. This MiG-15bis was damaged in combat with Israeli Mystéres of No. 101 Squadron flown by deputy CO Jaakov Nevo. The Egyptian pilot had to make a forced landing in Bordavil, in the Sinai Peninsula due to the damage sustained, and the abandoned aircraft was captured by the Israelis. This MiG is one of the three Egyptian MiG-15bis aircraft shot down during the so-called Suez Crisis. The aircraft was built in Czechoslovakia. Note the quick identification black stripes on the fuselage and wings. The green national insignia was used till 1958. The sprues and decals. As this is a duel combo kit I am going to build both at the same time. Unfortunately only the above marking qualifies for this GB. For the second build (which won't be part of this thread) I am going to build the Cuban plane of Henry Perez from the 1960s. Interestingly there is a connection to Africa for this build because Henry Perez was shot down whilst flying a Mig-21 in Angola in 1983. As always all comments very welcome. Kind regards David
-
 Finished at last. Here are my two little Pfalz scouts in 1/144. Little wasps... I'm normally more of an RFC type, but I'm really happy with how they came out. I hope you like them. Here is a link to the work in progress thread for some photos taken along the way:
- 29 replies
-
- 53
-
-
-
- Pfalz
- scratchbuilding
- (and 1 more)
-
 As a 16 year old apprentice I used to walk through the 748 Wing and Fuselage Major Assembly bays on my way into the Chadderton site training school. Having this in the kit pile and with an option for RAAF marked version, I thought that it would be a good opportunity to add a 748 to the collection and rekindle memories of some of the characters that I served my time with. Here are the usual box and contents shots. by John L, on Flickr by John L, on Flickr
 -
I've been meaning to post this ongoing build for ages, but sheesh! Its so hard to come up with a title sometimes. I wanted to kick it off with some cracking wordplay, but alas I can’t think of anything 🤔 Perhaps its just best to rip the lid off and get on with it. These are a pair of Pfalz D.III and D.IIIa scouts that I've been doing from scratch over the past 18 months or so. Over the Christmas break I finally managed to get them out of the grey primer doldrums and into their top coats before all the fun stuff starts. Here's where one of them is at right now.... And here's how they got there: The idea was to do a D.IIIa initially. That's the later version with the two spandaus sitting on top of the fuselage decking, plus a larger tailplane and rounded wingtips. A short way into it I suffered scratchbuilder's remorse when I discovered that the schemes I liked best were for the earlier D.III version, with a smaller tailplane, pointy wingtips and the spandaus buried inside the fuselage (!). So I dithered around for a while, and eventually decided to have a go at both. Plucky fellow... The fuselage is basically the same for both versions. So I thought if I could get past my ripping allergy to resin I could replicate it and convert one casting to the other. I started off marking the fuselage profile up on a sandwich of two pieces of 3mm styrene and carved the basic fuselage to shape. Wing stock was made from acrylic so it wouldn't bend and the under-camber was made by scraping the shape in with an old steel ruler that had the end filed to the correct profile. I set the wing up against a straight edge so I could scrape along the whole length of the stock in a straight line. One of the good things about 1/144 scale is there is exponentially less mess and elbow work involved in jobs like this. The fuselage was mounted in a jig, which exactly matched a similarly shaped jig on my drawings. More about that on the first post here: https://www.britmodeller.com/forums/index.php?/topic/235062073-sparrowhawk-more-like-microhawk/ This made transferring dimensions easy as there were a lot of bits in close proximity, which would have been tricky to align otherwise. Details like the little round inspection panels are made from discs of decal film that have been thickened up with primer. I sharpened the end of some brass tube by reaming out the inside with a scalpel to create a mini punch. The wing ribs were made with primer too. More on that in the Sparrowhawk topic too if you want to learn more. I made a mould in silicone and cast some copies. A bit of a learning curve there, but eventually I got a couple of useable wings. Much better! At about this time I stopped to work on the Miles Magister for the BM 1940 GB. Later however I was able to bang out a couple of fuselages and keep going. One was converted back to the earlier D.III and other bits like the guns and engines were made too. Posting an image of a model next to a coin of unfamiliar currency drives people nuts over at Hyperscale... Well dear reader. That's pretty much where I got with them up until Christmas. During the break I've been able to put some extra time in, and have got them to the painting & decal stage. I was super nervous about the surface finish for the Pfalz silver-grey and scrubbed like I was prepping for surgery when it was time to do the base coat. I bought a set of 1/144 crosses some time ago from a company called Mark I. Most of them are not fit for purpose as the white outlines are well out of register. I hoped I could at least trim one pair down to a consistent width for the tail of Hecht's machine. Then I realised any I stuffed up could be used as a 2nd chance to make the plain black crosses for the Buddecke D.IIIa that I planned to do. I decided to give it a try and it seemed to work. Providing I had enough magnification and a sharp enough scalpel. Speaking of magnification: I took a broken pair of super cheap 6x reading glasses that I use and stuck one of the lenses onto the front of another 6x pair. I now have access to 12x magnification... Look out world! And that pretty much brings us back around to where things are at now. Loads more stuff to do, but they are coming together nicely now. Sorry for the picture heavy presentation. I was hoping to get the saga up to speed as quickly as possible so we can do the rest at a more relaxed pace.
-
Hawker Siddeley Trident 1C BEA late 1960s This is the old Airfix kit with a ‘standard set’ of modifications to make it look a bit more like a Trident. These are : Addition of wing root fairings Increased fin chord Sharpened tailplane / fin fairing Reprofiled wing chord Replaced wing fences Offset nose gear Reshaped radome Rescribed engine nacelles Decals are from TwoSix. In the photos the dark blue on the fin looks darker than the cheat line blue, but for some reason this isn’t noticeable in ‘real life’. The next one will be in the original Red Square livery to complete a trio of trijets. Picture to show the extent of the wing to fuselage fairing on the starboard side only: First two Tridents completed :
- 22 replies
-
- 48
-
-
Hi all, I’m hoping to build a Wizz Air A321 but I’m stumped on a colour match for the pink and purple of the new livery for it? Anyone got any tips or advice for, it would be greatly appreciated! Thank you 😃
-
.thumb.jpg.ba34a9f6ddce411193946dbdcc7b5fe8.jpg) Hello all. This will be my second entry into this GB. This one qualifies on two counts, it is for Air New Zealand, and it is Australian made by OzMods! This is what I am up against. On the whole, it looks to be a good package. It will need a fair bit of work, but should be fun! The box was nice and sturdy: The parts have a bit of flash and are also quite stained. I am not sure if it is discoloured plastic or releasing agent. I know the bits will get a bath before I start though. There is a nice selection of resin parts, and an optional interior. There are marks inside the fuselage to indicate where to cut if I want to use the cockpit details. I will need to have a closer look at the glazing before I decide. The markings look very good indeed. There will be an interesting round of masking to get the black/white demarcation right. This is the inspiration for this project. I took this photo at Nelson Airport in 2017 when I was fortunate enough to get out to NZ and visit an old school friend of mine who I had not seen since 1982! Anyway, I am looking forward to getting this started when the time comes. I will occupy my time in the meanwhile by building another EE Lightning! Take care all, Ray
Hello all. This will be my second entry into this GB. This one qualifies on two counts, it is for Air New Zealand, and it is Australian made by OzMods! This is what I am up against. On the whole, it looks to be a good package. It will need a fair bit of work, but should be fun! The box was nice and sturdy: The parts have a bit of flash and are also quite stained. I am not sure if it is discoloured plastic or releasing agent. I know the bits will get a bath before I start though. There is a nice selection of resin parts, and an optional interior. There are marks inside the fuselage to indicate where to cut if I want to use the cockpit details. I will need to have a closer look at the glazing before I decide. The markings look very good indeed. There will be an interesting round of masking to get the black/white demarcation right. This is the inspiration for this project. I took this photo at Nelson Airport in 2017 when I was fortunate enough to get out to NZ and visit an old school friend of mine who I had not seen since 1982! Anyway, I am looking forward to getting this started when the time comes. I will occupy my time in the meanwhile by building another EE Lightning! Take care all, Ray -
Hello All, A Kiwi company Micromaster produces these exquisite vehicles in 1/144. Happy Modelling All Ian
- 4 replies
-
- 17
-
-
- 1/144
- 3D printing
- (and 1 more)
-
Well my take on this ship after a 4 month build period trying some new techniques grinding the hull to get the oil-canned effect some people said they thought I was mad going at it with a Dremel but I think it came out OK. Used the new Vallejo coloured water gel jury is still out on that one and used the Big Etch set from Eduard added some needed details I will be adding some figures later when I can get round to finding the ones I used on my LSM build from Shapeways but the prices looks like they have gone up a fair bit. Stay Safe beefy
- 25 replies
-
- 45
-
-
-
Here's my finished entry to this the Australia and New Zealand GB. Unsurprisingly, it's a Vulcan. What else do I even build these days? Now it's not just any old Vulcan, that wouldn't have much of a link to NZ or Australia aside from quite a number of visits, this is XH562 which was the victim of a RNZAF practical joke in 1972. As recalled by Crew Chief Bill Pearsey: So here's my model, representing one aspect of the RNZAF's hospitality when it comes to hosting foreign guests. It's the 1:144 scale Great Wall Hobby Avro Vulcan B2, decals are from Printscale, Fündekal and some that I printed myself. Paints are a combination of Tamiya, Vallejo and Citadel. This is probably one of the least modified vulcan builds I've done. I only removed a few blisters, changed some of the ECM equipment and removed the RWR fairing from the tail. No trace remains of the X-Band Jammer that was previously on the tailcone. XH562 never had either version of this equipped. WIP thread here:
- 26 replies
-
- 54
-
-
-
- XH562
- Avro Vulcan
- (and 1 more)
-
After over a year, I have finally finished "3 Kittens" i.e. 3 Tomcats in braillescale I had few bad moments unfortunately, some of them are visible, some are not until you see them in real. - white undercolor on both F-14As have gone to blueish hue, due to failed brush which I was using for thinning color - brush has blue handle, and that blue probably resolved under thinner and mixed with white... it was very painful trying process, end in the end it turned out a bit blueish - in vivo is not so visible, but on this white background for sure is - while glueing wheelbay doors, I didn't notice that Tamiya Extrathin glue went to the trailing edge of fixed part of wing, and glued movable part of wing in position you see on photos - I've tried my best to unglue wings, but with no success, so they stayed like this - fortunately in same position on all three kits - middle wing position on F-14 Everything else is more less out of the box... Painted with Gunze acrylics, wash is made from artistic oils... Well, enough talking, here are the photos... F-14A, VF-84 Jolly Rogers ("Final Countdown" movie) F-14A, VF-142 Ghostriders F-14D, VF-101 Grim Reapers Family portrait Cheers, S.
- 14 replies
-
- 34
-
-
- F-14 Tomcat
- Revell
- (and 1 more)
-
British Midland DC-9-15, 26 Models 1/144. British Midland were the only UK operator of the DC-9, using both the short -15 and the longer -30 versions. This kit from 26 Models contains the plastic from the Fly Models DC-9, with 2 fuselages for the -15 and -30 for you to choose from. Also included is a set of 26 Decals own silk screen printed sheet, for the -15 and -30 in British Midland colours. I know there are some minor issues with the engine pylons being slightly too far back, and not wide enough. Well. I know now! But not when I started the build, so they are not corrected. I'm happy with it though, it is a lovely livery from what to me was the classic age of airliners. I thoroughly enjoyed this build, I chose G-BMAA 'Dovedale' because it is such a lovely part of the country. I can never resist a photo 'with something else', so here is my growing British Midland fleet: Thanks for looking John
- 32 replies
-
- 62
-
-
-
- British Midland
- 1/144
- (and 1 more)
-
I hope this is the right place to post this - I cannot see a What If section, and weird though this is it is not Sci-Fi! Please do move it if not. I don't post many of my builds on here but this is a bit of a rare kit and aircraft so I thought I'd share it (apart from anything else, despite searching the ends of the internet I can find no images of completed models of this aircraft in any scale so this might help the one other human on this planet who might want to build this kit!). This was a genuine but unbuilt anti-submarine patrol seaplane from Convair. It kind of looks like a Martin Marlin on acid, I think. Either way - it's damned ugly. If this had entered service, I think there's good money on it being called the pelican (in fact, half way through this build I realised what it reminded me of - Nigel from Finding Nemo!). Info on this design is very scarce but I managed to track down some decent three view drawings (Secret Projects Forum has a lot of helpful info if anyone is looking for it). The history of this aircraft is intriguing. In 1957 Mother Russia decided to fit SCUD missiles to their Zulu class submarines, giving the Soviets their first ballistic missile subs. This caused great alarm in the US, and a strong fear that the existing sub picket lines on the Atlantic and Pacific needed upgrading. So an aircraft was sought to replace the Martin Marlin and Lockheed Neptune - the designs of both were nearing ten years old. Both Convair and Martin submitted proposals (XP6Y-1 and XP7M-1 respectively), with two prototypes of the Convair aircraft ordered before budget cuts forced the navy to see sense and decide on a long range land-based aircraft which ably fulfilled this role until only a few years ago - the Lockheed P3 Orion, of course. The idea was this would fly along, land - dunk its sonar and sit for a few hours waiting for a Russian sub to amble past. Spare a thought for the unbelievably seasick sonar operators in the back! It would then take off and repeat the exercise somewhere else. To actually hunt the sub, it would have flown a similar pattern as the Orion subsequently did and use its extendable MAD boom at the rear to fix the sub's position before dropping depth charges or homing torpedoes. Here's the small scale model that was built in 1958: It's only as I put this together that I've really appreciated what a whacky thing this was. The whole design was centred on reducing the stall speed in order to enable this to land and take off in short distances in any sea state the Atlantic or Pacific might throw at it. So it had absolutely massive 'blown' flaps suspended from a flying wing - like a Catalina in a way, just less aircraft and more scaffolding. The height of the wing would presumably have kept the flaps out of the spray on takeoff. To power it off the water, the aircraft was designed with five (5) engines - and a rocket. The three massive Wright R-3350s in the nacelles are obvious, but the central nacelle also housed two jet engines which could be angled over 150 degrees up or down (although quite why you'd want to angle it up I don't know). There was also a JATO rocket in the rear just in case none of this was really enough oomph for you. This would have been able to carry a colossal array of weapons - I was puzzling over what looked like two massive cargo doors in the side of the model amidships (I feel very nautical when I say words like amidships - after this, I must go and don some chunky knitwear and gaze thoughtfully at the middle distance). Actually these were bomb and torpedo bays which rotated through 180' when needed. Similar to the Canberra bomb bay arrangement. The Navy actually liked the design quite a lot - more so than its competitor the Martin Submaster (of which a partial, full-scale mockup was actually built). It ordered two prototypes built before budget cuts led to these being cancelled. Anyway - history aside, there's a WIP in a thread here on Kampfgruppe144 if you're interested. This was largely built out of the box, but I had to source beaching gear from the spares box (these came from a Constellation) and a few other bits and bobs were scratch built like the searchlight. The paint scheme is entirely speculative but I have gone for how I imagined the first prototype (147206) might possibly have looked when it rolled out of Convair's San Diego factory for the top brass - painted in the contemporary white over seaplane grey that Marlins wore, complete with dummy depth charges. I borrowed quite a lot of paint ideas from pictures of the Marlin - especially the props. I don't usually love What If aircraft but there was something fairly liberating doing this knowing there was no prototype let alone production aircraft to base this on. It is surprisingly large. It's not often in modelling in 1:144 that you can fit the entirety of your smartphone camera underneath the wing of the aircraft you're photographing! I say surprisingly, because it was only when I finally put the wing and fuselage assemblies together properly last night that I really appreciated this properly. Quite noticeable next to the Sikorsky Dreadnought I built last year... And particularly so next to what would have been a contemporary naval fighter (even if the Cougar was fairly petite). thank you very much for looking and for reading if you made it this far! Angus p.s. I'd be very surprised if another one of these appears on this forum anytime soon. If one does, I promise to eat my airbrush!
- 24 replies
-
- 52
-
-
-
Hello all, I have just completed this lovely little kit for the Australian and New Zealand Group Build here on Britmodeller, the build log can be seen here if you are interested: I was lucky enough to find my way out to New Zealand in 2017, and had a flight in one of these from Christchurch to Nelson, and what a wonderful aircraft it is too! It was with some excitement that I found out last year that OzMods did a model of one with the white/black fern leaf design that I personally think looks a classic. Opening the box, I found out why it was 'for experienced modellers', but having dealt with that sort of thing before, I gave it a go. I am happy with how it came out, but I did make a few errors (all in the log!). The worst was a slight discrepancy in the masking for the black part of the fuselage. I think I got it about 5mm too far forward, and, when I aligned the cabin window/door strips so the doors where part on the white, part on the black, the windows and forward doors wher too far forward too. I do apologise for that. I also think there were one or two bits that I could have tidied up a bit more, but basically what you see is what was supplied in the kit (except paint/glue/filler!). The transfers were very good indeed, but you are warned not to use setting agents, only water and washing up liquid. Some of our Forum Members could do a fabulous job with one of these, as for me, I am happy with it. Anyway, this is what I ended up with: This, hopefully, will set me in good stead for the FRsin ATR-72 I also have, with the earlier bluish-tailed ANZ scheme. Thanks for looking, and please forgive the errors! Take care all, Ray PS, please do pop over to the Australian and New Zealand Group Build, there are a lot of cracking builds of all genres going on there and is well worth a look!
-
As I mentioned,and as it can be read through a link in my WIP of the -SP,some negative critics were given,shortly after the kits release. Here the link to the WIP Well,for those of you,who did not follow my build,I can assure you that nothing of those mentioned problems showed up. I checked and cross-checked all 747 kits with drawings provided and it only showed that Eastern Express researched their subject very well. The 747SP kit is,in my humble opinion,probably the most accurate injection moulded 747 kit available in 1/144. How it compares to the resin counterpart from Authentic Airliners,I cant say because I do not own one and have not seen one either.But I assume there wont be many differences shapewise. The build itself was more or less straight from the box,just some hydraulic cables were added to the already very well detailed landing gear. The fit overall was very good throughout,carefull cleaning and sanding of the mating surfaces is recommended,then everything fits together very well. Very little puttying and sanding was required on the fuselage. The wingbox fits almost perfect into the fuselage. The installation of the landing gear was the most troublesome part of the build. To get all wheels touch the ground isnt so easy,but thats something that comes with almost every 747 kit. I would recommend though to remove the locators for the wing landing gear in the gearboxes of the wing.They seem a tad to high and keep the center main gear off the ground...ask me how I know😉. It was a fiddly task to remove them after all was glued together and painted.So sanding them away before glueing the wing halves together will save a lot of trouble. The rest is no problem,just carefully read the instructions. The instructions are the weakest part of the kit.The sprues contain only letters and the parts are not numbered. Every sprue with their respective parts layout is in a diagram on the instruction sheet. You will have to make out every part needed via the diagram. I chose Aerolineas Argentinas because its a very attractive livery and the airline was a regular visitor at Zurich airport for many years. Originally,I ordered that decal set from f-dcal,but for some reason,since mid december I received no news/update/ money or even a reply to my emails. Thankfully Ray from 26 Decals was a big help and provided me one of his decal sets,designed esp. for the EE kit. They fit perfectly and are nice to use. A big thanks again to Ray 👏👍👍👍,otherwise this build would have been stalled infinite,or the whole model repainted. Paints used for this build are from Gunze (white,some metallic shades)and Testors (engine cowlings,voodoo grey for the wings.) The coroguard panels are a mix of Tamyia metallic grey mixed with light grey. My conclusion; Pros; Very accurate mouldings Only injection moulded 747SP Highly detailed Very good fit of parts Decals are also nice,if one wishes to use the kit provided ones Cons. Very high priced Instructions Over engineered in some places (less is more) Highly recommended kit for those who wish to have a 747SP in their collection and who dont fancy resin or vac formed kits. I hope I tempted some to get one of these kits😊😉 Enogh text,here some photos Enjoy
- 26 replies
-
- 43
-
-
-
- BOEING 747SP
- Eastern Express
- (and 1 more)
-
After more than 2 years from the start of construction, I finally finished work on the Boeing 787-9 PLL LOT SP-LSC in the occasional 'independent' painting, which was the reason for such a long duration of the project. The first decals I bought in 8A turned out to be extremely thin and curlable and I was unable to lay them down. Only the release by the Banzai S-F of its version of the decals, although not without errors, allowed to complete the project. The model has been slightly valorised: tread cuts in the main landing gear tires, deflection of the ailerons of the horizontal fins, "cables" in the landing gear chambers and on the legs, an element protecting the exhaust from the APU, air inlet covers on the 'belly', several decals from the storage compartment for 'technical' markings . I painted Gunze C - although due to the oversight I also painted the wings white and they should be Boeing light-gray. Tamiya X-22 final varnish, Tamiya "eye shadow" weathering sets. Sorry for so many photos
- 16 replies
-
- 33
-
-
So we’re mete mojo restoring here as my PV Kitten pair ( over in the interceptor GB) is an antidote to the complexity of my PB31 (Also in the interceptor GB and coincidentally also dubbed the Nighthawk ) and other projects, as an even more straightforward mojo restorer I thought I’d dust off some if the little jets I bought last year. For the GB I’m going to do an F117a, a Tomcat and an Eagle, possibly a Hornet and an Apache too. So starting with the F117a Sprues. I’ve started painting the interior, more to follow. I think the challenge for this one will be making the black finish visually varied and interesting.