Search the Community
Showing results for tags '1-72'.
-
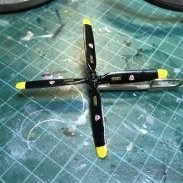
With the P-51D done and on the shelf, and the He-280 back on the table I scanned the stash and decided a chopper is due. Picked out this one and will try to go for the White JDF Bird. This should be an easy build with a challenging paint job. Stay tuned. Ran
-
Hi there The Mustang is waiting for its 3D printed MLG's, following an attack by the carpet monster. The 2 X P-400 are drying up from an enamel paint layer - will take some time. I found myself with some bench time (the wife is down with Covid-19 in the bedroom ) So... I did not want to start a new kit - as this is just a temporary halt. It's not that I do not know which kit is next, but I try not to have too many kits in progress. I could have spend some time arranging stuff around the bench - boring After a while I decided to deal with this B-29 - as it is a big build with lots of parts, so I can sneak some progress here and there. This kit has a story - so let me share it. As you know - my dad was an a/c mechanic with the IAF. You can find one of his stories here. He was also a modeler and got me into the hobby when I was a kid. The story goes that at the night I was born he completed a big B-29, and with the family growing and the salary not, it was the last model he built for a long time. Later on he introduced me to modeling and we build together. These building sessions are some of the happier memories of my childhood. The B-29, along with a couple other kits (B-17, Anson, F-4) were hung up in our family room and later on moved to a shelf in my room. They were the basis for my model collection. I fondly remember the silver monster. I can't recall if it was a 1/48 or a 1/72. I will have to look up some old photos. I remember it was big but back then I was way smaller myself. When I got back to the hobby, my Dad was interested in all the updates and in my builds. We talked for a while about building another kit together, 'for old times sake'. When I moved to our current home, and got myself a decent bench, we talked some more and I suggested we build a B-29 - as kind of a 'getting back to modelling' build. It took us a long time to finally find the time. My parents live an hour from our home but most of the time they get here on family occasions. After a long time, we arranged for them to come early on some family gathering and we sat together. Even in 1-72, the B-29 is a BIG kit, with a decent number of parts. We started with airbrushing the bombs (all 32 of them) - and it was a new experience for dad. When I was a kid we could not afford an airbrush and all painting was done with Enamels and a brush. We followed up with some silver painting of some parts and then time ran out. Dad was happy but it was clear that sitting down with me and building was hard for him - his eye sight is not what it used to be. The kit being a 1-72 did not help either. Since then, the huge box is kind of a fixture in the back part of the bench. Last month, my dad turned 80, and it dawned on me that if I want to celebrate the completion of this kit with my Dad, I need to push forward on my own and find other ways to make it a shared and meaningful experience. With this idea racing in the back of my mind, my eyes fell on the 'fixture' and I decided that this will the 'micro project' I will spend some time on, and keep doing little steps with this kit in hope to get it to the paint booth and then finish it up. I opened the box, took some pictures of the things we started, spent some time arranging the setup - opening a new build folder on my drive, opening a new project and album on Scalemates, Opening a new album on Imgur and writing this up. A lot of setup for one build So, here we go: Kit sprues, box, instruction and two after market items - a decal sheet and a PE set: I decided to start with the cockpit, as per the instruction. This was a short sitting so I just cut and cleaned all the parts, glued some parts - those that make sense to glue before paint, reviewed the PE instructions to see I'm not building something I will have to remove. Then I sorted the parts to the 'green pile' - those will get a Z-C coat, and to the 'black pile' - those will get ..... a flat black coat. Green pile: Black pile: Stuff: That's it for tonight, and probably for a while. Ran
- 17 replies
-
- 12
-

-
Have 4 to choose from in the stash; gone for the one I think I will complete in time with minimal stores. Only AB is Eduard etch (kit pit is very bare); coloured etch which is new to me; help and recommendations on what glue to use to fix folded parts appreciated. Searching for photos of the 2 kit decal options I found the next assignment for 82-1041 was service in the Oregon ANG and a photo showing it weather beaten; which is doable with a mix of kit and SuperScale decals. Bench should be clear for next Saturday. Chris
-
Hello everybody! Some weeks ago I started building it few weeks ago. This is the CA-12 boomerang and I will try to make the aircraft number A46-95, registration ZA-O. This model is slightly valorised. I made some extra parts in the cockpit and replaced the engine with a quickboost. Also I made some additional elements in gear wells. I would like to do some nice weathering, I have some photos as reference, but they are in black and white. Looking at the photos, I came to the conclusion that the plane had worn pavements on the wings along the fuselage, a bruised leading edge, and some patches on the engine cowling. Also, clearly visible in the photos, especially the brown color, it is more faded than on the metal covers. I have only one photo with my model, but I can see a brown stain painted over the top of the fuselage behind the cabin. Could it be painted a fresh brown, or could it be green? Anyone have some information?
-
I'm slowly moving back through the years. This is a kit I first built in the summer of 1982 (memories of the World Cup in Spain!), doubtless with the proceeds of my first summer job. The Airfix DHC Beaver was another kit I clearly remember from that time. Both kits have been favourites of mine ever since, but I've not yet managed to get another kit of the Beaver. I picked up the Skyray again second-hand in 2015, and have been waiting ever since for a good time to build it. This kit must have been bought c. 1976/1977, as it has "new" on the box cover: The Skyray was first issued in 1976 1977. The kit I built in 1982 had modified artwork, and I suspect was in a slightly larger box. It's not included on Scalemates, but it did exist! Here's my own scan of that - spot all the differences: The box contents appear identical, save that the original issue kit includes a stand. I will be building this kit "wheels up", because (a) the kit supports this option, and (b) it supports - and includes - a stand. I have two of the excellent Tamiya kit, but that can only be built "wheels down" out of the box. I'll probably go with the USMC subject on the cover. And I'll be using the pilot. No painting instructions are included for the pilot figure, but that's easy to figure out. I should get started this evening. The long-term weather forecast for this week is very good, so I may not be going at full tilt on this. On the other hand, it's a very well engineered kit, so assembly should be relatively straightforward.
- 46 replies
-
- 10
-


