

Fritag
-
Posts
4,738 -
Joined
-
Last visited
-
Days Won
37
Content Type
Events
Profiles
Forums
Media Demo
Everything posted by Fritag
-

An RAF He-219 Uhu ++++ FINISHED ++++
Fritag replied to mark.au's topic in Work in Progress - Aircraft
Well you like a challenge, Mark. Proper cracked it 👍- 134 replies
-
- 3
-

-

-
- He-219
- Tamiya 1/48
- (and 1 more)
-
Yikes! No threat of silvering? Sounds almost like cheating… Looking mighty fine, G. Shall enjoy seeing it in the flesh so to speak
-
Cripes. LOTS of ‘mazing modelling going on here, Bill. Really enjoyed the catch up.
-
Legendary Blackbird - Part 0: Genesis... (3D Printing)
Fritag replied to Serkan Sen's topic in Work in Progress - Aircraft
And it’s a WOW from me too, Serkan. Those prints look just about perfect. And the design of the chine plugins is impressive. I don’t think I ever knew that the YF-12A was fitted with canards. Amazeballs -
FM 1/48 Hampden - Duel Build with the General!
Fritag replied to woody37's topic in Work in Progress - Aircraft
Rescribing, riveting and working with PETg. Three tasks that I find a bit of a pain - and would much rather watch you do, than do myself.... Ha. I've just nearly finished a model in mere months! Not at all glacial. Well not in pre global warning terms anyway... Glad to see this one again Neil. -
I've been back from the Shetlands for over a week now, but work and life have been so busy I've not really had any time to spend catching up with BM. I have squeezed in a bit more progress on the Defiant tho' - it's remarkable what a looming deadline can do for one's motivation... So, the walking on Shetland was as joyous as ever. If you like walking you really must go some time. Some scenery piccies. The Braewick area of the Shetland mainland: On the island of Fetlar: On the island of Papa Stour: And the Fulmar's continue to fly so close that even a muppet with an iPhone can manage a photo: Fulmars practising basic fighter manoeuvres: I’d say that the one in front really needs to break hard right - like now; or maybe he trying to sucker-in the one behind and he’s gonna pull-up and roll and try to initiate a rolling scissors. Either way I reckon he should be toast. Oh, and if you want to see a Gannet or two - go to Noss (or Unst) - but this is part of the Noss colony Anyroad up - this is a modelling forum and so I'd better show some model making. I used the template I printed to cut out slightly smaller inner skins from 0.2mm plastic card to line the inside of the undercarriage doors. I thinned down and repurposed the Airfix 'undercarriage retracted' doors to be the outer skin of the doors. Firstly because the 'undercarriage down' came with the doors moulded in the overlapping position. And secondly because I'd used the 'undercarriage retracted' doors to mask the wheel bays when painting the underside - and so they were already painted on the outside! Insides of the doors painted and weathered. 'undercarriage down' doors for comparison: And the doors fitted: The second photo abovce also shows the retractable entry step in the port wing root. Like an idiot I managed to lose the kit part and so had to draw a replacement in Fusion. Actually the kit part was no great loss, I probably threw it in the bin not realising what it was - it was just a fairly shapless lump. And the entry step from the top. Also visible is the now attached printed and painted operator's cockpit door. It was painted weeks ago so I was vaguely surprised to be able to find it. I also drew up some gizmo's that attach to the tail area of the TT Defiant and to which the wires that circle the tail plane to protect it from the towed targets fix: And printed, painted and fitted: It's for quickly producing bits and bob's like this that I really value using Fusion and having the printer. They're a game changer for these sorts of little additions. And the printed aerial mast has been painted and attached, the windscreen unmasked and some glazing from a square of PETg added to the little window in the top of the rear fairing. Presumably the window let in some light for the operator to see the winch controls, drogues etc: I was pleased with how the vac-formed rear canopy came out - so that got dunked in Klear and then masked and painted: The kit pilot's canopy was also masked. Fiddly as are so many WW2 era canopies. At least it was 1/48. And then it was painted and weathered with a silver sharpie and a 7B graphite pencil: And this is where we're up to. The pilot's canopy is sitting very slightly (half a mm or so) high as you can see by the gap underneath it. I'll need to glue it in place eventually - when it will sit flush. Just a hint of exhaust staining, using Tamiya weathering powders (snow, oil stain and soot). Not a lot left to do now. The aerial wire, and the tailplane protecting wires need to be added and I've invested in some fine (0.2mm) and super fine (0.1mm) Mig Ammo Rigging cord for those. The pitot needs fixing to to the port wing - it goes in the hole just visible outboard of the leading edge landing light. The canopies need a final polish and fixing in place, probably with some thin blend Gator's Grip. And then it'll be final paint and weathering touches and repairs - a little bit of work with Klear to make the simulated oil and petrol leaks shine to contrast with the matt finish and final snagging. And then I'll have custody of her for a week or two before I have to give her to Jim at the museum...
- 663 replies
-
- 37
-
-
-
Interesting that. Looking forward to seeing how the multiple-mask-thing works. Also looking forward to you grubbying up the airframe, Mark.
-
As it happens, I may or may not have driven through St Catharines, Ontario on the way from Toronto to Niagara on the Lake (or p’raps the way back!) once many years ago. Not quite as impressive a connection as Mark’s - but it’s the best I’ve got Yikes. Like Chris, I hope it’s not a BE2c threatening injury… (on a more serious note - hope it heals fast and completely).
-
Azur Frrom 1/72 Focke Wulf FW-58B 'Export' Hungarian
Fritag replied to woody37's topic in Ready for Inspection - Aircraft
Typically accomplished, Neil. And forced me yet again to confront my ignorance of the wide world of aviation. -
Was that good practice or just habit? Handsome fighter, the Hellcat. I’ll follow along if I may.
-
Hope so; really enjoyed this thread, James.
-
Pegasus 1/72 Spitfire Mk 22, or 24 (or now both...)
Fritag replied to Galligraphics's topic in Not My Comfort Zone GB
Likewise. Looking forward to seeing them finished - in whatever thread that may be -
Rareplanes 1/72nd Ryan ST/PT Trainer - old school vac form
Fritag replied to Troy Smith's topic in Not My Comfort Zone GB
Agreed, I’ve enjoyed this build, Troy. Can’t easily see myself doing a group build as there’s no way I could meet the deadline! Maybe once I’ve retired… -
Hadn’t realized you knew me then….. You fancy 3D modelling a cold war era Jag don’t you Sekan… Don’t you? Just wanted you to know that I posted a ‘laugh’ reaction on the assumption you survived unscathed to be able to tell the tale in the Bar, Colin BTW wot exactly is ‘wind-milling’ in the second engine? Was that how it was started? As ever with the week before leave, it was very busy; but puttering about duly happened, and whilst I’m not sure it’s progress worth posting I’m going to anyway… We’re on route to Aberdeen for the ferry to Shetland but have stopped for breakfast and the morning in Edinburgh. Yours truly is killing time in a coffee shop whilst Mrs F wanders about; so. A simple Jig was drawn using a scan of the undercarriage doors and then traced and offset in Fusion be 0.75mm smaller. The plan is to use the Jig to cut some 0.2mm plastic card to shape to glue to the inside of the kit doors (suitably thinned) add some contouring to the doors. We’ll see if it works when I get back from Shetland. Whilst in Fusion we needed an Aerial. Best to have some spares. And a canopy buck. Decided to experiment with adding the frame work to the buck - just to see how well (if at all) it comes out using the dental vac. It’ll be convenient if it works, that’s for sure. Only had time to get this far: So I dunno yet if the definition of the framing is good enough to use or not. I’ll find out when I get back from the Shetlands… Next stop Aberdeen…
- 663 replies
-
- 24
-
-
Ah, well, that’s experience for you - there’s no real substitute for it Previous Richie would no doubt be very envious of what present Richie knows Great re-start.
-
Have you set a removal reminder on your calendar then Bill? (or a nice big ‘X’ on the removal day if you prefer yer traditional wall-hung paper calendar).
-
Levasseur Pl.8 L'Oiseau Blanc 1/32 Scratch Build
Fritag replied to RichieW's topic in Work in Progress - Aircraft
That rudder looks superb Richie, the decals are easily a match for the standard of good commercially produced ones, and better than many! I’d be very pleased indeed with them. And a suitably dramatic final picture to go to the commercial break on this one. I’ll switch channels to the BE2C again now…- 74 replies
-
- 1
-
-
- Nungesser and Coli
- 1/32 Scratchbuild
- (and 1 more)
-
Airfix 1/600 HMS Ark Royal + PE + crew - Finished
Fritag replied to AdrianMF's topic in Not My Comfort Zone GB
Thoroughly enjoyed this build and thread and a properly impressive result (never really in doubt). Not really sure it belonged in this GB though Adrian… as you seem pretty comfortable building anything.! -
Terrific little added-value monograph on the seat, Crisp. Love the high-tech anti-contamination turn-it-upside down measures… Oh, and a cracking representation.
-
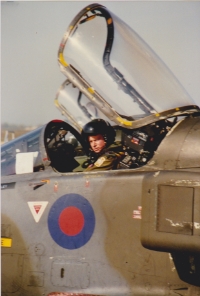
It's a wonderful photograph innit. I cam across it during my USAAF Vb build and it's now a personal fav. I have no problem with it being posed; I just hope he really was a steely-eyed Seafire pilot I think actually it was one of series of PR-type photographs taken on HMS Indomitable in March 1943 and I think this one shows the same pilot now in the cockpit. Still looking terribly steely-eyed t'is fair to say. Not sure about the pink bathing cap look tho'... I'm here to tell you that the under-foot crunch of a crushed bit of kit is quite a disheartening sound... Gulp. Double gulp. I just stuck it on the wing as it came orf the decal sheet At the beginning of the build I got hold of a decal sheet on ebay from the Classic Airframe kit, which had DR945's markings - and I just used em. No blue edge to the bar you say? I see what you mean. Had I noticed? Had I heck as like.... And there's more than one profile drawing of DR945 showing the underwing star and bar to have a blue edge... But then one must remember what @Troy Smith always says about the evidential value of profile drawings... And there is this photo of DR945: Seems to show there weren't any blue edges to the bar on the underneath. Looks like Classic Airframes called it correctly. Curious ain't it. Pretty sure there aren't any other photos to contradict this one and the only photograph of DR944 is too poor a quality to be of much use. Caused me a proper moment of two there, Ian. They were somewhat mucked up, Bill Do they need more mucking up so as to be more apparently mucked up? I can muck anything up - me. That's wot Mrs F says anyways. I reckon that riveting was well worth it though. Glad I felt obliged to copy Roger @Dunny. You mean you skipped page 7 Colin? One of my personal favourites is page 7. Lots of cracking stuff on page 7 [In the interests of full disclosure I should admit that I have no idea what happened - if indeed anything did happen - on page 7]. Welcome aboard Taking the Ferry from Aberdeen, Alistair so we'll not be that far north this trip. We'll be back up that way early next year on our way to Loch Eriobol though. On the other hand Mrs F is vegetarian (well pescatarian to be actual about it) so I'll struggle to sell a visit to Cockburn's Butchers to her (I love both Black and White pudding - but that's not important.... Obvs.) Oi! Redeemed only by being genuinely amusing, Neil Puttering about with Aerial masts and canopies n'stuff in odd moments to spare this week. Not sure if there'll be anyhting worth posting before we go though.
- 663 replies
-
- 16
-
-

-

-
An RAF He-219 Uhu ++++ FINISHED ++++
Fritag replied to mark.au's topic in Work in Progress - Aircraft
Great post (and work), Mark. Freehand airbrushing camo? The mere thought of it sends shivers down my spine... And that's for 'simple' schemes. This scheme? I take my hat off to you, sir.- 134 replies
-
- 2
-
-
-
- He-219
- Tamiya 1/48
- (and 1 more)
-
Goes for me too, Bill.
-
127 Squadron RCAF Hurricane Mk.XII AZModel (from a IID)
Fritag replied to marvinneko's topic in Work in Progress - Aircraft
Really enjoying this thread, David. I’m learning these things n’all. The learning is a big bit of the fun i’n’t it? My tuppeny-ha’penny worth is that oil washes, filters and and dotting are all excellent techniques but best kept simple and done with a a clear aim. I don’t tend to use a wash much, maybe just a pin wash in certain panel lines only, I think a filter works well on discrete sections, like hatches and individual panels - to give a contrasting tint to the hatch/panel, and when I use oil dots I tend to try and avoid mixing colours together when wet - but that’s cos I use oil dotting to tray and get a patchy look to the finish. With dotting, I also stick to a limited palette and tend to use different colour oils over different colour camouflage. Greys and black over green and browns and ochre over dark earhmfor example. But that’s just me and my current thinking. I’ll probably think differently in a few month’s time and there’s much better modeller’s n’me do things very differently anyways -
As Chris says, Rob. Privilege to follow your j***n*y (can’t quite bring myself to use the ‘J’ word) in developing your techniques.
- 191 replies
-
- 3
-
-
-
- Arma Hobby
- Hurricane IIb
- (and 1 more)