


MattBlack33
-
Posts
507 -
Joined
-
Last visited
Content Type
Events
Profiles
Forums
Media Demo
Everything posted by MattBlack33
-
"Oh, there's another Belgian Lightning, seen a few of those in my time....haven't I!?" Like Max Headroom said above it's one of those double take kits, looks really good! Looking forward to seeing her finished
-
I've done both Tucanos now but I think the Church Fenton version looks nicer. I've never been able to brush paint, it always ends up looking horrendous! Glad to hear you've mastered it though, maybe I'll try doing my own all in brushes...one day! I've got some green on her, but needs a few touch ups as I've overdone some of the lightening. I've been focused on the diorama base as I'd love to have somewhere to put the finished a/c once completed! You can check out my progress on the shed here: http://www.britmodeller.com/forums/index.php?/topic/234987148-raf-binbrook-1970s-q-area-building-diorama-and-desk-lamp/page-3
- 89 replies
-
- 1
-

-
- Airfix
- Lightning F6
- (and 3 more)
-
 I've had a bit of a think about the Group Build and have realised I might not have time now to do the Typhoon to the standard I'd like. I still want to submit an entry so I thought up a quicker compromise. Earlier in the year my youngest and I put together an Airfix Vampire with an added 1:48 missile on the underbelly. It looked ridiculous, but it was part of a post-apocalyptic universe and made lots of sense!! Honest! The backstory was that Britain had been obliterated in a series of nuclear attacks, but a small crew of brave souls have retrofitted old museum aircraft to carry modern weapons in order to mount a counter attack and to defend our honour! This GB entry is from the same universe but a few years later. The counter attack worked which meant that the allied army and airforce have had time to regroup and assemble for one last push back into mainland Europe. A small squadron of volunteers was smuggled by boat into North Africa to form the basis of a flank attack through Southern and Central Europe supported by three retrofitted Vampires for ground attack roles. Disguised to be hidden in the mountains of Tunisia this Vamp has a modern digital desert camo scheme, but retains its NMF underbelly. I'm going to have a play around with weapon options I've got loads in the spares box but it's likely to be a ground attack variant. Sorry for the change, but I've heard the Typhoon can be a bit fiddly and I don't think I'll have time to finish it for the deadline.
 -
RAF jet fest. Part 1 - Lightning vs Starfighter.
MattBlack33 replied to RMP2's topic in Work in Progress - Aircraft
Coming along nicely. Paint job looks spot on -
The shed continues, and I reckon I'm about halfway through now. The main structure is done so it was primed and readied for painting. The reference pictures show a drain at the front of the shed so I've added this in (plasticard) and cut the concrete slabs to fit. First step after priming I added some shading using Xtracolor Dark Sea Grey to bring out the expansion joints and dirty floor inside the shed. At this point I realised that I needed to remove the part of the roof I'd prematurely attached as well as the roof support beams. After this a thin layer of Humbrol 147 was sprayed over the top to lighten it all up a bit and replicate as best I can the actual concrete shade. As with the primer there was a bit of curling of the sandpaper of used, once the paint is dried I'll go over it again with a roller and glue the bits down that have curled up. Now starts the laborious task of picking out the details and adding signage etc. if I were to build this again I'd probably make it easier for myself and paint the supporting struts and metalwork before construction. I gave up halfway through because I got bored and my eyes were giving up on me! The door needs another coat of paint (maybe two) and the vertical struts and a/c box need painting. I can't resist seeing what it looks like with an a/c on it! I'm not a patient man! The gap under the door looks a bit out on this side. Once they're painted I'll take it off and glue it on lower. And the bungalow is starting to take shape. I've tried to model the visible bits as they are in real life. Apart from this bit...the real version has the alarm switch and duct in opposite positions. The gap behind that you can just see will house the electronic elements. aaaaaand, the doors. Other than the left door looking too high I think they look pretty convincing! Just need to make another set for Q1. Thanks for looking!
-
Thank you all, the bungalow has changed a bit since the cardboard version, however the plane spotters posters have been retained I have finally solved the problem of the doors!! .5mm plasticard cut into 5mm strips, glued together at random points up and down the length to give a bit of variation. The lighting conundrum is now rearing its head as I'm actually motoring on and getting to the point where it's time to add the lights. My LHS now stocks Woodland Scenics lighting so I've had a chance to have a look at how it works. Overall it looks really easy to set up and use, however the small scale lighting ( (http://www.smallscalelights.co.uk) appears to have the lights that I need, cheaper, but not as easy to set up. I'm stuck between the two! If any of the model railway crowd (or anyone who has experience lighting dios etc) could add their £0.02p I'd appreciate it. I've done some thinking about vehicles and other activity on the dio. Ascoteer has been really helpful in suggesting accurate vehicles for the period and at one point I was considering getting an AEC Mammoth refueller on her recommendation. However that's looking like it would be quite an expensive option (there's one I've been watching on eBay that's going for £30) so instead I've picked up an Airfix Landie (obviously...) which has got me thinking about this: http://www.smallscalelights.co.uk/viewitem.php?productid=111. Looks like it'll be lights for everyone!!! I'll have a couple of hours on it tomorrow so I'll post some pictures either tomorrow evening or Sunday.
-
Fantastic! It looks massive! I think I might steal your concrete technique if you don't mind?
-
Looking good. Nice to see you're back at this! I'm looking forward to seeing more
-
Thanks, Dorbeck. What are you building? I'm kind of making things up as I go along, but feel free to ask any questions and borrow all you want! It's nice to hear that my inane ramblings might be useful to someone else. David
-
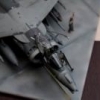
Here are a few more pictures from last evenings' work. Roof section in place. I won't put anymore roof pieces on now for ease of access to the back panel, which in this picture looks horrendous... Door mechanism cladded. Lights to be added at the end: Drainpipe detailing: Lightning (for size and position) coming along: Next weekend I'll be either finishing the detailing and getting the whole thing primed (if the LHS has the parts). If not, I'll be building the new bungalow.
-
Looking good, Sean. Sorry I missed this when you posted the latest update!
-
My biases aside, that's definitely the right size board and once painted will look spot on.
-
I agree with Onkey above. I'd keep the rectangular shape and see how workable in the long-run it is once it's all together. You can always cut it down easier than you can add to it if you decide it's too cumbersome down the line. This and I can live my desires to have a full-size HAS vicariously through you...
-
Thanks, Bar. I think it looks so much better than the card version. In a weird way it's gone together much easier too despite being more complex! 1/4 roof sections are now on and the front door mechanism is cladded. Pictures to follow soon!
-
So, for those of you following there have been some changes. Some, quite drastic changes. An 'overhaul' if you will. The standard of the dioramas in this new section is incredible. Incredible and inspiring. So much so that I felt that my cardboard shed needed a lot of work if it was going to look the way I want it too and to hang with the big boys. Herein lies the process I've been through... I'd been in B&Q looking at potential bases to attach the shed and diorama to and found a pine shelf in the reduced section that met my needs perfectly. The only difference being that it was slightly deeper than the plans I'd drawn up and I conceded that I'd have to get out the jigsaw and make some amendments. When I got home I noticed that the shelf didn't look too big, even on my smaller workbench. So, instead of hacking it up I thought I'd leave it but extend the shed another 2.5" into the base. To do this I would have to disassemble the card shed and extend it. Back to the drawing board, or so I thought. I consulted the pictures I had collected for reference, and the plans I'd drawn up and decided to try and build it as close to the real thing as I can. So instead of having the cardboard skeleton I'd made already, I'd build the shed using scale construction materials. The cardboard version is not lost however, it now forms a pattern and a guide. Off to the LHS I went and bought up the materials I needed (for less than £20 as I have budgeted myself £30 for the shed in total). So how do I turn this: into the Q-shed I had envisioned at the start of the build... Firstly I build a solid wood frame which will hold the doors and be the anchor for the rest of the pieces: then using the back from the original shed I lined up the main supporting struts: These struts then have allowed me to attach modular parts like the real things: To which some basic detailing structures have been attached, looks quite rough for now: Then the concrete standing. 100grit glass paper cut into squares: A quick coat of primer. Some of the concrete slabs have started t curl up. This was rectified with a roller: More finer details being added: and to finish, a couple of visitors for scale...the ground crew apologise for how dirty they are: how she looks now: Work has stopped for now as I've run out of certain materials and with it being a bank holiday, there's no chance of getting them until next weekend at least. Comments, questions and queries welcome! The question of what to do with the back wall still remains!! David
-
With a few builds to clear off the bench at the moment so I'm not getting straight on with this. However, here's the plan for thi very exciting GB. The kit: Trumpeter's 1/72 F105G Thunderchief. Extras: Eduard's "Big Ed" PE detailing set. Others: Hasegawa ground crew and equipment. CMK Vietnam era pilots (standing). In the group chat I heard the fin needs modifying to be accurate so if anyone knows how to go about doing this let me know and depending on how much time I have, I might give it a go.
-
DONE - 1/72 RAF Typhoon & Russian Tu-95 Bear intercept
MattBlack33 replied to Dermo245's topic in Work in Progress - Aircraft
Brilliant stuff!- 46 replies
-
- 1
-
-
- Typhoon
- Eurofighter
- (and 5 more)
-
1/72 B-52D, Linebacker II, 1972. Finished 16/12.
MattBlack33 replied to DaveJL's topic in Vietnam II Group Build
One of my favourite aircraft and a kit that I remember building as a 13year old (all brush painted!). It hung on my ceiling for years! Really looking forward to seeing this build come together. -
Thanks Danyel. Apparently they were posters given away in the Sun newspaper in the 60s/70s. I thought it would be a sarcastic crew member/pilots joke hanging them up in the crew quarters. I'm going to post an update at the end of the weekend as there have been some significant changes to the Q-shed since my last post...stay tuned!
-
Thanks, Yankee. Welcome to the boards by the way! Hopefully I'll be able to post an update this weekend!
-
In that case I'll keep posting them I'm wondering what to do with the back "wall" of the shed. Obviously it's not meant to be there and I don't want it to look too out of place. I had thought about just painting it black, but I've also considered making a scaled-down rear door at the back to simulate perspective. Does anyone have any suggestions? Thanks for looking! David
-
Hi Yankee, I'm afraid the other member is mistaken, I use an airbrush on all of my kits. Although I don't have any tips, I can give you encouragement. I think a brush-only Group Build would be a cracking idea!
- 89 replies
-
- 1
-
-
- Airfix
- Lightning F6
- (and 3 more)
-
Thanks again, Sean. I do worry about posting pictures with it in such a state!