


guillaume320
-
Posts
482 -
Joined
-
Last visited
Content Type
Events
Profiles
Forums
Media Demo
Posts posted by guillaume320
-
-
55 minutes ago, Aeronut22 said:
It was revealed as 'New Parts' so the spinnerless prop the only new part or are we getting the larger bore (cockpit heater) exhaust and modified lower cowling as well? Also didn't the royal Scheme Chippy have a carbuncle of an anti collision light on the canopy?
I hope to see the large anti collision beacon for WP903... The modified exhaust would be nice to see, however I don't think any of the new Airfix provided options had that modification.
Also, nitpicking, and I would be really surprised if Airfix caught this detail: the Portuguese built Chipmunk had a P-51 handgrip instead of the 'straight' stick usually seen...
-
 2
2
-
-
Any pictures of the updated parts Airfix promised?
-
I’m curious to see what those improvements to the tooling will be.
Off the bat I could think of the ailerons (as someone mentioned earlier), but also the main tank pylons which where not high enough. That might prove crucial because the larger tanks have that additional brace, and if the main pylon isn’t correctly dimensioned this could really look ‘off’.
Also a set of gun blast deflectors and a set of blanks to cover the guns for the GA.11 would be welcome…
In any case: bring it on 😀
-
Temperatures are rising on the forum...
I think the decision to not have the strengthening plates molded from the start might be a sensible one (at least from a financial point of view). They could have gone the 'Eduard route' and tooled several more different upper fuselage parts, with and without the various different strengthening plates and yes, this would have been extremely welcome. But short of that, my preferred alternative would be some kind of self adhesive vinyl. Photo etch is too stiff to conform to the curves nicely, and the superglue required makes it all harder to do without messing up.
Would I get the kit as it is now? I say yes. With some own research, there is plenty in the box to make a credible airframe. But I surely hope Kinetic will keep 'upgrading' their boxings in the future, and for that I'm hopeful considering their track record. My 'Wishlist' would be the vinyl plates, tinted canopies and yes, those lacklustre ADF antennas on nose and intakes need redone (hopefully in a future dedicated ADF boxing)...
G
-
We should also keep in mind that Kinetic has a track record of making incremental improvements to their kits over time. Their legacy Hornet kits are a prime example, with retooled tails and separate rudders, not present at first... An approach that should be commended in my opinion
So who knows what we will see over time with those new F-16 kits 😃
-
 2
2
-
-
There is a discrepancy with regards to the Belgian colour scheme provided:
The stencils provided for the Belgian option are the 'new' grey ones. Look at the ejection seat triangles: grey (like current US F-16s) as opposed to earlier salmon pink triangles. If using those newer stencils, the camo is 2-tone, as opposed to the earlier 3-tone. The paint guide is wrong. That being said, a earlier Belgian version can be done by using the Dutch stencils that are provided...
Also the box art is off in that regard: on the newer 2-tone camo, the dark grey should come further forward, and the ejection triangle should be on the dark area. The box art shows a dark grey triangle on lighter grey background. That's wrong. For that particular paint scheme, the triangle should be salmon colour.
So in summary everything is in the box to to either early or late camo, just beware of the instructions (and box art)
G
-
2
-
1
-
-
1 hour ago, Biggles81 said:
I am going to have to ask the obvious - the boxart is G-VENM which is variously listed as an FB 1 or FB 50. The kit is and FB 4 if I read correctly. How hard is it to get from an FB 4 to an FB 1? I know little about Venoms.
FB.4 had powered flight controls, leading to larger ailerons (sticking past the trailing edge of the wings). This in turn needed larger rudders...
At a first glance I think all is in the box to make either an FB.1 or an FB.4, but don't take my word for it. Better to wait for an expert to have a good look over the sprues...
Best regards,
Guillaume
-
1
-
-
Hi,
For decals there is the recent FCM set.
There also used to be a Kits At War decal sheet, long out of production though!
Guillaume
-
1
-
2
-
-
I’m also expecting a set of HARM missiles... Years ago when Tornado test shots were first revealed in Cosford, those were on display.
G
-
23 hours ago, eclipse said:
I don't know about the kits, but IRL, nose cones of every version of Mirage 2000 have the same geometry, the same shape. C and B cone are perfectly the same and easily superseded one by another and it happened sometimes...
The only difference with N/D cones are the add of a frame ("frame 0") in front of the usual frame (frame 1) where the C/B cone is attached, due to the forward position of the radar Antilope V, smaller and lighter than RDM/RDI, in order to restore the equilibrium of the plane.
In fact, without the probe in front of the cone of B and N versions, B, N and D versions have the exact same lenght...
You may very well be right, but the Heller single and two seaters have a different geometry. Somehow the N nose looks good, so does the C, but the B looks wrong to me.... 🤔
-
On 3/28/2020 at 8:12 PM, exdraken said:
Is the Heller 1/48 kit still the most accurate one shape wise?
You get a B, C and N.... and those are ok!
They are basic but very nice indeed. A resin burner and ejection seat is basically all I would bother with. But an observation on the B kit, which as far as I know was only released by Airfix and not Heller themselves. The radome on that one is a bit off. They correctly engraved the radome line further back than it is on the N, but the N/D radome is less bulbous in real life. So the B kit radome looks too skinny, especially when put next to the C kit.
My solution: I have a Renaissance resin radome to convert a C into a -5. The leftover C radome will be grafted onto the Airfix B kit 😎
Apologies for going off topic....
-
1
-
-
YESSSSS 😎👌🏻
-
9 hours ago, Truro Model Builder said:
Are you sure, Guillaume? I've never come across any image of a GA.11 with anything other than 100-gal tanks. If you have a photo of this combination I would be very interested.
I'm pretty sure yes. Have a look at this video .... All of them with the larger tanks, even the T.8C's!
Also this shot for example
G
-
2
-
1
-
-
If you are making a ‘late’ GA.11, note that many (if not all?) received capability to carry the larger fuel tanks. Therefore they received the cutout flaps. Those are not included in the Airfix kit. Of course with the flaps retracted this a simple scribing job...
Regards,
Guillaume
Ps: It is interesting to note the GA.11, when carrying the large tanks, did NOT have the extra strut which was seen on FGA.9 and F.6A Hunters....
-
On 2/22/2020 at 10:02 AM, exdraken said:
I'd like to see a J-10 at an airshow...
I was lucky... Saw the PLAAF display team in action at the airshow in Zhuhai a year and a half ago. Except the Pakistani JF-17, I had not seen any of the aircraft in the flying display before. Definitely a 'refreshing' experience 😁
-
1
-
-
If you are on Facebook, I recommend to join ‘Belgian Wings’... There is an insane amount of Meteor pictures being posted lately. And some very knowledgeable people in the group who I’m sure would be glad to help you.
G
-
2
-
-
On 2/1/2020 at 3:48 PM, Shaun said:
The Revel IDS/GR4 nose is ok, the mistake most people make thinking the cone to fuselarge join is demarcation but infact you have to fill that joint line and come back to next panel line and then paint your nose cone from there..
That’s what I was trying to explain, but English isn’t my first language haha 😅
-
3
-
-
Stunning attention to detail throughout... Truly a faultless built! I'm looking forward to your next project already 😀
-
1
-
-
16 minutes ago, alt-92 said:
GLow2B is a major distributor in Germany for many manufacturers.
Ah ok... I had never heard of them. So this Heller Mirage will remain a mystery a little longer I guess!
-
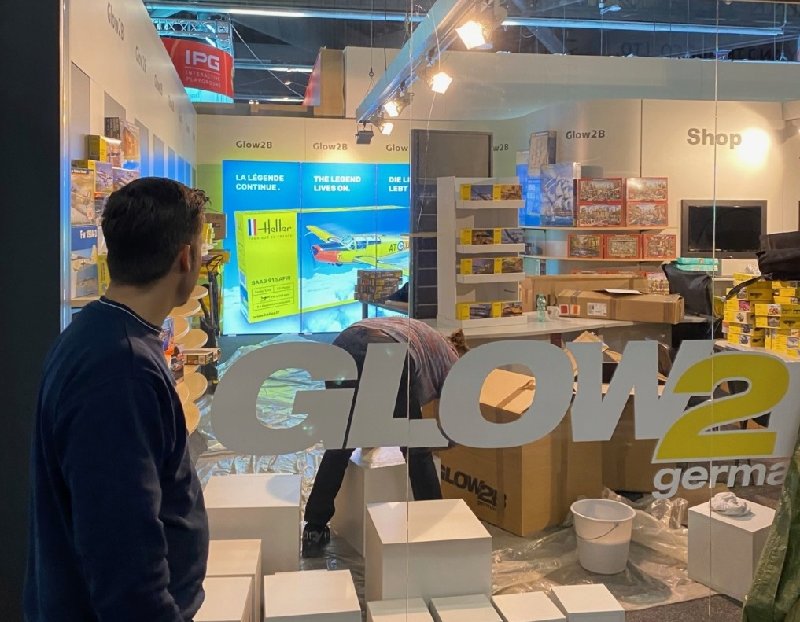
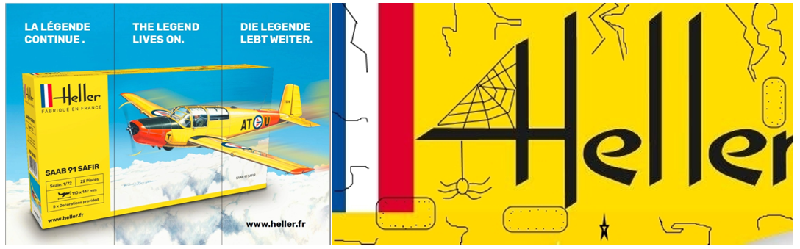
1 hour ago, Homebee said:
Do you know the yellow jackets? Now there's the yellow boxes.
https://heller-forever.forumactif.com/t12336-nuremberg-2020-stand-heller-glow2b
The Glow2B (German wholesaler/distributor) catalog with the future - not new! - Heller Hobby GmbH products:
https://www.glow2b.de/list.php?type=mm&c1=970179&order=sku&show=200&page=1
https://www.glow2b.de/list.php?type=mm&c1=970179&order=sku&show=200&page=2
V.P.
I can see a Kinetic Mirage IIIRS on that particular stand... Is that a hint? 🤔
-
10 minutes ago, Britman said:
Heller did their own Mirage years ago and I thought it to be a very good kit.
They did, but it was a IIIC/B, not an IIIE/O/R/RD/EE/EA. That's why I was suspecting Kinetic as those versions can be covered from that specific kit...
GJust now, exdraken said:But wasn't that a C/B model only?
You beat me to it! 😁
-
1
-
 1
1
-
-
Just now, hopkp said:
Or the old Esci kits, perhaps?
Oh dear 😬😬😬
-
Heller 1/48 Mirage IIIE/O/R/RD/EE/EA and F-104G... Could those be Kinetic reissues?? 🤔
-
The Revell Tornado kits in 1/48 are definitely delicate to put together. The transition from radome to fuselage is definitely something to watch.
-On the GR or IDS kits, the dome shape of the radome should extend to the next panel line (the physical line between the kit radome part and the fuselage needs to be blended in completely). On the kit built as such there is one panel line too many. The first molded panel line should be the base of the radome. The overall kit length seems correct, but the radome part too short and the actual fuselage too long. This is however easily fixed.
-On the F.3, comparing the picture Dave Fleming posted and the actual kit, I would conclude the following: Between the radome and the windshield, there are 2 distinct vertical panel lines. The kit and the real aircraft match here. However looking more closely how the radome shape transitions to the fuselage, I do see a difference. On the real aircraft, the radome shape is kept till the first panel line. On the kit, the transition starts more forward, right at the base of the radome itself. To me this gives the Revell kit that pinched look. A bit of filler could solve this (I plan to do just that). It will be a little bit more tricky than on the GR, as the radome separation will need to be rescribed.
I hope my words make sense because it's not always easy to describe
On a sidenote, other things (easily cured) that might make the Revell kits look a bit odd at times are: base of the windshield needs to be completely blended in, wings need to have some anhedral (completely straight when oob), the speedbrakes when positioned open need to spread out a bit (on most ones I've seen they are glued on too vertically), not enough forward wing sweep, tip of the fin should not be diamond shaped... Well the list is quite long...
G
-
1
-
1
-
Airfix 2024 Mystery release..>Could it be a 1.48 Jaguar??
in The Rumourmonger
Posted
I don't want to be pedantic, but a French Jaguar isn't really an 'export' version, is it? LOL😜