

Kallisti
-
Posts
5,119 -
Joined
-
Last visited
-
Days Won
1
Content Type
Events
Profiles
Forums
Media Demo
Everything posted by Kallisti
-

1:2500 AMT USS Enterprise D [Failed :( ]
Kallisti replied to Kallisti's topic in Above the Karman Line GB
The problem with that is it would dull the decals as well and what is really needed is the contrast between the decal panelling and the base colour. I did consider this but I dobn't think it would work sadly - this is just one that has to go down to experience, but thanks for all the encouragement -
Haha glad you spotted my - ahem - deliberate mistake! Obviously I hit my head so hard I mistook it for a helicopter!
-
Some years back, I had a personal encounter with the tail plane of the prototype Westland Wyvern at the Flee Air Arm museum in Yeovilton that resulted in a cut across my forehead when I accidentally headbutted the almost invisibly thin starboard tail plane. This even has gone down in the lore of our club, as these things do. So when it came to building the Trumpeter kit of the S4, even though its not the same version, this HAD to be represented in this build For a Trumpeter kit, its a pretty good representation and I really enjoyed this build, even though it isn't a sci-fi subject which is what I tend to do a lot of To this was the kit: Build thread is here: One of the things I discovered thanks to advice from @71chally and @CJP is that this particular airframe WN 325 did NOT have the folding wingtips that the kit allows you to include. Considering the detail for this part is totally lacking, that was a relief I did incorporate the gearing mechanism provided in the kit so that the contra-rotating props actually contra-rotate! The only thing I added - apart from a small blood stain - was some extra detail in the main wing fold as this was quite bare. I know there are aftermarket additions for this but I enjoyed scratch building the detail myself. So enough talk, here are some pics! If you look very carefully at the tail plane directly behind the red vertical fin, you can see a small red mark Finally a close up of the wing fold detail This was an enjoyable build and now that Airfix have released the Gannet, looks like I'll need to build that as well!!
- 23 replies
-
- 77
-

-

-
1:48 Trumpeter Westland Wyvern S4 [Finished]
Kallisti replied to Kallisti's topic in Work in Progress - Aircraft
I think I can now call this done. Some last minute fixes after realising: 1. I'd forgotten the yellow tips on the prop blades 2. I'd forgotten the yellow stripe around the rocket warheads. Seem to me a problem with me remembering yellow Anyway, fixes applied and here are the finished shots. I'll do and RFI as well later. and finally, close up of the wing fold: -
1:2500 AMT USS Enterprise D [Failed :( ]
Kallisti replied to Kallisti's topic in Above the Karman Line GB
Oh dear, well I suppose sometimes this happens... I think I have to declare a failure on this build. I've used a base colour that is too dark and too blue and stupidly pressed ahead with the decals anyway and now I see just how awful it is Underside after main decals Topside after main decals The camera flash makes the base colour appear lighter but its too dark and too blue. The paint mix looked okay in the pot and on initial spraying but once it dried, it went darker. I should have fixed it before starting the decals but I didn't and now its too late This has to be considered a learning experience and consigned to the "Oh well, at least I tried..." section of my stash. Thankfully its not a hugely expensive kit, so one day I might have another go. -
Superb, and a very interesting subject - proper job!
-
1:48 Trumpeter Westland Wyvern S4 [Finished]
Kallisti replied to Kallisti's topic in Work in Progress - Aircraft
It is, there are issues with the colour call outs and in some cases the lack of them but it builds well. -
1:48 Trumpeter Westland Wyvern S4 [Finished]
Kallisti replied to Kallisti's topic in Work in Progress - Aircraft
Well I think i can call this completed. Final assembly with added detail for the wing folds and the last minute replacement for the torpedo with the centreline fuel tank after I read on other threads on this site that the Wyvern never carried the torpedo. I also used the correct colour for the warheads of the rockets, not red as described in the instructions. and this pic shows the wing fold in more details. I added extra bracing and ribs plus some pipes, wires and conduits using plastic trip and lead wire and here is a close up of the wing fold- 32 replies
-
- 12
-
-
1:48 Trumpeter Westland Wyvern S4 [Finished]
Kallisti replied to Kallisti's topic in Work in Progress - Aircraft
After a couple of thin coats of Klear, it was time for decals. I was initially nervous about the Suez stripes but they went down surprisingly well with suitable applications of Micro Sol. There was a couple of minor tears when going over some bumps, but that was easy to cover in the end. I then gave it a light dirt wash to pring out the detail but not make it heavily weathered as these things were kept in good nick. I also assembled the undercarriage, doors and the exhausts as well. I was initially concerned at the forward rake of the undercarriage but afte consulting photos this seems to be how it was! The wing folds have not been addressed yet - will need to paint this separately and I want to add some wiring etc once the wings are assembled. Also missing are the rockets. The canopies still need attaching and the overall satin varnish applied. Working on this today so lets see how far it gets. -
1:2500 AMT USS Enterprise D [Failed :( ]
Kallisti replied to Kallisti's topic in Above the Karman Line GB
What can I say about this kit apart from omg what a bloody awful fit!!! Filler has had to come out in force, first of all there were two huge ejector pin marks on the upper horizontal surface of the engineering hull and the fit of the two parts was abysmal so filled the gap with Mr Surfacer 500 The saucer join was also ropy as hell and the deflector dish needed a major reconfiguration!!!! Blimey! -
1:48 Trumpeter Westland Wyvern S4 [Finished]
Kallisti replied to Kallisti's topic in Work in Progress - Aircraft
Well after that 'quality of life" discovery, the build has moved on quite a bit to the painting! So here are the wings that will be in the folded position with the wing tips permanent attached and not folded and painted up using Tamiya XF-21 Sky and XF-77 Extra Dark Sea Grey The main fuselage has eben sprayed with Sky as well and underside... on this pics you can see the silver pain that was spreayed into the wheel wells and then covered over, s still coming through the sky When I spotted this on the pic I took it back out to the shed and gave it another spray of sky paint. The torpedo has been painted up assorted pained have been painted as have the canopies... and then the masking came off... always a worrying time but it turned out okay Next though was masking for the Extra Dark Sea Grey... gulp... But wonder of wonders, when the masking came off, it all looks fine... blimey what a relief! Klear coat next and then decaling, but that will be later... -
1:2500 AMT USS Enterprise D [Failed :( ]
Kallisti replied to Kallisti's topic in Above the Karman Line GB
Yes its a repop of an old kit and its REALLY showing its age! Here are the obligatory sprue shots, not much but there aren't many parts - thats probably a good thing!!! Look at the MASSIVE sprue gates on the edge of the saucer pats! That took a LOT of careful cutting with the razor saw and some very careful sanding to clean up! There is also a lot of flash on the section that joins the lower engineering hull that needed a LOT of cleanup I've since removed most of the parts for the engineering hull from the sprue and dry fitted them, oh boy what a mess! Same with the saucer section, the fit it horrendous!!! What have I done???? What have I let myself in for... gulp!!! Beam me up Scotty, I wanna get outta here!!! -
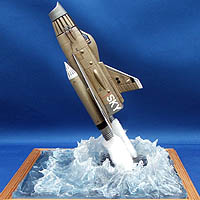
My second entry into the GB we move from "A Galaxy far far away" to Space, the Final Fronter" with a small kit from the other enormous Sci Fi franchise, Star Trek! Its a snap together kit with a minimal number of parts but has a load of decal sheets for the aztec! The build instructions are on half a sheet of paper, small than A4 but the colour and decal placement guides are on the sides of the inner box: This should be an interesting build
- 21 replies
-
- 10
-
-
Wow, just found this, superb stuff. The variations in metallic effects are excellent. I'm familiar with this engine most of all because it it represented on the back of the Hawk from Space:1999
-
Cheyenne Dropship 1/72 Scratchbuilt/papercraft
Kallisti replied to Marklo's topic in Above the Karman Line GB
Ahhh spent many a day back in the 80s writing Fortran on Vaxes for BP Exploration!- 27 replies
-
- 1
-
-
- 1/72
- Scratchbuilt
- (and 1 more)
-
1:48 Trumpeter Westland Wyvern S4 [Finished]
Kallisti replied to Kallisti's topic in Work in Progress - Aircraft
Thanks for that, yes I know that Yeovilton Wyvern well, it has my blood on it Well that info has saved my bacon... or at least the need to scratch build some extra folding mechanism, cheers -
1:48 Trumpeter Westland Wyvern S4 [Finished]
Kallisti replied to Kallisti's topic in Work in Progress - Aircraft
Ahh interesting so the aircraft serials supplied with the kit are WN325, WN335 and WL879 so it sounds like these should have fixed wingtips? -
1:48 Trumpeter Westland Wyvern S4 [Finished]
Kallisti replied to Kallisti's topic in Work in Progress - Aircraft
Hmmm interesting so it is a valid option... thanks for that ! -
1:48 Trumpeter Westland Wyvern S4 [Finished]
Kallisti replied to Kallisti's topic in Work in Progress - Aircraft
Work continues, this time its been a matter of rescribing the damage done joining the fuselage halves together and using my riveting tool for the first time in what seems many years Next the tailplanes have been assembled with their distinctive fits. I really need to add a dent and bloodstain to back the starboard tailplane as a remembrance of me accidentally headbutting the tail of the Wyvern in Yeovilton Museum many years ago as we were setting up our club stand at the model show there. Yes I know the one in the museum is the prototype and it is bare metal, but its as close as I'll ever get This incident has gone down in the folklore of IPMS Farnborough! Torpedo has been assembled and primed Wings have been put together But now we come to a problem in the kit. The wing tip fold is really badly reproduced in the kit: and using some blue tac I can represent what it will look like after assembly: which looks rubbish! What I've noticed with some models is they leave this wing tip unfolded and only fold the main wing. What I find strange is none of the aftermarket wing fold kits that I've found seem to include anything to fix this. They all focus on the main wing fold. Doing some research i did find a couple of pics like this and zooming in... Similarly a photo of the Wyvern at Yeovilton from above... So it looks like I need to do some scratch building OR cheat and leave the wing tip unfolded like other builders have done... -
1:48 Trumpeter Westland Wyvern S4 [Finished]
Kallisti replied to Kallisti's topic in Work in Progress - Aircraft
Bit further along, fuselage has been closed up with cockpit, engine cone and tail wheel. The fit was good but a couple of places reacted badly with the cement and needed a few touches of filler. There is a LOT of surface detail so need to be careful to try to preserve as much as possible to avoid too much rescribing!- 32 replies
-
- 13
-
-
1:48 Trumpeter Westland Wyvern S4 [Finished]
Kallisti replied to Kallisti's topic in Work in Progress - Aircraft
I thought they did turn at the same speed? I didn't count the teeth in the gears or do gear ratio calculations, but from looking at the behaviour to me it looks liek the rotate at the same speed in different directions. -
Decided it was time to build something that wasn't sci Fi for a change and this was the next candidate on an incresingly long list of "I MUST build that kit!" Its the Trumpeter kit of the West Wyvern S4. This will be an out of the box build because I can't be ar... bothered getting loads of PE and faffing about with it The inevitable sprue shot Extra dark sea grey and sky are my favourite FAA colour scheme and making a Suez version sounds like it would look good! Need to decide if I'm building it wings folded or extended... First job was the cockpit, its basic but I recon will look good enough under the canopy. The PE is okay, but not very detailed. Next was the contra-rotating props. Trumpeter provide a gearing system that fits inside the cowling that allows the props to rotate each other. This has the props dry-fitted after painting with a custom mix of Tamiya gloss red plus a drop or two of matt brown to darken the colour into a more maroon shade as was discusssed in other build threats on this forum. I've made a short video to show this working - the action is a little stiff as this is only dry fitted together... Next will be enclosing the cockpit and the cowling between the fuselage halves... tomorrow most likely...
- 32 replies
-
- 10
-
-
-
You are thinking of a rather juvenile video by Clarkson of a Reliant Robin which he deliberately drove badly to make it tip over repeatedly. The Bond Bug's centre of gravity looks to be lower than a Reliant Robin so is probably less liable to do that.
-
1/24 Miniart D8506 German Tractor with Roof
Kallisti replied to Pete Field's topic in Ready For Inspection - Vehicles
Great stuff! We need more tractor and farm machinery kits, especially some Massey Fergusson Combine Harvesters -
1966 Batmobile with 3D printed Bat Signal
Kallisti replied to hendie's topic in Ready for Inspection - SF & RealSpace
Wow, that bat signal is superb! Love the floormats Glad I inspired you to post this 👍

