

Wafu
-
Posts
1,152 -
Joined
-
Last visited
-
Days Won
1
Content Type
Events
Profiles
Forums
Media Demo
Everything posted by Wafu
-
The intake is just putty roughly moulded over the plastic part, then paint with Tamiya Matt Red. The exhaust is filled with putty, left to dry then again painted red. The Scale Warship rotors are easy if you stick to the instructions.
-
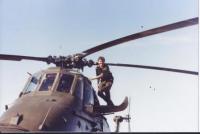
This is my US Marine Corp, Rescue HH-46D Helicopter.
- 8 replies
-
- 23
-

-
This is me a calling this done. After putting on the decals and adding the U/C, lights and the rotor fold, it's time for me to call it finished. The positive's where:- The kit is very easy to build, goes together extremely well with little to no fuss, the cockpit glazing is easy to deal with and I'd use a Eduard mask set again, cos I'm lazy and its probably the best fitting set I've used in a long while. Scale Warship rotor fold adds a whole new dimension to the kit, it gives a quirky look and saves space once its finished, essential for a rotorcraft modeller like me. Lastly, returning to the kit, the decals sheet is massive, intact its two sheets of detail stencils and colourful markings, well done Academy for that. The only 'negative' to the whole kit are the intakes, these are two cones shaped blob's of plastic. This pushed me into applying putty and painting red to show intake covers, I also applied filler to the exhausts to show this as well. a couple of Eduard 'Remove Before Flight' flags finished it off. I'll put more photos in the finished section but here's one of the finished article.
-
Wasn’t it part of the weapons mount, the greenie/bomb heads electrical connections for the EMRU?
-

CH-46 U.S. Marines-Vietnam (Academy 1:48)
Wafu replied to wimbledon99's topic in CH-46 / KV-107 STGB
Looking very nice indeed, you’ll have no problem bring the two half’s together. -
Very quick post, a brief amount of time spent starting the two decal sheets, well part of it anyway. I'll leave this as you see it tonight and hopefully crack on tomorrow afternoon.
-
1/700 HMS INVINCIBLE returns from Falklands War
Wafu replied to franco1964's topic in Ready for Inspection - Maritime
Absolutely great work Franco, congratulations. -
Well after a short'ish time away from the bench I received my paint for the build. Its the first time i've used MRP and I have to say I'm impressed. Very thin and light coats applied but I do like the coverage and the way its gone down and dried. I might have to get some more of these. By now the Mr Hobby Engine grey had well and truly gone off, so its straight into the masking ready for the orange. And after a brief spell of airbrush action it's left to dry overnight. Tomorrow I hope to apply the engine black and the walkways. Cheers and gone.
-
David, you’re pretty much correct, however the Royal Navy, soon after the Wessex coming into service, insisted that Westland enlarge the window to give the rear crew a chance to exit the cabin. So you see the early Wessex with the smaller windows.
-
Dave, let me join in, it’ll get messy.
-
CH-46 U.S. Marines-Vietnam (Academy 1:48)
Wafu replied to wimbledon99's topic in CH-46 / KV-107 STGB
Looking great, I’d not know the difference 😉 You’re really gonna see those belts through the large amount of glazing on these thinks, especially in the Scale we’re doing. -
Amazon or Hyroboy has them, get the very fine one though.
-
Sorry to hear you've got snags with your F-4B. I can only say that the two F-4's I've built in 48th have had mixed fortunes with. The hasegawa kit I found to be an over engineered bag of crabs, however the Academy kit was 100% the opposite, its not perfect but I found it close. The fit was great and I built it from the box. I enjoyed it so much I have bought the J and am thinking of buying the Diamond Back's version. The build, as you know, follows the bigger scale Tamiya F-4. Probably not what you wanted to hear though? Here's my Academy F-4B just before the masking tape came off the canopies.
-
CH-46 U.S. Marines-Vietnam (Academy 1:48)
Wafu replied to wimbledon99's topic in CH-46 / KV-107 STGB
Ooooo, thats gonna hurt. Still the tech looks nice, onward and upward. -
A day in the shed with the rain beating against the windows, good modelling weather. Small steps taken today but a halt called as I wait for paint, International Orange to be exact. Order placed but I won't see it until next week now. The airframe went in black primer to check for missing seam lines and blemishes, only after I cleaned those did a light panel pre-shade of white go on. With that applied I turned to the undercarriage oleo's and wheels. The old liquid chrome pen came out to add the fescalised portion of the oleo's. Hobby colour H339 applied with a smidge of self levelling thinners, no to much but hopefully enough. The panel lines look better now with a tad of paint on them, they should take a nice wash at the end of the build. The rotors have been left at the moment, I really want to get the airframe in full colour with decals applied before tackling them in the folded position. I need to get the aircraft on its U/C to get the right height and stance. One thing that is pants with this kit is the engine intake guards, two pointy blobs of grey plastic, I think I'll have to do something about that. Its back to work tomorrow for a set of shifts so that will stop my plastic fun for a while. Thanks for looking.
-
It’s made so much easier by closing up the aircraft, the sink marks and injection pin marks are in the most obvious places, it’s the major let down of the kit, once you get past that the build fit is excellent. More to come today as I had a good session in the shed yesterday😉
-
Hi Antoine, Im afraid I have been using google images to pick an aircraft and then look at the differences to my kit. I have also used ARC forum as the guys in the USA know their stuff regarding home grown aircraft. Very sorry I can’t help you anymore, my only advice would be to find a helicopter and model to that picture or set of pictures, good luck.
-
CH-46 U.S. Marines-Vietnam (Academy 1:48)
Wafu replied to wimbledon99's topic in CH-46 / KV-107 STGB
Very nice work Nigel, I'd of preferred to do the A but couldn't find a reasonably priced on on Ebay. I see you engaged in the pin marked hell, good on you. -
After a blinding two days and some build decisions made on the way, here she is. I've decided to close this puppy up all round, I did start doing the internal details but this sink marks made my heart sink, so the plan is to build her at rest with all doors and panels closed. I've also fitted the loud speaker to the forward port side, we at UK SAR carry one of these and I've seen pictures of this fit to both the D and E model USMC cab's, so its on. The kit went together with no fit major issues, its cleverly engineered to hide panel lines, I can only see a few areas where a very small amount of filler will be needed. I do however thing some of the recessed panel lines are a bit deep and wide, I hope to get the primer coat on this afternoon so will see when a layer of paint hits the surface. The only area of the build that caught my attention is the cockpit, this I added and painted in short time, again very easy to assemble and with only a marginal amount of detailing, the consoles and the seats, the seats received a set of homemade straps. The glazing was dipped on Friday morning, the first thing I do normally on my builds, by Saturday afternoon the Eduard mask set was applied, very easy and well worth the couple of quid. Great kudos to Scale Warship Models, my order arrived yesterday and I only placed it at lunchtime on Friday, thank you to them. I'm still uncertain if I'll fit these as I do have a Bull Frog to do as well. A guy on FB did this cartoon image of a Sea Knight, he was happy for me to alter and copy it for the model build, I don't have the knowhow to get it as a banner so it's here Cheers and gone.
-
Could do this scheme but as the earlier D model or get my E model and make that, anyway you get the idea, I like the scheme and the theme. If I choose the E I can rob the nightsun from the D model and most of the decals.
-
Hi all. Well I'm off and running, so here's my obligated box shot with the kit sitting waiting to be started. The only thing I was going to add was a set of cockpit glazing masks but I've now decided to buy a set of blade fold gear from Scale Warship. I've used their Wessex ones and been pleased, so thought I'd get the ones for this kit. If I don't use them I've got a Navy Sea Knight kit anyway. I've started the cockpit and cabin area already this afternoon but have no build pictures, the one thing I will say is annoying is the sink marks on the inside of the cabin wall's, good one Academy why not put them on the side that might not be seen???
-
Thanks guys.
-
Hi, Asking this for a friend who’s new to modelling. Can anyone point me to where he can get UK reg plate decals for his 1/12 bike kits, I think he building Tamiya? He’s looking at the square type as well as the smaller style. Thanks in advance for your help.
-
Any room for a late arrival? If so it’s a 1/48 Academy F-4 USN or a Revell F-4 RN conversion.
-
Can the 2nd of March please hurry up😉

