


Bughunter
-
Posts
325 -
Joined
-
Last visited
-
Days Won
4
8 Followers


Bughunter's Achievements
")
Established Member (3/9)
2.7k
Reputation
-
 Eduard has dedicated two pages in their new INFO Journal September 2023 to this model. Please see pages 104/105. https://info.eduard.com/en/09-2023-septembear/page-104 What an honour, I'm so pleased! Cheers, Frank
 -
At the end I had to hurry, because I wanted to finish the model before my holiday. That worked out, I had also shown the pictures at the lake above. Because the contrasts outside were a bit strong, I also took pictures in a light tent, but didn't manage to show them here - so here they are. Have fun! Cheers, Frank
-
When I came back from my summer holiday, I found your wonderful comments. Thank you very much! You made my day! Thanks, Frank
-
Thank you very much! That masking was a lot of work! But it was a good decision to prepare the masks in a drawing program, so do more of the work on the computer instead of manual masking with tapes. After I decided to paint the fuselage again this saves a lot of effort.
-
Bristol Berkeley - 1/72 scratchbuilt
Bughunter replied to Jonners's topic in Ready for Inspection - Aircraft
What a huge bird! I like that model too. -
Scratchbuilt 1/72 1916 Bristol TTA
Bughunter replied to Jonners's topic in Ready for Inspection - Aircraft
Really impressive work - a model of that period is my topic. -
Thanks fro all the likes! I like to add another picture showing it on the mentioned beautiful profile, as this was my reference and inspiration: Cheers, Frank
-
Thank you very much for your kind feedback! The real masking job (to apply cut masks) takes "only" some hours (a bit more, as I was not happy with the first try on the fuselage so I wiped the paints away with alcohol and doing it again for a second try), but I spend a lot of work before to draw the masks in Inkscape (vector drawing program). I worked also step by step, e.g. masked the upper wing and painted it red. Another day the lower wings. I have not counted the hours ... For speed up I used Mr.Paint because those paints are dry in nearly zero time. But I wait a day before apply masks on it. Mistake. Big mistake. Oh yes. Would you please so kind to tell Bud/coyotemagic about it? While searching for information about this Camel I found a posting from him: "2F.1 Ship's Camel N6818, as illustrated by Ronny Bar's exquisite 3 view on the inside back cover of DF 170. One of the most beautiful and colorful Camels ever" And yes, Bud is sooo right! Thanks again, Frank
-
Look on ebay and Co for the old Eduard kit: https://www.scalemates.com/kits/eduard-8004-hansa-brandenburg-di--121807
-
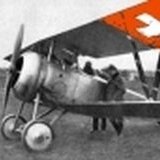
Sopwith 2F1 Ship's Camel N6818 Do you know the Windsock Datafile 170 about the Ship's Camel? It contains a wonderful big color profile created by Ronny Bar. After Eduard released in June the new kit of the Ship's Camel in 1/48 as part of the new Camel series I had to built it immediately in that livre. As this marking is not part of the ProfiPack offering I had to mask it myself and used only some small stencils from the kit decals. Now it is finished so this is my model number 6 of this year. The last few days I made a wooden platform, and as I was able to finish the Camel today I had a bit of luck with the weather today to take outdoor photos at a lake. The following sets was used: 82173 Profipack Sopwith 2F.1 Camel 648725 Sopwith Camel 2F.1 Lewis gun (only the mounting, as the profile do not show a Lewis MG) 648677 Bentley engine 648660 Vickers Mk.I gun 648659 Camel seat 648674 Rotherham air pumps 3DL48038 Sopwith Camel SPACE The rigging was done using Gaspatch parts: RAF wire terminals and some turnbuckles of Type C. Additionally a lot of scratch work as usual in my projects. The airscrew, the outer struts and parts of the undercarriage are made from wood. Many parts are metal: undercarriage (soldered from brass), tail skid, inner struts, engine bearing and more. A detailed build log can be found at Scalemates. I guess this is one of my best models so far and I'm happy to have it in my collection now. And now have fun with the pics! The mentioned undercarriage: Cheers, Frank
-
Fieseler Fi 156 Storch in Swiss livery, Tamiya 1/48
Bughunter replied to Bughunter's topic in Ready for Inspection - Aircraft
Thank you very much for your wonderful comments! Especially your comments made my happy! Same impression as my last Camel Comic Since we can only show our models on the internet (only very few will be able to see my model at an exhibition), it is also worth investing some time for good photos after the many hours spent building. Cheers, Frank -
Fieseler Fi 156 Storch in Swiss livery, Tamiya 1/48
Bughunter replied to Bughunter's topic in Ready for Inspection - Aircraft
Some impressions from the build (a detailed build log can be found on Scalemates). On the Argus engine the pushrod pipes are replaced by real aluminium tubing. The finished engine. I got the recommendation to leave the side panels open to show the engine, but the lines of the Storch looks may be better with panels? So I integrated small magnets to have optional side panels. For the oil cooler I used PE parts and turned a new front part on my lathe. Looks more like the original one now. For the exhaust pipes I soldered PE parts. A nice addition of the Eduard set are the internal window framing, but this requires also internal masking. I decided to do a wooden floor for this early Storch. A lot of masking! I decided to replace the grey position lights by self made clear parts. Cheers, Frank- 16 replies
-
- 18
-

-
Fieseler Fi 156 Storch This is now something completely different for me as my finished model number 5 of 2023. A Fieseler Fi 156 Storch in Swiss livery build form a Tamiya Limited Edition kit in 1/48. There were some reasons to do this build. The Storch always fascinated me with the slow flying capabilities. I wanted also to build at least once one of those fabled Tamiya kits. This one has even special construction features with metal holm, undercarriage and clear parts integrated into the grey fuselage as it was the aircraft kit number 100 in 1/48 for Tamiya. I caught the kit as a special offer in 2012, so it was time to finally build it. In addition to the kit I used Eduards interior and exterior PE sets, which provide wonderful additions. But I found also room for some scratched additions. The complete markings were masked. I used the decals only for the little stencils. And now have fun with the pics! And now some with open engine side cowlings. And finally some pictures with light tent. And now hit the keys for a comment! Cheers, Frank
- 16 replies
-
- 36
-
-
Sopwith Camel Comic, 1/48 Eduard
Bughunter replied to Bughunter's topic in Ready for Inspection - Aircraft
Thank you very much! Right now the price of the kit is reduced to an incredibly low 14.19€ for the ProfiPack, and Eduard now has better shipping costs as well. https://www.eduard.com/eduard/sopwith-camel-comic-1-48.html This kit is great - it was the "Kit of the year 2022" for me! I need to finish my actual project, then the Ship's Camel will be the next one! Cheers, Frank -
Sopwith Camel Comic, 1/48 Eduard
Bughunter replied to Bughunter's topic in Ready for Inspection - Aircraft
Wow - 100 Likes! Thank you very much, also for all last comments. After the regular Camel and this Comic, I think I need the new Ship's Camel for my collection too!
