


tomprobert
-
Posts
3,650 -
Joined
-
Last visited
-
Days Won
9
Content Type
Events
Profiles
Forums
Media Demo
Posts posted by tomprobert
-
-
Decal debacle over!!
I’ve been re-enthused and have raided the spare decal stash and have cobbled together enough stencils to at least give a representation of a Vulcan - the green/grey camo previously damaged on the nose through stubborn decal removal has also been corrected and repaired.
The roundels came from Xtradecal and I’m just waiting on delivery of some stencil lettering for the serial on the fin. Thankfully, I managed to salvage the Aeroclub fin badges and got them applied ok. I’ve also painted the smaller detail areas and it’ll soon be ready for some matt varnish. Air brakes, bomb bay and gear doors need adding first - a job for another day.
Anyway - excuse the terrible lighting in my kitchen and the too-shiny appearance at the moment, but I think I’m back on track…

More when there’s more…
Tom
-
 23
23
-
-
4 minutes ago, gunzo said:
Offer them your research services? You must be amongst the most genned up in building these big scale heavies.
I'd be very happy to - I think a 1/48th example of a Stirling would be a really popular kit (along with a new-tool Halifax) and if HK are going to do the Sunderland and Halifax in 1/32nd I'd be hopeful they would do a 1/48th version of each too, as they did with the Lanc.
-
4
-
-
The Sunderland is massive in 1-32…
…and the Halifax too! I have one of those built as well.
In fact it seems HK is rumoured to be following my lead (by that I mean I spend 2+ years building one in vac and then HK release one!) so you can bet your bottom dollar a Stirling will be next!
-
12
-
 1
1
-
 10
10
-
 1
1
-
 1
1
-
-
12 hours ago, Romeo Alpha Yankee said:
I had totally forgotten about the is one, nice to see some progress from 10 years ago!
10 hours ago, kev67 said:10 years later 😂
It’s important to remember, gentlemen, that one mustn’t rush these things!
-
1
-
-
2 hours ago, Graham T said:
Lovely job. Might just make it my next build!
Thanks, Graham - it’s a lovely kit to build and even from the box it has some lovely detail. A super-detailer could have a field day if they so wished, however.
-
2 hours ago, bentwaters81tfw said:
Tom, do you know someone with an Alps printer, who can scan and upsize the 1/72 sheet?
No - but I’ve been looking through the decal stash again this afternoon and I reckon I can cobble enough together stencil-wise to make it work…
-
2
-
-
1 hour ago, Robin-42 said:
Might be time to add making your own paint masks to your tool kit to replace the decals. I bought one a year ago, but haven’t had time to figure out how to use it!
The roundels and serials aren’t a problem as I have an Xtradecal sheet for them. It’s the many stencils that are causing the issue - I could leave them off but it would look a bit bland, but having had a rummage through my spares box I have a few odd stencils that may do the trick. They won’t be perfect, but I think I can make it work. I now just need to find the enthusiasm to repaint the affected areas…
My other concern is the 44 Squadron badge on the tail and the City of Lincoln badges - I’m hoping if I trim very close to the artwork itself and remove the carrier film silvering will be kept to the minimum.
I am going to give it a week or two and will then have a bash and some repairs. Still not in the mood for it to be honest.
-
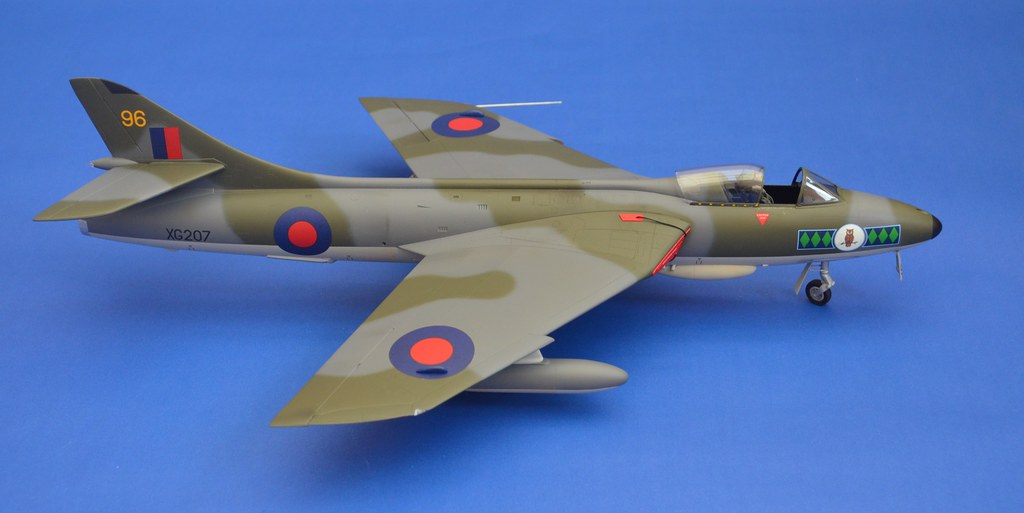
14 hours ago, Charles68 said:
What I like about this is, at least to me, it represents what you really see in the colors on the real jet. Meaning you have not overly done any shading effects and panel highlights that I just dont see in photos of the classic green/gray scheme. I have my 1/48 Academy kit that i want to complete and yours is a true inspiration. Great job!!
1 hour ago, Mr H said:Very nice. I agree with Charles68 regarding the finish. I'm not a fan of accentuated panel lines and overdone weathering. Your Hunter looks just as it should.
Cheers, gents. I did some research and couldn’t find any pictures of 58 Sqn Hunters looking anything other than very clean, so that’s the way I replicated mine.
-
1
-
-
10 hours ago, HPoirot said:
I thought I had located another source of decals but the scale was wrong, please disregard. 😅
No worries - I’ve now got a beautiful British Airways decal sheet and this will, one day, be finished in the timeless Landor livery after BA took on the Caledonian DC-10 fleet.
10 hours ago, woody37 said:Wow! One of my favourite airliners, great to see this progressing Tom
")
Cheers, Neil - and I agree the DC-10 is one beautiful bird. It’s a shame we don’t see much of them these days - only the occasional cargo hauler but even these are becoming a rare sight.
-
On 4/9/2024 at 10:10 AM, kev67 said:
Just caught up with this, actually had seen the photos on Instagram, looking very smart, hopefully see it in the flesh at model show somewhere this year
Thanks, Kev - it might make Telford if I ever overcome the decal issue!
On 4/9/2024 at 2:25 PM, MOK61 said:Taking a planned break, however long works for you, is the way to go. Far better a visit to the box/drawer/shelf/attic/garage of doom than pushing on until the Mojo is completely exhausted and all that work gets consigned to the bin in frustration.
Yes indeed. There’s no point slogging on with a model if your heart is not in it. It’ll only end up causing more frustration and then, as you say, things start to go really wrong! I’ll come back to it one day, when the mood takes.
8 hours ago, Pajarito said:Hi Tom,
I take it that these are the original sheet of decals which came with the kit? Might have to warn my mate with regard to the kit decals, if so.
Thanks for the help, chap. Hope you're in the mood for your Vulcan build anytime soon. I understand how frustrating this has to be.
It's high time someone came up with a nice 1/48th scale Vulcan decal sheet for those having any of the three or four offerings of that kit in this scale, huh?
Igna
Yes - they are the original decals. I imagine any kit if the same vintage will have the same issues unfortunately. And an aftermarket set would be splendid - but the market very small, I imagine!
This is going to have to be a case of cobbling together but and bobs from other decal sheets - I’m not obsessed with accuracy so I’ll make something work…
Tom
-
That is some incredible modelling, Neil.
-
Holy thread resurrection, Batman!
I found this lurking forlornly in the back of my loft so did some work on it today.
I filled in the cockpit windows I’d previously cut out as I have some photo-realistic decals from Authentic Airliners, and also rubbed all the fuselage joints down and made them good.
Wheel bays have been made from plastic card previously (didn’t take any photos at the time) and I am now ready for a marathon scribing session…
The tail is just plonked on for the photos and will be finished off and added as and when I’ve done the stabilisers and wings.
-
8
-
-
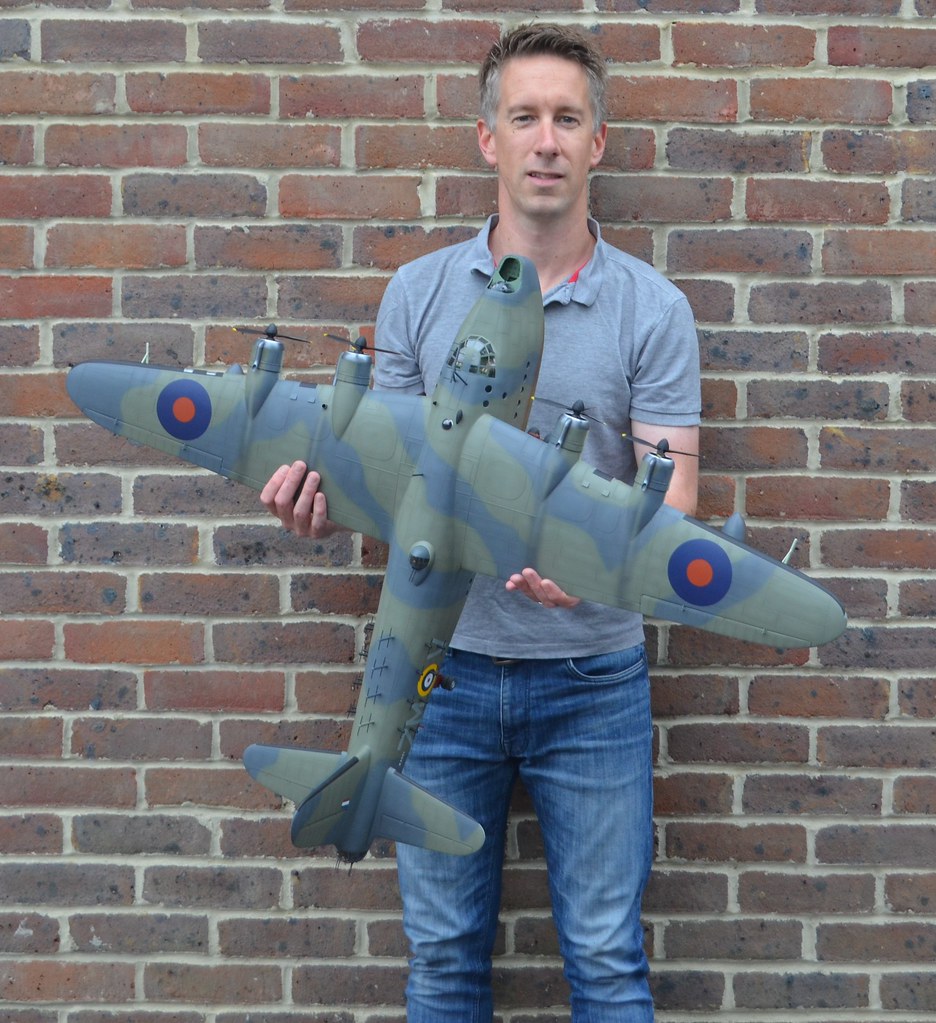
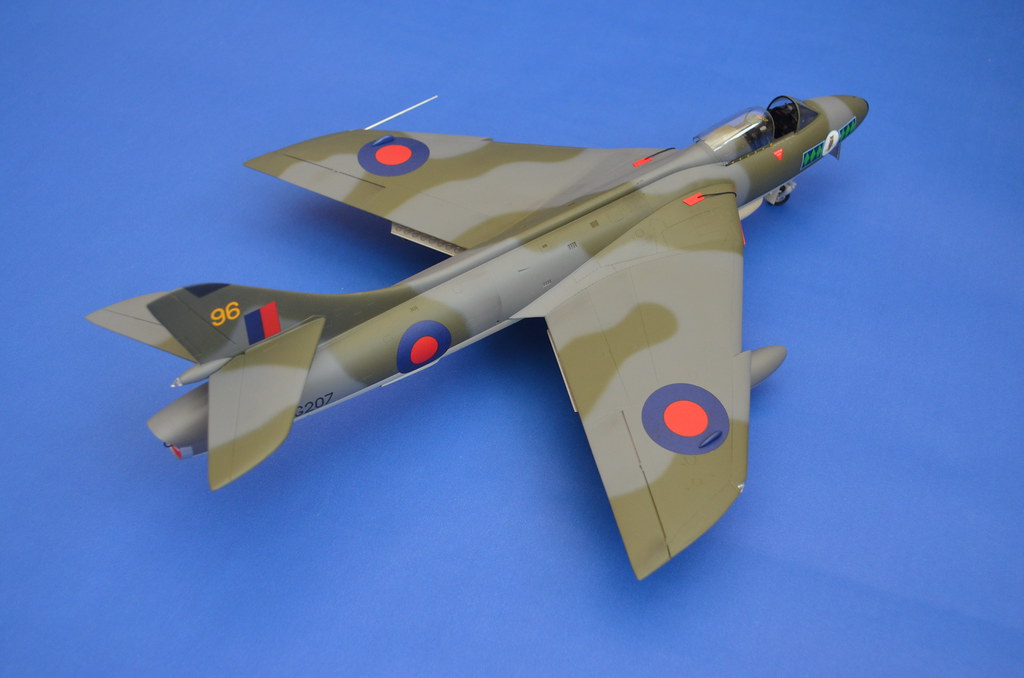
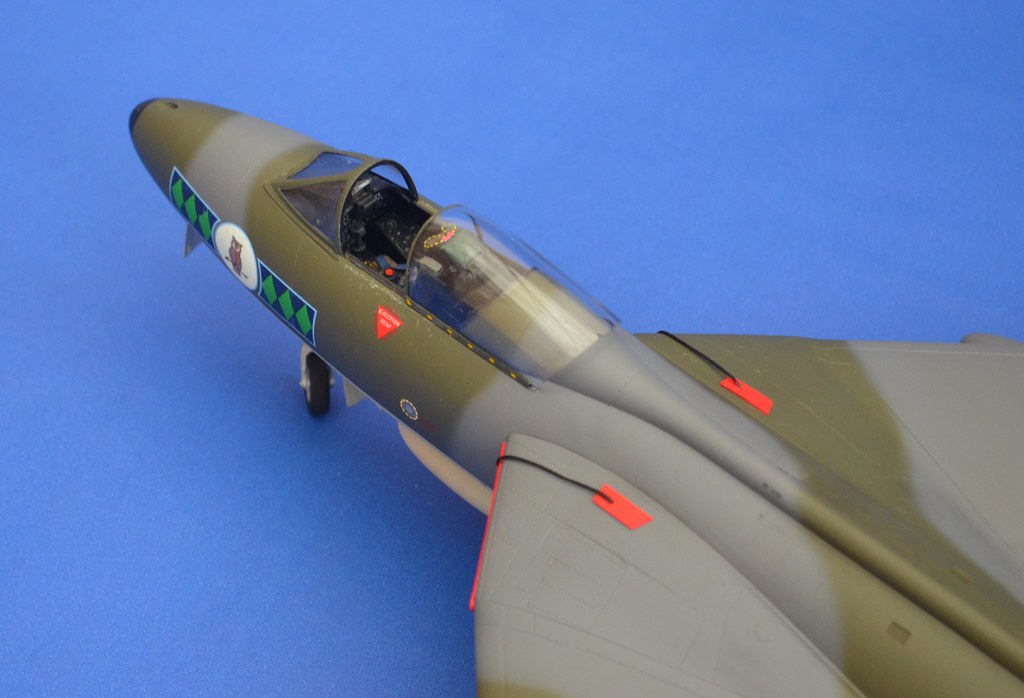
Greetings all,
An Easter holidays completion from me - Revell's 1/32nd scale Hawker Hunter FGA.9 more or less OOB, other than some aftermarket decals from AeroMaster and some home-made FOD guards. This kit is really under-rated in my humble opinion - it has lots of detail OOB and beautiful surface detailing from a time when Revell were at the top of their game. I had no issues whatsoever with the build - it's about as close as you can get to building Lego - and it went together in a few days. Paints were Xtracolur enamels with a splash of Humbrol Matt Cote to finish it off. Some light weathering was done with Mig pastels.
All in all a very enjoyable build - and it only cost me a tenner under the table at a show!
All the best,
Tom
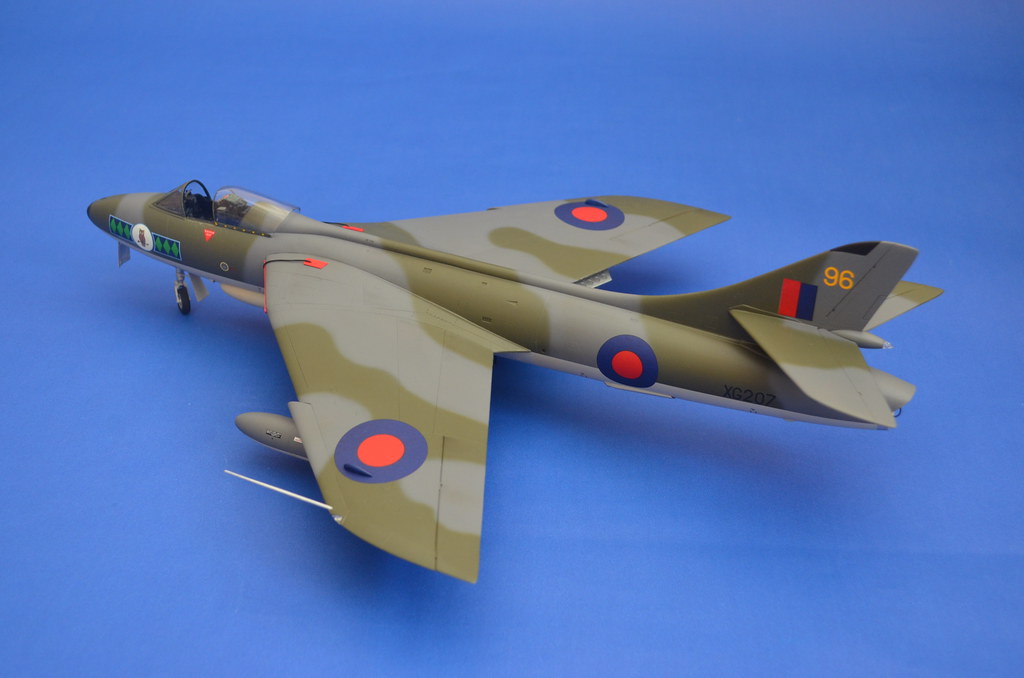
Hawker Hunter FGA.9, XG207, 58 Squadron, RAF Wittering, mid-1970s.
-
46
-
3
-
-
19 hours ago, christian Boehm said:
hello Black Knight and Tom , thanks a lot !
Tom , it seems you were crazy invested in this subject even while getting tne orginal Boeing plans ! (the fact many 72nd scel plans of tyhat "beast" are wrong, I know...
Let me be quite curious :
Do you live in US ? ( I had the chance travelling to USA 15 times ( job or tourism ) in my life , while in Seattle, I visited the Boeing museum)
And, as well ,I took pictures including interiors , but reallized many restored planes are wrong painted
So your words sound very objectiv and true
I was aware of the wood floors and , as well about black ones in cockpit and on the center part of back fuselage floor, under the "gunner's feet !
It seems these black surfaces were perhaps anti -slip carpets , not ?
I thought about sticking very smoth black grey abrasive paper... ( easy to find 1000 or less texture just well for 1/72...)
The squadron Signal Walk around Nr 16 shows many colours shots, yes but ....many restored planes are wrong painted....!!
But sorry to bore you , please :
1° were compartment vertical panels natural aluminium as well ? most models and pictures show any way int green for that sections ...
2° was the front post (bomber & navigator side panels as well unpainted
3° and the bomb bay with its doors ? often showed Int green also...(except bomb racks)
I built a Hasegawa B-17F about 20 years ago ; now , I don't like the cam OD painting I did it too dark ......
My "G" will be natural metal (I use alclad)
Did you build B-17 models ?
A friend of mine built a crazy 1/32 !! If interested I can send you pictures on the forum
Thansk 1000 times !
Christian
Hi Christian,
I’m from England but have been in love with the Fortress since I can remember. When I was a wee lad my dad gave me a 1/48th Monogram B-17 to play with and my life long obsession with the Fortress began then and have never stopped! I even visited the US a few years back specifically to fly in a B-17 and what an experience that was!
You are correct in saying that most restored B-17s are painted/restored incorrectly but this is due to conservation - painted interiors help prevent corrosion. Why interior green is usually used is still beyond me - although Yankee Lady is painted inside at least they’ve used Bronze Green which is the correct colour. Sentimental Journey is the most accurate warbird - she’s been left in her factory finish aluminium inside.
Doors were indeed left in natural wood from the factory - the only exception is the one at the rear of the cockpit which was often (although not always) painted in Bronze Green on the flight deck side. However, this does seem to vary between airframes and batches. All other doors were unpainted.
The nose compartment was unpainted in all models, with the exception of the rear bulkhead which was Bronze Green. Models up to mid-batch Fs left the factory with an olive green noise deadening material between the ribs and stringers, but this was deleted from production as it proved to be a fire hazard. Many had it removed when in service, too, revealing the natural aluminium beneath. This was also fitted in the radio room up to mid-batch Fs too, but the bulkheads were aluminium.
Bomb bays were unpainted on all G models - including the racks. There were some F models which had their bays painted in Neutral Gray (Memphis Belle included) but I’ve not been able to pin down exact construction blocks yet - they do all seem to be Boeing built though. By the time the G model was in production, no paint was used - including on the doors.
However, it does appear that there are some exceptions the rules above. Keep in mind over 12,000 B-17s were built in three different factories. Douglas built B-17s did seem to have more green used inside - I have managed to track down one image of a crashed B-17 and it appears the radio room walls were painted. It’s the only picture I’ve ever found showing paint in the radio room though.
Also, with many parts manufactured and prepared by subcontractors, there was/is some variation. I have seen pictures of some ribs and stringers in Zinc Chromate Green primer, as well as other various interior parts. However, B-17s were never fully painted inside - at least I’ve never found a photo of one and the Boeing construction manuals specifically state that as such.
What’s important to remember is unless you have a specific photo of the interior of a specific aircraft in time, no one can prove you right/wrong either way - and even if they did it’s your model so who cares!
-
4
-
-
5 hours ago, mike_hore said:
Ok, I’ve bitten the bullet and ordered the Anigrand kit. From the cost of that beast in Aussie dollars, and assuming if Kinetic ever go ahead it could be double the price, I couldn’t have afforded Kinetic anyway. As it is, to save my marriage I won’t be buying any more kits for a couple of years. But that’s ok,it will take me that long to build it.
As I said I like to demonstrate a lot of the moving bits like flaps, slats, spoilers and gear which are really fascinating on that a/c. I’m less interested in the interior, but I’ll no doubt try something there as well.
A couple of more-or-less failed attempts with the 1/144 Revell have convinced me that it’s 1/72 or bust. Anyway this will certainly keep me out of trouble for a LONG time…Just be aware that the early versions of the Anigrand kit have the wing a scale 6 feet too far forward which ruins the look of the model. I believe later versions were corrected but it may be worth checking. Also, the whole cockpit and nose is totally wrong - again it can be corrected but it is a lot of work.
I built the Combat vac a few years ago and it seems it was a direct copy of the Anigrand kit (or vice-versa) and it proved to be a lot of work to get it up to scratch. However, it was a lot of fun!
-
1
-
-
2 hours ago, brianthemodeller said:
Could you not simply put the new decals over the old ones? Or is it too late for suggestions like that?!?
Unfortunately I think this will just exacerbate the problem - I’ll likely get silvering on top of silvering. I’ve resigned myself to another re-spray but have had enough for the time being. I’ve got plenty of other projects to keep me amused until the Vulcan juices start flowing again… I’ll definitely finish it but need a break as I’m fed up with the hassle!
-
1
-
-
8 hours ago, gunpowder17 said:
Im not sure its a time thing. I remember when i built one not long after they came out , i had exactly the same problem. I put them over wet Klear and then put more klear on top and they still silvered!
That’s exactly the same method as I’ve used - and getting them off is now proving rather problematic..! I’ve got most of them off, but inevitably it’s damaged the paint - out with the masking and airbrush (again) it seems.
I’m rapidly losing interest in this project as it’s becoming a real faff, so it may well be consigned to the loft for a while until I get the urge again.
-
7 hours ago, Pajarito said:
Hi Ed,
Thank lots for the info; highly appreciate it.
Incidentally; I'm building mine (XM607, I mean) during her first Black Buck mission raid, all with Dash-10 and nose vortex generators. I take it that the colour of the lower grey was darker than Light Aircraft Grey? I'm planning to use MRP. Any idea what MRP numbers these specific BS would match?
Thanks once again, mate.
Cheers,
Igna
@treker_ed has covered the colours above… and I believe Black Buck Vulcans were resprayed Dark Sea Grey on their lower surfaces for those missions. They also painted out the squadron badges and City of Lincoln emblems on the tail.
In other news, I attempted to apply some decals yesterday… their age has conspired against me and they have silvered terribly - even over the super smooth gloss and a bed of future. Not happy. They’ll have to come off and I’ll need to raid the spares stash - which won’t be easy for some of the Vulcan specific stencils. One step forward, two back…
-
1
-
-
I’ve spent many years studying the interior colours of the B-17 and my research, although far from definitive, points to the following…
- B-17 interiors of all models were unpainted with the exception of the flightdeck. Specifically the G model was as follows:
- Exposed metal in this area was bronze (or dark dull) green, with olive green padding on the sidewalls.
- The nose, bomb bay, radio room, rear fuselage and tail turret were left in natural aluminium.
- Floors were natural wood with black anti slip mats fitted throughout.
- Inside of wheel bays, engine cowls and flaps were all aluminium.- US Interior Green was never, at any point, used in B-17 production, despite it usually being plastered all over the insides of 99% of B-17 models built.
The above info comes from studying probably thousands of WWII era pictures as well as the Boeing production manual so I’m fairly confident it’s accurate. If you want any more detail then do ask as I’ve got lots of extra detail if needed. To give Airfix credit, their interior paint instructions are pretty accurate in their new tool kit.
Best regards,
Tom
-
10
-
7
-
-
17 hours ago, ColinChipmunkfan said:
Excellent work, lovely paintwork. The intricate work you have done in the bomb bay looks magnificent. You have done a great job on this Aeroclub Vulcan. It was a sad day for modelling when John Adams retired.
Cheers, Colin - the bomb bay was a lot of extra work but I feel worth it. Although sadly very little is seen when on the display table!
17 hours ago, Robin-42 said:Magnificent work on a great a rare kit. I am glad you are ruining the value by building it!
Ha! The fact that this was already cut from the backing meant I didn’t feel so bad about building it. But, saying that, even if I did have a mint one I’d probably still build it - it would be very expensive loft insulation otherwise and kits are made to be built!
2 hours ago, Quiet Mike said:Well saved Tom, looking splendid now, and we'd never know!
I find it strange how brutally hard we are on ourselves when we make simple mistakes, yet so readily forgive others when they make them?Looking forward to the next update, hopefully mishap free!
Thanks, Mike - I did need to take a few deep breaths and step away as I was furious with myself. I’m glad I didn’t send it for a test flight though…
2 hours ago, bar side said:Looked very nice indeed Tom. Easy to mess up an area that size when spraying. I guess you are on week two of the Easter break? I didn’t start the two week until Easter so sneaked away for some sun so no modelling happening with me
Yes - being a private school I get closer to 4 weeks so plenty if bench time! I’ve actually got three builds in the queue and ready for paint so I’m making the most of time away from the classroom. Enjoy the sun - we could do with some of that here…
-
1
-
-
I’ve taken advantage of some time away from the classroom and have splashed some paint on the big brute of a Vulcan.
Xtracolor enamels are my go-to paint brand - whilst they’re a bit ‘pongy’ and take a good 24hrs to cure, they’re bullet proof and provide a beautiful gloss finish perfect for decalling.
I first sprayed the RAF Dark green, and then this was masked to give the hard edged camouflage pattern seen on the 1970s/1980s scheme - that’s a few hours of my life I won’t get back!
It was when I was merrily spraying the Medium Sea Grey that disaster struck - I hadn’t secured the lid on the airbrush paint bottle properly (I think it was cross-threaded) and as I began working out from the centre of the model, I realised far too late that paint had been dripping out and all over the carefully applied green… I managed to take a step back and avoid putting my fist through the model and put it out of sight whilst I gathered myself after such a major setback!After a day or two to cool off, I stripped the whole lot off and began again - along with another 3 hours of masking time lost to the modelling gods. Anyway, over the next few days I got the main camo done - along with the Light Aircraft Grey undersides. 5 tins of paint later and here we are:
It’ll now sit for a week to allow the paint to harden fully, before getting a good polish with some micromesh to remove the small paint ridges left over from masking and I can finish the detail painting before adding some decals.
Until next time,
Tom
-
42
-
1
-
-
10 hours ago, jenko said:
So would Tom Probert.
Guilty.
-
4
-
-
A couple of interesting review videos for those interested:
https://youtu.be/uGJOloLAgyc?si=du19_2H_T_77pFrQ
-
4
-
-
Good Lord that’s a beauty!
-
1
-


Fast jets in Greece
in Aviation Photography
Posted
There really are some wonderful pictures here - and the thing that strikes me is the variation in finishes on the airframes. Some are weathered to the point of looking as if they are going to fall apart, and others are more or less pristine. And this varies hugely between air forces, and also within the range of a particular aircraft type in a particular air force - it's really quite fascinating!
Thanks for sharing!
Tom