

Royster
-
Posts
496 -
Joined
-
Last visited
Content Type
Events
Profiles
Forums
Media Demo
Everything posted by Royster
-
1:48 Hasegawa Sea King Mk4 (ZF121)
Royster replied to Royster's topic in Work in Progress - Aircraft
Now this didn't turn out to be such a pain after all and was quite enjoyable using fuse wire I tagged one end to the middle section and trailed the remaining around the head then back under. I know there's more going on than I have even attempted but I think it looks reasonable enough. and the finished article. If you look closely you can make out the droop stops that are missing from the detail that I HAD to include for peace of mind! haha I think that I'm about 98% complete here so hope to be done very soon thanks for stopping by -
Airfix 1/72 A-4B - almost OOB
Royster replied to HansReggelsen's topic in Work in Progress - Aircraft
Ah loving this build thread! Those are coming along a treat -
There's a lot of great builds happening at the moment and your's is no exception! What the hell do I build next?
-
Looking great so far, can't wait to see them all painted up!
-
1:48 Hasegawa Sea King Mk4 (ZF121)
Royster replied to Royster's topic in Work in Progress - Aircraft
Thanks Rob! Well with the progress I've made I'd like to finish before the cold weather puts the Man Cave off limits unless I want an enormous heating bill or frost bite! So Mostly left over in Rotors. Tail Rotor first. When all assembled the soft metal set that comes with the flight path weighs quite heavy and feels somewhat delicate. This proved correct when trying a dry fit of the assembly to the tail pylon. I knocked the pylon off which after hitting the carpet made the tail rotor disintegrate into it's component parts... So back to the drawing board I decided to create my own lightweight version using the 5 bladed kit parts (from both kits) thus: After jigging them together on a template I have the following: Then the painting began So Eventually I have the finished article all ready to fit With that out of the way It's time to tackle that scary area the Main Rotor Head!!! So far I'd infilled the blades to look like composite from the kit steel blades - With 1 blade test finished which I'm quite happy with More soon thanks for looking in -
1:48 Hasegawa Sea King Mk4 (ZF121)
Royster replied to Royster's topic in Work in Progress - Aircraft
Sounds like an awesome experience Tiger331 and thank you for your encouragement. I've found and error in this decal sheet can anybody else spot it? I only found it whilst in the process of applying! Grrrrr. -
1:48 Hasegawa Sea King Mk4 (ZF121)
Royster replied to Royster's topic in Work in Progress - Aircraft
Thanks Igor, Thanks for the share Tony and your kind opinion, your's looks cracking! Wish my glazing looked like yours for a start! and your HF aerial is taughter too! -
1:48 Hasegawa Sea King Mk4 (ZF121)
Royster replied to Royster's topic in Work in Progress - Aircraft
Ok Ex-FAAWAFU I confess I was a triple trader haha Time for an update: I wasn't happy with the American tail pylon So I put together a replacement and doctored it to something I'm much happier with All decals applied, all aerials fitted. Just need to sort our the SACRU and flot bottles (The Flightpath parts for this are very over-scale so not quite sure how to go about that yet.) Also decals are difficult to not silver even with Sol. Thanks for following... -
Airfix's new Harrier GR.1 - a build review
Royster replied to Paul A H's topic in Work in Progress - Aircraft
Loving your work -
I quite fancy this kit myself so will look in on your build as you go. That's some cracking progress too!
-
Airfix's new Harrier GR.1 - a build review
Royster replied to Paul A H's topic in Work in Progress - Aircraft
YES! Now where's that popcorn?! -
Love it! A lesson in "how it all should be done" demonstrated here me thinks! Quite fancy a crack at this kit too one day!
-
1/72nd scale Vickers VC-10 C1K - FINISHED
Royster replied to tomprobert's topic in Work in Progress - Aircraft
What a gorgeous aeroplane! Lovely work so far! Very Gerry Anderson! Is this the plane that has rearward facing passenger seats? If so I flew to and from Norway in one! Never had the urge to take more notice back then, but heyho. lol -
Airfix 1/48 Sea Harrier FRS.1 - another bite of the elephant
Royster replied to NickR's topic in Work in Progress - Aircraft
Cracking idea and very intricate! -
F-16a Venezuela Air Force Italeri 1/48
Royster replied to nionios_v's topic in Work in Progress - Aircraft
Very impressive work -
Idolmaster Harrier: Not so grey and boring...
Royster replied to LeVi Tophatter's topic in Work in Progress - Aircraft
Looks epic! what a scheme. Love how it actually suits the venerable Harrier! -
1:48 Hasegawa Sea King Mk4 (ZF121)
Royster replied to Royster's topic in Work in Progress - Aircraft
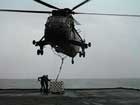
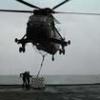
Thanks everyone for your kind words, sometimes you can sit back and see that your kit looks awesome then when viewed in a zoomed in image looks to be a bit garish! @ Ex-FAAWAFU: I compared Tamiya's olive drab to actual mod issue olive drab (as supplied by old Sqdn friend) and they are extremely close. perhaps the real deal has a touch more green than Tamiya but it really isn't that far away to give results as above. Glad you like the exhaust method with the following images hopefully you'll see better than that above. I also found nose bay images very lacking but felt I had to put something in there, being a closet greenie ahem grubber! This image seems to have been taken by an old friend of mine, nevertheless his copyright is maintained. Great shot of the a/c and era I'm going for! Stub wings assembled and foibles remaining will be sorted before paint. All parts now hung primered ready for drab olive All drab olive'd Assembled shots and the last you'll see these aspects until the day she's finished. Will probably display with spread tail and folded blades, therefore the flot cans will not be fitted so I drill out the holes for some authenticity. Only things left to do are tail pylon, rotor head, fuse bits and bobs, decalling and weathering... Thanks for coming to look and all your comments. -
Building from scratch KC-10 Extender 1/48
Royster replied to Paulo Regini's topic in Work in Progress - Aircraft
Still impressed! reminds me of the wind tunnel models we get involved with. -
1:48 Hasegawa Sea King Mk4 (ZF121)
Royster replied to Royster's topic in Work in Progress - Aircraft
Hi, thanks for looking everyone. I've fixed the images (something to do with permalinks of course) Anyway a small bit of progress and things are beginning to take form Some matt black added a dayglo mix of Tamiya red and orange and filler caps just red. Window tape removed and windows cleaned. Exhausts finished, ALQs finished. Grey lining around front side windows as in some ref images I have breaks up the green a bit Another angle and one final image Next up she'll be sitting on her own tricyle cheers -
That's very impressive. I like how this is coming along
-
1:48 Hasegawa Sea King Mk4 (ZF121)
Royster replied to Royster's topic in Work in Progress - Aircraft
So not being happy with colour, I made a quick swatch Therefore I went with Tamiya XF-62 (Drab Olive) It doesn't look quite right in the above image, but a leap of faith and a brush with Klear has produced the following and I'm happy with that So colour detailing next time, thanks for looking -
1:48 Hasegawa Sea King Mk4 (ZF121)
Royster replied to Royster's topic in Work in Progress - Aircraft
Thanks Martin, I'm terribly sorry to all who are trying follow my build, that my images seem to be coming and going, They should stay around now. Will try to get a better host if not. Some small progress Primered and areas filled And with some xtracolor RAF green, not sure that this was the correct shade. with flash without flash So gave it a coat of Klear So I'm still not convinced of the colour -
WWII RAF Bomber Re-supply Set - 1:72 Airfix
Royster replied to woody37's topic in Aftermarket (updates/conversions)
Airfix are just getting better and better! Their attention to detail nowadays is awesome. our company specialise in high precision engineering and we've made some mould tools (DVD cases, railway track gauges amongst others) but just looking at the bicycle, it's a simple shape but damn tricky to create a mould tool for! Really well done Airfix -
Nice job! What make of colour is the beige?
-
1:48 Hasegawa Sea King Mk4 (ZF121)
Royster replied to Royster's topic in Work in Progress - Aircraft
Engine exhausts. The kit doesn't have to drive shaft tunnelling within the can and this is quite an important detail point if it's going to look 'real' - Last time I built one of these I just cut up some sprue but wasn't happy with the look. This time I used some brass rod and drill through to see if that worked better. Here they are assembled And needing some minor refinement here's the end result: Lastly so you're up to date the tail pylon: This had already been part assembled in the donor kit so I chose this rather than build another. I drilled out the shapes on top and added some PE. Hopefully will add to the realism once all painted. I also drilled out the oil level view ports and the tail fold pole hole - try saying that out loud!!!! Because this is the SH-3H set, the Stabiliser is the long variety with strut Holes. Therefore I cut it short, filled the aperture and filled the strut holes That's where I'am at right now so I hope to be masking and painting next time. Unless I've forgotten some other PE or detail or something............ Thanks again
