


beeza1
-
Posts
206 -
Joined
-
Last visited
Recent Profile Visitors
1,701 profile views


beeza1's Achievements
")
Established Member (3/9)
33
Reputation
-
Salmson Moineau S.M.1 Copper State 1/48
beeza1 replied to Sergey's topic in Work in Progress - Aircraft
Thanks very much Sergey for the link, I will let you know if I have any issues ordering the PE. Des. -
Salmson Moineau S.M.1 Copper State 1/48
beeza1 replied to Sergey's topic in Work in Progress - Aircraft
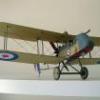
You posted a photo of a PE fret with a heap of control horns, could you please tell me where you obtained the set, I would like to purchase a couple of sets. I just completed the same model, Edgar sent me the kit and asked me to do a build log on my forum, here is a photo of the completed model, it was a real joy to build. Des. -
That is a very nice looking model with some great colour schemes, this is a great addition to the 1:32 scale range of aircraft models. Des. http://forum.ww1aircraftmodels.com
-
Here are some photos of my recently completed scratch built 1:32 scale Voisin III. This was a very enjoyable build where I picked up a lot of new techniques, I am very pleased with the way that it turned out being my very first scratch built model. The rigging is very complex on this aeroplane but I tried to keep it looking as close as possible to the real aircraft. A full build log of this model can be found on my website http://ww1aircraftmodels.com or for a condensed version on my forum http://forum.ww1aircraftmodels.com Des.
-
New WW1 aircraft modelling forum launched World War 1 aircraft modellers have a new online forum soley dedicated to ww1 aircraft models and modelling. http://forum.ww1aircraftmodels.com/index.php This is an extension of the existing ww1 models website run by Des Delatorre, who is well known in WW1 modelling circles. His site is an invaluable resource for WW1 aircraft modellers. http://www.ww1aircraftmodels.com Des is one of the nicest gentlemen in the hobby and wanted to create a forum by a modeller for modellers and not simply an add-on to WW1 history sites or general modelling sites, which has been the situation to date. The creation of a new WW1 models forum run by a modeller for modellers augers well for the future. Des wants to be a complementary WW1 specific site to existing respected hobby sites such as Britmodeller. Des invites you to the web's newest WW1 aircraft models forum and would also be very grateful if you could spread the word of the new site among your other WW1 modelling friends. http://forum.ww1aircraftmodels.com/index.php Cheers Dave Wilson Gold Coast Australia
-
Thanks guys for your kind words. T-Tango - I have not done the Daimler-Mercedes D.III yet, but it is close. Des.
-
Thanks for the wonderful comments. Copper wire and brass tube are the two main materials I use when detailing. Copper wire can be found in all electrical cables and once the plastic outer covering is removed there is a wealth of wire available, electronic cables contain very fine wire, down to 0.08mm and usually about 12 - 20 strands per cable, some copper wire is plated which is even better. The micro brass tubing starts at 0.3mm and goes upwards in sizes, it is great to work with, easy to cut, accepts CA very well and can be polished to a high shine. Micro drill bits are another item which I keep a good supply, the most common ones I use are 0.2mm, 0.3mm, 0.4mm and 0.5mm, they are all used in a hand held pin vice. 85% of my work is held together with CA with plastic glue only being used for larger items, I prefer the very runny CA as it flows into all the little crevices before setting ensuring a very strong bond. My main tool for applying a small drop of CA is a piece of 0.13mm copper wire, I dispense a small amount of CA onto a non absorbent material, then I dip the end of my wire into the glue, a very small droplet will adhere to the end of the wire, I then apply this little drop to the appropriate area to be glued. The small amount which I dispensed from the tube can only be used for a short time because CA does "go off" very quickly and looses its affectiveness. In an average week I would go through about 8 - 10 tubes of CA, so I buy from a wholesaler in bulk lots, I usually have around 50 tubes on hand most times. Hope some of this has been helpful. Des.
-
I finally completed the Liberty engine, it was an absolute joy to build, Wingnuts have done a superb job creating this model. Here are some photos of the finished engine. Thank you to all those who left comments and also to all those who took the time to look. Des.
-
Thanks guys for your nice words. Will - I painted the exhaust with Aqueous Hobby Color H76 (Gunze). I added a small amount of lacquer thinners then air brushed at 20psi. I did no surface preparation to the exhaust, once dry, about 2 hours, I buffed them lightly with a soft brush. Mike - The Liberty V12 Aero Engine specs as follows; 5in bore and 7in stroke 1,649 Cubic Inch 400 Horse Power at 1,800rpm 786lb dry weight Over 20,000 built Des.
-
I have added all the ignition leads and the ignition lead tube, the magnetos have also been added and wired up. As this engine is being depicted as a brand new engine I painted the exhaust to match, I used Gunze Burnt Iron thinned with a little lacquer thinners and air brushed. This engine is just about completed. Des.
-
If you are going to use it for the tail boom assembly then try micro brass tube, it comes in size from 0.3mm upwards, easy to work with and is readily available. Des.
-
Thanks very much for all the nice words, they are much appreciated. FZ6 - The engine supplied by Wingnuts is a kit in it's own right and would look perfectly OK if built OOB, I add the extra detail for my own satisfaction. I do this type of detailing to all the Wingnut engines I have built and in most cases I display the models with the engine cowls off, here are a few more of the Wingnut engines which I have added detailing, hope you like them. Des.
-
I have just about completed the Liberty engine which belongs to the Wingnuts DH.9a kit. I have added quite a lot of extra detail to this engine as it will be in full display when fitted to the aircraft. As you can tell the propeller will not be fitted so I made the prop mounting plates and bolts, also the 12 priming taps, 24 new spark plugs, all the hose clamps, extra plumbing plus a few other extras. This engine has been a joy to build with the fit of parts being excellent. A full build log of this engine can be found on my website. http://www.ww1aircraftmodels.com Des.
-
That would have to be the nicest collection of WW1 aircraft models I have ever seen, brilliant workmanship. Des.
-
I would like to thank everyone who left wonderful comments about my build, they are much appreciated. also a big thank you to all those who took the time to look at my build, I hope it has inspired others to build this great model. The Spad was never very high on my list of favorite aircraft, but since completing this build I now put it up there with the best, it is a lovely little aeroplane and certainly compliments my other WW1 aircraft models. Des. A full build log of this model can be found here http://www.ww1aircraftmodels.com
