


mitchem
-
Posts
1,496 -
Joined
-
Last visited
-
Days Won
7
Content Type
Events
Profiles
Forums
Media Demo
Posts posted by mitchem
-
-
2 hours ago, TheyJammedKenny! said:
What's your plan for tidying up the wing roots?
It's looking great so far, BTW.
Alex
Many thanks for the advice Alex. Sounds like just enough time to try and mate the engines to the wings, although this could be harder than I had hoped - the raised portions under the wings appear to be slightly wider than the aperture in the tops of the engines. Not sure if I should try spacer bars or just pull out the old 240 grit and sand the the raised portions into oblivion.
I reckon I should be able to mask the fuselage up before adding the wings to the fuselage. The joints don't look to bad, and if the current paintwork is protected, I should be able to blend everything in before sanding it smooth.
mike
-
 1
1
-
-
Many thanks for the support - much appreciated.
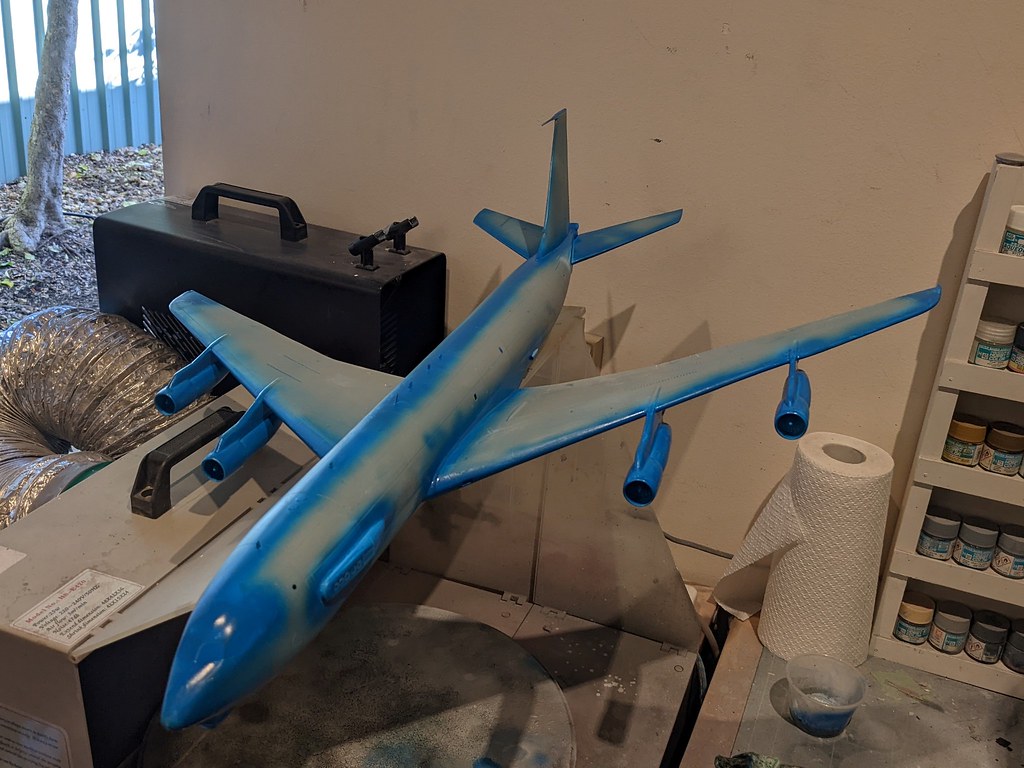
Fuselage cheatline has now been completed, but I'm really struggling with the tail stripes / cheatline join. There are some complicated curves at the back of the fuselage and laying down the masking tape has been a bit hit and miss. I'm hoping that once I've sorted out the starboard side, I can use it to make a template for the port side.
I also removed the cockpit masks to give the pilots a bit of a view 😁

View of the port side (some minor touch ups required) :
and a dry fit of the wings (for motivation) :
I may have to take a bit of a break from the build as the Halford's Gloss Appliance White seems to feel a bit tacky at present. Not sure if it's due to all of the masking tape that has been used, or if it's because of the atmosphere of self-levelling thinners? (Answers on a post card if anyone has any ideas ?)
Thanks for dropping by.
mike
-
15
-
-
-
1 hour ago, Viking said:
That is a nicely animated little diorama Mike, not your usual fare, where do the passengers sit? 😉
Cheers
John
Thanks John. I had to get something finished, and as for the passengers ?...
...let's just say that they're still sitting waiting patiently for the Air Zimbabwe flight under construction in "Work in Progress". 🤣
mike
-
 1
1
-
-
1 hour ago, keefr22 said:
Glad to see it back in progress Mike!
K
Thanks Keith.
I'm sure it won't be finished by September and having shifted my attention to the other KUTA build, I've spent most of the weekend remembering why I shelved it in the first place 😱
Anyway, back to the 737. I took a bit more care in removing the remainder of the window masks, and then touched up around the window frames with all four colours, The forward section of the cheatline has had the yellow base colour added, and to my surprise, it lined up on the nose cone with the yellow base coming in from the port cheatline!
Heading in the right direction, slowly but surely.
mike
-
12
-
-
Bit by bit, I'm losing my plot !
I removed some of the window masks through impatience. Some of the window edges are a tiny bit ragged, so I need to think about how I'm going to deal with them.
In the meantime, I'm trying to work out how to get the cheatline and tail markings to join up.
mike
-
14
-
-
On 6/25/2022 at 10:02 AM, Doc72 said:
Looks great! The arrestor wire makes it look very dynamic.
Many thanks Doc72. Inspiration was taken from a photo of 3-A-305 about to land on the carrier deck (The photo is near the bottom of Page 3 on this great reference site for Scooters : airfix-1-72-douglas-a4b-4p )
On 6/25/2022 at 11:04 AM, keefr22 said:What modest Mike fails to mention again is that this was the worthy winner of our latest club competition - amongst some great builds!
And as usual, excellent though Mike's pics are, it looks even better 'for real'!
Top work Mike!
Keith
Many thanks Keith, but methinks you're being far too generous! It helped that someone wasn't able to finish their entry in time !...
(If I don't see a Sea Harrier at the KUTA competition in September, I'll be disappointed. 🧐)
22 hours ago, Wulfman said:Super Scooter, great build !
Wulfman
Many thanks Wulfman - much appreciated.
6 hours ago, Winenut said:Very nicely done indeed
Congrats!
Many thanks Winenut - much appreciated.
mike
-
I'm afraid I've been AWOL for some time Matt, so it's good to have a catch up with your builds.
Loving the fact that your "baby steps" in decal design have reached adulthood in a blink of an eye 👍👍
I'm sure that I'm not the only one who is looking forward to seeing all of your builds completed.
mike
-
 1
1
-
-
Still glued to this with anticipation.
mike
-
1
-
-
On 6/25/2022 at 2:20 AM, Romeo Alpha Yankee said:
😱 - My eyes !!!!!!!
...have turned into little crosses 😵
mike (watching with interest, but now with dark glasses on 😎)
-
1
-
-
Argentine Skyhawk 3-A-305 returns to ARA Veinticinco de Mayo following a reconnaissance mission over the South Atlantic in 1982.
The 1/72 Airfix Douglas A-4B/Q Skyhawk kit finished in the markings of the 3o Escuadrilla Aeronaval de Caza y Ataque.
I added a replacement pilot, a couple of aerials, dropped the flaps and the tail hook, but otherwise it's out of the box.
Mounted on a base from Coastal kits with an arrestor cable made from 0.4mm brass wire - Job done!
The real aircraft was lost in an accident over BACE on 22 May 1986, but the pilot managed to eject safely.
Thanks for looking.
mike
-
50
-
-
On 6/12/2022 at 5:01 PM, billn53 said:
Those Gaspatch Komets are true gems! I really need to get mine out of the stash.
You're right! Get it out and combine it with their new Scheuch Schlepper . (Gaspatch were obviously waiting for me to finish the Me163B before they released the recovery vehicle 😁)
On 6/12/2022 at 10:40 PM, keefr22 said:Really nice work Mike - some very tidy paintwork, especially the mottling...

")
Tell me about it, my Falklands comp thing has been ready for paint for about 2 months now and I just can't get motivated....
Kracking Komet though!
Keith
Thanks Keith. You've got 8 days left to the competition and I've got faith in you. (Lucky for us that Ken finished his Neptune in Dutch colours, but the way he's been knockin' models out recently, he could probably have finished another squadron in the same time. The man is a machine, I tell you ! 🧐 )
-
1
-
1
-
-
It's been some time since I posted anything in RFI, as I kind of lost the plot with model-building.
Gaspatch to the rescue with their 1/48 Me163B. Really enjoyed the experience.
I went a bit overboard with the fuselage mottle, but that serves me right for taking too much time off 😀
Thanks for looking
mike
-
35
-
-
Been watching from the sidelines with interest as I've had the 1/32 Hunter in the loft for more years than I care to remember.
One day....
mike
-
...well I'm back after an extended hibernation.
After the original splash of Gloss Appliance White, I noticed some minor issues in the window strip / fuselage joins. Bad enough for me to move the 737 into the hangar before shutting the doors.
Slow forward nearly a year, and a club KUTA competition scheduled for August made me have another think. No choice but to sand everything back to basics, fill in the blemishes, re-mask the windows and slap on some more Gloss Appliance White.
Better than the original attempt:
Time to have a go at adding some colour using the vinyl masks that I made.
From left to right, add the colour mask to the tail before adding the offset surround, followed by removal of the original colour mask:
Same with the curved bits on the forward fuselage...
...before slapping on the yellow undercoat :
After successive masking sessions for each colour, I've managed to get the basics done:
I'll park it to one side now for the time being, while I plan my next move. I think the stripes connecting the tail to the fuselage cheatline could be a bit tricky.
mike
-
13
-
-
42 minutes ago, Pete in a shed said:
Thanks very much. It was the colour that drew me to make this version rather than the older grey one without radar or an SD version from India.
P.S did you hit the i key instead of the o in the second line .😁
Crikey - thanks for the heads-up Pete !
I reckon I could have ended up sitting on the sidelines in the second half 🤣
-
1
-
-
Eastern Express kit finished off in the markings of Aerocaribbean - a Cuban Airline that was formed in 1982, and eventually ended its days in 2015 by being merged into Cubana.
I did buy a set of 8a decs for the model, but they seemed a bit too short for the kit, and when I compared them to photos of the real aircraft, there didn't seem to be enough definition between the fuselage colours. Only one thing to do - make my own :
The kit wasn't the easiest to build and I had a lot of trouble with the propellers and the outboard engines - not nice.
Standard walkaround shots :
Time to fire up the Ivchenkos and head back to Havanna - Adios
mike
-
45
-
-
Cracking build Dave of another airline giant that is no longer with us. 👍👍
Glad to say that in spite of the original copyright issues, Brussels Airlines eventually got their man !
-
1
-
-
Excellent stuff Wally. Liking the comparison shot with the An-12 too 👍👍
mike
-
Excellent build and metallic finish there Eric. Nice to see some rare markings too. 👍👍
mike
-
1
-
-
Excellent stuff Pete. Looks very menacing in that colour scheme, and I wouldn't fancy one of those sneaking up on me 😱
Loving the comparison shots with the Nimrod too.
👍👍
-
1
-
-
I have a set of those decals in the stash, so many thanks for the inspirational build.

-
1
-
-
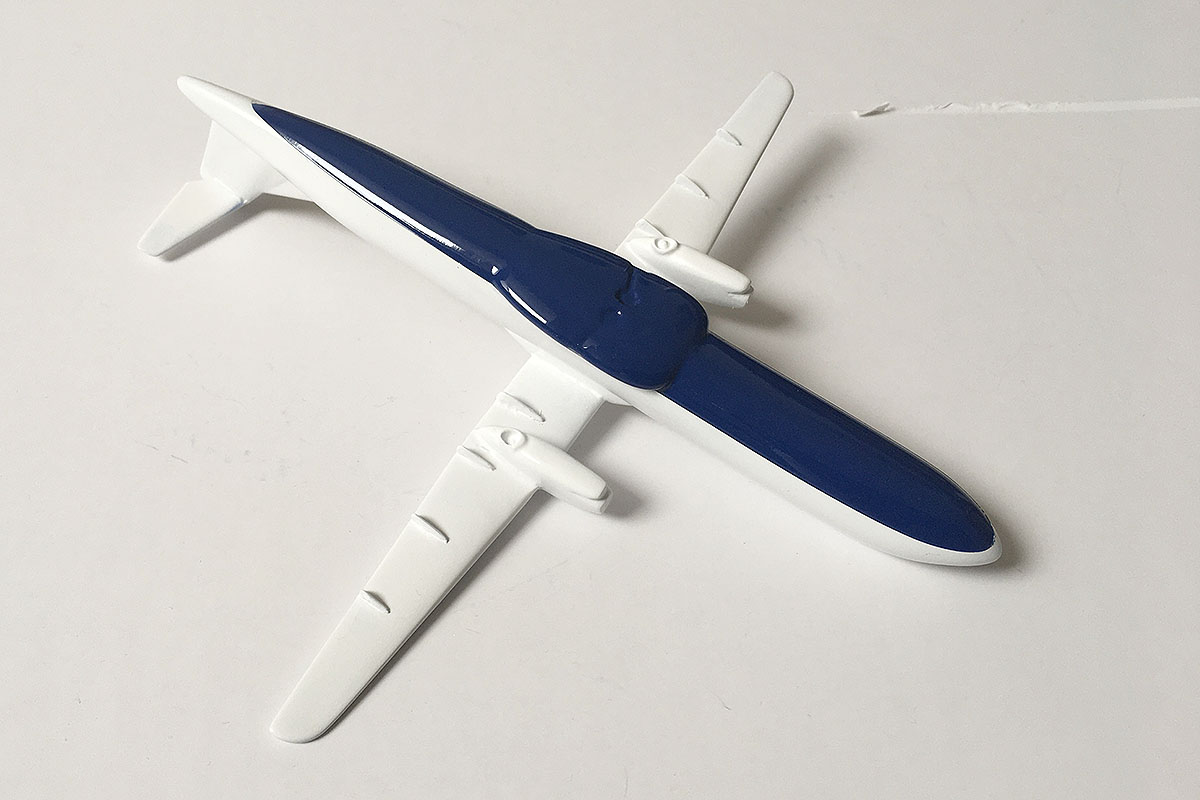
13 hours ago, Back in the Saddle said:
The blue is on:
I am now working on the undercarriage and propellors, then it will be decals and RFI!
Wow! Ever thought about taking up gem-cutting as a hobby? I can't believe that we're looking at the same kit in comparison to the "build / carving grinding" phase. 😁
37 minutes ago, keefr22 said:I'm currently 'working on' an Italeri ATR-42 - I think it might be just as bad a kit as this one
Keith
Oh Dear.....Have you just disqualified yourself from the club competition? 😛
mike
-
1
-
-
Excellent.
👍👍
-
1
-


,_Airbus_A320-214,_OO-SNB_(30766654261).jpg)
1/72 Boeing 737-200 Air Zimbabwe
in Work in Progress - Aircraft
Posted
Thanks Alex. I've taken your advice and sanded the starboard bump off and....it hasn't been missed. There will be a gap at the top of the pylon, but I should be able to sort that out when I get there. (Famous last words)
I'm speechless K, That's the nicest thing you've ever said to me (....the bit about getting your coat 🤣)