

EricP
-
Posts
168 -
Joined
-
Last visited
Content Type
Events
Profiles
Forums
Media Demo
Posts posted by EricP
-
-
I'm in too ... have the Authentic Airliners 737NG engines and winglets, would love to do one with a Scimitar winglet, just need to find the right livery.
-
Count me in too! I happen to have the Planet Models 1/72 Airabonita kit, but I can do a racer too (Accurate Miniatures), or the old MPM KingCobra (need to find a replacement canopy, the vacform ones in the kit are amber in color due to age).
-
Count me in.
-
Hi Mark, I can confirm that the wheel well colors on RSAF (Republic of Singapore Air Force) F-5s are a light semi-gloss (tending to matt) aluminum, having climbed under them at airshows and air force open days. And perhaps because they were prepped for display, the wheel wells were very clean, hence the color looked bright (I hate to disagree with Giorgio, but a grey may have the wrong hue).
I'll be following your WIPs!
Cheers,
Eric -
Thanks Tom & Rich, I'll still try to join the GB as I have a few other eligible candidates in the stash, e.g. resin-n-metal 1/72 Magna Models DH Hornet, or vac-n-metal 1/144 Welsh Valiant, Victor or Nimrod. Or really go out of my comfort zone and do an resin-n-metal Provence Moulage 1/43 racing car

-
Nice build, Steve! I like the panel line contrasts.
-
 1
1
-
-
Wow, that's really tiny! Is there a decal for the windscreen, or do you have to paint the frames?
-
Thanks, guys. A little encouragement can be a dangerous thing ... I decided to go through the "junkyard" to see what I can add, and you can see the results here
The 2 life preservers are the wheels from the old, venerable Airfix Spitfire Mk IX (yes, the one molded in light blue with solid wings!), and as rescue work can be dangerous, a weapon is provided on the rear passenger bulkhead
. I didn't want the interior to look empty, but I reckon I may have overdone it somewhat Doesn't look too bad inside the cockpit.
I also took the opportunity to airbrush the fuselage color ... my usual trick with tricky (!) gloss white is to start with a coat of flat white (Tamiya XF-2) followed by gloss white (Tamiya X-2). That allows me to do thin coats without runs or paint pooling in corners.
Test fitting the cabin again, this is what we get:
And with the engine cowling on top ...
Note that I added the "grab handles" on the tail boom with 0.5mm wire, that's quite prominent on the aircraft and not provided in the kit. Anyone know what they are?
The cabin roof is provided as a separate part, surprisingly with console switch detail which I tried to paint.
Next up are the rotor blades. I beveled a 45-degree notch on the tip of the leading edge ... bottom is original, and the top blade's done.
A bit of masking ...
And automagically they turn out like this ...
They're still not done, need to mask and paint the leading edge a dark grey/silver color.
-
2
-
-
Nicely done, and a very quick build too, Steve!
Thanks for the tip, will try that out.
-
I'd like to join in with a Welsh BAe 146-200, this may be iffy as there are a few injection-molded plastic parts in it.
Would like to check with the hosts if it's ok ... basically the breakdown is:
- Vacform: Fuselage, wheel well
- Injection: Wings, engines, vertical tail, stabs
- White metal: Undercarriage, fan faces
Cheers
-
Nice quick work, Enzo!
I can confirm that the plastic originates from HPM, and the resin and PE bits are added by PJ.
Edit: Hmm, I'm not so sure about the resin bits, as HPM produces them as aftermarket products, and the guy who runs HPM did extensive research on the tanks (dimensions, shape).
-
2
-
-
That's quick work, Steve!
-
Thanks for the comments, guys, and the advice on bending the rotor blades. I'll need to give it a gentle touch ... my ham-fisted efforts resulted in one broken blade so far (2nd from top in the pic below, doesn't come out well in the pic as I had sanded and re-primed it, though it's obvious to the naked eye).
The engine cowling came out ok, though, here it is primed.
Decided to populate the cabin ... apart from the Airfix Islander seats, which I sprayed grey with a hint of blue, I added seat harnesses and lap belts from Tamiya tape sprayed semil-gloss black, and used a punch set to knock out tiny tiny discs for the belt and harness clasps. A bit oversized, but better than nothing. The belts and harnesses I see in pics online are firmly cinched up, no free play like usual harnesses we see on aftermarket ejection seats, maybe so they don't fly around the cabin like pendulums during violent maneuvers.
The kit comes with decent control columns and oversized rudder pedals, which I left alone. I scratchbuilt the collective levers, as well as a pilot from some unknown kit. I don't know what French pilots wore, but overall khaki seems a safe bet. There's an empty spot on the rear bulkhead next to the seat, I'll probably paint a tank in dayglo orange and stick it in there for visual interest ... after it's all closed up, I doubt we can see much. In the same vein, I felt the cabin's a bit too clean, but any weathering I do is not likely to be seen, so I'll leave it alone.
-
2
-
-
Nice one, that decal sheet's looks pretty good, and I'm looking forward to seeing the awesome weathering job you'll do on this!
-
1
-
-
This looks like a nice kit, Aaron, I'll be following your build!
I've asked a question on getting rotor blade droop on Steve and Colin's threads, hope you don't mind chiming in as well.
-
1
-
-
Looking forward to following this build, Colin! I'm also building a helo for this GB with a shrouded tail rotor (a Dauphin 2)
I'd like to ask for advice on drooping rotor blades (I asked the same thing in stevej60's thread) ... what's the best way to bend rotor blades to get the characteristic droop? I'm worried about breaking them if I just used my fingers and pressure, plus they may have "memory" and return to their flat molded shape over time. Perhaps my fears are unfounded.
-
Nice, quick work on this kit, Steve!
I'd like to ask for your advice (as I'm also building a helo for this GB), what's the best way to bend rotor blades to get the characteristic droop? I'm guessing using force alone has a high chance of breaking them, and the other trick is trying to get them all to droop the same, if you know what I mean.
-
1
-
-
Thanks, Wez & Aaron ... I haven't seen this helo around these parts, and didn't know it's a noisy beast!
A bit more progress ... I'm guessing with that hefty tail, this will be a tailsitter, fishing weights to the rescue!
The only space available is under the cabin floor, and that's a narrow area just behind the nose wheel well, so round fishing weights were shaped with pliers to resemble 2 "planks". It's not that difficult, doing both of those probably took me less than 10 min while watching the idiot box. I only had to remember not to touch food with my bare hands before washing them.
Test fitting shows they do fit nicely, I'll epoxy them in at some point to prevent them rattling around.
The cabin's a bit bare ...
... a very old Airfix Islander kindly donated passenger seats ...
They fit rather well, perhaps a touch of sanding needed for the middle double row, and I'll get creative with the rear seats, maybe putting in some "rescue" equipment in the open space. Or maybe a mini-chaingun
Started work on the engine cowling, the seam's not too bad but still need some sanding to even it out.
-
2
-
-
That's a good kit, Graeme, HPM did a great job on them, real beauties with great detail. I have a single-seater that's been in limbo for a year or so, no fault of the kit's, I just got sidetracked. Looking forward to your build!
-
Hi gang, I'd like to join in the fun with a (hopefully) simple build.
I haven't built a helo for a long time, last ones I remember were the Matchbox Cobra and Airfix Sea King (Apollo recovery), and that was when they were still "current issues"
This kit is simple but good ... the fabled mad trencher must have been on vacation when the mould was cut on this kit, hence only door outlines are engraved.
This is also a "China" version of the kit ... at some stage several Matchbox kits were produced in or for the Chinese market, hence Chinese instructions and possible funky plastic. Many years ago I picked up a Matchbox Tornado with really brittle plastic that split & flaked. Thankfully this kit is not like that, the plastic is soft but workable, sort of like short run kits.
The box ends show the 2 provided liveries as nicely rendered drawings ...
... while line drawings are on the back in the usual Matchbox style ...
Nope, you will not get a "white" helo if don't paint it, despite what the box promises
Clear parts aren't bad, a bit thick but thankfully not scratched despite the age of the kit.
Decals are a bit sad ...
I put them in a ziplock baggie and left them on a window facing direct morning sun for a week, this is what they look like now.
Not a biggie, I plan to spray them with an acrylic coating as I fully expect them to shatter, and will cut close to the decals. The French cockade is also out of register, so will need to do some surgery there too.
I plan to build this as the French Air Force version, I could not find a single photo online that shows this particular livery, though the ones I found came close, with the cockade further down the fuselage rather than on the cheatline.
-
2
-
-
Deleted - it is against the forum rules, this is not the wanted area.
-
Hi Mark, sorry for the long silence, things have stalled a bit due to family and work commitments ... fair bit of drama in the latter worthy of a soap opera
I'll take a few more photos as it has progressed past the decaling stage, and is nearly finished ... but the gremlins struck again and I lost the canopies! I think I'll have to raid another kit for them, and perhaps in a few years I'll find the originals again!
-
Thanks for the comments, gents!
Been a bit slow the last couple of weeks, but got a bit more done (not as fast as some of the other members here though!)
I darkened the blue a bit on the camo and re-did it, as well as put on the IFR probe.
Next came the detail decals ... lots and lots of tiny decals that are amazingly readable (for such a cheap kit). Things like "No Step", "Press here to drain cockpit", etc. I kid you not ... under high magnification, much of the text is readable, so I needed to take care that they were aligned correctly.
The only problem (not sure how accurate it is) is that the decals are black, which contrasts with the subtle camo. Hopefully a bit of weathering and filters will tone down the contrast.
The decals even covered the Mk82s, Sidewinders and the stripes for the arrestor hook!
Too bad there's nothing for the prominent fuel tanks, I'll cobble something up ...
-
3
-
-
Been a busy week, managed to nip in to comment on fellow modelers' threads but only did bits on mine till this weekend.
Arguably _the_ definitive reference on RSAF F-5s is this decal sheet by Milliverse;
Well-researched, and with "local" knowledge contributed by the decal maker and multiple enthusiasts (including some who were in the Air Force), make this a great resource for anyone keen to build any F-5 that's ever been in the RSAF inventory.
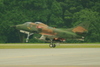
The one that I'll be building is tail #823 circa late 1980s, that still retained the red/white national insignia (rather than the low-viz grey that came in later) :
Airframe puttied
Primed
And as in every build, a bit of the ol' "what doesn't kill you makes you stronger" kind of test ... in this case the Mr Surfacer 500 bottle broke and proceeded to fill gaps for me automatically ...
A few minutes of sanding with the magical 3M sanding pads put things right.
I tested the camo as recommended ... the difference between the 3 greys (light, medium and blue grey) are pretty subtle.
-
2
-


1/48 Seated Pilot Figures Suitable For Eduard Spitfire Kits
in Aircraft WWII
Posted
Here you go ...
http://www.pj-production.be/en/figures-1-48/16-raf-fighter-pilot-seated-in-ac-wwii.html