


Sebastiano Tringali
-
Posts
28 -
Joined
-
Last visited
Content Type
Events
Profiles
Forums
Media Demo
Posts posted by Sebastiano Tringali
-
-
I update the wip of the "space chicken".
I wanted to put a captain to enhance the vehicle, so I bought the STL file online from SkulForge Studio and printed it in 3D with the help of a friend.
You can see the result in the picture, not bad at all both in terms of definition and detail ........
 [/url]
I believe this is the near future of model making, at least for accessories, detail set and figures.
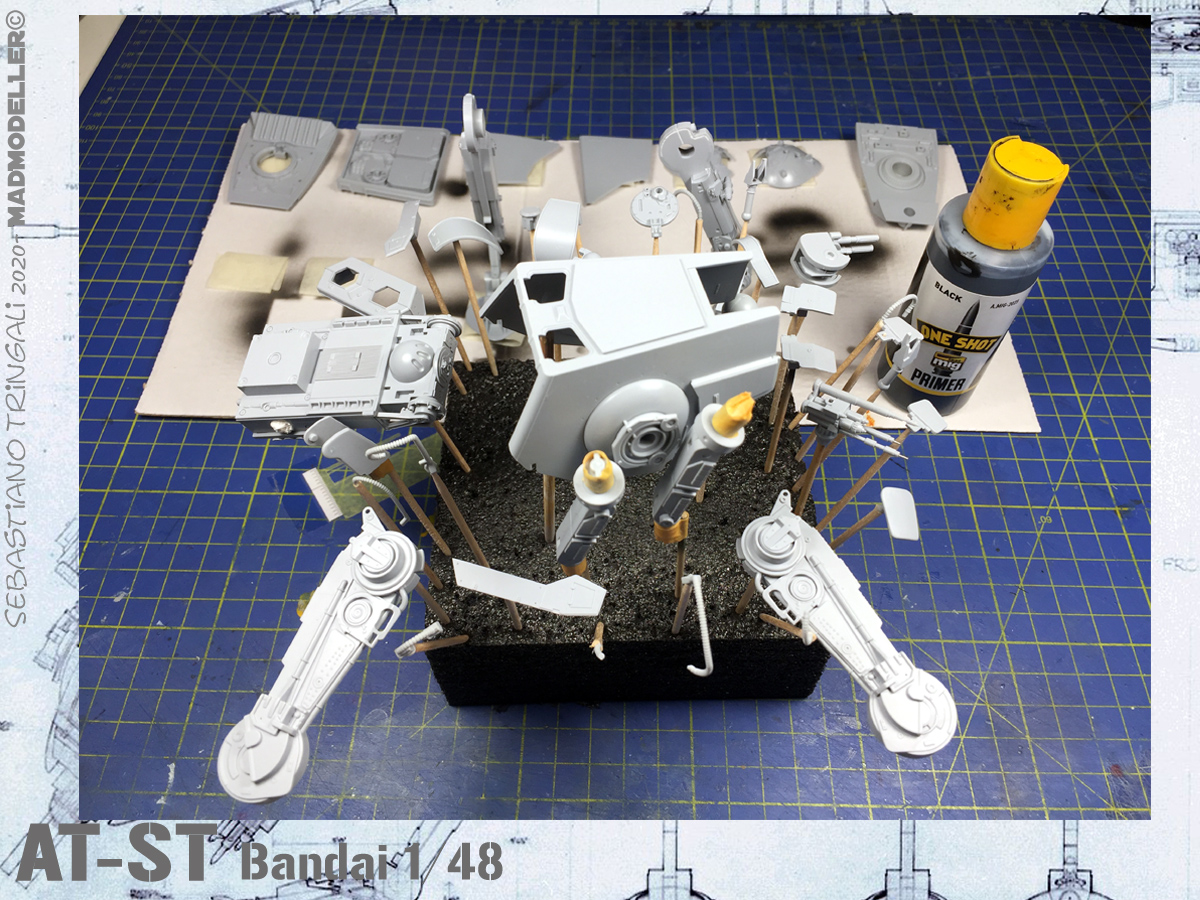
After the assembly of all the parts, I moved on to the primer painting, I preferred to leave the parts disassembled because after it will be easier for the weatherig process .........
[/url]
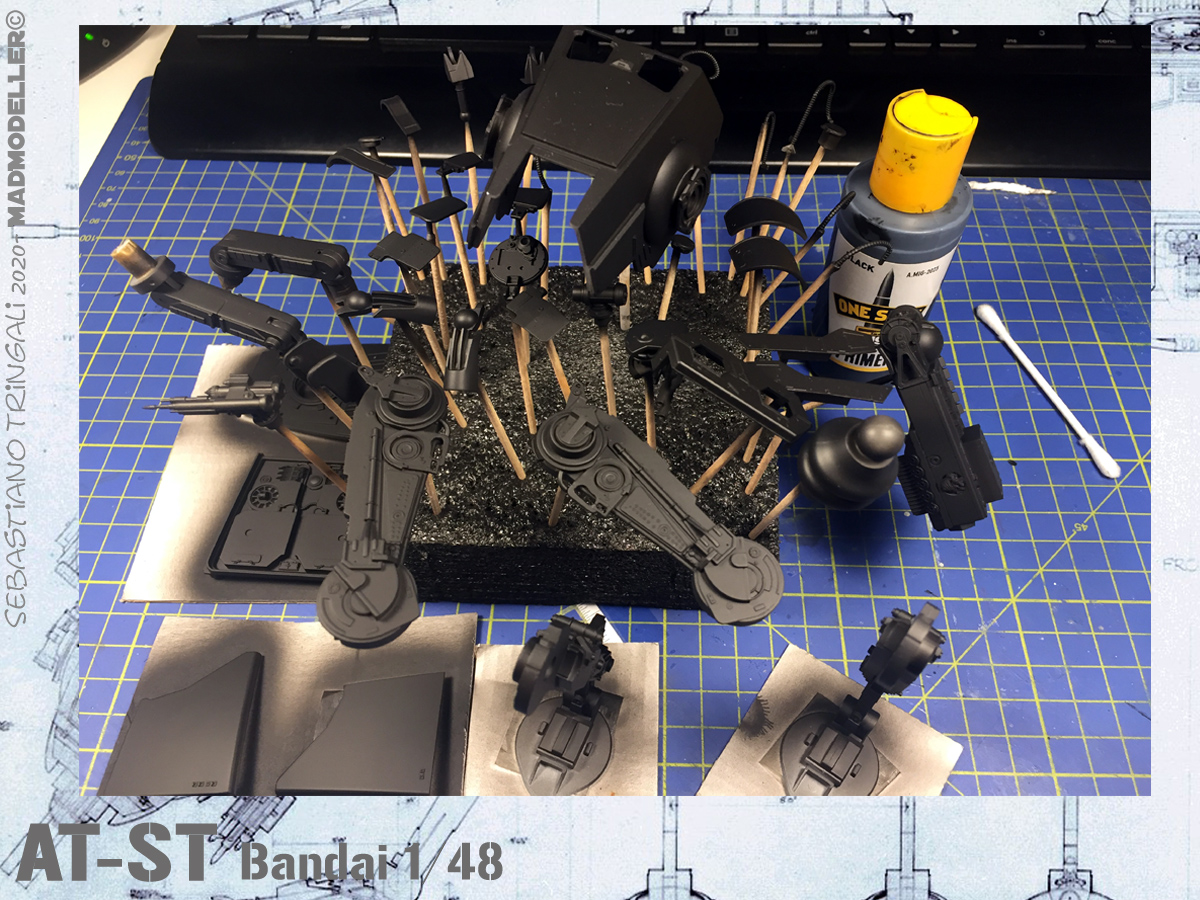
Usual black base.
This time I used Mig's ONE SHOT instead of the usual Mr. Finishing Surfacer. This primer should be given pure, but I have diluted it slightly with the Vallejo thinner.
The result was very satisfying, not at the level of the Gunze primer with the Leveling Thinner, but my lungs thank me.
[/url]
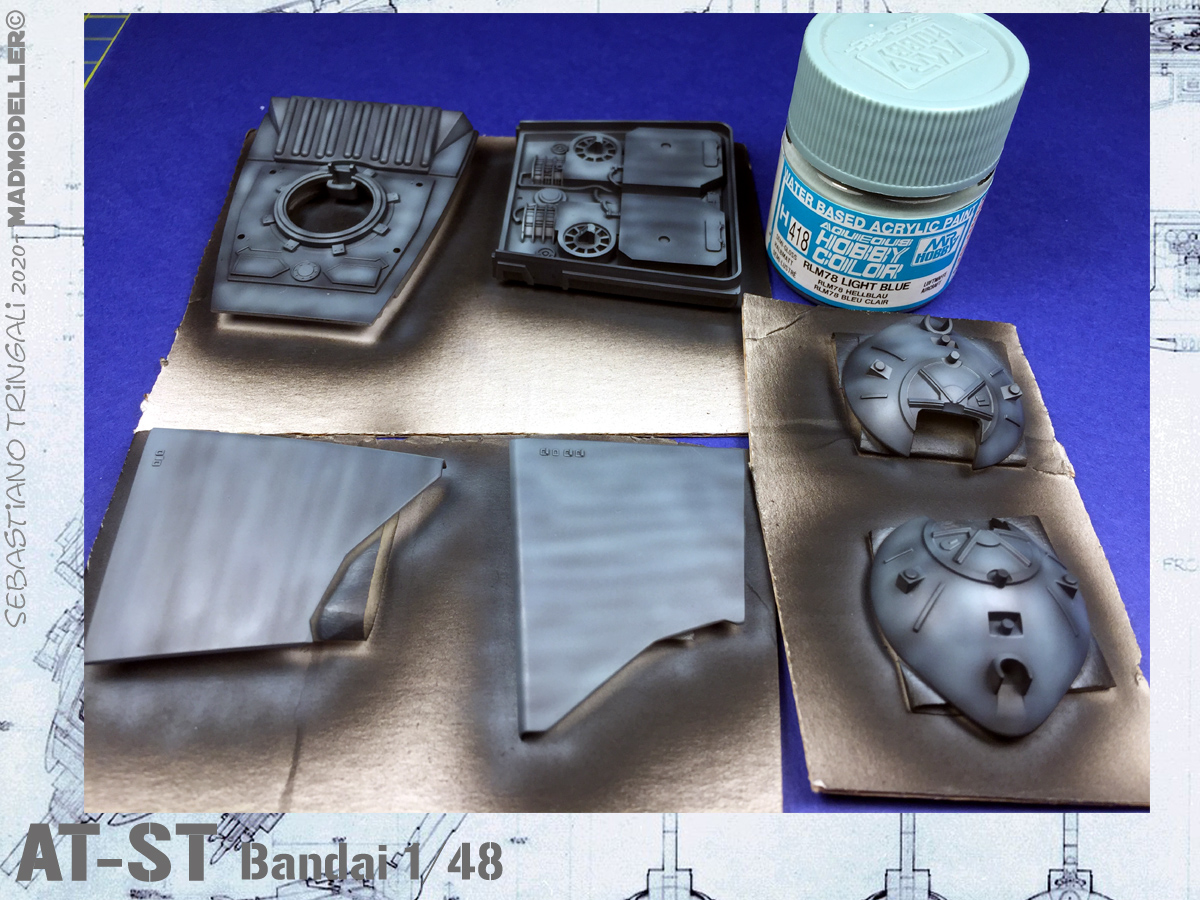
Then mixed spots with Blu ....
[/url]
RLM 78 and then sand and gray (I don't have photos of the last two)
[/url]
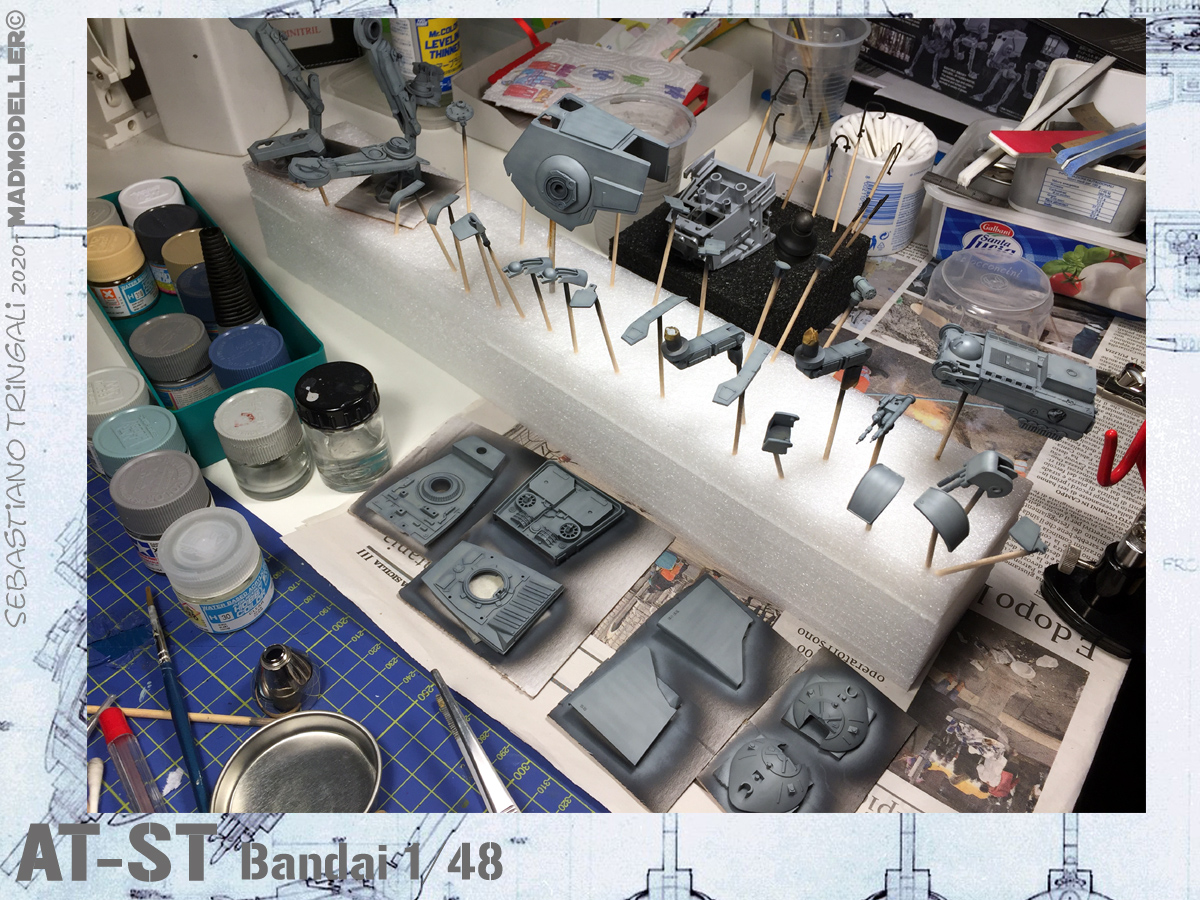
Final coloring with light shades of gray mixed by me, I wanted a slightly "glacial" shade with bluish shades so I mixed at random (but the percentages I wrote them) Dark sea gray + Rlm78 + Light Gray until a satisfactory color was obtained .......
[/url]
With all the pieces organized, I started covering with thin layers of very diluted color (about 80%) ........
[/url]
Here is the result .......
[/url]
[/url]
Next step, washes, oils and weathering ...... stuff from tank model makers.
We will see what it will be!-
 6
6
-
-
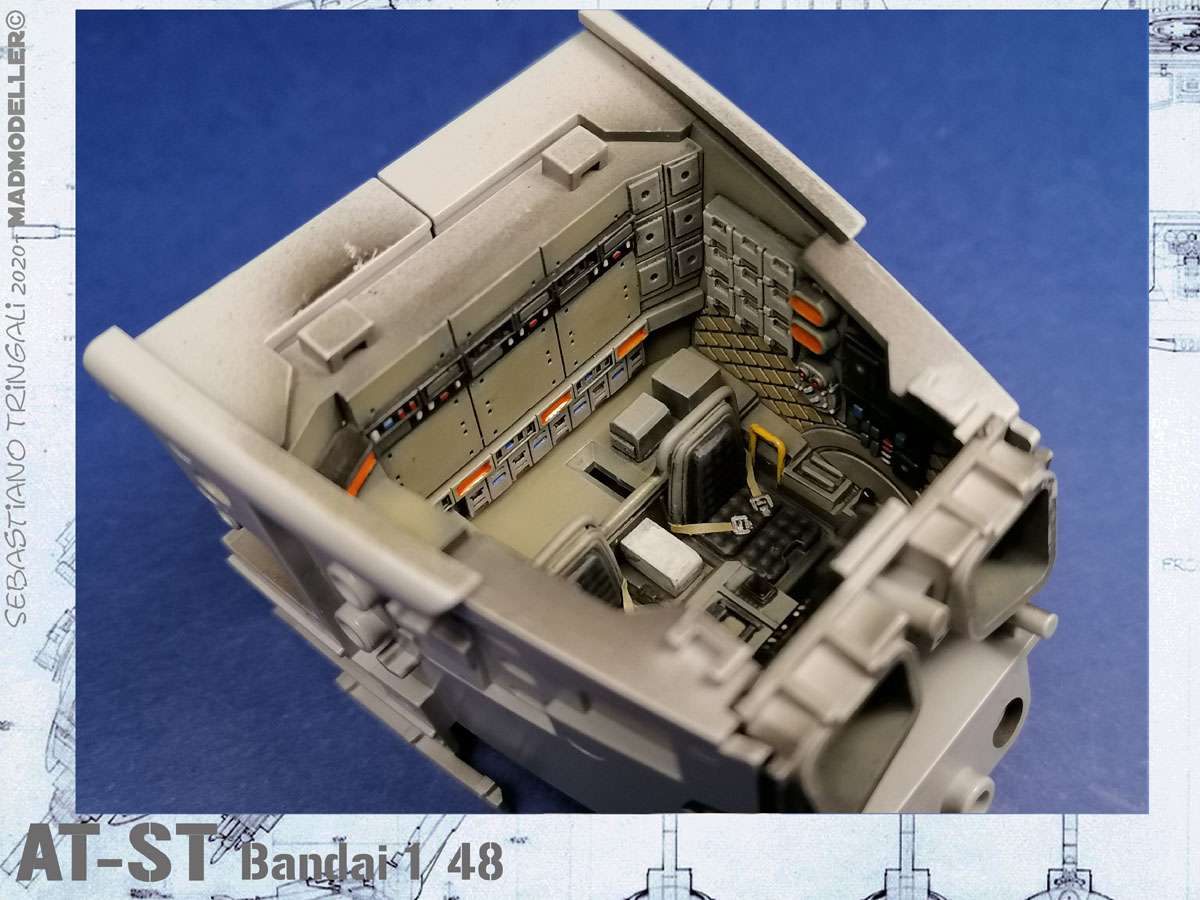
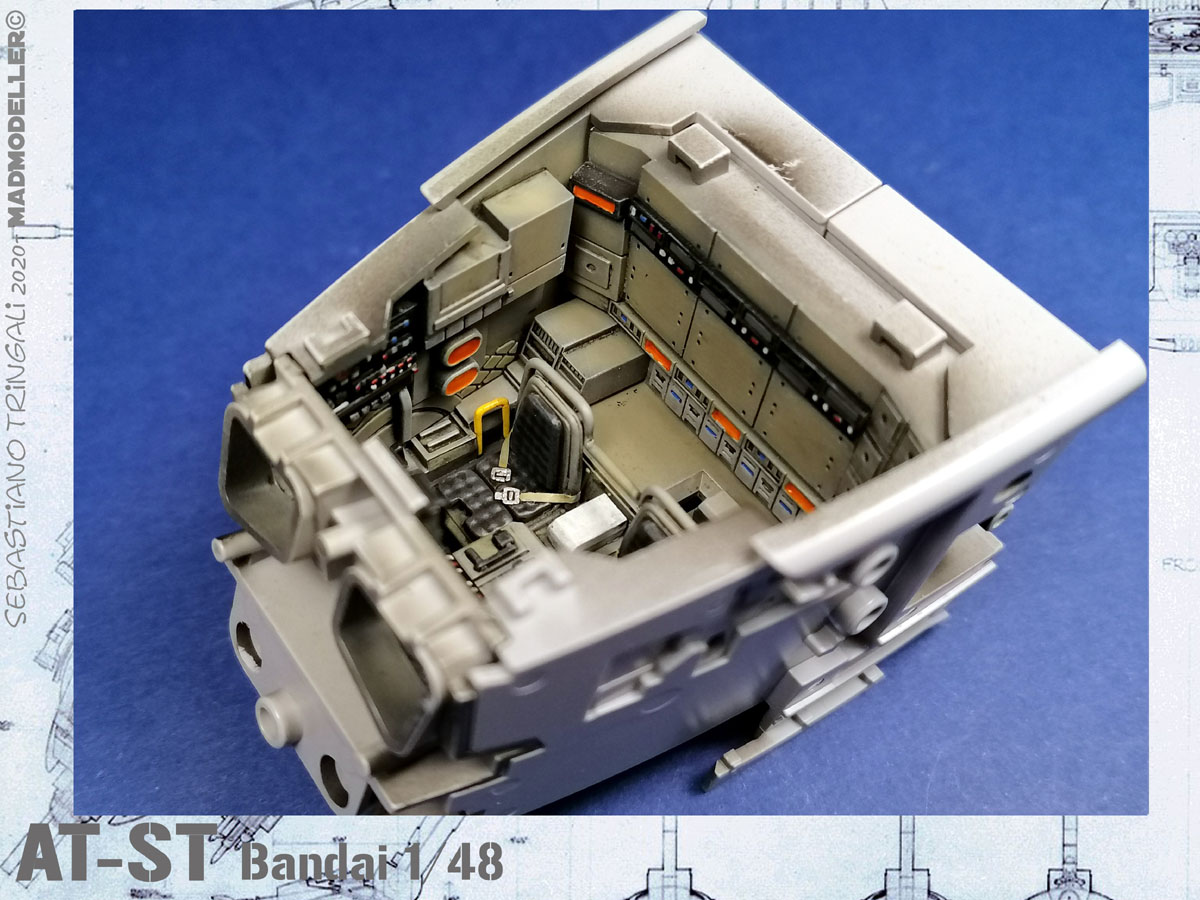
A few months ago on this forum I saw Andy Moore's work on this subject which was of great inspiration for me.
I have always been a Star Wars lover so occasionally I allow myself a distraction from my planes, just for fun and to experiment with some new painting techniques.
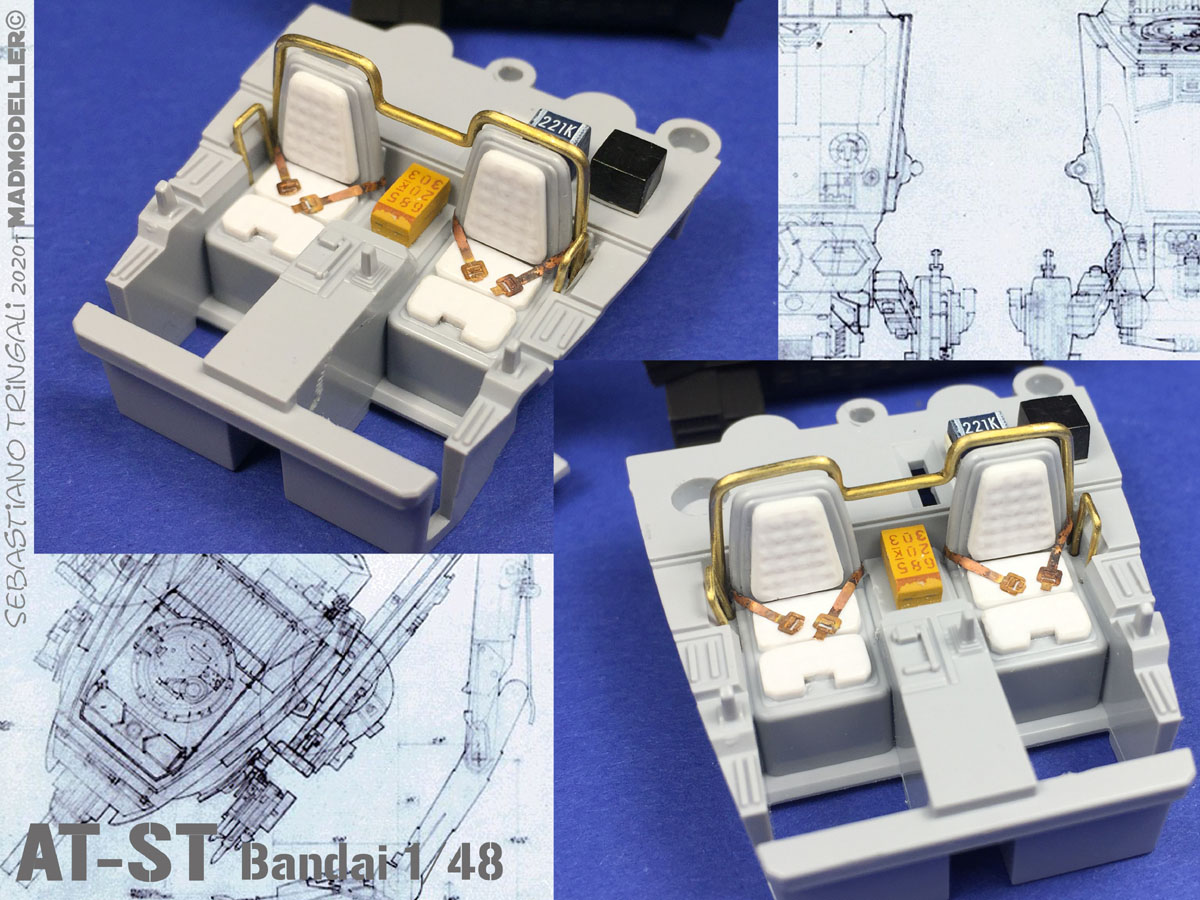
The Sci-Fi are pure fun, no rules and then these new Bandai kits are a fairy tale, perfect joints, zero burrs, the sprue attaches to the very thin pieces that leave almost no trace ....
some small details added to the cockpit, using remains palstic and photoetchted spare parts, the only drawback are the seats that have the pins for the pilots' figures so if you don't put them you have to cut them away and rebuilt the padding.
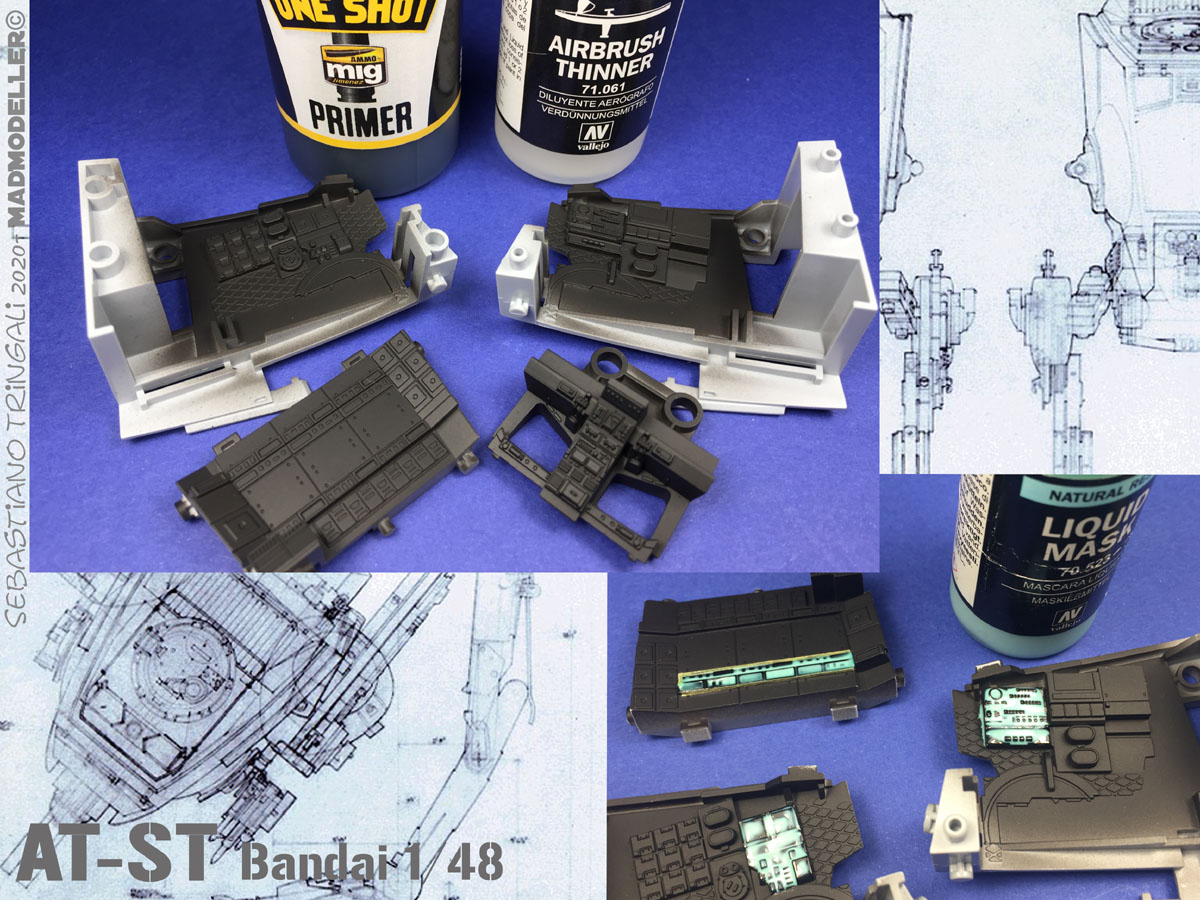
then primer, I tried this Mig One Shot which in theory should be sprayed as it is but which I have diluted with the Vallejo thinner, it does not reach the same fineness as the MrSurface 1500 but it smells a hundred times less and then the plastic of the Bandai fears the aggressive solvents......
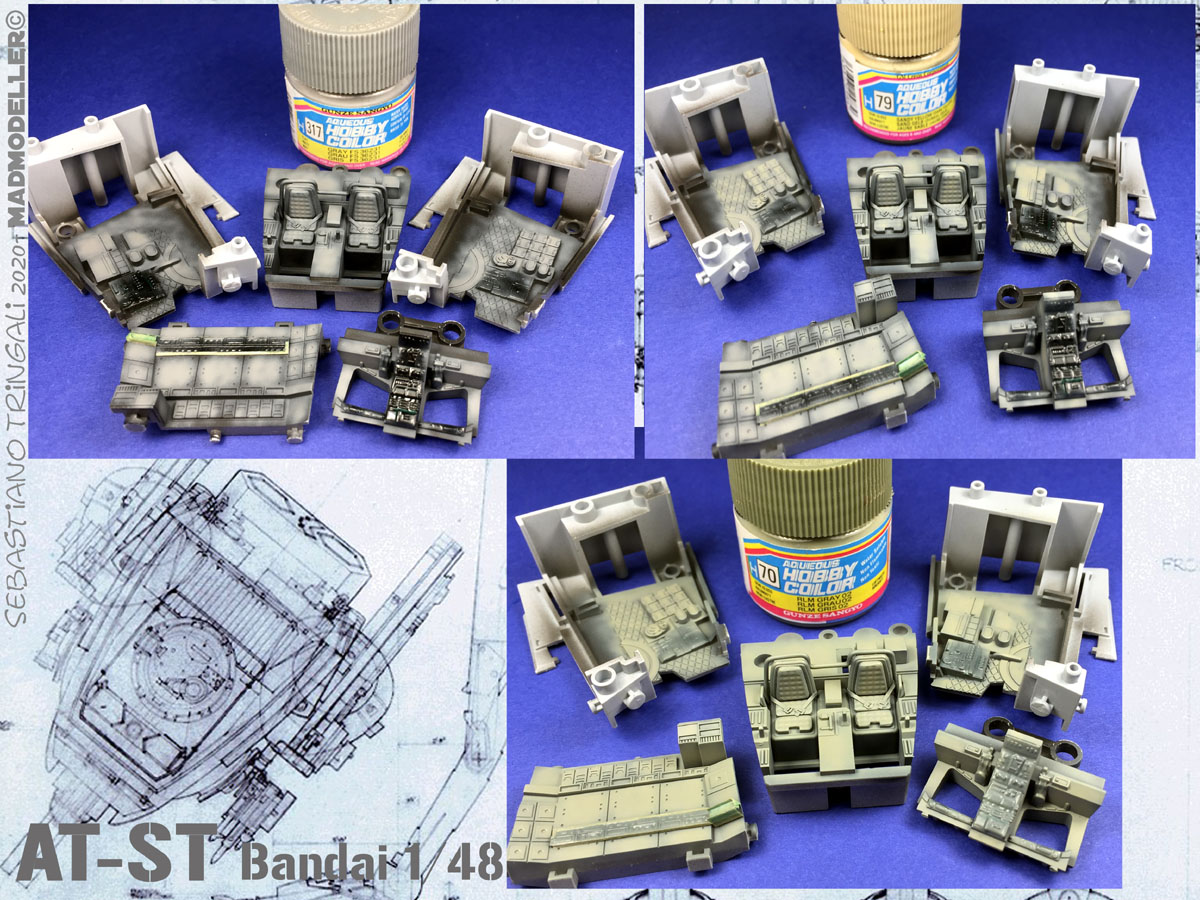
then black base technique with chromatic variations in sand and medium gray before the final color. I used an RLm Grau 02 for the interiors, I like the tone and so I train for the next 109E ...
[/url]
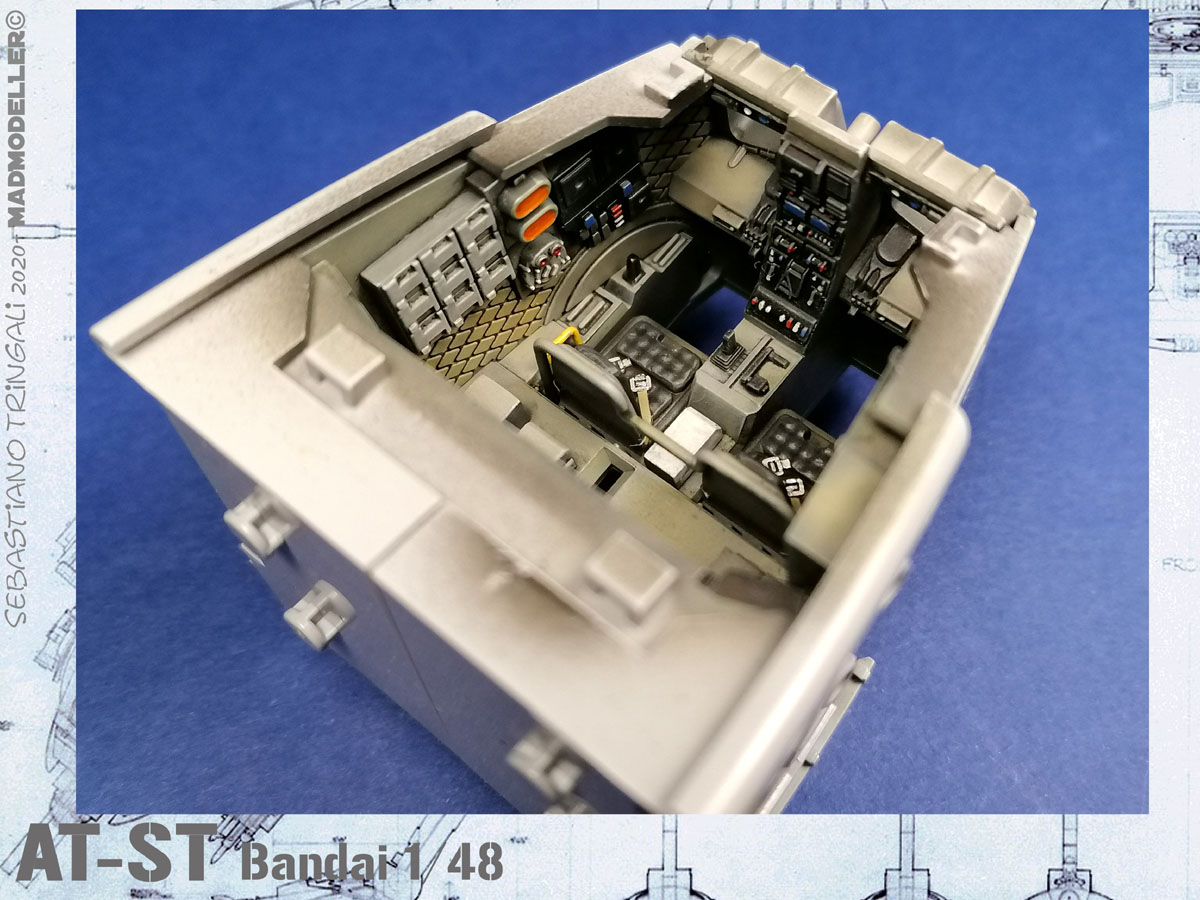
then the usual technique, details painted with Vallejo, clear coat, washes, flat coat and drybrush finish with oils to give volume .....
[/url]
[/url]
[/url]
[/url]
[/url]
[/url]
that's all for now, I hope you like it.
See you soon with other updates.
Sebastiano-
20
-
 2
2
-
-
12 hours ago, AdrianMF said:
Mmmmm. Two different fillings too!
And now we are ten:
Great job, I have done the same thing on my Lancastrian but I've made a master of a couple of seats and after many resin copies.
-
10
-
-
On 2/7/2020 at 10:31 PM, Admiral Puff said:
I've only ever seen B&W pictures of Lancastrian interiors, and they were all of the passenger areas. All that I've seen had quite pale lining, with slightly darker seats and carpets. You should be safe going with shades of grey, brown or blue for those areas. I suspect that the crew areas were left in the original Lancaster colours, on the basis that the aircraft was in essence a stop-gap until purpose built types like the Tudor became available, and was needed in service in very short order.
Thanks!
-
I have resumed my old Alitalia Lancastrian 1/72 project and it's time to paint the cabin crew compartment and the cockpit. I am in doubt as to whether to use the standard color for the Lancasters (all black-black / green) or whether there was a specific color for the civilian version.
I have not found any references or photographs except for this which represents the radio operator's position:
So if someone could give me some suggestions, would I appreciate it very much.
Thanks in advance.Sebastiano
-
2
-
-
Another little slow update on the Sycamore.
I tried to scratchbuilt the structure of the rear seats with round 0.4mm profiles like evergreen and simulate the fabric of the seats with 0.10 mm "texturized" sheet metal. To reproduce the canvas effect, I simply heated the sheet on a candle and pressed it with the wooden handle of the brush on a squared bottom (like Ikea cutting board).
The result was satisfactory, I will try to exalt it in the painting stage ....[/img]
At this point I fixed all the interior parts for a fit test.........................
and finally I tried to put the entire cockpit in the fuselage already glued .......
That's all for now, but I have to say that this little short run is really enjoying me.
See you soon with other progress!
Sebastiano-
22
-
-
Ciao, waiting to complete my two 1/32 Bf109, I'm taking some moment of relax, building another chopper!
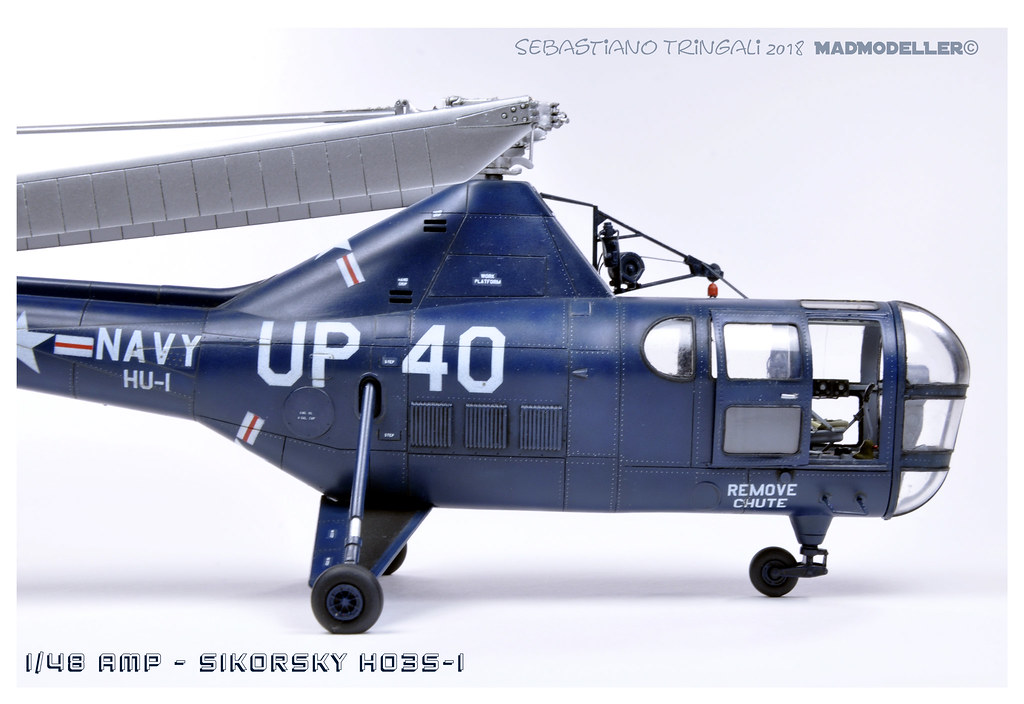
The Bristol Type 171 Sycamore, it's the typical ugly but fascinating.The kit is in 1/48scale from the prolific Ukrainian brand AMP, I had already built their Sikorsky HOS-1, a few months ago and I must say that also this Sycamore is not bad.
Fine details and engraved panel lines, the only drawback is the presence of numerous molding burrs on many parts, probably cause of a mold not particularly accurate, but in a "short run" kit there can be acetable.
A small flaw because the kit looks very well designed!
I'll have to work of the cutter and sandpaper adding extra time to the clean-up prior to building.I am very undecided on the color, between kit's white / blue RAN Royal Australian Navy or a RAF yellow overall , of which I have no decals but that I could easily print at home.
Accept suggestions!
pics came from:
https://www.helis.com/database/cn/48198/
https://www.goodall.com.au/australian-aviation/sycamore/bristol-sycamore.htm
https://www.flightglobalimages.com/cutaways/military-aviation-1946-present-cutaways/bristol-171-sycamore-cutaway-drawing-4641234.htmlI start to assemble the two fuselages and the main transparent parts with white glue to check the fit ....
the most boring job for me is to clean them from the burrs of molding, I also put some pieces of yellow tape on the glass to protect them from scratches in this brute stage of the work....
the assembly of the front part appears rather complex, I prefer to do some dry tests first to check that everything fits well and not have any surprise once the parts are painted ....
I added some small details to the seats .........
tomorrow I will continue with the rear seats and the central instrument console.
Sebastiano-
28
-
-
For first....thank to all for your appreciation!
5 hours ago, Spitfire31 said:A humbling display of superior modelling!
But I hope that you're wrong – that it is your latest and not the last…😉
Kind regards,
Joachim
Yes the latest not the last ......I hope!
3 hours ago, Terry1954 said:What can I add to what others have already said? This is a really superb rendition of this aircraft. What blue did you use for the main colour? I think it looks really authentic.
Cheers
Terry
The painting process is showing in the following pictures.......

-
1
-
1
-
-
My latest....hope you like it!
-
51
-
2
-
-
Some slow progress on my Lancastrian, finally I've made some resin copy of the windows, interior arrangements and seats.
I'm planning to make in the near future some complete copy of this conversion with BOAC or ALITALIA decals so if someone are interested, please drop me a message.Sebastiano
-
8
-
-
Various little problems had brought me to stop modelling.
Now these problem are partially solved, so now is time, after over two years, to unfreeze my Lancastrian and to go to complete it.
I restart working on the internal arrangement, I've scratchbuilt only 5 seats but I need 13, so I ve planned to make a resin copy.
Also I've scratchbuilt the lavatory compartment and the middle bulkhead that separated the cabin crew from the passengers.
At last I've opened the passengers entrance door on the back end of the fuselage.
Hope to post more progress soon !Sebastiano
-
5
-
-
Another little progress.......
Because the colors are the same of the Alitalia version, by request of a friend, I've added two BOAC version to my decal sheet........
and I've printed it of a self-adhesive paper sheet to make a test on the real model.............................
I've sent a copy of my sheet to BOA Decal for a quotation.....
Please if anyone notice any errors in the text or in the colors of the BOAC version, may you report it to me?
Bye for now
Sebastiano
-
.................................. watch your flap details as it looks like you've transposed them and I wouldn't want to see such a fine looking model spoilt by a minor oversight!
Mark.
I know, good point, but I just changed them to take pictures.
....................If you decide to sell any sets of the conversion parts, count me as a customer
Neil
maybe the main problem is the decal sheet, I'm checking the cost to print a few dozen copies.
I will keep you updated!
Thanks to all
Sebastiano
-
First of all thank you all for your interest in my model.
The work on the Lancastrian proceeds so I passed on the wings detailing the flap with the Eduard photoetched set.
It was a very tedious job and here is the result after a few hours and many ...... many ribs after.
Unmentioned so far, but the Revell wing has excessive dihedral on the outer wing panels. Not difficult to fix, seeing what you've done already!
I know the problem of the dihedral of the wings, but I do not know if correct it because, having cut off the flaps, I do not want to weaken the wing too.
I do not know, we'll see along the way.
Now is the time to detail the wheels bay, does anyone know where to get good photos of the interior?
Sebastiano
-
1
-
-
After a long time I'm restarting my work on the Lancastrian.
For first I have made a first resin copy of the nose and the tail, adding recessed panel lines and some rivets........
for second I have modified the lower shape of the two vertical stabilizer using a 0.5 mm plastic sheet.........
now is time to make the definitive resin copy of the all pieces............
and this is the final result, the fit with the Revell model seems to be good and I think that no relevant filling with putty are necessary........................
next step is to complete the decal's drawing.
bye
Sebastiano
-
In the weekend I've started with the major conversion. The nose and the tail sections.
For first, helping me with a sharp saw, I cut off the Lancaster front turret using the existing pannel line as guide.
I did the same thing on the rear turret...................
Comparing the conversion of M&E with Aeroplane News drawings and photos, it seems more pointed and too short.
To try to correct the error I decided to glue some shaped plastic sheet in the middle section and in the joining section with the fuselage.
Also to ensure a perfect joint with the fuselage of the Airfix Lancaster, I have made a copy of the front section at the point of cut.
This is the result of the intermediate work on the nose section.
In the picture. You can also see in the picture I tried to scratchbuild the bomb bay doors because my box was for the Dumbuster's version of the Lancaster.
Next, I covered the sections gluing on them two thin sheets of plastic.
To correct the nose annd tail section of the M&E set and make it compatible with the section of Revell Lancaster, I added a thin pasticard strips from 0.10 mm along the edge.
In the meantime I have replaced the stracthbuilt bomb bay doors with an original ones coming from another Revell kit, after having filled it with resin and reshaped.
This is the final result, after hours spent filling, sanding, adding putty and sanding again.
It's all for now.
Ciao
Sebastiano
-
1
-
-
Yesterday I have completed the drawing of decals with Adobe Illustrator.
For first, I tried to draw it using the example of old advertising signs, or pictures of other airline Alitalia and after having drawn the individual parts I tried to put them over the original photos
and then I created the whole sheet....................
Tomorrow I'll try to print on common paper and try the fit on the true model.
If all is ok, I would like to ask about printing to Fantasy Printshop.
Any suggestions on that?
Sebastiano
-
First to all, thanks a lot!
Hello Sebastiano,.........the Alitalia Lancastrian had the passengers seated in two rows facing front, or were they seated sideways?
Carlos
The Alitalia Lancastrian have 13 seats on two rows, 7 on left side and 6 on the rigth.
All the seats are facing front, except the second row which is directed backward and is raised above the floor.
.....................when you come to the nose, the old M+E nose looks too short and pointed to me.Cheers
Tony O
Yes, I agree the M+E nose looks too short and pointed also to me, if if I compare it with pictures.
I would add plastic sheets in the middle and in the back side to correct the shape and to do it better match the Revell Lancaster
Sebastiano
-
Here is my next project, an 1/72 scale Avro Lancastrian starting from the Revell Lancaster kit.
The Lancastrian was the civil conversion of the famous Lancaster, stripped of all the offensive and difensive weapon was able to carried about 13 passengers with a new nose and tail cone.
After the WWII the newborn italian airline, Alitalia, had taken four Lancastrian (ex BOAC) to put in service on the South America routes.
Some months ago a friend of mine, give me an old M&E Models conversion for the Lancastrian starting to the Airfix models.
I've started some research about this airplane, but nothing much than some good pictures. I needed of some scale plans.
After much wandering a friend modeller, Filippo, a great lover of aeronautical history, remembered a nice "scale plans" in 1/72 of the Lancastrian on an old issue of Aviation News of the mid 80.
I don't know how much it is accurate, but enough for me.
I'll try also to drawing and printing a correct decal sheet because the existing Magna Model decal is wrong for the Alitalia.
Starting from fuselage, I've cut away the new windows, using a brass template........
and replace any empty space with a small square frame made from 0,25 plastic sheet........
glued it on the outside face of the fuselage using a masking tape as refer..............
and this is the result.
It'all for now.
Any feedback welcomed and thanks for looking!
Sebastiano-
1
-
-
so whats happening on this project?
These are hard modelling times for me, I've a newborn (eigth months old at today) and often, for my work, I stay away from home for weeks.
I've do some progress but I've frozen this project until better times.
Ciao
Sebastiano
-
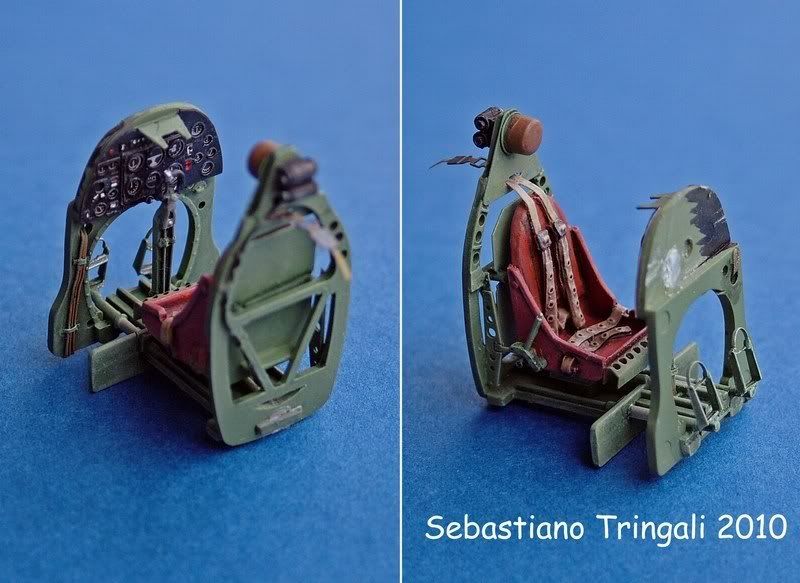
A little update, the cockpit is done:
I hope not to have forgotten nothing......
Sebastiano
-
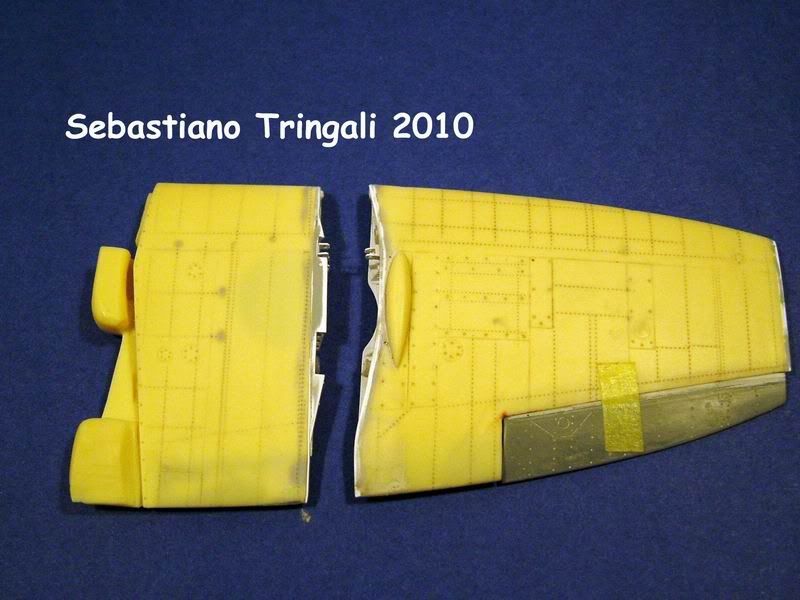
Some update:
In this Christmas holidays I have work on wingfolds, Airwaves photoetching details for the wingfold mechanism seems too flat, in my opinion, so I have added some scratchbuilt details to improve realism. Also I have cut the flap on the solid resin wing and replace them with photoetched new one.
Now I have a question: Which is the correct color for the wingfolds ? Interior green or Sky?
Thanks for helping.
Any feedback always welcomed and thanks for looking!
Next step: the cockpit!
Sebastiano
-
Thanks to all, I hope to post soon some progress.
Sebastiano
-
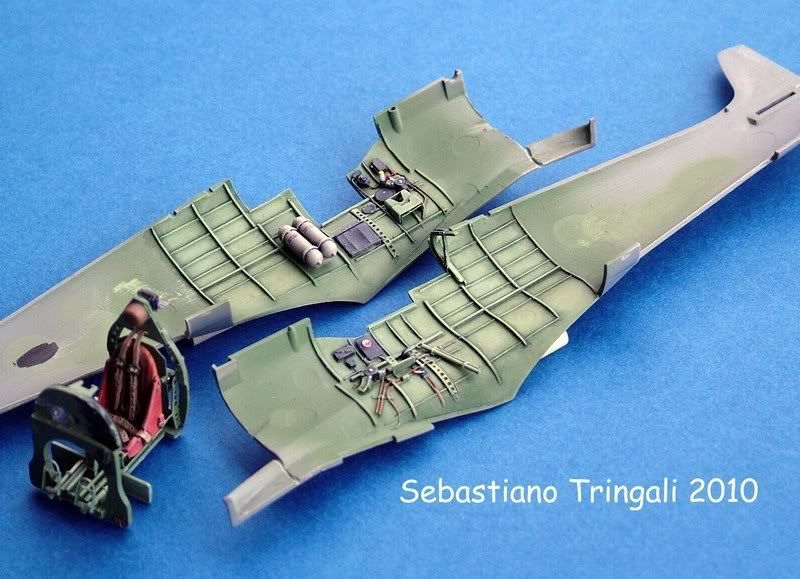
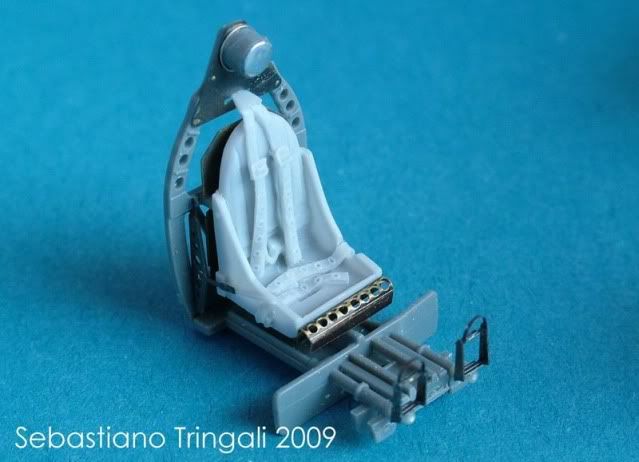
I'm new on Britmodeller and I would to show you some photos of my Seafire in progress.
As base I've used the Tamiya 1/48 MkV+Airwaves Seafire III wingfold conversion set.
The merlin engine came from Aires.
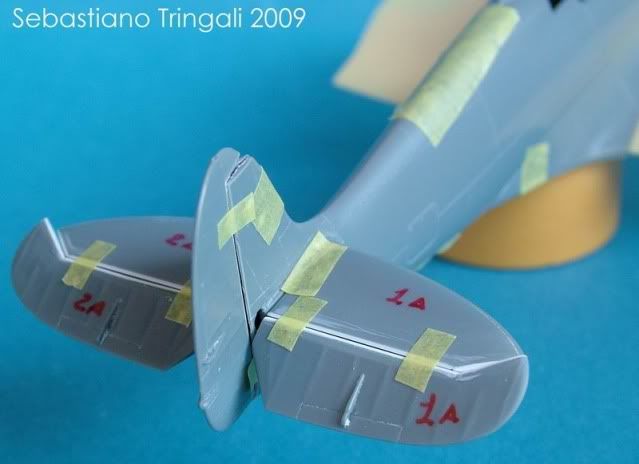
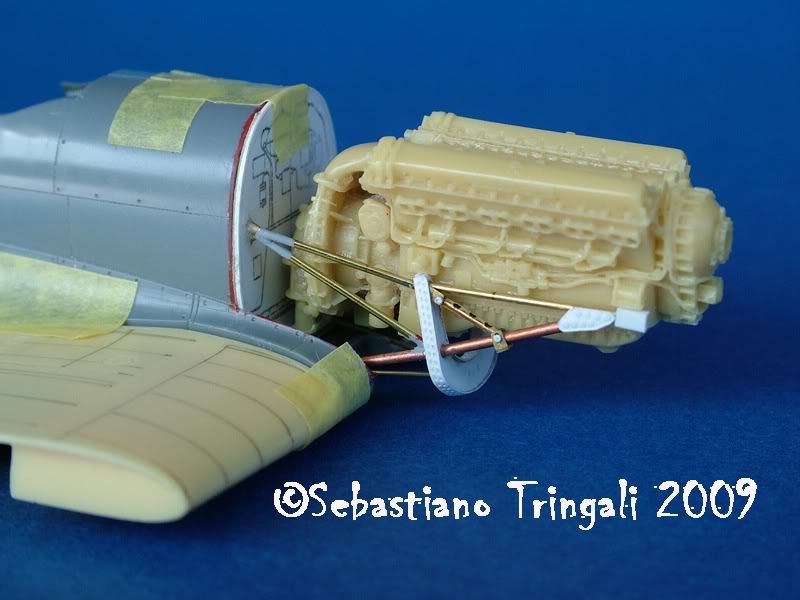
Next step, the wings and the folding mechanism.
Any feedback welcomed and thanks for looking!
Sebastiano
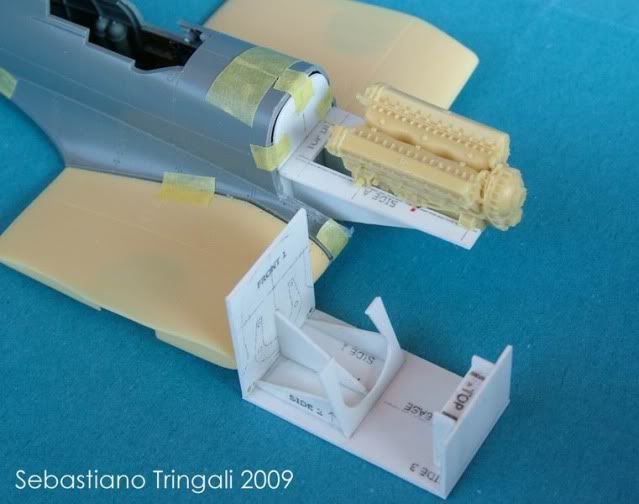
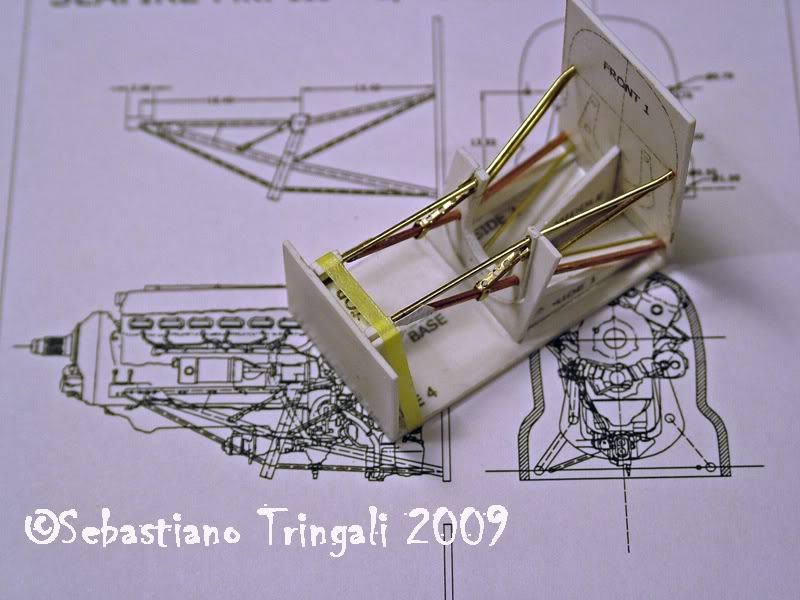
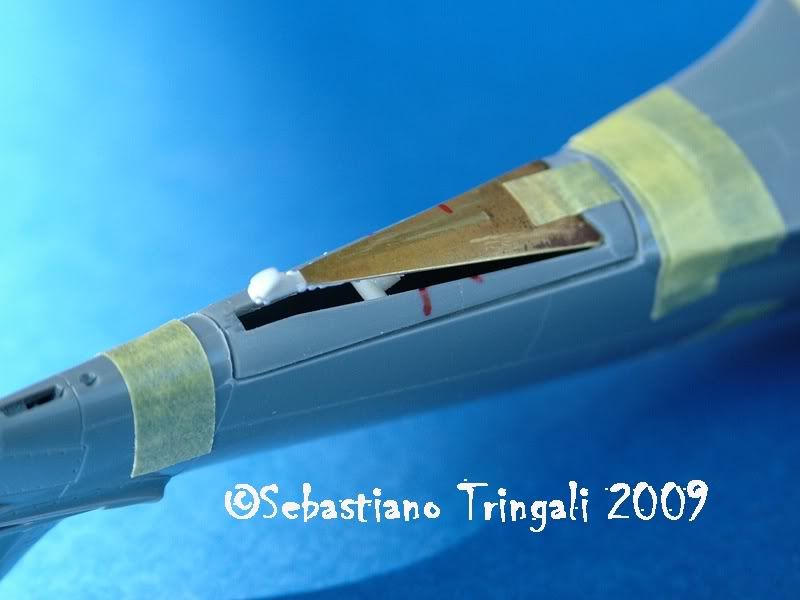
Engine mount template
Interior frame with seats
Scratchbuilt engine mount frame using a template
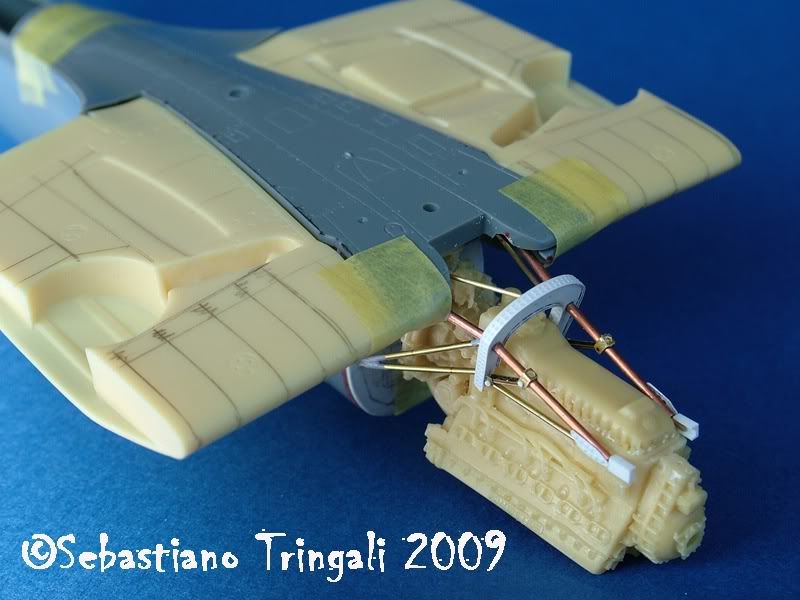
The Merlin engine
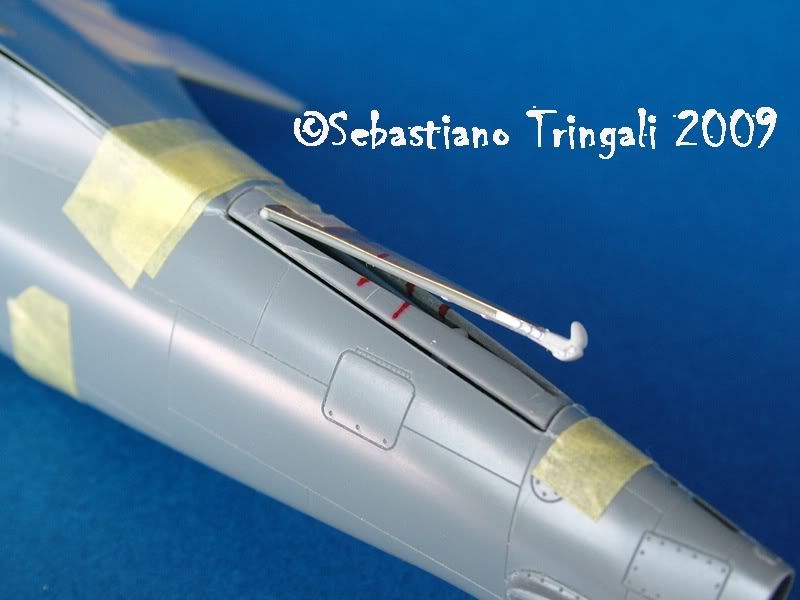
The arrest hook
 [/url]
 [/url]
 [/url]
 [/url]
 [/url]
 [/url]
 [/url]
 [/url]
 [/url]

 [/url]
 [/url]
 [/url]
 [/url]
 [/url]
 [/url]
 [/url]


 [/img]


Bristol Sycamore - AMP 1/48 Update
in Work in Progress - Aircraft
Posted
Yes probably. After all it is a short run model. Pay close attention to the alignment of the various parts of the fuselage. Better to dry test all parts before assembly to check that they fit smoothly. For example, I had to insert a thickness of plasticard between the two valves of the tail trunk because this was a little narrower than the corresponding front part with which it was going to match.