

Pascal
-
Posts
487 -
Joined
-
Last visited
Content Type
Events
Profiles
Forums
Media Demo
Posts posted by Pascal
-
-
Nice work. Following with great interest, I have 3 of these kits in my stash.
Sincerely
Pascal
-
That looks superb !
Very nice work, great details on this very small scale.
Sincerely
Pascal
-
 1
1
-
-
On 9/19/2020 at 1:18 AM, nick said:
Stand today...

Hi Nick,
I took a good look at this photo. What's the white thing that's on the left of the Ferrari emblem on the plenum ? Is that a piece of frame from the printing process ?
Is it possible to get the Magneti Marelli emblem sharper detailed ? It's looks a bit of when compared with the numbers on the block.
Sincerely
Pascal
-
Progress is very slow because - despite all models being Bburago's - there are quite a few tiny differences between each model. So every part that I make, has to be tailored to a specific model.
Used some plasticard to enlarge a part of the body :
With some plastic strips and putty, I made the top of the beams round, needs a bit more sanding :
Here's my handmade frame, every frame is a bit wider, lower or higher depending on which model it will be fixed to:
Used CA and a steel nail to beef up the structure :
Dryfit. I'm glad I ordered the letters A (they are made with a CNC millingmachine) a bit too tall, now I can sink them into the beams to get a strong bond :
Sincerely
Pascal
-
4
-
-
Metallic yellow = giallo tristano , nice color for the 599GTB. This is a 599GTO :
-
4
-
-
Yes, will post an update later today.
-
Looks mighty fine Nick. I'm still looking for the oil pipe, hope to find some photos today.
Sincerely
Pascal
-
The paint is terrible ?
You're selling yourself short here mate . Yes some parts are a bit rough, but I see patina and weathering on a lot of parts, it makes them look very authentic in my opinion.
Good job Nick.
-
Some very small fit issues with the water cooling pipes, but overall very nice work Nick !
-
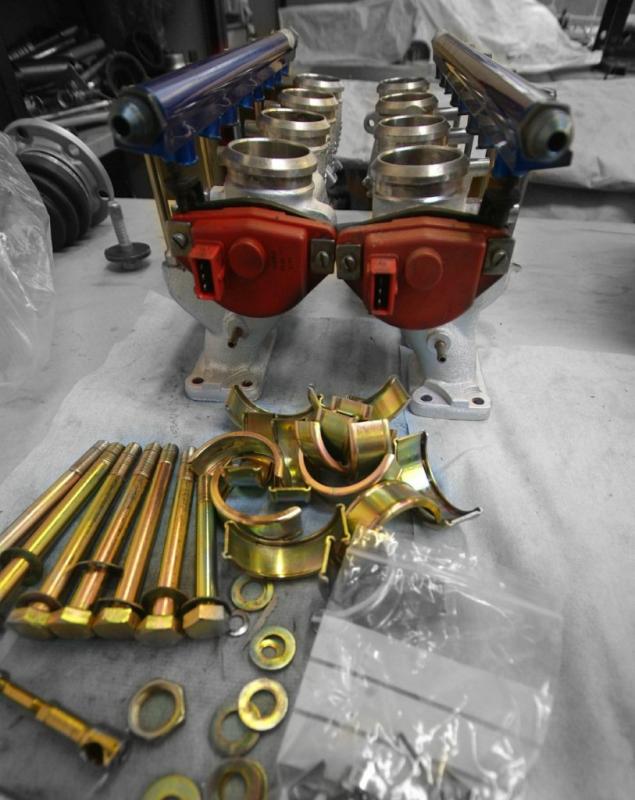
A bit late, but this photo might still be handy for the shape of the gasket :
Underside of the block :
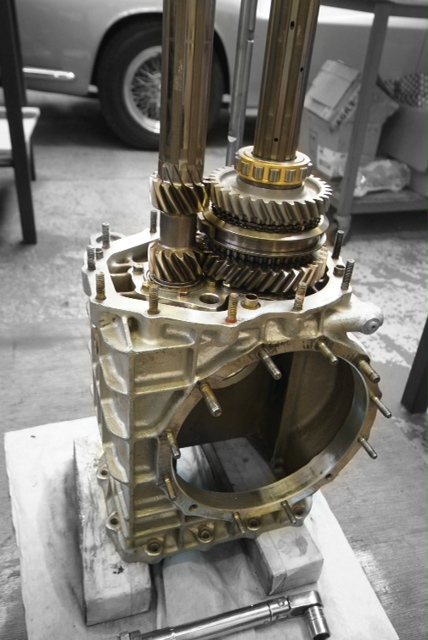
Gearbox from an unusual angle :
Angles and curves :
Water cooling pipe attachment :
Pulley and connectors :
Will look for more oil pipe photos this afternoon.
Sincerely
Pascal
-
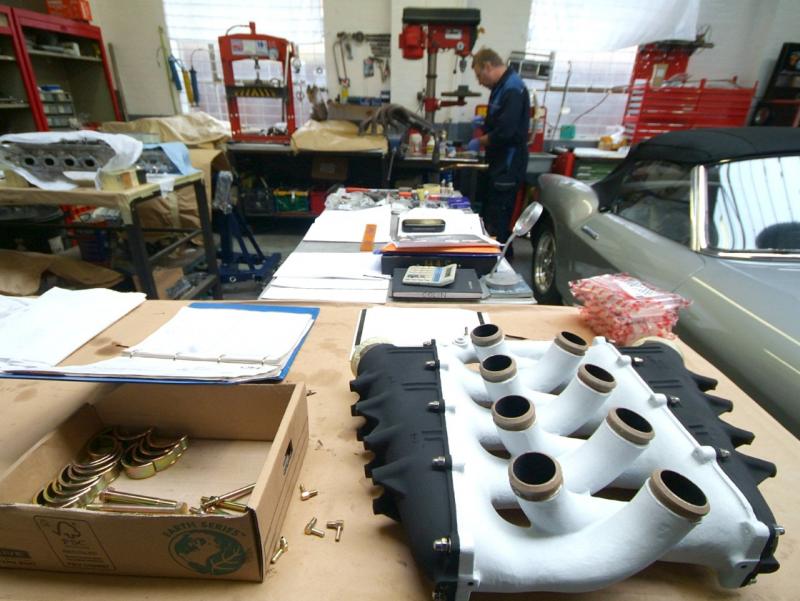
On 9/4/2020 at 4:29 PM, nick said:
Hi Pascal,
I can't find a single useful image of an F40 oil Pan, I've done as much as I can based on the Pocher item and snippets from various angles in many photos, and come up with this:-
I know a fairly fat pipe emerges from the angled section as I have guessed at, but I have no real idea what this looks like, I don't suppose that anywhere in your collection that you have any sort of clue to what this looks like? much appreciated if you could dig something out now I'm on the home staright!
Regards,
Nick
Hi Nick,
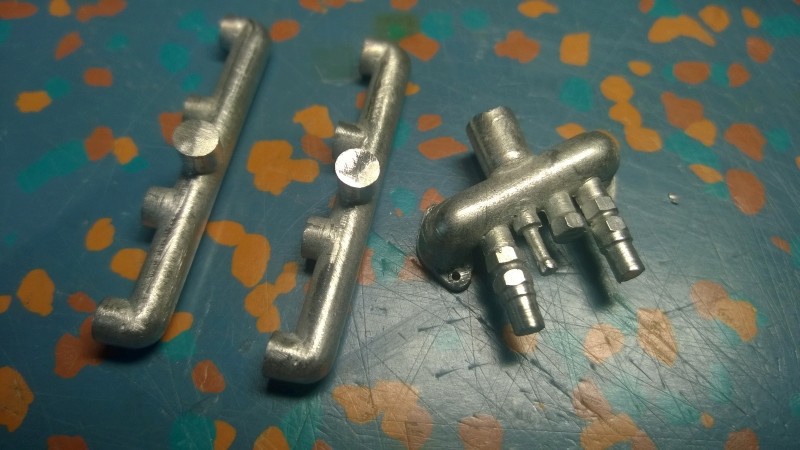
This is how Autograph made the pipe :
And this is the only photo that I've found sofar :
I'll look at the DVD tomorrow and see if I can take some more screenshots.
Sincerely
Pascal
-
When's the first test run ?
Wonderful work Nick.
-
No this is not the 1/24 FPM kit, it's a 1/18 kit made by some italian.
-
 1
1
-
-
I applied a lot of putty to the F-40's, while the putty is hardening I did some work on this 250 Bertone.
The way this model is designed, the windows are never gonna fit properly : you have to glue a PE border to the clear plastic and glue that to the body. No way this is gonna give a good result.
So after much head scratching I came up with a solution that might work : I'll use a 2 x 2 mm plastic H-profile that I will glue to the body. This will replace the PE border and give the clear plastic something to fit into (at least that's the theory) :
I started by removing the resin A-pilar :
And replaced this with a strip of brass :
Made a trench in the inside of the body so that it can be fixed securely :
Dryfit with the side windows, yes we might be on to something :
I'll keep the PE border for the side windows, the H-profile will be used for the windscreen and rear window, dryfit :
It will take a lot of work to carve a little ledge in the resin for the H-profile to be glued to. This ledge has to be about 0,5 mm wider then the H-profile because I'm thinking of gluing a 0,5 mm black cable on the outside of the H-profile. We'll see if that works.
Did some work on the interior, a couple more parts and this will be done :
I made it as strong as possible so I can be pressed into the body, dryfit :
Looking pretty good :
Sincerely
Pascal
-
7
-
-
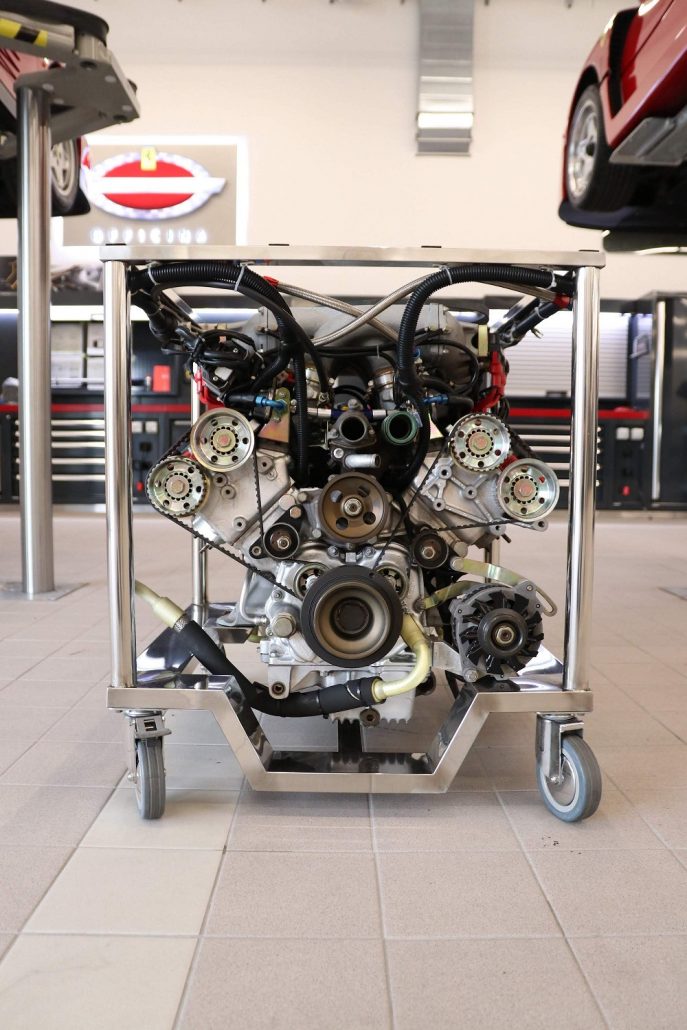
Nice work Nick,
That same waterpump was offered on Ebay for 20k US dollars in 2018, it hasn't been sold since then. For the prices he's asking, I don't think it will ever sell. I'm pretty sure that you can order a new build F40 waterpump even today.
-
3 hours ago, nick said:
And here’s the model
Nick
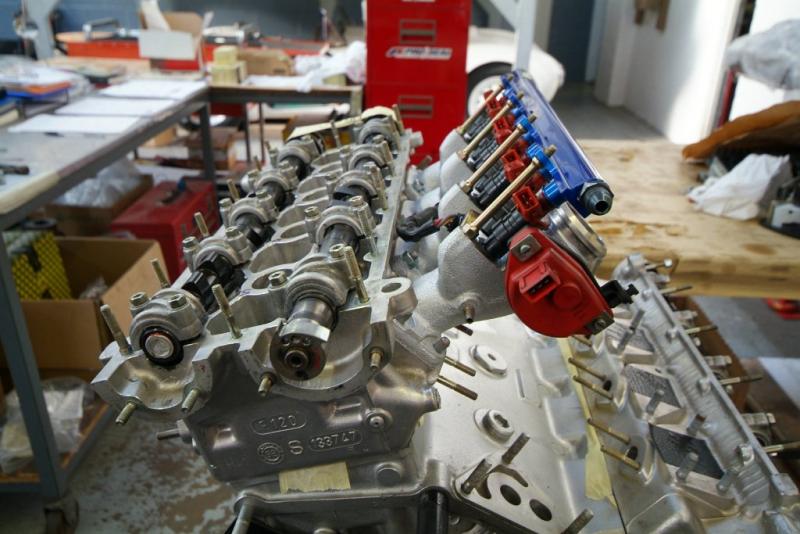
The amount of detail is just insane. Great work Nick.
Can you please post some more photos (like the ones above) of the block from all angles ? They are a joy to look at.
Sincerely
Pascal
-
1
-
-
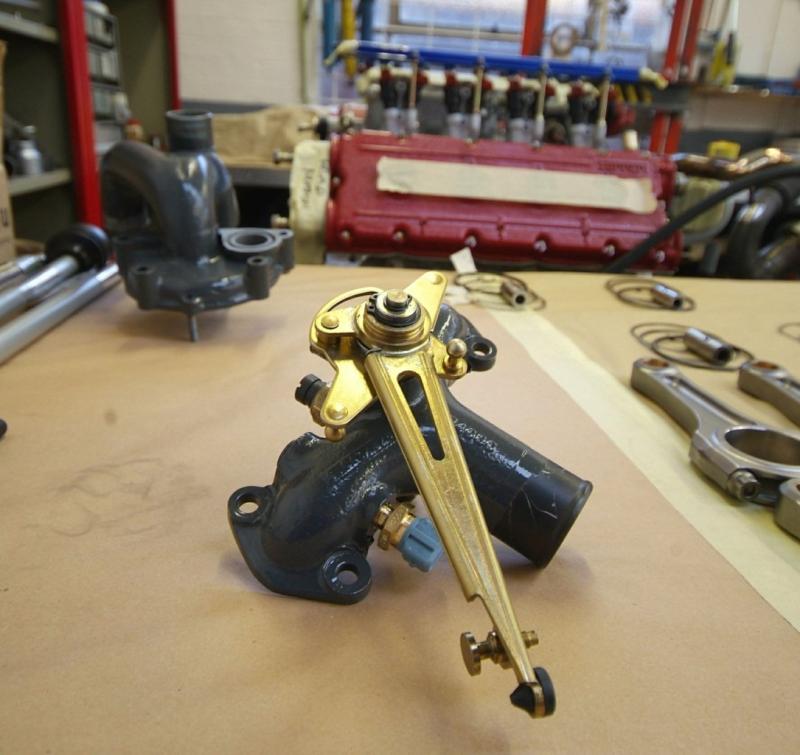
Very nice work Nick,
Those parts indeed have a lot of complicated curves :
One of the underside of the thing that sits on top :
Sincerely
Pascal
-
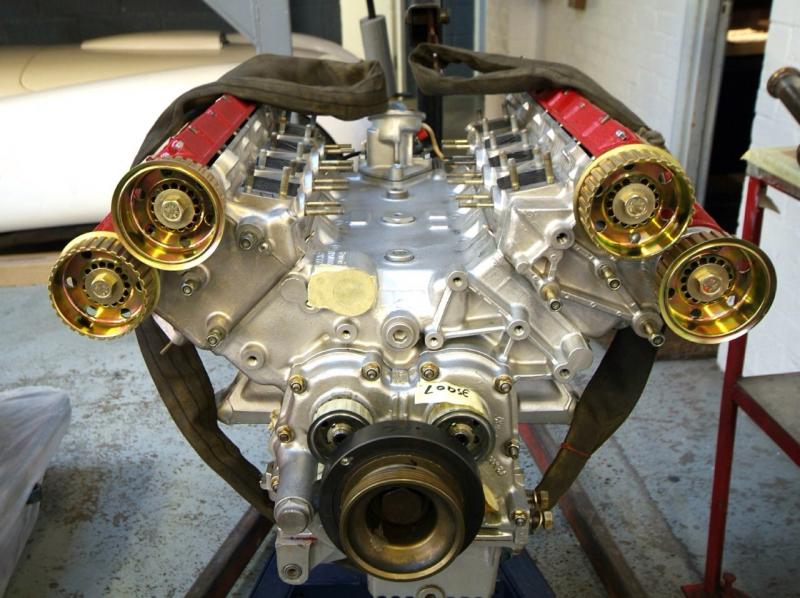
That's not an engine, that's a thing of beauty. Outstanding work Nick !
And the waterways have the perfect amount of "pits & dents".
Sincerely
Pascal
-
You nailed it Nick ! Waterways look perfect.
I've gathered a much F40 info / references as possible during the last 20 years. Hoping to finish my 1/8 scale F40 Beurlys project in the future.
The cam belt photos are screenshots from the almost 3hr DVD, let me know if you need more photos.
Sincerely
Pascal
-
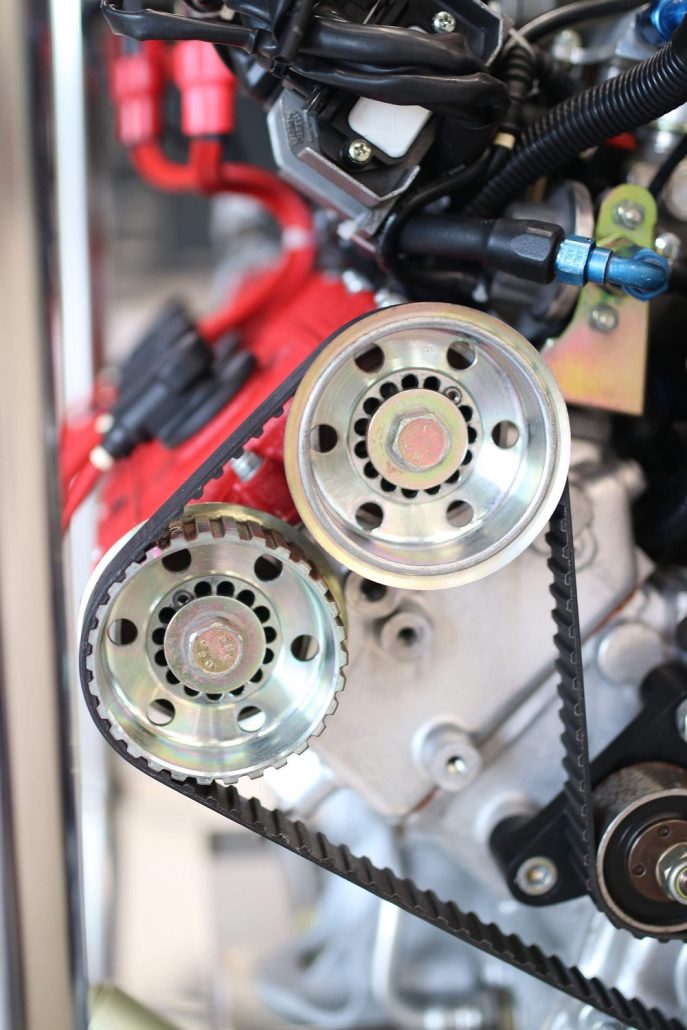
Hi Nick, the new rendering looks a lot better.
I'm still looking for the website of that german F40 rebuild (if it still exists, it's been over 20 year ago since I last saw it).
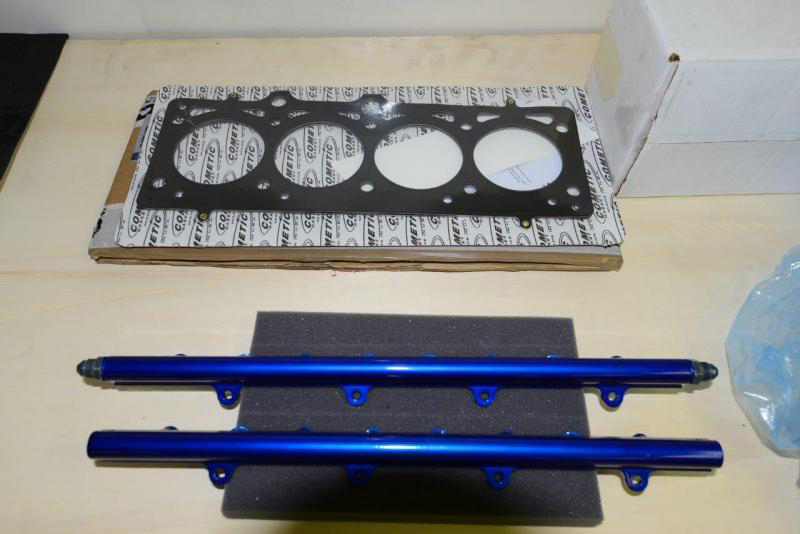
Here's a couple of screenshots that show the cam belt assembly :
And I found these online :
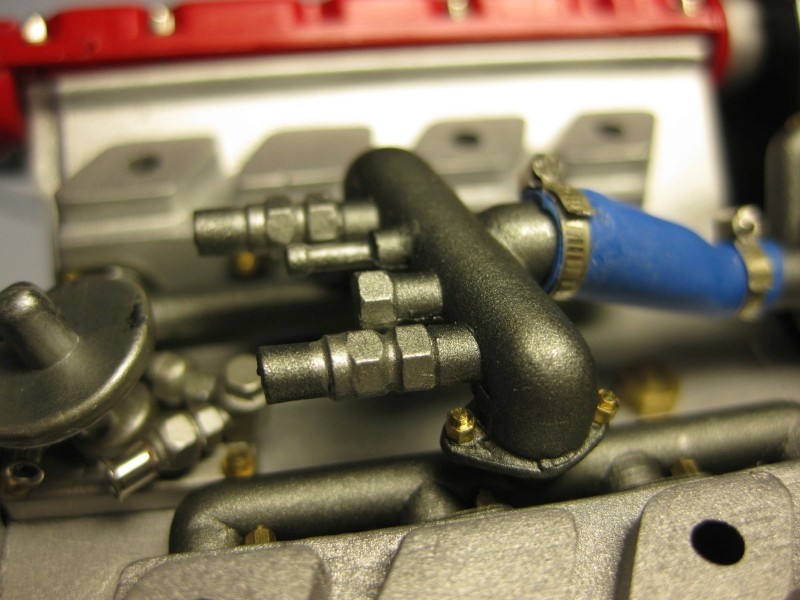
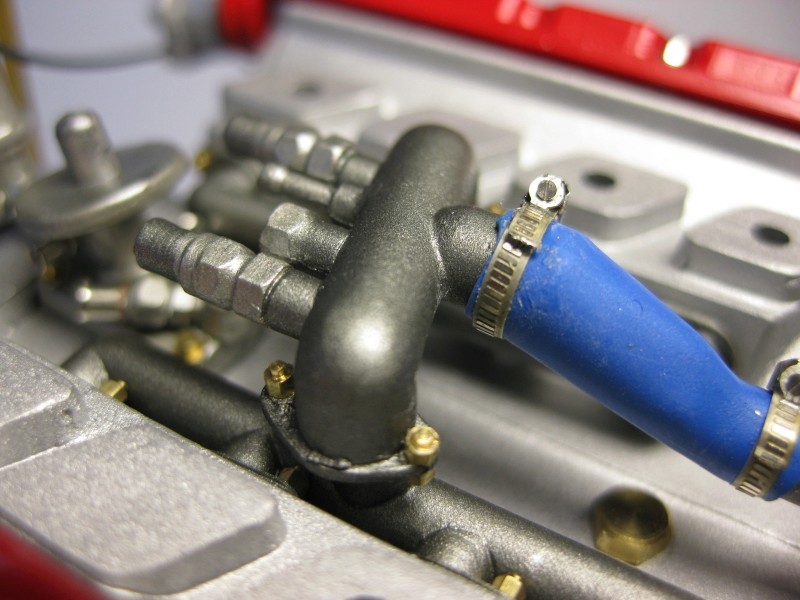
I finally found some good photos of the Autograph water cooling pipes (your latest rendering looks a lot better !) :
@ Codger : I've tried left and right to get scale plans and/or dimensions of F40's and F40 parts, nobody wants to share that kind of information. I've contacted Ferrari, Michelotto, garages and workshops : nada.
There's a garage not far from my home that maintains and rebuilds exclusive cars (mostly Ferrari). I could ask them permission to visit and take measurements of an F40 motorblock, but - even from them - it's very rare to have a disassembled F40 engine.
Contrary to popular believe I don't own a real F40, nor do I have parts lying around everywhere in my house (LOL).
But I'm sort of the local F40 "affectionado" here and very willing to help with info and photos.
Sincerely
Pascal
-
1
-
1
-
-
You're welcome Nick !
I found a couple more photos.
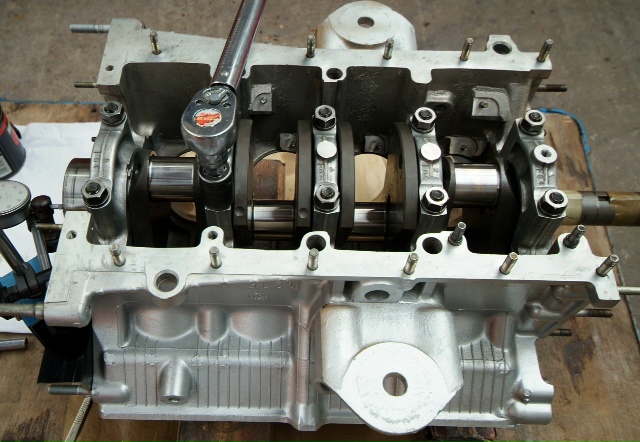
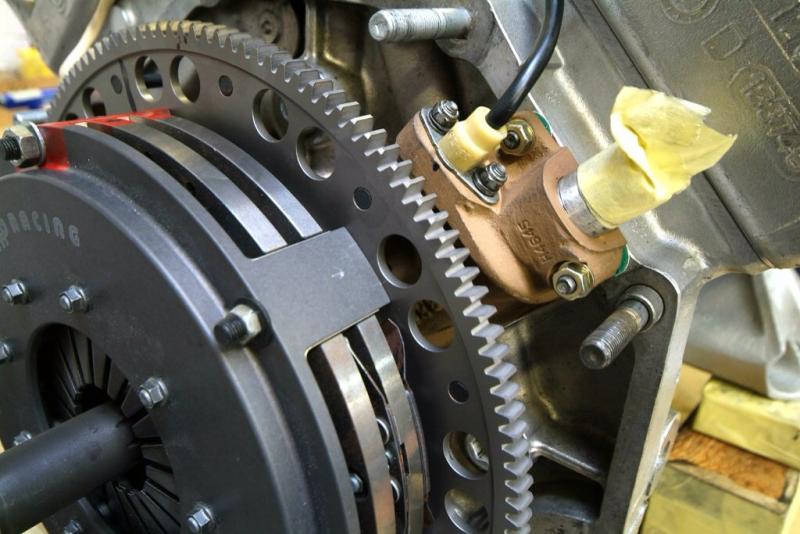
Look how small the distance between the cylinder heads is :
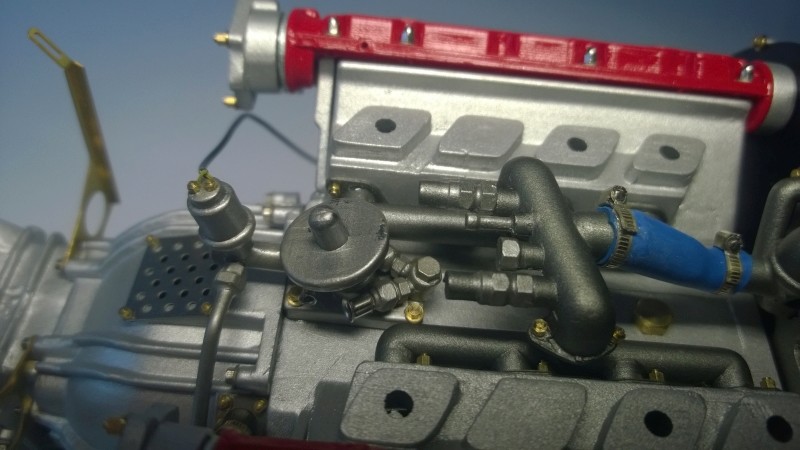
With the cooling pipes installed, the top part that connects the pipes is massive :
Years ago there was a website that showed the rebuild of a F40 in Germany. Are you familiar with that website ? I'm trying to find the name, but no luck sofar. The website had hundreds of photos of the rebuild and a 2 part video that you could by on DVD. I'll continue to look for the website.
Sincerely
Pascal
-
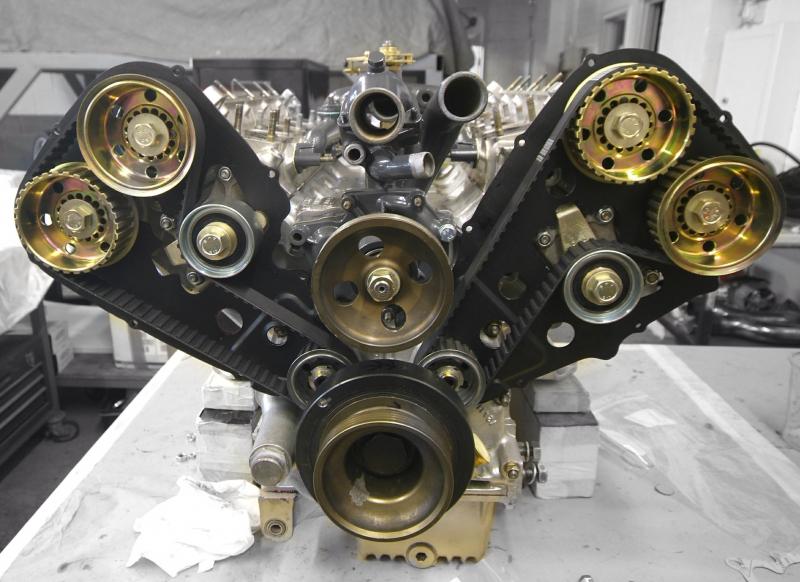
Hi Nick, if you look at that first photo with your parts and the Pocher parts, and draw a line from left to right at the inner sides of the cylinder heads, you'll see that the Pocher cylinder heads are at the same position as your cylinder heads + the flanges. In my opinion you need to add at least the thickness of your flanges to the inner sides of your cylinder heads.
The water cooling pipes are between 5,5 and 6,5 mm in the transkit. I would increase the diameter of your pipes by at least 50 % (personally I would make them twice the diameter).
Look at the big hole on the engine block (to the left of the blue filter), I thing the pipes should be about the same diameter as the inside of that hole. You have a plastic straw ? That's the size you're looking for.
I have the Autograph cooling pipes, if you want I can look for them and give you the exact measurements.
Sincerely
Pascal
-
3 hours ago, nick said:
And there's the real world version.
Hey Nick, I think there's something odd about that last set of photos. Here's my 2 cents :
I think that the distance between the LH and RH cylinder heads is a bit to wide. Can you measure that distance and compare it with the Pocher parts ?
I compared your photo above with this one :
Hard to tell, but it looks to me that your block is a bit to wide (or it might be that the pieces where you attach the cylinder heads are to far from eachother).
If the distance is indeed to wide, it might explain why your water cooling pipes look so flimsy compared with the Autograph parts. Here's a photo from the WIP of terrible4130 :
Look at the diameter of the water cooling pipes and the shape of the piece that connects the two.
You might get a better result by just enlarging the diameter of the water cooling pipes, but it might be good idea to check the width of the your engine block (with and without the cylinder heads) and compare that with the original Pocher parts.
Sincerely
Pascal
-
Indeed awesome paint job Andy ! Thank you very much for explaining in detail the methods / techniques that you used.
My hat's off to you sir for sharing this kind of information that is extremely helpful to other modellers like me.
Sincerely
Pascal


Kremer 962
in Ready For Inspection - Vehicles
Posted
That's not a restauration, it's a major upgrade.
Stunning work.
Sincerely
Pascal