


ScanmanDan
-
Posts
647 -
Joined
-
Last visited
5 Followers


Recent Profile Visitors
5,308 profile views


ScanmanDan's Achievements
")
Obsessed Member (4/9)
2.5k
Reputation
-
 Thank you gentlemen for your kind comments. I'm glad you like the little critter. I recently saw that after six years Tiger Models is coming out with two more of these little guys. A P-51D Mustang and a FW-190A. I'm really looking forward to both of them and can see a FW-190 D9 or Ta-152 conversion as a possibility. Dan
 -
Zombie build! Finished after six years sitting on a shelf. A little toon version of the bf109g6. Converted from a E model. Wing tips added to and rounded, new spinner and prop, srcatchbuilt interior and canopy frames all sanded off and redone for the one piece Galland style hood. Markings are all painted with vinyl masks I did on my cutter. I hope it brings a smile. Of course being so small you will never see the whole scratch built interior I put in there, sigh. So I suppose there is a way for shelf queens to get finished. I have many, many more like this one. Poor forgotten souls. Kits that for one reason or another just lost the fight with the Squirrels and got put on the shelf, unloved and neglected. I'm cleaning and reorganising the shop so some will be moved to new safer( and less dust prone) spots and some sadly will go to the great round bin in the sky. Thanks for stopping by for a look at my madness.
- 5 replies
-
- 28
-

-

-

-
I would venture a guess that Hauler will produce a resin and PE set for this within the next year if past performance is anything to go by. ( That's what they did with the last Tamiya kit the Nashorn) I do know there are some 3D printed items floating about but as it's the newest Tamiya kit it will take a bit of time for somethings to come to market. I would echo John Tapsell in suggesting that as it's a 1/48 scale kit lots of added parts aren't that much of a priority for builders. In 1/48 scale if high detail is what you want then building it all yourself is much of the attraction. A lot of folks like the fact that the kits build quite nice models from the box and are quick, easy and less stress inducing than their bigger scale brothers. I hope you give the kit a go on its terms and have a good time with it. Happy modelling.
-
More work completed. Actually tried to tell a story this time. Based on being at the park and watching a mother telling off her child for climbing too high up on the Jungle Jim. I think I might add a 'Bobby Trapped' sign as well. I just noticed that I forgot to add the horizontal NCO bar on the painted guys helmet. Live and learn, I should take notes. I do think working this stuff out before painting the tank is a big help as I could more easily drill holes in the tank top to pin the seated figure where I wanted him. Usually doing this after painting is a nightmare. Onwards and upwards. Thanks for looking in. Dan
-
Sometime life just beats you about the head and heart. I'm just getting back to the bench on this one. A little figure action. Tamiya GI straight from the tin. Spent a bit of time cleaning up the flash, mould lines and defining the undercuts. I think it's a pretty good figure considering how old it is. I long for the day Tamiya blesses us with some more GI's. 😠 I'm really rusty with the paintbrush. More pics soon as I get some more done. I hope everyone is safe and well. Dan
-
I haven't felt much like building kits but got the itch the other day. Working a bit back to front as I usually finish the kit then do the base. Thought I try the other way round. Nothin' fancy only some Art Wrox's mesh and an Aber barrel. Coming together okay. Made an early stuff up so I'm not stressing out about muckin' it up like I usually do. Thanks for looking in. Dan
-
I've not been building much at all, just no mojo. Getting Covid didn't help but I've not touched anything in weeks. This was a little project to see if I could limit myself to some quick fun. I had a stupid idea to do a series of models each with a single word title. This one was going to be 'Wet'. There was going to be a "Hot', Tired', 'Cold' etc. Lack of mojo means that I'll probably only do this one. But my main goal was to play with the clear UV resin for the water. I'm pretty happy with how that worked out. Here's some pics. Only added the putty tarps and some 0.5mm carbon fibre rod antennas. Thanks for looking in. Dan
- 2 replies
-
- 18
-
-
Humber Armoured Car 1/48 Tamiya
ScanmanDan replied to ScanmanDan's topic in Work in Progress - Armour
Glad you like her Gary. I posted the finished shots in The Ready for Inspection section but never linked it to this post. Humber scout car finished I hope you like her. I haven't done a base for her yet but she looks pretty good in the cabinet. Dan -
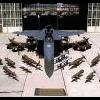
I'm always on the lookout for new figures in 1/48th scale and have been experimenting with using figures meant for 28mm wargaming. I printed this 28mm figure from a stl file purchased from Wargaming3D.com. Rescaled for 1/48th scale and printed with my Elegoo Mars printer I think it came out pretty well. I'm still working on his mortar and the other crew members. Here's where I'm at so far. I hope you like it. Dan
- 1 reply
-
- 6
-
-
Just a quick one. Built just for fun Pretty much OOB with some bits of resin stowage and tarps made from Greenstuff. Posed on a little scenic base I'm working on. Neat older kit that builds nicely. Thanks for looking in. Dan
- 6 replies
-
- 25
-
-
-
P-51c Mustang - 1/48 scale Tamiya
ScanmanDan replied to ScanmanDan's topic in Ready for Inspection - Aircraft
I used what was to hand. Evergreen no 253 (4.8mm x 4.8mm square tube) and 1/8" K&S brass square tube. Works well enough for single seat 1/48 scale prop aircraft but I'm not too sure about jets. You might want to go up a size. I have a He219 that I think I'll need to use bigger rod on. I'm also looking into getting some 3mm and 4mm square acrylic rod from EvilBay to see how that works for supports. See how you go. -
P-51c Mustang - 1/48 scale Tamiya
ScanmanDan replied to ScanmanDan's topic in Ready for Inspection - Aircraft
Thank you to all for your wonderful comments. Murewa - What I do is install a length if Evergreen square tube into the fuselage which has an internal size just larger than the K&S Brass square tube is externally which I use for the uprights. I then brace this internally with epoxy putty and superglue. On installation I leave the tube just a bit proud of the surface of the fuselage and then sand and fill with superglue to make a strong and seamless joint. I use this same connection on the base. This kind of connection makes it easy to remove the plane from the stand to work on it. IHTH. Dan -
Last for the year Another one straight OOB. Neat older kit using only aftermarket decals. I hope you like her as I had heaps of fun building it. Though masking all those stripes and checkerboard nose were a challenge. Once I get some bits squared away I have an He-219 Uhu in the dock for the same treatment. Looking into alternatives for the spotted camouflage that most of those birds seemed to have. Best wishes for everyone for the new year. Dan
- 8 replies
-
- 30
-
-
-
Wonderful results and great to hear that the kit builds so well. This is a subject I find interesting but always somewhat gun-shy of Airfix engineering. Nice to see her all in black. thanks for sharing.
-
Dewoitine D.520 - 1/48 Tamiya
ScanmanDan replied to ScanmanDan's topic in Ready for Inspection - Aircraft
Hi Doccur. I used a set from Iliad Iliad set 48009 Nice set, has four complete sets of markings. They were thin with very good colours and registry. Unusually none of the decal solvents I used on them had any effect at all they settled down pretty well. Unfortunately out of stock at BNA models, though he might still be able to get them. IHTH Dan