

Neddy
-
Posts
1,425 -
Joined
-
Last visited
Content Type
Events
Profiles
Forums
Media Demo
Everything posted by Neddy
-
Running the supports outboard from the centre made too shallow a vee and the way they are now follows the perceived "bonnet line". I know I shan't please everyone here but this solution pleases me which is the main thing. 😊
-
Now, I have to admit I was doubtful about moving the supports outboard but I've given it a try and it's a definite improvement on my original arrangement... It works well and I've decided to leave it that way. Thanks all for your input, I really appreciated all thoughts and suggestions. Now to sort out the floorpan and interior fittings.
-
Nor do I - yet... 🙂 Beautiful looking paintwork and that interior is flocking gorgeous!
-
There you go... ...just used a thinner paperclip!
- 99 replies
-
- 10
-

-
OK, here's a lashed-up proof of concept for a pair of tubular supports, together with the hi-tech tools and materials used to create said innovation... ...laughing is not only permitted but positively encouraged. D'you think they're a bit too thick and heavy?
-
AC 289 Sports MkIII, starting with a Monogram Cobra
Neddy replied to cmatthewbacon's topic in Work In Progress - Vehicles
Nicely saved! The work on the rear suspension is superb, well done getting everything back together and aligned. -
Pete's right, that really is a little beauty. I hesitate to use the word 'cute' but it is, definitely. Welcome to the community, if that's what you can do in 1:1 scale I can't wait to see the models progress!
-
I'm leaning that way meself, in fact I've had an idea how to achieve it but I need to test it first. If it works I'll give you a good laugh by showing you.
-
Thanks Pete, I'm considering either single or twin wire supports and headlights on the fenders are a distinct possibility. I have the 2CV lights and those from the street-rod at my disposal, I might even go for quad lamps. I don't want to overdo it but agree it needs something. EDIT: I've just ordered a sheet of 1/24 scale engine-turned embossed foil from Spotmodel, hoping it'll be suitable for the firewall.
-
Firewall installed - this is the Mk II version as the Mk I was hopelessly misshapen - and the radiator shortened in line with the newly lowered bodyshell. Still undecided about the nosecone shape, I'll ponder it a bit longer before finalising it. All opinions welcome as always!
-
AC 289 Sports MkIII, starting with a Monogram Cobra
Neddy replied to cmatthewbacon's topic in Work In Progress - Vehicles
Yup, quick and simple fix. Five minutes' work each side. Good luck with it! -
Overpainting the sticky felt is surprisingly effective, it looks really good.
-
Greetings Eduardo, Don't be impatient, give it another twenty years or so and you might grow tired of it. 😁
-
Assistance from 'classic' rally navigator required
Neddy replied to mbdesignart's topic in Vehicle Discussion
You are correct, it's a Monit, either a G-100+ or G-200+. It basically replaced the Halda SpeedPilot mechanical unit as the co-driver's "must-have" when everything wented digital. -
...oh yes you are, or you wouldn't be here. 😁 to the British Association of Plastic-mangling Addicts. Fear not, you're amongst friends here.
-
AC 289 Sports MkIII, starting with a Monogram Cobra
Neddy replied to cmatthewbacon's topic in Work In Progress - Vehicles
That's a lovely piece of work Matt, you've really captured the unique shape of the Mk III which isn't easy - it's neither as slim as the original 289 nor as beefy as the 427 - but it looks spot-on to me. -
Fujimi 1/24 Ferrari F430 Scuderia
Neddy replied to Kodiopa's topic in Ready For Inspection - Vehicles
Gorgeous! beautifully built and detailed, amazing paint job. -
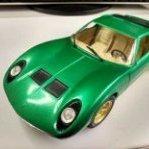
That's a little beauty! I'm very fond of those cars anyway and that's as good a model of a FIAT 500 as any I've seen. Delicately detailed and immaculately finished. Very well done!
-
AC 289 Sports MkIII, starting with a Monogram Cobra
Neddy replied to cmatthewbacon's topic in Work In Progress - Vehicles
Really nicely crafted Matt, a tricky bit of plastic surgery carried out most successfully. -
The yellow piece is actually the Ford radiator - I need something to prop the cowl up and hope to cut it down to more reasonable proportions. The tube support is food for thought, I'll ponder that idea - thanks!
-
I thought it did too but the thought of sectioning the body filled me with horror! It was only just today when I noticed I could easily lose 3mm off the bottom that the job became simple enough for me to tackle it! It's also neatened up and simplified the look of the rear wheel arches a lot
-
Thanks Nick, I'll ponder that one. Not sure about bracing, I might even shorten the creation a bit and make it purely a rad cowl. I'll park that for a while, let it mentally brew and ponder any other opinions before finally deciding. Meanwhile I realised I had about 3mm leeway below the doors that allowed me to lower the body a bit and tidy up the rear end at the same time. A couple of hours' effort with razor saw and my trusty mini-drill/drum sander combination resulted in a better proportioned look... ...and also aligned the lower extremities at the rear so that the edge mouldings were properly aligned.... While I'm cogitating about the nosecone I'd better get on with making a firewall, a floorpan and an interior. Thanks all for your interest so far.
- 99 replies
-
- 11
-
-
Not a huge amount of progress this weekend but a LOT of thinking. First I finished building the engine and wired it... ...then I got to thinking about an idea I mentioned earlier in the thread, that of creating some kind of nose that would be in keeping with the 2CV bodyshell and also the street rod persona. After a lot of false starts, a lot of permanent marker and IPA was used on the hood moulding to establish a basic shape. This was chain-drilled and shaped with the miniature drum sander attachment I use with my mini-drill. The end result was more or less as I envisaged it, so I shaped the radiator header tank slightly to take it then mocked it up with blu-tack to give an initial idea of what's in my mind... Feel free to let me know what you think!
- 99 replies
-
- 10
-
-
Mustang Shelby GT500 "Eleanor" 1967 USCP/Revell 1/24
Neddy replied to Ints30's topic in Work In Progress - Vehicles
Oooh beautiful! Well detailed, well finished, well done! -
Er... no. Just....NO!

