


Technoboots
-
Posts
12 -
Joined
-
Last visited
Content Type
Events
Profiles
Forums
Media Demo
Posts posted by Technoboots
-
-
I've built a few of the Revell Starfuries over the years. Despite all the issues with the kit it has become one of my all time favourite kits. Each time I've built it I've tried to do things a bit differently.
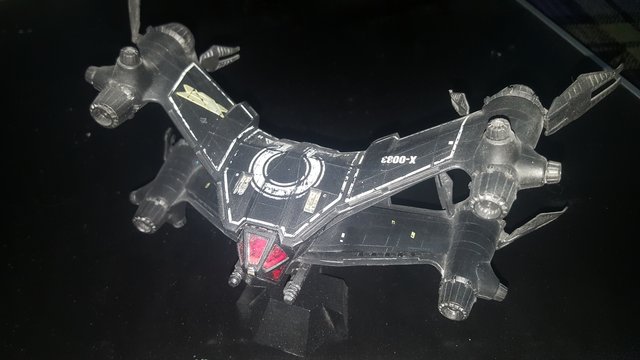
Black Omega made in 2003
My first build was straight out of the box using black enamel for the main colour. I took it out of storage a couple of years ago only to find it had broke apart. Fortunately all the pieces were there. Unfortunately when cleaning the model I realised I hadn't sealed the decals. This resulted in the decals becoming damaged. Luckily the effect didn't look that bad and could always be seen as one found years after the Telepath war.

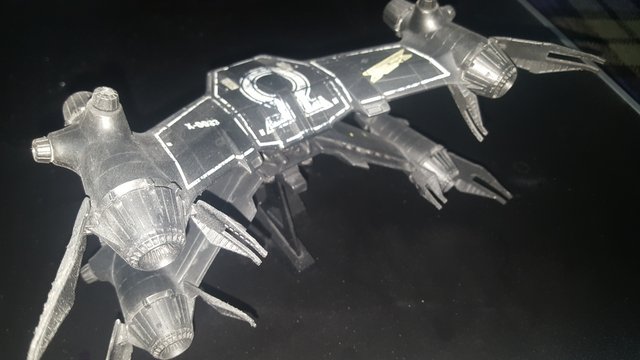
Presidential Starfury made in 2010
My next build was the first one I actually used filler on to clean up the inner wing gaps. It was also my first kit where I painted on multiple colours using an airbrush. As an early weathering attempt I covered the whole model in Humbrol smoke.
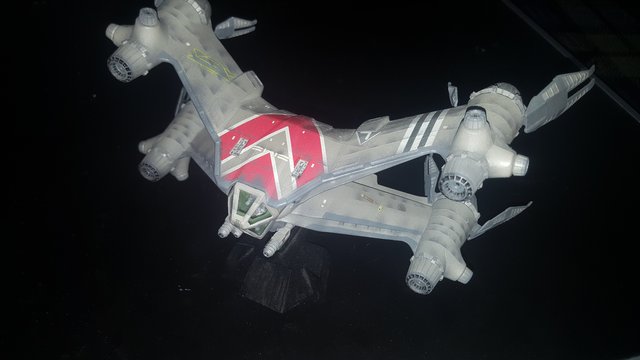
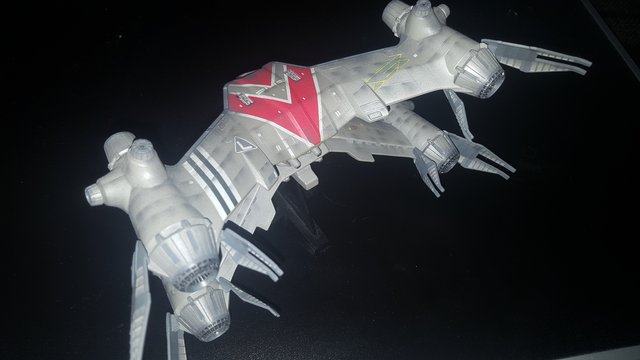
Sinclair's Starfury
This build was made in 2020 during the first lockdown. I spent ages trying to get the wings level only to realise that the inner wing sections aren't symettrical. I had to do a lot of filing to get them even. It worked though as when I took measurements they were evenly spaced on both sides.
I decided to try the weathering example they gave in the instructions and it came out ok.
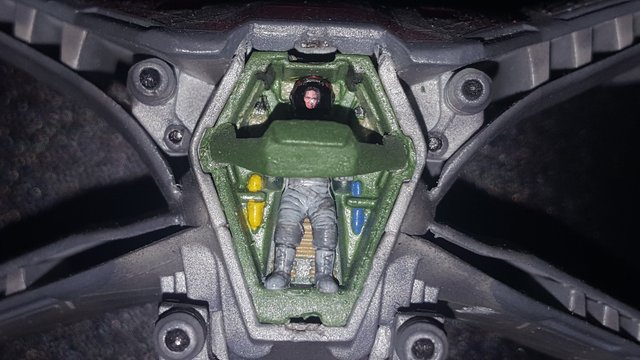
I used picures as a reference for painting the cockpit as the instructions scheme is inaccurate. When I got decals made for the Blue Midget I added a couple of small decals for Starfury pilot faces. This one has Sinclairs face on the pilot. I also made it so the canopy is removable as I attached it with a small magnet.
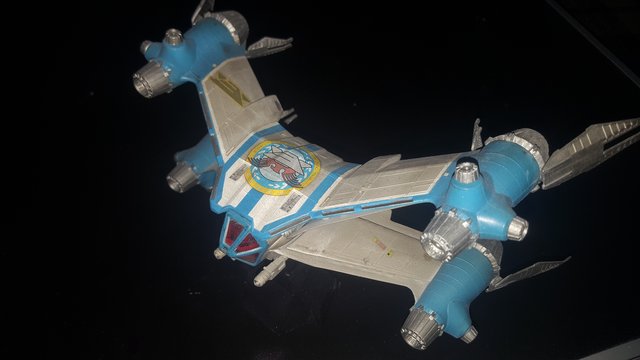
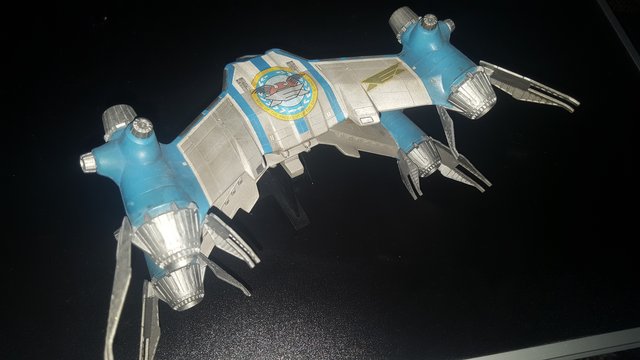
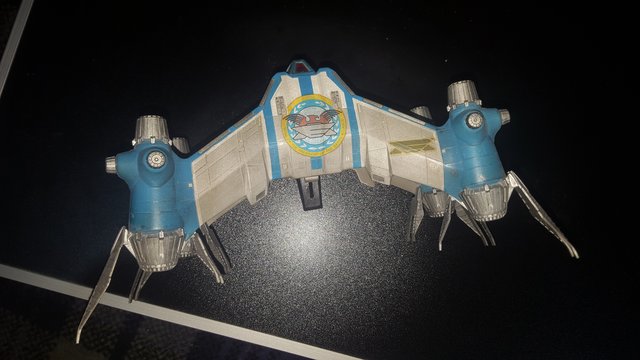
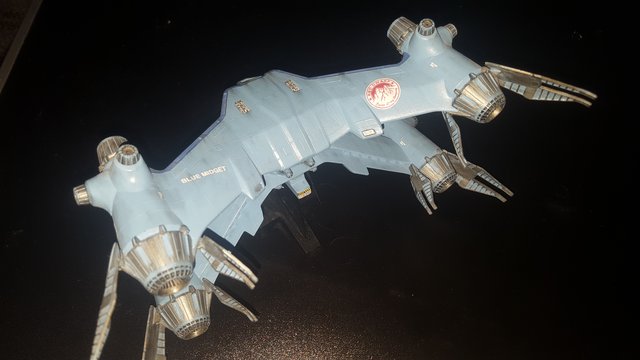
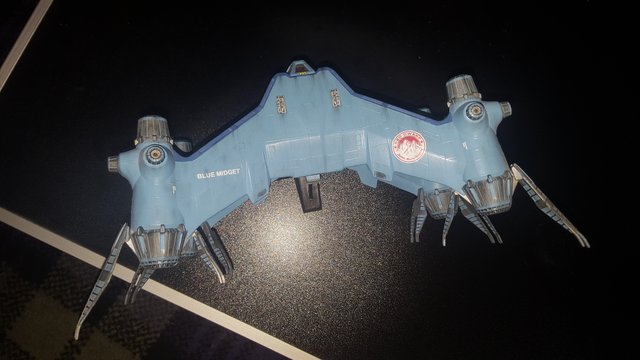
Blue Midget Starfury
This was made during the second lockdown. I had some decals left pver from Blue Midget so I decided to make a custom Starfury. Using the leftover paint from Blue Midget I hand painted the model. The cockpit was painted in grey's. Can't remember if it was ocean grey or military grey.
I decided to have Cat as the pilot so painted the suit in gold. It also has Cat's face as I'd added the RD crew to the decals as I'd been thinking of doing something like this for a while.
-
 14
14
-
-
For me I've found it depends on the brand. Humbrol seem to dry quicker for me than tamiya acrylics do. I can't say I'm fond of the new humbrol design. It's very difficult to get any paint out of them though the paint at least seems to cover well.
I'll probably stick to brushing for smaller models but when it comes to larger ones airbrush will probably be the way to go.
-
Small update.
Started adding decals to it. I can now see just how rough the brushed on paint it. I'm definitely digging out the airbrush for the next model. I've also added the pilot, bombs and bomb bay doors. Saving the undercarriage doors for the end.
-
7
-
-
I've painted on the main colours. Decided to do it as No 109 Squadron as I like the look.
I've just remembered why I'm not keen on brushing on Humbrol acrylic. The 106 which I have kept on clumping a bit when brushing on. Might just be because it is an old one I was using though. I never have the same problem with Tamiya paints. The green went on fine though that was a new one I was using.
I still need to paint up the undercarriage, bomb bay doors and propellers but have ran out of primer so need to get some more.
I've also painted the canopy and nose cone. Painted them by hand without masking. Took a while but was still quicker than if I'd done the masking.
-
4
-
-
I've just gone back and sorted oit the images in the original post.
I'm still hoping that more will be made. Just wish a decent model of the original Red Dwarf was made.
-
1 hour ago, Pete in Lincs said:
Boys from the Dwarf! Cool.
Very nicely done, both of them. Shame kits weren't more widely available.
You should be able to copy and paste the URL from Postimage onto here so the pictures come out bigger.
Just don't make them too big or the Mods'll get you! I use 640 x 480. Quite adequate.
Got any more to show?
I've just opened the account with post image so I'm still getting used to it. I'll try and remember for future posts. Just had a look and saw the upload options and have taken a few more pics close-up. I remembered I also made up a set of steps for Starbug. The figures are from the toy so are a bit out of scale.
-
6
-
-
Thanks for the advice. I've just started using a new image site so I'm still getting used to it.
-
1
-
-
Hi
in New Members
Thanks for the welcome. I've already posted a couple of threads of my builds in the forum.
-
1
-
-
I started on this kit on wednesday. Saw a build up video and thought it was a good kit to start getting back into aircraft modelling.
I'm using this kit as practice using washes. Made some up using black enamel and white spirit. It definitely improves things. My builds from over a decade ago always looked a bit plain as any slightly raised detail just faded into the background.
-
6
-
-
I built these a couple of years ago. Blue Midget around a year after I finished Starbug.
Starbug is the JPG Productions 1/72 scale kit. I was fortunate to get one before they went out of production.
I made a number of changes to the kit to improve it. One of the fins was lower than it should have been so I repositioned it so it matched the other one. I also remade the segmented section the engine bells attach to using a 40mm pipe coupler as the original piece didn't line up evenly around where it attached to the main hull.
The doors were also made from scratch as I found the original ones were too big.
The decals were custom printed and all of the striping was done using vinyl tape cut to length.
Weathering and detail panels were airbrushed on. The burn mark on the starboard side was actually sone as the decal accidently lifted after I had masked the area off for weathering so I decided to make the damage look deliberate.
I added basic lighting which is just 4 led's running of a 9v battery. The front just unscrews so replacing the battery is easy. I hid the switch so I need a rod to turn the lights on and off.
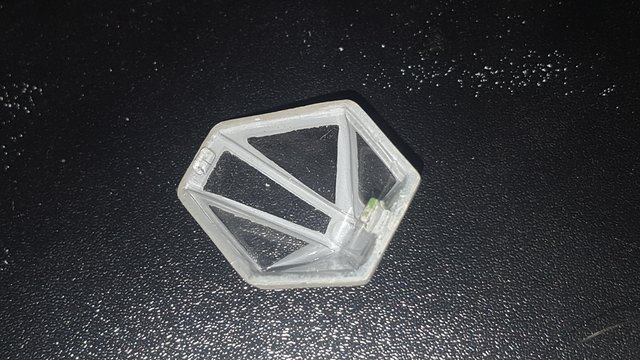
Blue Midget is a kit from Larson Designs. I made a lot of modifications to make it look more accurate. The legs were shortened and positioned higher with the extra hull section at the bottom removed so it sits lower down.
The back hull detail was scratchbuilt using plasticard and tube. The front mouthpiece is a 3d printed part which I designed.
The decals are custom printed. The JMC decal says Jupiter Mining Company rather than Corporation as this is actually what it says on the studio model.
Weathering was very basic, just using tamiya weathering master over the model.
-
15
-
-
Hi
in New Members
Hello everyone
I've been doing modelling for around 25 years. I tend to prefer the actual building part though in the past few years I've started putting in more effort into the finishing of models.
I tend to focus on Sci-fi like Star Trek, Babylon 5 and Red Dwarf though I do occasionally build aircraft. I'm currently working on a 1/72 scale Airfix DH Mosquito and have a 1/32 scale Revell version in storage as the next build.


Revell Starfury builds
in Ready for Inspection - SF & RealSpace
Posted
I wish I had a 3d printer, I'd love to make a larger one.
I still have 3 unbuilt ones myself, one open and two sealed special editions I managed to get cheap.