


Freester
-
Posts
144 -
Joined
-
Last visited
Content Type
Events
Profiles
Forums
Media Demo
Everything posted by Freester
-
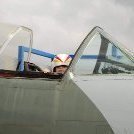
Ok, my son got the Revell 1/72 Sea Vixen FAW2 kit from the in laws for Christmas. Now he would really like to reproduce the last flying Sea Vixen XP924 as he has fond memories seeing her fly (and fold her wings in front of us) and also looking at her in a sorry state after her crash Pretty sure XP924 was a FAW2. I guess I'm not so worried about complete accuracy. If she was an FAW2 all good. However decals... My understanding is the Xtrakit 1/72 kit had the XP924 decals and these were printed by Aviprint? I think I've found a set of these decals on the dreaded FleaBay. In CZ. It's about 6 quid posted. Worth a punt I guess? Sorry for the noob question but it's the first time I've considered any kind of mod to an OOB build. And just for posterity and because we love her... Sea Vixen by Freester, on Flickr
-
Well I hope everyone had a nice addition to their stashes over the holidays. I requested a 'Wolfpack' F14A for a couple of reasons. I have fond memories of building an Airfix version when I was a teenager, and this Tomcat adorns the front of my old and well thumbed 'Encyclopedia of World Air Power' that I have had since I was a teenager. This is the 4th model I've started since rediscovering modelling (only one completion so far but another coming very soon)... Obligatory picture of boxes and sprues... I'll be working with my 10 year old son on this one. This is my second Hobby Boss kit and one of the things I've noticed is the information on colours / details for the cockpit, engine fans other internals etc is a bit lacking. I'll be having a look at other builds and other model make instructions. Plan is straight out of box... Hand brush with thinned enamels. I'm sure I'll be asking questions along the way... Off to the local model shop to pick up a few colours I need and hopefully make a start with a little assembly and painting today...
- 11 replies
-
- 7
-

-
- f14a tomcat
- wolfpack
- (and 1 more)
-
Fantastic great tip thank you I will try that on the next model with small delicate parts. I have plenty of the DE razor blades. I've actually gone old school and shave with them. Way nicer closer shave with less irritation once you've got the hang of the DE razor and a darn sight cheaper than shaving with the latest new fangled 7 bladed vibrating shaver thingumajig! Thanks again.
- 26 replies
-
- 1
-
-
- 1:48
- WWII Fighter
- (and 1 more)
-
Well the roller coaster of emotions continue 🤣 The good bits: Decals finished - really please how these went on can see detail underneath. Had a go at some exhaust and gun smoke. I used a some brown and black (for exhaust) and black (for gun smoke) pastel crushed and applied with an old brush dry. Looked good. Sealed it in with some Humbrol spray varnish which seemed to lessen the effect. To be fair it's a dark model and the effect is subtle. The not so good bits: Finished the model off with a coat of varnish - Humbrol Gloss in a can. I didn't practice on anything and it felt a bit too liberal when I did it. Looking OK the day after. I fixed the two antenna mast and spraying the model blew them off. One lost. I can bodge a replacement. Cutting from the sprue resulted in some small detail that would be attached to the drop tanks to snap. The first happened when I cut. The second broke barely as I touched it. I use sprue / side cutters. I guess I need to be more careful use a knife or something. At this point I got quite downhearted. It's been (for me) a fiddly model where my son has not been so involved which is the point. Going forward we are working together on a little Revel P-47M Thunderbolt, I think I will have projects that we both work on and let him do the Lion's share, and maybe I'll have a project for myself evenings. Any way in the cold light of day. It's still looking good. Canopy to fit. Antenna masts to refit. Front wheels to fit. Folded wings to fit. One more coat of yellow on the prop tips, coat of gloss varnish then prop decals. Then I'll be calling it done. Hopefully the next post will be an RFI. Never though I'd be brave enough to show some close up detail but it's OK. Not perfect but not bad for second build in a long time. Broken bits
- 26 replies
-
- 5
-
-
- 1:48
- WWII Fighter
- (and 1 more)
-
1/72 Hawker Hurricane Mk. I
Freester replied to HisNibs204's topic in Ready for Inspection - Aircraft
As another recent returnee to modelling since my teenage years I just wanted to comment and say welcome and you've done a great job. Photography is my other thing and one thing to watch out for is when taking a pic with a white background the subject might get little underexposed and look a little dark. Hope you don't mind me saying... -
A little more progress to report. Underwings and starboard decals completed last night. Decals applied to gloss coat. Soaked in warm water, applied onto some Microset (blue one), positioned then I pressed down VERY GENTLY with a damp cotton bud (Q-Tip) before applying a liberal but gentle brush of Microsol (red one). Went OK these are the pics the day after. I managed to damage very slightly the bottom of the 'Y' on the wing tip being a bit too keen to get the brush under the decal whilst positioning, also the stripe to the right of the star (left of star in pic). Learnt my lesson. One small potential disaster where the forward '410' decal floated away from the backing paper and sunk in the water. I retrieved it with tweezers and it folded in half when I removed from the water. No panic - managed to release it using a paint brush and gently getting water between the 2 folded halves. Using more water on the model to get the decal to float again if it had adhered and wasn't located correctly was another tip I'd read and used last night... The rest of the decals look good now dry no silvering. There is what looks like a small crease on the 'T' on the tail fin but it is genuinely detail under the decal. Really pleased with how it's looking. Top of wings and port side tonight. Feels like I'm on the homeward straight...
- 26 replies
-
- 8
-
-
- 1:48
- WWII Fighter
- (and 1 more)
-
So a quick update. Lacking pictures as most of the work has been in the evenings and I prefer to take photos during the day. - Touching up done. - Undercarriage doors fixed. - A coat of gloss varnish applied. - Kit supplied yellow decals for propeller tips decided to mask and paint can't imagine decals will be that good and also to match the other yellow on the wingtips etc - Unmasked canopy. It's OK ish. Not that bad but I will do a better job next time. Varnish is Humbrol Enamel Gloss and I thinned it with Humbrol Enamel Thinners. Can't tell you the proportion just kept adding a drop of thinners at a time until it felt and looked right. A coat all over the fuselage and wings last night. Had a quick look this morning and I'm pleased. One very quick daylight photo before work this morning... Plan is to get going with the decals tonight. I want to do some exhaust and gun smoke once decals done. Must admit I'm not sure what the finish should be on this model - another coat of gloss varnish to coat?
- 26 replies
-
- 5
-
-
- 1:48
- WWII Fighter
- (and 1 more)
-
Thank you! Oh yes we're going to finish this. Thank you - yes I'm using enamels, for no other reason than that's what I used all those years ago. Maybe knowing what I do now I'll move to acrylic but I've got a fair few pots of enamel now. I must say, I haven't had any problems thinning with White Spirit. But for my next model I will invest in some enamel specific thinners and keep the white spirit for cleaning.
- 26 replies
-
- 1
-
-
- 1:48
- WWII Fighter
- (and 1 more)
-
Steady progress. Handbrushed 5 thin blue coats, and 5 black coats on the top of the fuselage in front of the cockpit. Just some touching up to do here and there then I'll be putting a coat of gloss varnish in advance of decals. Drop tanks done. I've started the canopy frame. Some fiddly assembly done - the wing folding gear, and the landing gear fitted which was fiddlier than expected. Not a patch on most of the amazing work some of you ladies and gents do on here but I'm pleased with the paint finish considering it was with a brush...
- 26 replies
-
- 5
-
-
- 1:48
- WWII Fighter
- (and 1 more)
-
Back into the Hurricane - Mk.I Airfix 1/72
Freester replied to PlaStix's topic in Work in Progress - Aircraft
As a noob here I've really enjoyed digging through your threads / WIPs and seeing what can be done with the hairy stick. Excellent work. May I ask one question as you are UK based. What variety of Pledge are you using? Do you use it as others have discussed in place of Klear for canopies and decals etc? -
Thank you!!! Thank you for your very detailed reply. Some things to think about on next builds, and stuff I can consider for this one. Never stop improving!!!
- 26 replies
-
- 2
-
-
- 1:48
- WWII Fighter
- (and 1 more)
-
Well this time last week I was feeling a little down on this model. I had managed to drop a tiny piece of the undercarriage on the floor. I found it, tried to grip it with some tweezers and it pinged off across the room lost. Not structural but I would have known it wasn't there on the undercarriage. Messaged the lovely people at @Creative Models Ltd and had a replacement part within 2 days for the price of a stamp and envelope. Thankyou. I've been chipping away. The wings and body had 5 coats of hand brushed 1:4 Revell Anthracite: Lufthansa Blue enamels thinned with white spirit. Took off the masking for the yellow wing tips and I'm pleased. The wing tip yellow is straight, the blue colour is pleasing and plenty of detail remains under the paint. There was a little bit of bleed but I've now started touching up the yellow. I did try a little 'pre-shade' just using a soft smudged pencil before the last coat of blue but I don't think it really did a lot. I've also masked the top front bit of the fuselage and applied a first coat of black (sorry no photo for that bit). I'll start thinking about a coat of gloss varnish where the decals are going and fixing the undercarriage...
- 26 replies
-
- 6
-
-
- 1:48
- WWII Fighter
- (and 1 more)
-
As another noob currently on my second model (as an adult) and also still hand painting I just wanted to comment and say I think you've done a great job. I think the detail in the cockpit is superb especially the belts you added. You've been honest and constructive about what you could have done better. With that attitude and the great help and tips on here I have no doubt your F18 will be a notch up again. But as I said I can't see a lot wrong with this Hawk! Thanks for sharing.
- 10 replies
-
- 1
-
-
- Second build
- trainer
- (and 1 more)
-
Chipping away this weekend. You try and set a target to where you want to get and there's always at least 'one more job' that crops up before you get to where you want. Fuselage joined. Engine cover on. Pretty good fit but I did use a little filler and sanding to get things flush. First time I've ever used filler. First couple of coats on the tips of wings etc that will be yellow. I had a couple of breakthrough discoveries this weekend... +1 reading glasses for the win!!! Tamiya Extra Thin Cement for those real fiddly bits. This undercarriage is 4 pieces and at this stage would normally would have been a gluey sticky mess!!!
- 26 replies
-
- 3
-
-
- 1:48
- WWII Fighter
- (and 1 more)
-
I had the idea to check out some of the later Revell Corsair model instructions on Scalemates to see what colour they were recommending for this era Corsair. By coincidence the instructions also recommend a 4:1 mix of Revell Lufthansa Blue: Anthracite grey. On the pre-assembly components I've given 4 or 5 coats it's looking nice. A mild / silky gloss coat. It may not be 100% accurate but it's pleasing to the eye and close enough for me and my son. Nice to have a little confirmation that I wasn't that far off from @Troy Smith's excellent steer. 👍 Thanks again
-
I will say again I do feel a bit of a fraud showing my progress on here. Comparing to some of the absolutely fantastic builds that occur on here, the attention to detail, the attention to historical accuracy... Anyway I'm reporting in really to record my improvement (hopefully) and also sometimes just to talk out loud in order to think things through. I was feeling like I wasn't making any real progress this week. It was a case of slapping a few coats of paint on parts before assembly. And trying to tick off a number of items so I could crack on and join the fuselage. I'll be honest I was also dreading that job. There was a cockpit, engine and rear undercarriage to slot in the fuselage at that point. The fiddliest bit was the rear undercarriage. The instructions suggested just glue it together. However there was a critical measurement / placement of the piston attached to the landing hook and if I got that wrong the landing hook wouldn't be right. This added to my worries about joining the fuselage. I just wanted to get some of the fiddly stuff out of the way so myself and my son could crack on and do some of the easier tasks together. A lot of fiddling, cussing, swearing trying to dry fit the rear undercarriage. Then I realised I could glue it all up APART from landing hook, get the distances right before a final glue. THEN I also realised I could actually fit each component in turn; glue to one half of the fuselage, dry attach the other side of the fuselage to make sure everything is OK. Let it dry then remove the fuselage and add the next bit. Probably obvious to most of you experienced hands. So cockpit got glued one side first. Then I tackled the rear undercarriage. This was less painful than expected. I also got on with gluing the wing sub frame and the ailerons to it. As well as assembling the main wings / ailerons rear stabilisers with my son. It was nice to be working together again. Another coat or two of paint on the fuselage under where the exhaust will be and I'll be gluing the two halves together. Jr still wants the wings up. Appreciate the folding action on this model isn't quite accurate as I understand the wings actually kinda fold up then forward. But I've seen a few examples of this model with folded wings online and on here. They look ok. Anyway the plan will be to paint / decals wings before fixing in the upright position...
- 26 replies
-
- 3
-
-
- 1:48
- WWII Fighter
- (and 1 more)
-
I've done a bit of searching on Ebay but those old kits aren't that cheap. Similar money to a more new / recent version. I'm not feeling that nostalgic about doing the exact same kit. It's more about the livery. I think I may end up splashing the cash on the HB 1/72...
-
I must admit. I found a couple of boxes of the Airfix kit David above mentioned on the dreaded 'Bay. I did have a bit of a further dig around the Scalemates website. I think IIRC this was the model I had seems about right by the dates. I think it's just a new box however... Sooo. The yellow decals? Would I have to buy a new / aftermarket set?
-
Grazie for your very detailed reply. Food for thought.
-
As someone who took on this very same model very recently (my 10 yr old son's first and my first for many years) I just wanted to compliment you. It's a great job - better than ours. The couple of bit we found challenging to fit - you've done a better job. And I like the weathering.
-
Thank you. That's very likely. At least I've narrowed it down to it's likely a 1/72. I got the ruler out last night. ~260mm for the 1/72 felt a bit small, but ~400mm for the 1/48 felt a bit big.
-
I know, I know - this gets raised regularly. I got myself in a right old overthinking state trying to relive my youth and one of the last models I made as a youngster before rediscovering modelling recently. Probably just under 40 years ago I made an F-14 Tomcat. I can't remember what brand (I'd guess Airfix), I can't even remember if it was 1/48 or 1/72. But I remember the wings swung in sync. To me at the time it was quite a big model (but I was smaller then). And it had the VF-1 Wolfpack decals. Which to me at the time (and now probably) was important as the VF-1 F-14 adorned the cover of my much loved 'Encyclopedia of World Air Power' that I spent many hours poring over, I still possess and now my 10 yr old son gets great pleasure from. That model is long gone probably in landfill somewhere. It's a model I'd like to revisit (as closely as possible) it's an itch I need to scratch. I'm not too worried about detail, historical accuracy. I just want a challenge that I is fun for me and my son to enjoy and a nice looking model that will reward mine and my son's time and hard work. I'm also a cheapskate 🤣 Options I can see. Hobby Boss 1/72 F-14A Wolfpack. Italeri 1/48 F-14A Tomcat are the cheapest. There's a 1/48 Hobby Boss but no Wolfpack (or Jolly Rogers) decals. But I like the HB because it has a nice ladder and raised canopy option. Not sure what I'm even asking really. Just talking aloud coz sometimes a (first world) problem shared is a problem halved.
-
OK as requested a picture of a little test on the inside of a wing. A couple of caveats. - Initial coat of both the Lufthansa Blue / Anthracite and 'neat' Blue was pretty thin but I could see immediately the neat Blue wasn't the right colour so didn't bother with further coats. - The Blue / Grey mix has now had 4 coats, obviously the photo is subject to all the vagaries of exposure / light balance and personal monitor settings but in grey day light it's a nice deep blue. Maybe missing a touch of that hint of purple but I think it's acceptable Thanks again everyone
-
Really just replying to this thread to wind it up and say what I decided to do in the end... Based on @Troy Smith's outstanding detailed replies I made a few experiments today. I compared the 'vanilla' 'Lufthansa Blue' to a 1:4 Revell 'Anthracite' / 'Lufthansa Blue' mix. For no other reason that I had the Anthracite in my stash of paint and looked close(ish) to the suggested Granite Grey from the Revell range card above. I've hand brushed 2 coats on and it looks hopeful. Probably nowhere near 100% accurate but certainly better than going for the straight blue. I'm not concerned about 100% accuracy, just something close, that my son and I can hand paint with Ok results.
-
Slowly chipping away at this, the engine and cockpit are now assembled. Mostly my son's work I just helped with the fiddly assembly bits. Not a patch on some of the amazing aftermarket engines and cockpits I see on this forum but the painting and gluing is a definite improvement from our previous build. The build stalled a little after a slight mistake with the main sea blue paint. I've got some paint now. Just experimenting with a mix of blue and grey then we'll be away again. In the meantime we've also got a 1/72 P47M Thunderbolt that we've been painting - again ready for cockpit and engine assembly. I must start a WIP for that one... Edit: Forgot to add we're considering going for the undercarriage down and wings folded option for this one... Thanks for all the support and help on this forum.
- 26 replies
-
- 5
-
-
- 1:48
- WWII Fighter
- (and 1 more)
