-
Posts
282 -
Joined
-
Last visited
About Valleyforge
- Birthday 29/07/1964
Contact Methods
-
Website URL
https://www.facebook.com/profile.php?id=100073214726993
- Yahoo
Profile Information
-
Gender
Male
-
Location
England
Recent Profile Visitors
Valleyforge's Achievements

Established Member (3/9)
467
Reputation
-
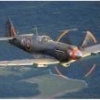
I’ve put together this Airfix Hurricane, while I battle with the FROG Shackleton; Iam building. Pretty straight forward kit and build. I used Merlin Invisible Thread for the antenna wire. All painting was done with the paints supplied in the gift set, thinned down and airbrushed. A gave it a coat of Galeria Gloss Varnish, did a little weathering and finished the whole thing off with Mig Ultra Matt Lucky Varnish.
- 1 reply
-
- 21
-

-
Thanks very much. It was a nice little kit to build and a little different for me. I find a lot of Soviet aircraft have a lot of this fancy and colourful writing on. One day Ill find out what its all about. Does add a little something extra to the build though.
-

VMF-323 F4U-4 Corsair, 1/48 Hasegawa
Valleyforge replied to Brian C.'s topic in Ready for Inspection - Aircraft
Ive built a few 1/72 and Iam moving into 1/48 now and this really does give some inspiration. Super build, love the cockpit detail. -

Airfix 1/72 Mitsubishi A6M Zero, Battle of Midway
Valleyforge replied to 81-er's topic in Ready for Inspection - Aircraft
Thats a super little build with a nice amount of weathering. -
Good to be back. . Nice little straight forward kit which was nice to put together. I airbrushed the kit with Vallejo black primer, then Vallejo 71316 Olive Drab and 71324 Dark Green; for the top. The underneath was a mix of Humbrol Matt 89 thinned with white spirit. The kit came with three options of which I chose this one - Captain Likholetov of the 159-th fighter regiment, Leningrad 1944. A lot of conflict on the colours. I’ve just used one of the schemes that was in with the kit. However, research says that the top surface colours show no green. c’est la vie
- 5 replies
-
- 13
-

-

1/72 - Pioneer 2 - Hawker Sea Fury 155 (WJ 236)
Valleyforge replied to Valleyforge's topic in Work in Progress - Aircraft
Well finally after a cracking start and then a long delay in working on the decals, the Sea-fury is done. Really happy with the way this turned out and as to how the home made decals have finished off the model. Will be hopefully looking to make a few more with the home made decal set up as it really does make you feel like you have put that bit more of an extra stamp on to the build. -

1/72 - Pioneer 2 - Hawker Sea Fury 155 (WJ 236)
Valleyforge replied to Valleyforge's topic in Work in Progress - Aircraft
Really quite impressed with the whole home made decal thing. I can see that there are easier ways to do this. However at the time I just went with the idea I had. After painting the initial area with the flat white paint I put on the decals and some and some Mig decal set; to settle it and see if it would sink a little more into the recesses. Things have been learnt and maybe some changes for next time. However, for now, Iam really satisfied with the results. Now to fix the rocket back on that came off. Long over due. However, an excellent bit of learning. -

1/72 - Pioneer 2 - Hawker Sea Fury 155 (WJ 236)
Valleyforge replied to Valleyforge's topic in Work in Progress - Aircraft
All the masking tape off and we are ready to put on the roundels. -

1/72 - Pioneer 2 - Hawker Sea Fury 155 (WJ 236)
Valleyforge replied to Valleyforge's topic in Work in Progress - Aircraft
Yes fortunate in away as Ive learnt how to make my own and hopefully use the right fonts to Ive read all about the confusion that was caused in the 50s with the colour schemes. Very interesting. I think the Canadian Sea Fury is on the cards for a build some time in the future. Thanks for that. They came out OK, not brilliant, but OK. -

1/72 - Pioneer 2 - Hawker Sea Fury 155 (WJ 236)
Valleyforge replied to Valleyforge's topic in Work in Progress - Aircraft
I did not move the tanks. However, I did move one set of rockets and re located them a little closer to the edge of the wing. I really thought the rockets were way to close to the tanks. I am sure thats a kit mistake, as if that was real life the rocket launcher would be inches away from the drop tanks. I think it looks good in this scheme to. I was going to do a Canadian version. However, I read up a lot about the apparent confusion, for the colour schemes, when they were ordered in real life. It sounds like some body made a big mistake when they were painted and they did not meet the RCN approval. Good luck with the build. -

1/72 - Pioneer 2 - Hawker Sea Fury 155 (WJ 236)
Valleyforge replied to Valleyforge's topic in Work in Progress - Aircraft
Sprayed up the necessary areas in Vallejo Matt White ready to receive the decals that I made a couple of weeks a go. Sorry for the crazy photo sizes, Ive changed the image size back to something a little more normal. -

PK-22 P-47D Thunderbolt - FINISHED
Valleyforge replied to IanC's topic in Matchbox 50th Anniversary Group Build
Coming along pretty good. Iam just about to start a Hasegawa P 47 D; when I can get my act together. The Vallejo paint sets are great to work with. I have three and they dont seem to muck up that often. Are you doing anything with the cockpit? I see in pictures its that crazy zinc chromate yellow/green something or other colour. The Tamiya set of decals, that you have, are similar to the ones I have; I was going to do the Little Cheif version in Olive Drab. good luck with the build. Ill be looking in to see how you are getting on. -

1/72 - Pioneer 2 - Hawker Sea Fury 155 (WJ 236)
Valleyforge replied to Valleyforge's topic in Work in Progress - Aircraft
Just a few pictures on the Sea-fury and very little work done on anything again this week. I fitted the black numbering and lettering and Iam pretty pleased with how they turned out. Did a fair bit of research on the fonts for the aircraft and this particular one seems to tick all the boxes. Apparently this style was used towards the end of WW2 and mostly used on single seat fighter planes into the 50s. Seeing that this aircraft was from 1952 it looked like the right one to use. Going to try and get on with the roundels this week, which should be fun. -

1/72 - Pioneer 2 - Hawker Sea Fury 155 (WJ 236)
Valleyforge replied to Valleyforge's topic in Work in Progress - Aircraft
Not been able to work on the models for a while. So made some movement on the Hawker Sea Fury to get myself going again. All changed now to what I originally set out to do due to the colour all being wrong. Decided to have a go at making my own decals. Plenty of trial and error. However, Ive come up with these and just printed a set out; due to the decals with the kit just totally disintegrating in the water. Ill leave them over night and apply some clear lacquer in the morning with the hope of putting them on tomorrow.


