


Muchmirth
-
Posts
1,270 -
Joined
-
Last visited
Content Type
Events
Profiles
Forums
Media Demo
Posts posted by Muchmirth
-
-
Just getting around to seeing this finished. Great job on a renowned fiddly kit…. Love the additional tea drinker!
Paul
-
Great work Maddox, your really nailing the figure painting.
Paul
-
 1
1
-
-
I know what you mean about the pe don’t know how others get it so neat and cleanly on.
Good luck with the battle! I’ll tag along on this one.Atb
Paul
-
Very nicely done. They sound like great kits… I’m tempted back to 1/72.
Paul
-
 1
1
-
-
Love this! The weathering is excellent and like how you’ve got the colours so bright and vivid.
Paul
-
1
-
-
Great job! And fair play for having the get up to come back to it.
Paul-
1
-
-
3 minutes ago, Bullbasket said:
Next step was a bit of a change for me. I thought that I would paint and weather the lower hull and running gear, before moving any further into the build. So once it was all primed with Halfords Acrylic Auto Grey primer, I then proceeded to spray everything with Mig's Portland Stone. Big mistake. I like these acrylics for detail painting, but I just can't get on with spraying them. So therefore I went with Plan B, which is what I should have done in the first place, Tamiya. Mike Starmer's mix for Tamiya, and this is as follows; 6 x XF2, 1 x XF1 and 1 x XF57. This was sprayed all over the wheels, sprockets, idlers and lower hull.
Once dry, I brush painted Migs NATO Black over the tyres.
A coat of gloss varnish, and it was ready for some weathering.

I used Migs Streaking to spread all over the sides of the lower hull and the wheels, and once it had dried, I removed most of it with a damp (white spirit) brush. I didn't want to do too much in the way of weathering as I prefer to use pigments nearer the end of the build.
Italeri have a very quaint old way of adding the road wheels. First, push the inner wheel onto the shaft. Next, add these very small plastic rings. Then, using the blade of a (very) hot screw driver, melt the stub of the shaft until it holds the wheel in place. Well, to me that was a bit Heath Robinson, so what I did was to follow the instructions up to adding the small plastic ring, and then I smothered the face of the inner wheel with Revell Contacta glue and pushed the outer wheel into place.
I think that the idea was so that the wheels would revolve, but that wasn't something that I was interested in. The sprockets and idlers were also supposed to be done that way, but glue sufficed instead.
Final job was to add the “hub caps”, paint them and then dirty them up a bit.
I solved the problem of the spare tracks on the RH track guard. Steve Zaloga did a build of a 1/48th Battleaxe Crusader in an issue of Military Modelling, many years ago, and in it he stated that the frame work that appears on the kit, wasn't fitted to early Crusaders. It's a run of track held in place on top of the track guard by a bolted down bracket. He also stated that it could be found on either left or right side. I even fitted one to the early Mk.1 that I did, both in 1/35th and 1/48th. Memory is a wonderful thing.....when it works!
The frame for the spare track links is moulded as part of the forward, RH track guard. So I removed this with a chisel blade, and then using an Olfa P Cutter, I scored the grooves into the track guard, finishing them off with a round file. Doesn't look very tidy, but the spare tracks will cover most of it.
I'll be back with an update soon (he said hopefully).
John.
Nice one for finding out about how the spare track was attached as I was wondering if it was sone kinda magic trick in the end!
Can’t beat a Mike Starmer mix.Looking good John!
-
1
-
-
Oh yes, this looks great. Looking forwards to seeing this one being built.
All the best,Paul
-
1
-
-
1 minute ago, IanC said:
Love those figures! Where are they from?
They are Stalingrad and evolution. Some think their definition is over pronounced (as hand sculpted as opposed to computer designed) but I think you need that at this scale.
-
1
-
1
-
-
Very good work. Love the pe additions and now wishing I’d also added a metal barrel. That line drawing is super handy too. Are you going to leave those back grated panels on the engine decks open?
I’d also say mdmb are best prebuilt dioramas on the market, their priced really reasonably and Marco is a super nice bloke!Atb
Paul
-
1
-
-
1 hour ago, Jasper dog said:
Looking good, always nice to reach the recognisable stage.
Your Sanxin tracks look good, never tried them but should. Only available directly from China via Ebay?
Atb
Darryl
Cheers Darryl.
yeah eBay or aliexpress (china based anyways) for the tracks. Think you’d get on with them. Same price as most others around the £30 mark.
-
2
-
-
That’s a real gem md! Great to follow this one from the start too.
Paul
-
This weeks update sees most of the construction complete ( had an extra day off work this week so spent most of yesterday on it):
I’ve left a few subassembly’s off as to help with painting.
Theirs a few clear parts for periscopes I have a also left out to be painted (edges etc)first.
Main sections dry fitted at mo.
No major dramas with these bits bar the simplest of sections… the stowage box. The box is just a box but the hangars were a pain. Theirs no guide lines or markings on kit parts for them to run along and the instruction pictures aren’t clear. So had to measure them mark with a pencil and attach with superglue. I didn’t get angle of the top hangers correct so had to rip them off, sand down and reapply. Done now.
Base painted the wheels as well (no pics) but will do with at least one more coat and then those rubber rims. I’ve left them attached to sprue for this, as keeps em steady.
Likewise with tow cables ( these are top quality in the kit so no need to replace with copper eureka ones.
I admire how Dragon have made out of plastic parts items you’d normally have to get in resin for instance a clamp on front hull has a butterfly nut on its top. I’d guess about 0.3mm maybe.
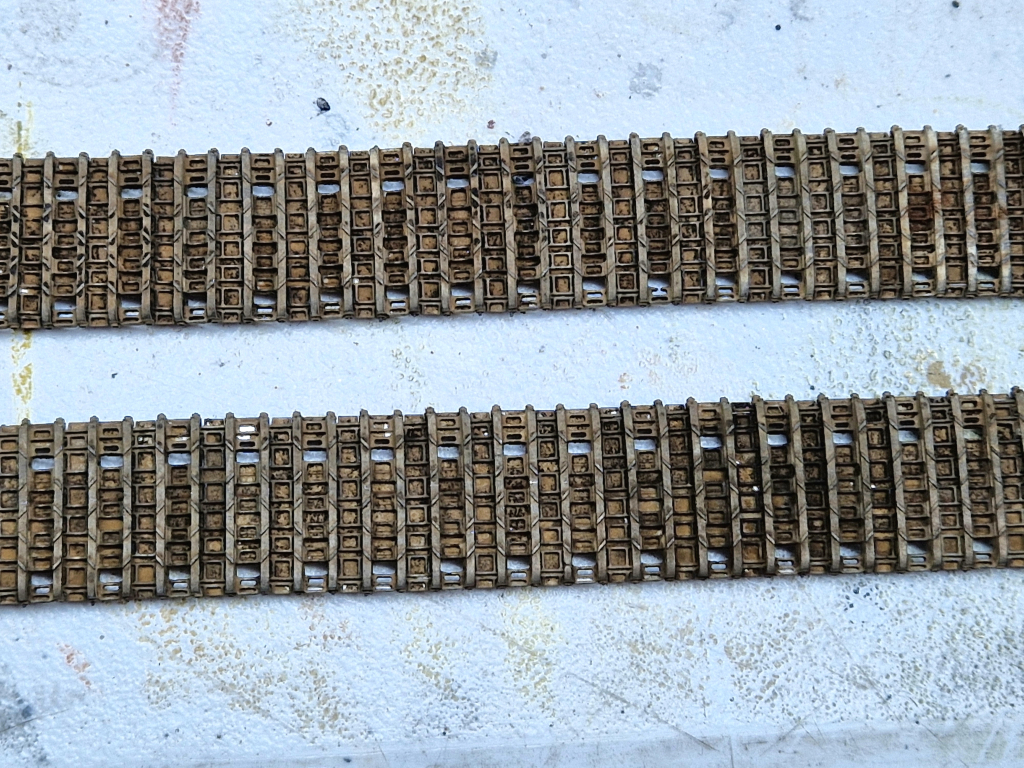
Made the Sanxin tracks:
Now these I love. Only one link needed a file down (95 links per side)and no ejector pin mark, no holes to burr out and zero flash. Each one comes with a pre cut brass pin to slide into a satisfying click. As a first experience I’d defo get them again. I’ll have the rmodels kt tracks to compare to later on.
Then I made up the three panzer crew (they’ll need a bit of work like filing and filling later on) Test fitted them to the hatches and they fit ok, so no keto diet needed.
One more night of work on the upper hull should see the build part done. Then I can get on with the fun bits.
Thanks all.
Paul
-
10
-
-
1 hour ago, Keeff said:
To be honest, the paint bubbled and looked like it had reacted so I put it down to the hairspray ..... hopefully fresh paint will be ok 👍
Keith 😁
Keith I’ve had similar, I brush painted a Gepard after it had been hair sprayed and I use water to thin the paint. So ended up in this bizarre situation where one stroke added the paint and the next stroke removed it. It was because I put on too much hairspray. Should be ok once you strip it back now.
Paul
-
2
-
-
Very nicely done Matt. The varying of tank camo looks good.
Paul-
1
-
-
Brilliant finish on this Ian.
Paul -
Good to see you here MD, Vino choice or not I’m sure it’ll look very impressive.
Paul
-
1
-
-
Looks great Stix! Very fast work. Like Ian said it’s got interest in the grey scheme and like the exhausts and mud too.
Paul-
1
-
-
55 minutes ago, Stef N. said:
It wasn't a strong mix so roughly half a bottle of fluid plus the same of water. Put the tracks in a large plastic/pyrex tray and cover with the mix and then agitate the fluid using a stiff brush, getting into the gaps and crevices (you will miss the odd spot but you can cover these up later on.) Because it was a weak mix I had a good ten minutes on each run to get them to that colour. You could leave them in for longer if needed.👍
Thanks Stef. I’ll be giving this a go in a few weeks and hadn’t a clue.
Cheers!-
1
-
-
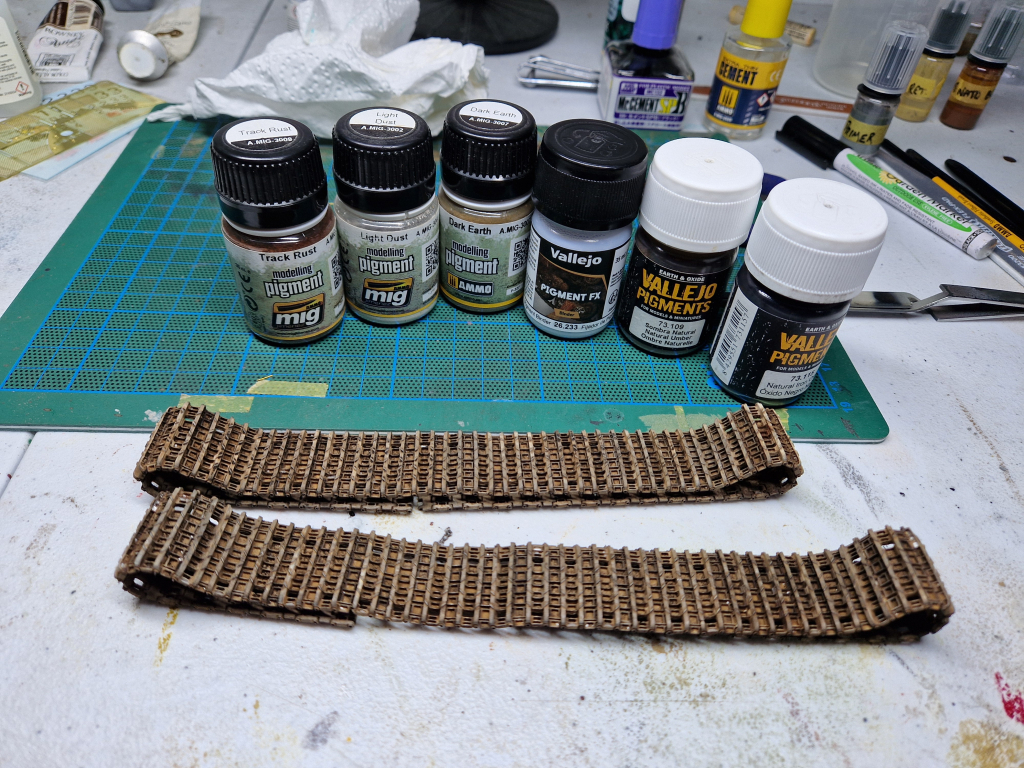
15 minutes ago, Stef N. said:
I used some AK burnishing fluid on the tracks and it worked ok. A few air bubbles but nothing too bad. Now a few layers of different colour pigments and a burnish with graphite and they can be placed and I should be able to move onto the main body for good.
Cheers all and have a great week.

Very nice indeed! Turned out well.
How long did you leave them in the ak fluid? Any tips for using it?
-
1
-
-
Glad to see you are going ahead with this one. I’ll be following along on this too. Really like a crusader and specifically the mk 1.
Paul
-
1
-
-
I’m happy with this, I think in this one it’s the diorama which counts. So I’m easy on this one.
Paul-
3
-
-
Well done Keith, like it 👏
-
1
-
-
1 hour ago, Mig Eater said:
It's amazing how much detail they managed to cram into this 1/72 kit, it looks better then a lot of 1/35 scale kits 😲
I second that comment!
Very clean and neat build Ian, looks the bizz.Paul
-
1
-


M3 scout car- zvezda- 1/35
in Ready for Inspection - Armour
Posted
Hi all,
Here is my m3 scout car by zvezda. It’s brush painted in ak third gen od base colour. I used oil paints, ammo enamels wet effects, pigments and homemade mud for the weathering. Added a driver (who looks to be a bit shocked that he’s driving). I made up some stowage. The tarps are the fingers from a nitrile glove, bounded with led wire for straps and copper wire buckles. The scrim is a fruit net and dried moss… sounds odd but works ok.
 The sun came out in Ireland for one day so took the pics whilst I could.

It’s an older kit but went together soundly enough bar me snapping the front axle a couple times!
I’ll be adding this and the kits below to a diorama set in the west wall/Siegfried line.
It’ll be a few months before I finish as I’ve a couple tigers to build for the tiger stgb (if anyone is interested in joining its until end of June.)
All comments and feedback welcome.
All the best,
Paul