

Adm Lord De Univers
-
Posts
921 -
Joined
-
Last visited
Content Type
Events
Profiles
Forums
Media Demo
Everything posted by Adm Lord De Univers
-
1/72 Airfix Concorde
Adm Lord De Univers replied to Back in the Saddle's topic in Work in Progress - Aircraft
Yes! Following along for this ons, and looks close to completion. David -
What would HMQ do? One is not amused - DNF
Adm Lord De Univers replied to Mjwomack's topic in KUTA 2022
She's carrying a bit of winter weight by the looks of things...but by no means the most ugly plane I can think of (Breguet 763 Deux-Ponts anyone?). David -
I'm not sure I can make up my own mind... Odd that the other two are so much bigger (and not like the real thing as far as my mark 1 eyeballs can tell), do they attach differently or something, or are from an earlier iteration of the plane? David
-
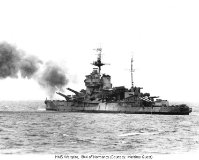
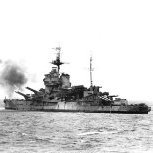
Bismarck, Miles M.52 and Battle of Hoth
Adm Lord De Univers replied to Adm Lord De Univers's topic in KUTA 2022
Make me?! Some sort of!? You are the Maritime Frankenstein! Hard disagree. And in either case, without seeing your builds this probably would have sat on the shelf indefinitely as I bemoaned its inaccuracies. Much more fun this way too! Oh Jeff, Jeff, Jeff; another hard disagree, again. What is going on? I think we may be having a rather public falling out... but I get it, some builds on here are so intricate, they are truly stunning and their builders are masterful. However, I think there a greater mastery (perhaps rather, a different set of skills I place more value on) from those that can scratchbuild or look beyond the confines of a kit (or two) and see that, say, sawing a ship in twane will allow them to build the longer flotilla leader, or can use off-pieces, scrap or household items in their work. On the plus side, you'll be glad to hear that modifying the kit, rather taking things off, is now complete - save tidying up. So from here forward, we can actually build. David -
Bismarck, Miles M.52 and Battle of Hoth
Adm Lord De Univers replied to Adm Lord De Univers's topic in KUTA 2022
Sources for last night's work: Two excellent builds on here: Iceman Gisbod Ww2db Hmshood website Bismarck-class.dk Oracle And general browsing of photos from a Google search, in addition to bookish material at home. David -
Bismarck, Miles M.52 and Battle of Hoth
Adm Lord De Univers replied to Adm Lord De Univers's topic in KUTA 2022
Onwards! As the putty continued to dry on the keel I turned my attention to the catapult amidships area: It just plain did not look right, in fact (stay with me here, try reading without the italics if confusing): whilst the forward superstructure encompassing the entire superstructure deck (aufbaudeck, what I would call the upper deck) level (one up from the upper deck (oberdeck, actually what I would call the main, weather or fo'c'sle deck)) to the walkthrough is the right length, or near enough, that pencil mark on the upper deck at bottom of picture (L-shape) is where the structure to it's right actually ends (it is itself about the right size, so needs shunting over to the left), so something has progressively gone wrong along this entire structure to mean this is quite off. However, if fixed - I think I know mainly where, this throws out the crane, secondaries, and generally the wood deck I have. In fact, it would probably be easier to take the entire superstructure off and scratch build it. The amidships walkway should also be over to the left by a few millimetres, something I can live with, but would cause the pe deck and catapult to look odd when adding later. Here's the outline of what it should look like with the Revell-kit-bound part I won't be using on this build but what I am aiming for (the walkway should begin to the right of that tiny 'jutty-out' piece of pe, pointing out to the bottom of photo, and to the left of this pe is the catapult that cuts into this currently flat deck): And here's the Tirpitz piece that I will be using in this area (that needs significant amending and whilst the deck pattern is not quite right in places around those secondaries (depending on year of build), it is good enough for my liking): Engaging Jeff mode I took off one slither with a saw, then another and ended up with (you can clearly see the thickness of the removed overhanging deck which will not do at all): Perfect, but this wont allow me to fix the main deck that runs through here, so it was full Jeff from here: And that is where we end today (or yesterday as is now the case) as much time was spent looking at pictures, plans, measuring, ing maths, and figuring out how and what I had to do. On the plus side it no longer rattles as all those drill bits are now free! Useless, but free. David Ps. Sorry Jeff, the above is my way of showing awe for your skills, that inspired these 'modifications'. As previously, I highly recommend others take a look at @ArnoldAmbrose builds (read, sawing ships asunder) to conjure some truly wonderful work. -
Bismarck, Miles M.52 and Battle of Hoth
Adm Lord De Univers replied to Adm Lord De Univers's topic in KUTA 2022
Sorry @Snafu35, I completely misread your question this morning - hadn't finished my coffee! I don't know about German shipyards (still), but I believe these sorts of models are usually constructed by the yard themselves. All said, I didn't think to research that important consideration (although in my defence I wanted something more concrete)... Doing some sleuthing on this subject seems to suggest the final design of the skegs was a later addition to the plans, designed primarily to offer a layer of protection inboard where the narrowing hull cannot sufficiently incorporate protection. This is as opposed to a purely 'hydro-dynamic' consideration/primary function. For those interested, search USN concerns with the Iowa class underwater protection forward (they are particularly fine). Does not seem they were happy at all with protection hereabouts. David -
Just staggering work Manfred, been away for a while and caught up with your build over today. As always, the detail is simply exquisite. All I can manage to say is ! David
-
Bismarck, Miles M.52 and Battle of Hoth
Adm Lord De Univers replied to Adm Lord De Univers's topic in KUTA 2022
I'm not quite sure how it worked in Germany to be honest, normally not (not really for capital ships in that era anyway - was either a shared affair or more likely an Admiralty etc. design). In either case, the shipyard models are usually extremely accurate (the KGV at the national maritime museum is a thing of beauty). The rest of their model looked accurate so it was surprising to see this discrepancy. The final step (at some much future date) is to put this in resin, so I have a fear it'll just melt the hull. Fortunately I have a spare 1/700 Wisconsin to test on first, but regardless - as my only 1/350 model I want it to be something special, or failing that, at least accurate. Putty is still curing so next up later today will be looking at that deck, particularly amidships. Shall we conduct a poll on whether I should go full Jeff on that too? David Ps. If you think my desire for accuracy is high, check out this Space Shuttle build log by Manfred ( @roma847 ). 'Tis a thing of absolute beauty and dedication. -
Finished: Italeri 1/72 QF-104A: ex-century fighters GB
Adm Lord De Univers replied to Angus Tura's topic in KUTA 2022
Gorgeous plane and it has come out rather drop dead gorgeous too (the cockpit detailing looks exquisite). I would've put the house on saying those decals were brand new, they've come out that well. David -
Too soon @Mjwomack, too soon.😅 But what a build, that'll be one tough act to follow! David
-
'BONE' - Revell 1/72 Rockwell B-1B Lancer
Adm Lord De Univers replied to Ghostbase's topic in KUTA 2022
Impressive. Most impressive. Also, way to go to break the fear factor associated with your personage, Lord Vader. David -
Bismarck, Miles M.52 and Battle of Hoth
Adm Lord De Univers replied to Adm Lord De Univers's topic in KUTA 2022
This one led me on a bit of a wild goose chase. Consulting the Anatomy book led me to roughly map out the changes marked up below: There's a few, in no particular order. Skegs are too short in all directions (except outboard) and are of a much more complex shape, whilst the angle is all wrong. The centre line prop mounting has a deeper cutaway and, further forward, connects to the hull more fully than here. The hull slopes around these features quite differently than provided and is flatter closer to the stern than provided (I mean where the keel sticks out from the 'hull proper'). Whilst the shaft should only be visible between those two pencil marks. Seemed so different that I had to double check. Well the Blohm and Voss shipyard model suggested the kit was correct. This 3d drawing showed something different again, but so far no definitive proof. Wreck photos came up with nothing, but then; apparent proof from German wikipedia, but drydock photos not quite clear (1 and 2 - gives a good indication of size however), but one definitely of Bismarck (thinking now, could be Tirpitz...) backing up that proof. Of course, to be sure, searching for Tirpitz capsize was consulted again and I think combined confirmed the Anatomy book, especially when I couldnt find mention of alterations done to the Tirpitz's skegs. Bring on the saw: The work on the struts earlier was a casualty of these efforts, as was the starboard rudder getting to that centre line cutaway (aft erroneous porthole plugs were sanded smooth as well): Magic sculp to the rescue and get that rudder back on (I'm sure it'll come off again soon enough, probably when tidying this mess...): And there we end for today, or yesterday as it now is. This needs to cure for 24hrs and then will be sanded into its final shape. The photo above does not do justice to the sheer amount of dust created as this (bottom right) is just a bit of the pile from tapping the sanding stick. At least I added something today. David -
Bismarck, Miles M.52 and Battle of Hoth
Adm Lord De Univers replied to Adm Lord De Univers's topic in KUTA 2022
Hopefully, now I just keep looking at the midship deck area (around the catapult) and thinking it just looks plain wrong... Anyway, the propulsion, looked like (taken the props off moments earlier): The outer shafts bend oddly and are too low in the water (or high in the air in the photo above), that's been fixed: You can see how much height was shaved off the struts, almost 1m if this were 1:1. Next stage is to fix the length of the shafts and hull (mounting/skeg) shape, but the above needs to dry first and its someone's bedtime before we continue David -
Bismarck, Miles M.52 and Battle of Hoth
Adm Lord De Univers replied to Adm Lord De Univers's topic in KUTA 2022
I should be used to it, I support Spurs too...😂 Oh, looky here, I've just looked at your profile. La pire défense française que j'ai vue depuis un moment! Still can't beat them though...and now cricket not going well either. Yes, it wasn't meant to be this way; having the excellent Anatomy book has been both a blessing and a curse. But we are beginning to enter the stage where I put stuff together! David -
Bismarck, Miles M.52 and Battle of Hoth
Adm Lord De Univers replied to Adm Lord De Univers's topic in KUTA 2022
Needed something to do after last night's game of football...hammer time: Unfortunately interrupted by a rather unwell young lady (nasty cough and by midnight wanted to join in on this melee), although probably for the best as I was rather chisel, knife and sander happy. The second breakwater has been removed this morning as well as some more sanding, before being hosed down in the bath to tidy up. "I'm just hosing down Bismarck dear" bringing some merriment to proceedings. Importantly, and hard to tell amongst the above carnage, is that deck overhangs (for secondary batteries) have been removed and holes drilled in the funnel, otherwise just more tidying up really. This will need polishing out, particularly, or rather glaringly, on the hull as I removed the boot-topping markings (sic raised panel lines) and as I want to finish marking plates and openings. I've been toying with the idea to amend the propellers/shafts/etc and decided that it was not something I could live with so that will likely be next as well. After that it's the deck detail that will get a review (read 🔨) as I think there is some misplacement - but will need checking against the wood deck veneer. David -
Bismarck, Miles M.52 and Battle of Hoth
Adm Lord De Univers replied to Adm Lord De Univers's topic in KUTA 2022
Well tonight's session was interrupted by a long game of football, so instead it's been sanding the M.52 to a smoooooth finish and applying more layers to the veneer: And because my camera shows the walnut as a light mahogany colour, here is one with the flash on that is much closer to the real life shade: Only it's less red, hmm... In either case, you can see the bottle of shellac has barely gone down so there are many more layers to come. I'll save photos on that for a bit until it's closer to the finished article. David -
Bismarck, Miles M.52 and Battle of Hoth
Adm Lord De Univers replied to Adm Lord De Univers's topic in KUTA 2022
Right, almost done weathering on the Hoth pieces, here's the AT-AT crushing the M.52 (which itself had its first Mr Surfacer 1200 in this photo, now on two coats and ready for a final polish before primer): AT-AT weathering still needs tidying, well removing some of it, but importantly it remains fully playable - I mean movable, yes movable - and comes with it's own lasers: Pew pew indeed. Only problem? In my haste to play with it (we might as well dispense with the lies at this point), I forgot to insert the pilots, drivers, whatever, in the cockpit and now can't get the head off! You can't see them, so er, not really an issue; so they might get added to a B-1 on the shelf of doom instead...regardless, once tidied and sealed, it'll get a dousing of snowfall and is then complete. The snowfall will also be used to strategically hide over-eager weathering...🤫 Next up? The veneer's first coating of shellac was sanded back to create a flat surface, then the first true coats to build up the shine were applied: It's hard to show off that shine, but here's some more shots for your enjoyment: Still got quite a few layers to go, carefully polishing/sanding between coatings as we go to ensure it is smooth (above is prior to sanding). Once done it should be quite reflective. In fact, when fully done and dry it will be close to the above photos (still quite tacky)...hopefully... Tonight will be continuing to mark out the Bismarck hull plates and prepping it for the pe. This will be broken up by adding pe to turrets and boats. David -
Think of the poor sucker that needs to buy and build 8x787s to join in on this boeing fest... David
-
By heck that's a good job! I'm very impressed it came back from its stint in the sea so impeccably well! David
-
'BONE' - Revell 1/72 Rockwell B-1B Lancer
Adm Lord De Univers replied to Ghostbase's topic in KUTA 2022
The 1/144 version I have is quite big, so I can only imagine the size of bookcase needed for this beauty. Well, about twice the size by my reckoning🤓. Gonna need a bigger house! Love the camo btw, really nicely done. David -
Drink enough wine, ice cream will be fine. Probably a rough order of consumption mind. Sails do look really good, I remember trying to stain my first sailed kit (victory, many a moon ago) with used teabags. Didn't work but got tea out of it, so can't complain. Sorry, flashback looking at these and wondering how you got them to look so good. David
-
Ooh an interesting comparison between kits, eras and decals; count me in, and looking good already! Delta Alpha Vindaloo Igloo David
-
Yes...I did wonder that myself. Here's hoping you use that link as inspiration. David
-
Oh fudge! There's a definite plus side of doing ships really. Sausage fingers mangling railing? Battle damage. Poor at painting a deck, spilt a bit of glue? Shove a sailor on it, a box, hell, even a cat. Fingerprint the hull? Add wave. David Ps. She's looking great though! I probably wouldn't have spotted this if not pointed out mind.


