

elger
-
Posts
1,502 -
Joined
-
Last visited
Content Type
Events
Profiles
Forums
Media Demo
Everything posted by elger
-
Thanks all for the input!
-
Hi all, I'm doing some preliminary research into a possible future subject. A profile in Osprey's Blenheim Squadrons of WW2 shows an aircraft from 82 squadron from February 1941 with night camouflage applied. I was wondering if there is any evidence to suggest that perhaps some 105 Squadron Blenheims operating in the winter/early spring of 1941 had their undersides painted black as well. Specifically, I've been looking into Blenheim T1895 (GB-X) which was lost in the night of Feb 28/March 1st that year. It was on a night bombing mission when it was shot down, so that's why I'm wondering about the possibility of this squadron perhaps turning to night camouflage as well. Any thoughts?
-

1/48 Pathfinder - Tamiya Mosquito B.IX
elger replied to JasonC's topic in Work in Progress - Aircraft
Looking good! Following with interest -
Airfix 1/24 Typhoon reboot. Small update 29 August.
elger replied to (ex)Sgtrafman's topic in Work in Progress - Aircraft
Looking good! Those mold seams are endless, aren't they... you think you got rid of all of them, 5 minutes later another few appear in a place you were sure you'd just cleaned up! -
Airfix 1/24 Hawker Typhoon as MN875 (EL-B)
elger replied to elger's topic in Work in Progress - Aircraft
as you said, nobody knows for sure what colour these things were so you and Steve might very well be correct too -
Airfix 1/24 Hawker Typhoon as MN875 (EL-B)
elger replied to elger's topic in Work in Progress - Aircraft
Thanks for your input - I really love your Typhoon build and if mine comes out looking even remotely as good as yours I'll be very happy. About the colour - I did opt for the yellow colour based on a discussion on the Barracuda Studios Facebook page in June. There seems to have been a colour which is referred to as "Hawker Primer". This isn't exactly zinc chromate, but looks similar. https://www.facebook.com/groups/848474938507986/permalink/1171300179558792/ -
Airfix 1/24 Hawker Typhoon as MN875 (EL-B)
elger replied to elger's topic in Work in Progress - Aircraft
I've been working on the wing. Continued with AK paints, finished with AK weathering enamels and mr Paint. Details painted with Vallejo. Once again nothing but praise for the kit. All the parts (once cleaned up - LOTS of flash / mold marks) just snap together with very satisfying 'clicks', but I was a little disappointed that there was only one copy of decal 6 which is supposed to go on to both of the 'pouches' covering the fuel filler hatch. Fitted the 'mystery lamps' as per the kit instructions and the discussion in the build threads linked above. Painted them with clear red and clear green. Next step will be adding the guns and ammunition. Thanks for looking! -
Ju 88A-4, Sicily, June 1941 (Revell 1/72)
elger replied to jrlx's topic in Ready for Inspection - Aircraft
Excellent! -
Airfix 1/24 Hawker Typhoon as MN875 (EL-B)
elger replied to elger's topic in Work in Progress - Aircraft
Today I finished the engine. Used Gunze, Mr.Paint and AK's Extreme Metals. Details with Vallejo metallics. Engine is OOB except for the radiator part. -
thanks all!
-
Airfix 1/24 Hawker Typhoon as MN875 (EL-B)
elger replied to elger's topic in Work in Progress - Aircraft
assembling the engine... dryfitting the main components before paint. as always, thanks for looking! -
Airfix 1/24 Hawker Typhoon as MN875 (EL-B)
elger replied to elger's topic in Work in Progress - Aircraft
Thanks! The size of the model and the sheer number of parts may be intimidating but so far it builds like a dream. It's such a fun build! -
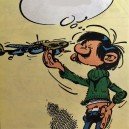
MN875 (EL - B ) was flown regularly by Dutch pilot Robbert van Zinnicq "Bergy" Bergmann. Bergmann was a law student in 1940 and some time during the German occupation of the Netherlands managed to escape to Britain. In Britain, he trained to become a combat pilot and had a successful career. With 181 squadron he operated out of improvised airfields and captured former Luftwaffe airfields in France, Belgium and The Netherlands as the allies advanced. After the war, Bergmann became a high ranking officer at the Dutch royal court (https://nl.wikipedia.org/wiki/Robbert_van_Zinnicq_Bergmann). On March 31st 1945, MN875 was flown by F / Sgt. D. D. J. Carter. Carter's aircraft was hit by anti-aircraft fire over the Dutch town Enschede. The aircraft crashed at 15:15, and Carter did not survive. Local resident Egbert. A. van de Haar remembers the remains of Carter being moved on a cart, covered by a white sheet; Van der Haar later drew the image above. The photo below shows what is believed to be Carter's grave. I'll be building Airfix' amazing 1/24 kit of the Typhoon. It looks pretty magnificent in the box; I also bought some aftermarket items. I was very much inspired by a couple of builds on this forum, especially Christer A's build (http://www.britmodeller.com/forums/index.php?/topic/234972761-that-large-sharkmouthed-typhoon-from-airfix-update-2016-06-21-gun-bay-covers-build-paused-until-house-move-complete/) as well as georgeusa's build here: http://www.britmodeller.com/forums/index.php?/topic/234964791-another-124-airfix-typhoon;-really-im-back/ (among others!) Some nice resin wheels from Barracuda, Eduard photo etch, and decals for MN875 by Dutch Decal. I've already spent a couple of weeks on it but frankly putting the cockpit together was so much fun I didn't stop to take any work in progress photos. All I have from the build is this phone taken with my iphone: It shows dryfitting the Barracuda sheet, but you can also see that I'm already adding the pre-painted Eduard photo etch. I decided to add as much as possible and repaint most of it. I also don't really like the 2-d look of some parts (especially levers) so I'm adding a bit of primer to those parts to make them look more 3-d in the end. Although the cockpit looks very complex, it goes together really easily and it's just very satisfying to work on this kit. I mainly used AK Interactive's aluminium (from their True Metal range) for the tubular frame. I added seatbelts from Eduard/HGW. These needed some adjusting. Although marked as specifically for the Typhoon 1b, they appear to be a generic 1/24 Sutton harness; the kit seatbelts seem to be the Q-type. Finally, I also used decals from Airscale to enhance the cockpit, especially the instruments panel. The dials were finished with some Kristal Klear (used for the first time. Nice stuff!). Thanks for looking, as always. Comments & feedback is welcome and appreciated, of course!
- 31 replies
-
- 11
-

-
Some years ago I built the 1/48 Eduard A-5 kit as Hondt's aircraft. Stared at the photo for hours trying to determine whether or not it had the yellow band. Eventually decided against it, interpreting the darker colour in that area as the upper camouflage coming down a little lower. I also think that, given the fact that Hondt described the red stripes he also would have mentioned the yellow, and that the yellow bands wouldn't appear officially for several months later. Here's my interpretation: I don't live too far from where the aircraft was lost in 1943, so at the time that I was building the kit I went for a little hike in the area and at some point I found a piece of aluminium. It's not impossible that this is a piece of Hondt's aircraft: Following your build with interest!
-
Since nobody replied so far I'll venture a guess. I don't have the Paragon part you mention but the Airfix and Tamiya fuselages really are quite similar dimensionally so if I was in your situation I'd just try it.
-
Italeri Stirling Mk. I W7449 MG-J, 7 Squadron
elger replied to Simon's topic in Ready for Inspection - Aircraft
Magnificent! -
Holy cow especially the Whitley looks good! Almost oob or did you also add something to that?
-
This has been a great thread to follow. Almost there!
-
Thanks for all the input and support everyone! I finished it today. One final thing left to do was to remove the antenna that Vicarage Vee pointed out earlier. It put up a bit of a fight at the end - the landing gear and the doors gave me some trouble and the antenna wires weren't much fun either but it's done! RFI here: http://www.britmodeller.com/forums/index.php?/topic/235003564-halifax-hx333-np-j-revell-172/
-
I just finished Revell's Halifax b.III. Build and backstory here: http://www.britmodeller.com/forums/index.php?/topic/234998720-halifax-hx333-np-j-revell-172-the-groningen-connection-ft-percy-the-peguin/ The interior was improved with the Eduard Halifax b.II detail set, parts of WEM's Halifax details and scratch built components. The interior was painted with Mr Paint and Vallejo paints. The kit's nose gun was replaced by a gun from Aeroclub. I also used Aeroclub air intakes (originally designed for the Airfix kit) on top of each engine. The propellers of the kit were sanded into a more accurate shape. The landing gear bays were improved with Eduard parts and I added wires to the landing gear mechanism. The wheels are from AML because the kit wheels are slightly too small. I added the mud scrapers from the Eduard set. Late Halifaxes didn't have them but they were fitted to early production versions of the Mk.III so I added them. I drilled into the clear parts for the navigation lights and added green and red to simulate the coloured light bulb. Once the main components were assembled I primed the model with black Mr Surfacer 1500. I mixed various shades of dark gray from Mr. Paint to paint the underside. I also used Mr. Paint for the dark green and dark earth on top. Added some chipping with Runafang Steel with a small sponge. Oil stains were applied with black pastel chalk. Special thanks to everyone who supported me in the build and gave input to make the model as accurate as possible! As always, thanks for looking and comments & feedback is welcome of course.
- 27 replies
-
- 40
-
-
I think you're right - I missed that. I'll remove it before I call it finished, caught it just in time!
-
Decals are on. Although Cotem hasn't been in touch I went ahead and modified and combined Printscale's decals for Halifax LV937 "Expensive Babe" and Halifax MZ913 "Jane" into an approximation of what HX333's nose art might have looked liked, based on his earlier description in this thread. The Printscale decals are gorgeous but they were the most difficult I ever worked with. The carrier film is very thin and the decal for "Jane" crumpled up as soon as I tried to slide it from its backing paper onto the model. Wrestled with it for about 15 minutes trying to unfold it almost to no avail. In the end, the first four letters were legible again but the final letter E had completely folded up on itself. I ended up carefully painting over it with some Vallejo off white and I think it looks acceptable now. The code letters and serial number are from an Xtradecal generic sheet. National insignia and stencil data from the kit decal sheet. I did modify the J; the photos of the crash landed aircraft appear to show a round font for the J; the J supplied on the decal sheet is squared off. I used an "I" for the top half and half of a top half of an 8 for the lower bit of the letter. I had a go at fixing the shape of the kit propellers. Original item on the left, modified item on the right. Not perfect, but it'll do. I finished all the props, going slightly overboard with the weathering although it doesn't look quite as heavy in real life (rather than in the photo). The next steps will include putting the model together, weathering and finishing. Thanks for looking!
-
Nice work but I think the shoulder straps are upside down.
-
Thanks for all the replies everyone! Today I finished most of the paint work. I used dark green and dark earth from Mr. Paint. The dark earth is more brown than I'm used to but I like the overall look. I sealed the paints with Tamiya X-22 thinned with Mr. Color leveling thinner. This does seem to react with Mr. Paint so if you're thinking about trying this combination be careful. I will wait a little while with the decals; cotem is trying to get in touch with Doug Robinson the pilot to see if he remembers anything more about the nose art. In the mean time, I'll work on the propellers which need to be reshaped (one of the let downs of the kit). Thanks for looking!