


Ima Penin Diaz
-
Posts
88 -
Joined
-
Last visited
Content Type
Events
Profiles
Forums
Media Demo
Posts posted by Ima Penin Diaz
-
-
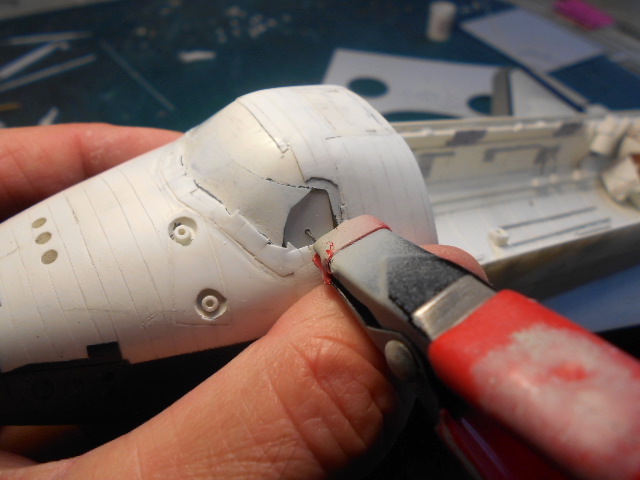
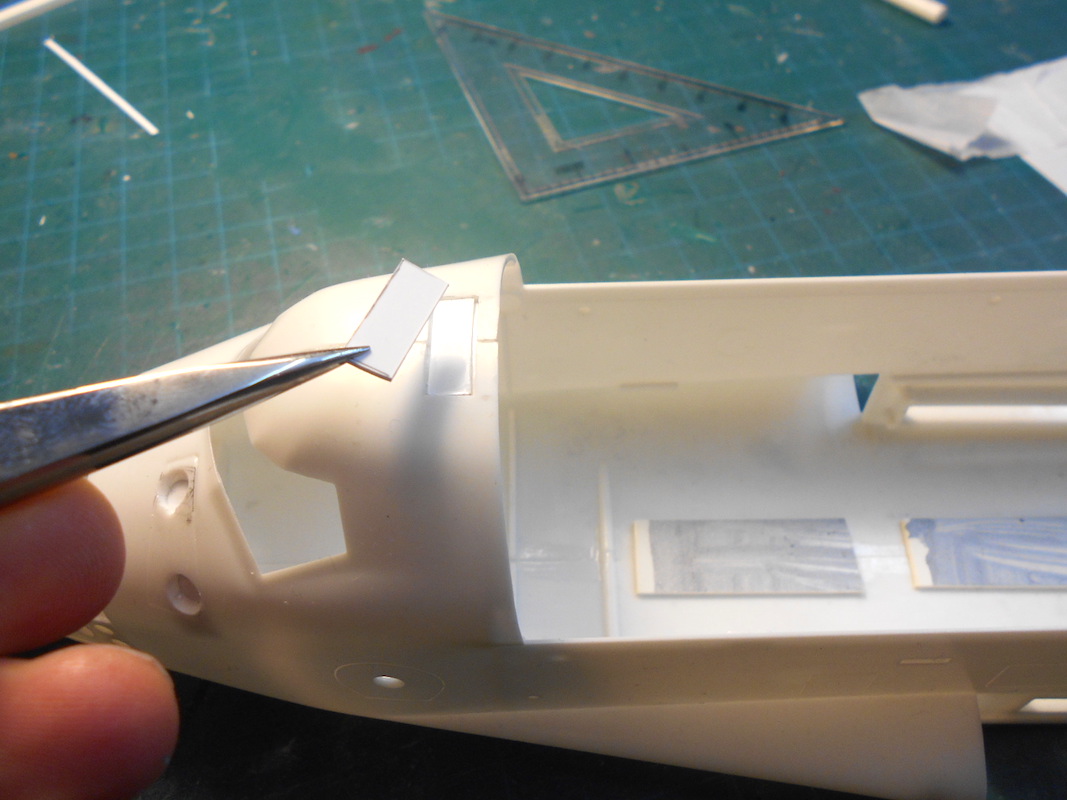
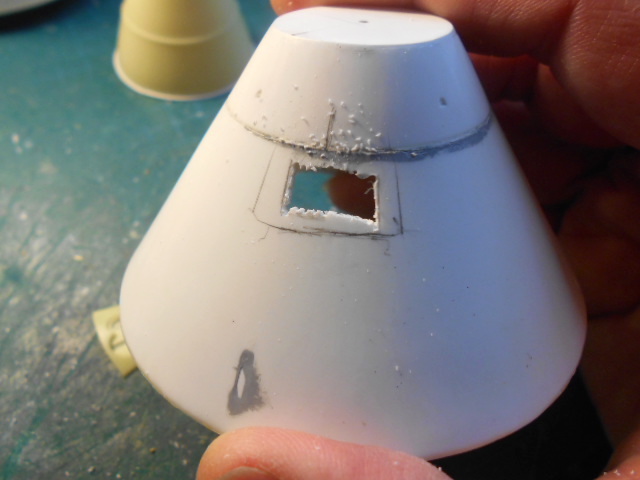
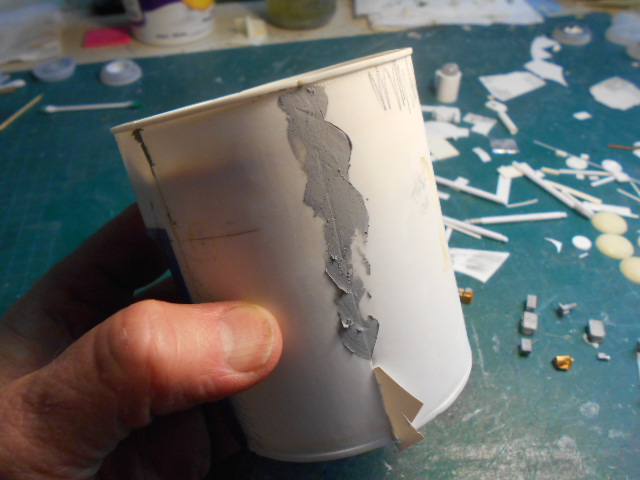
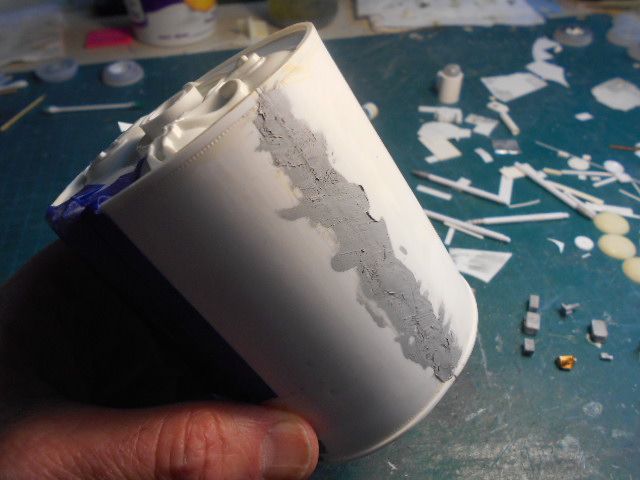
With all the necessary sanding, the windows had thinned down to a point where I punched through it ...

Using scraps of styrene the hole was filled ...
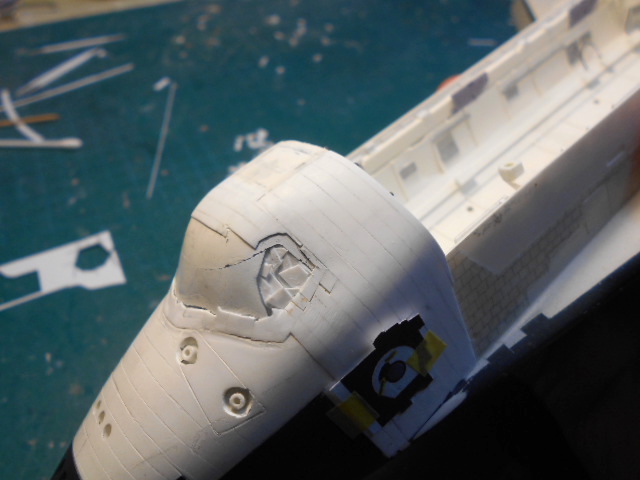
... putty was used to fill the smaller divots ...
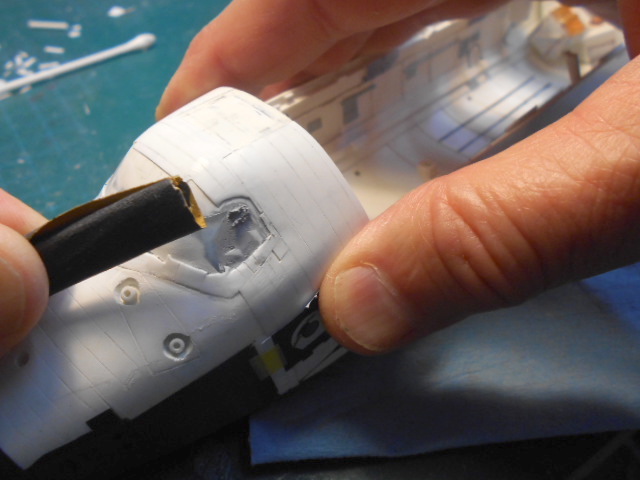
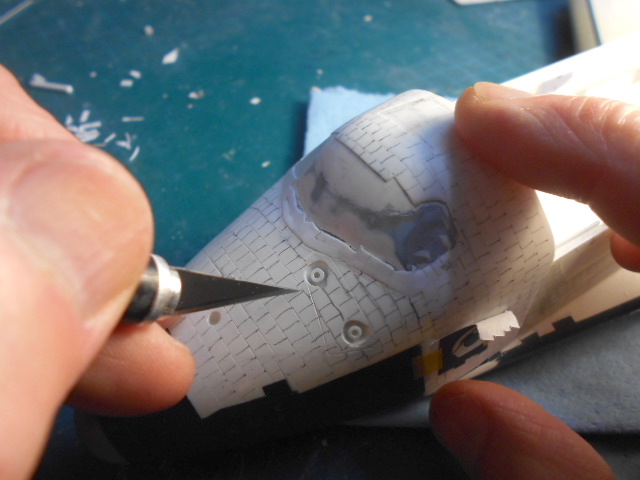
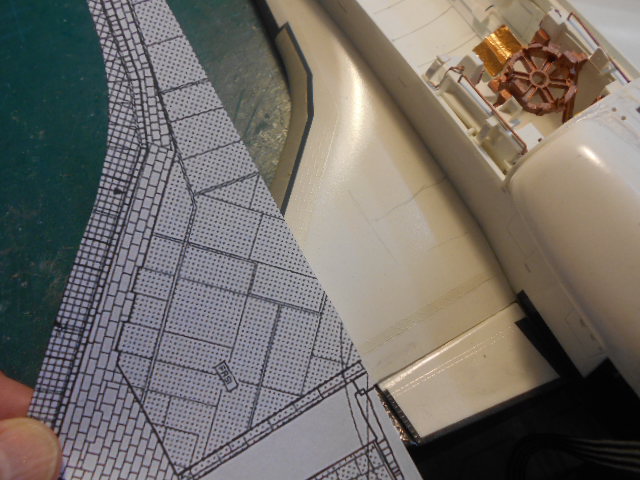
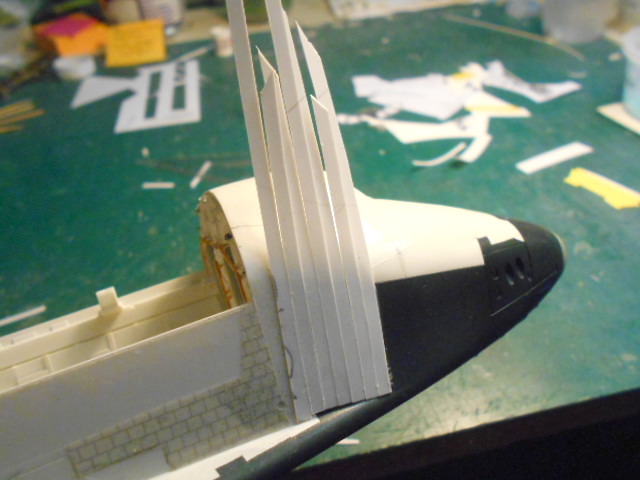
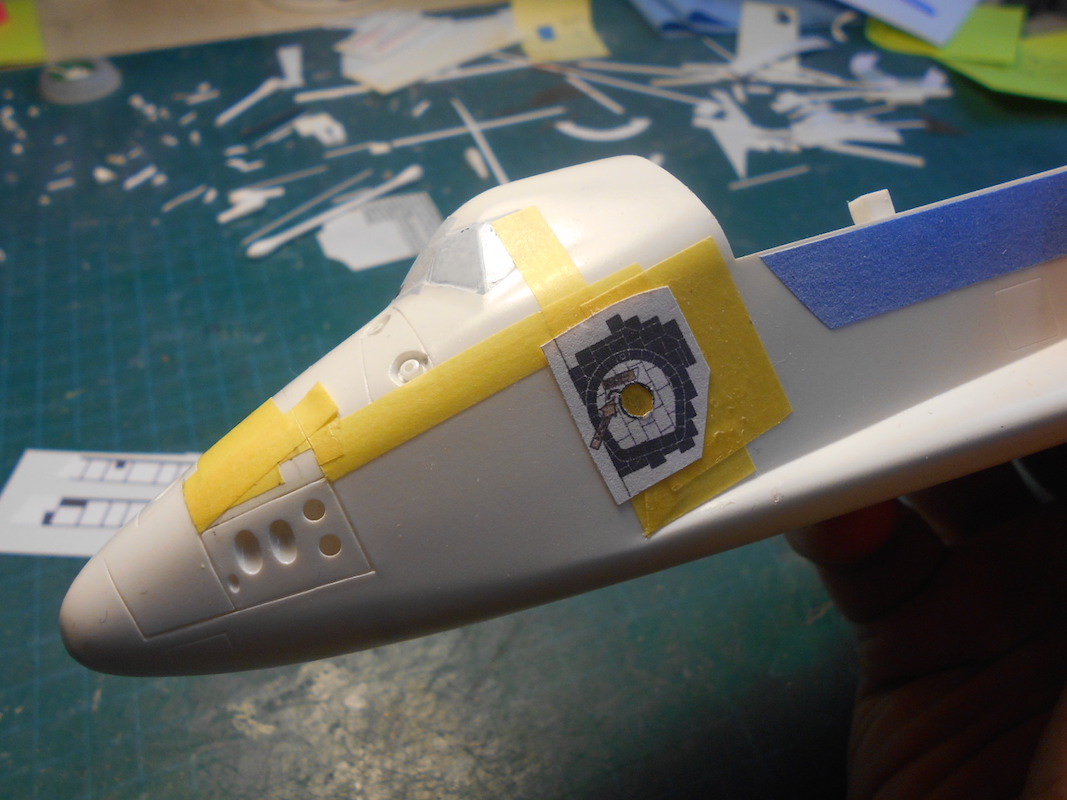
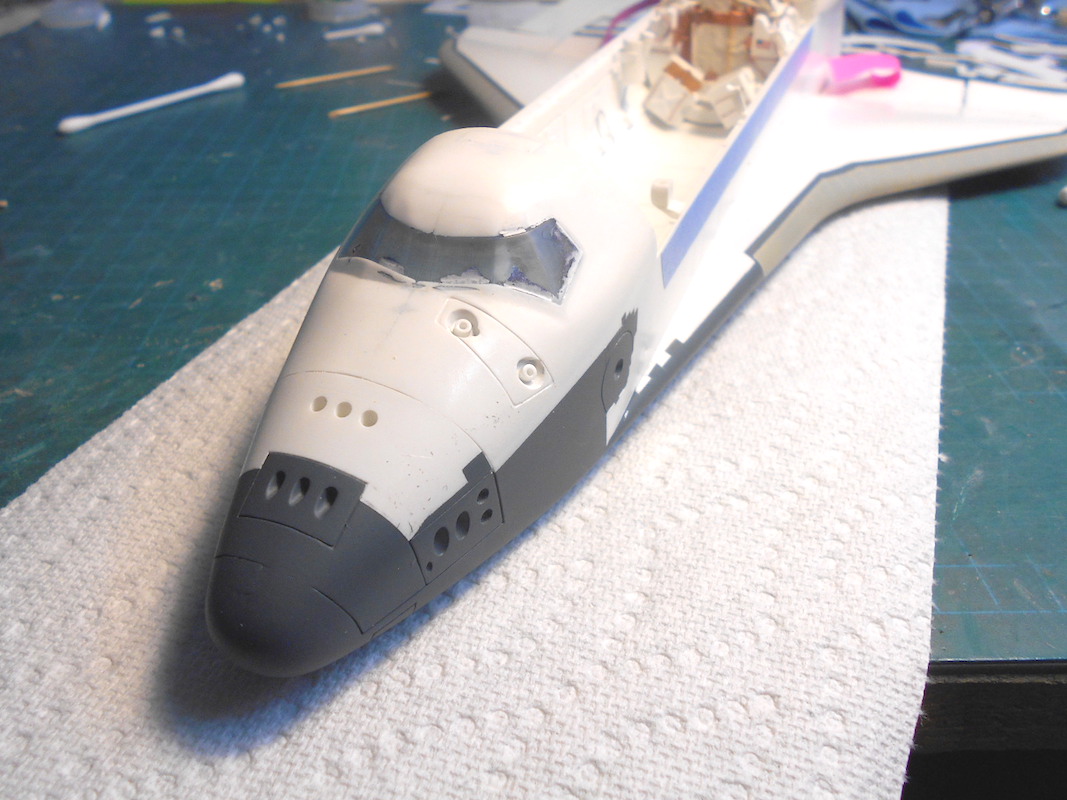
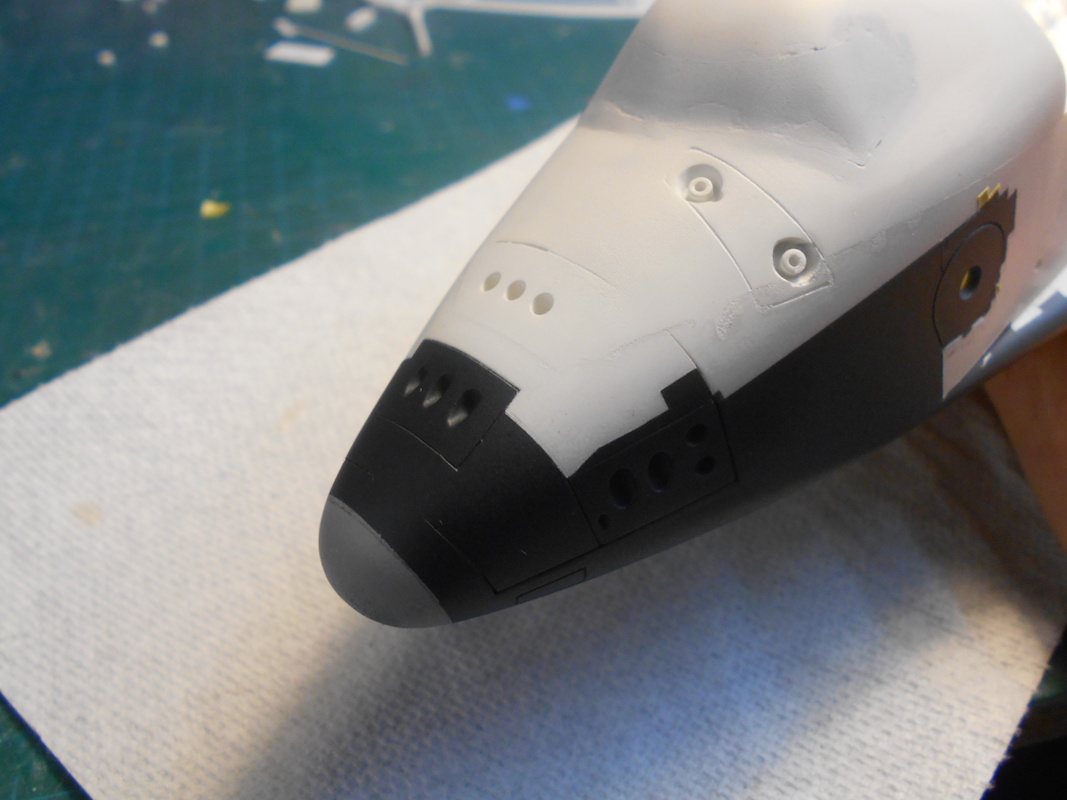
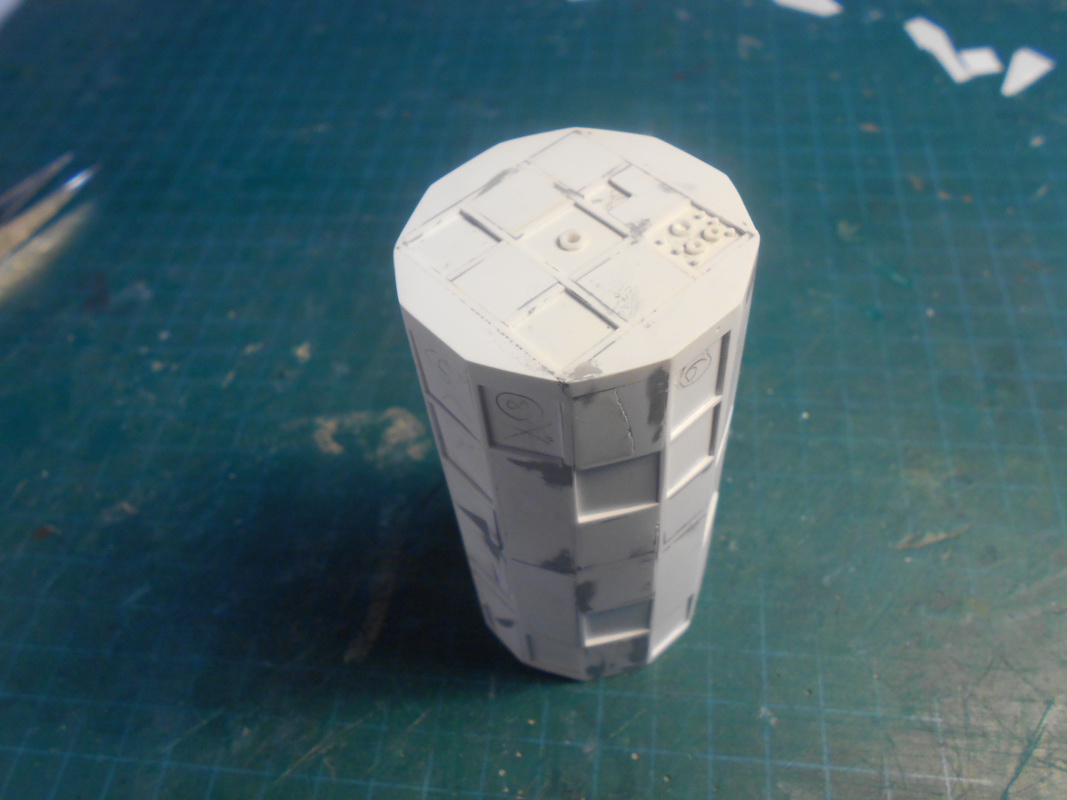
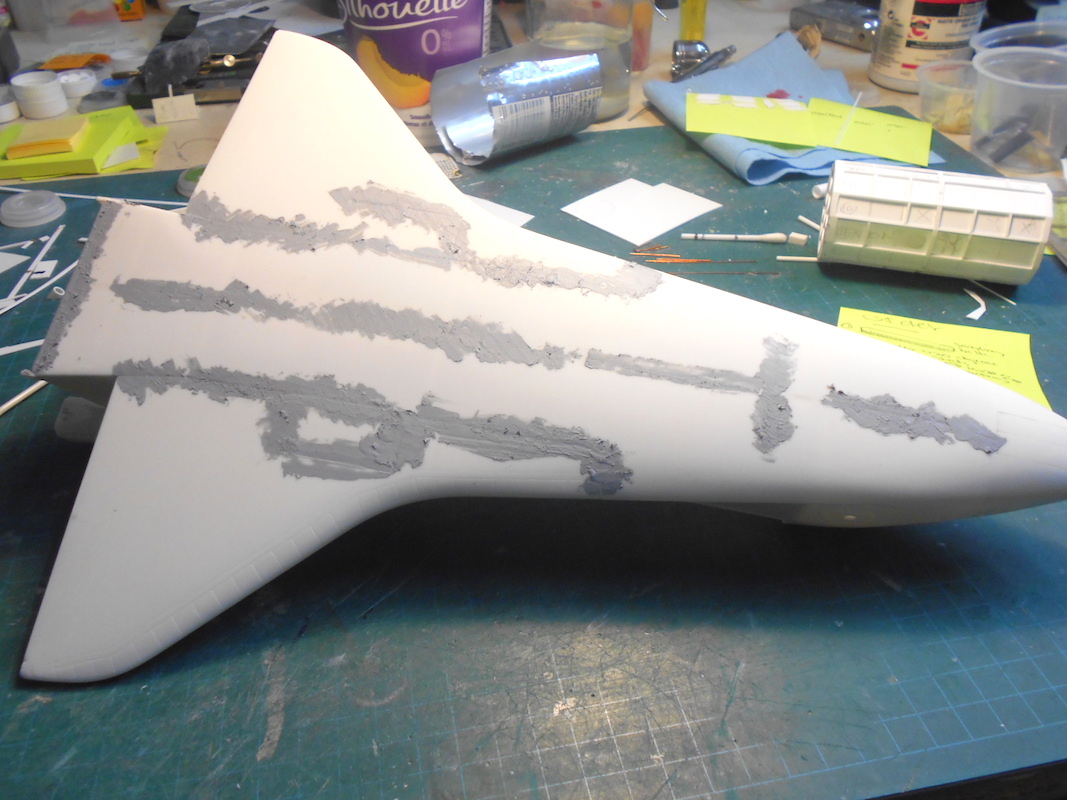
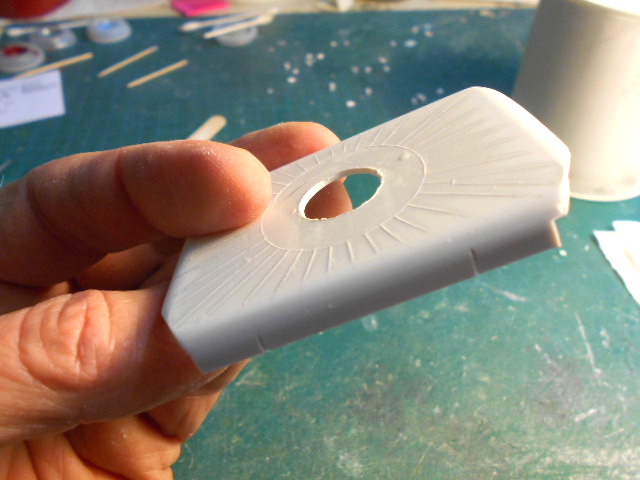
And after the patch was done, I prepped the nose to be scored to illustrate the tiles.
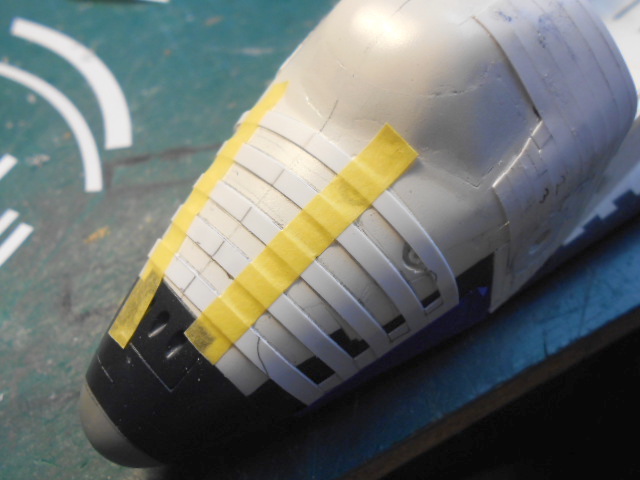
It was easier to score 'em by hand. Yes, they're outta scale a bit, but, they're close enough for me.
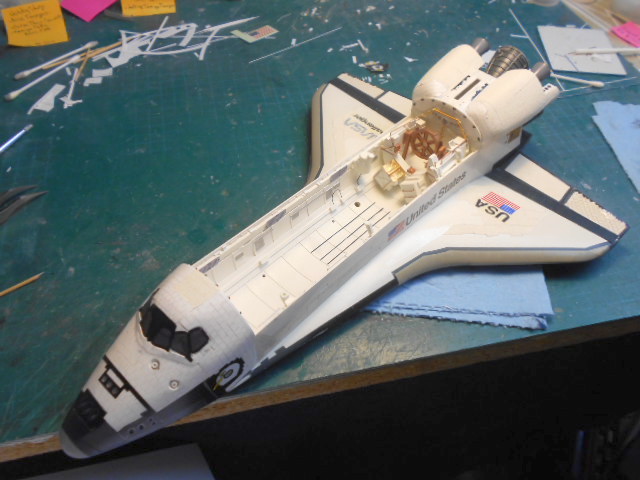
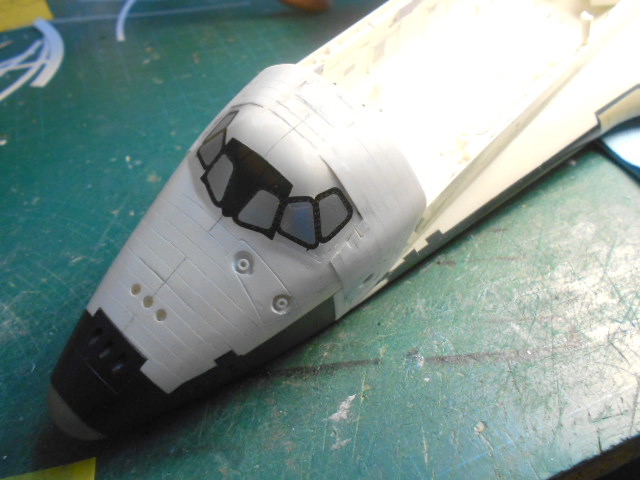
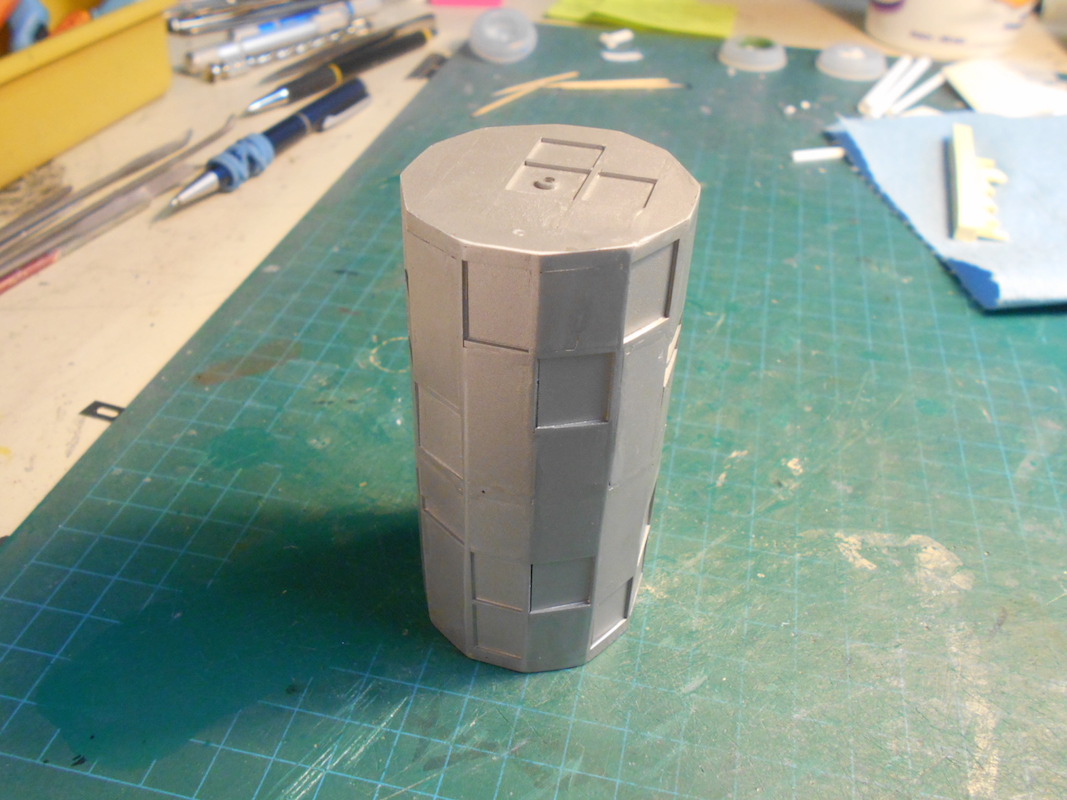
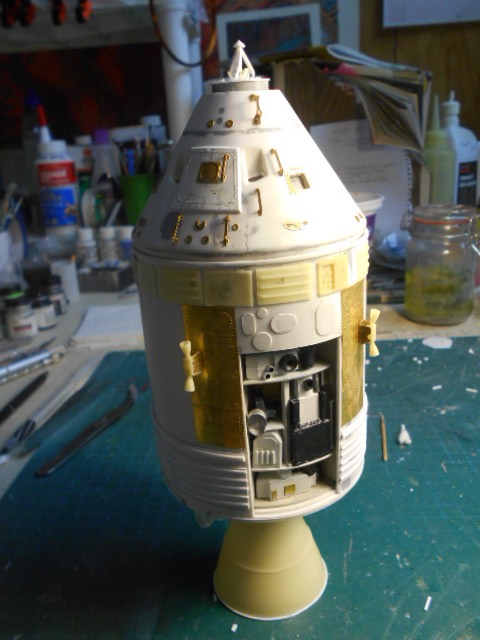
Starting to add decals ...
Then glued on the Payload Bay doors ...
... and it's just about done ...
-
 1
1
-
-
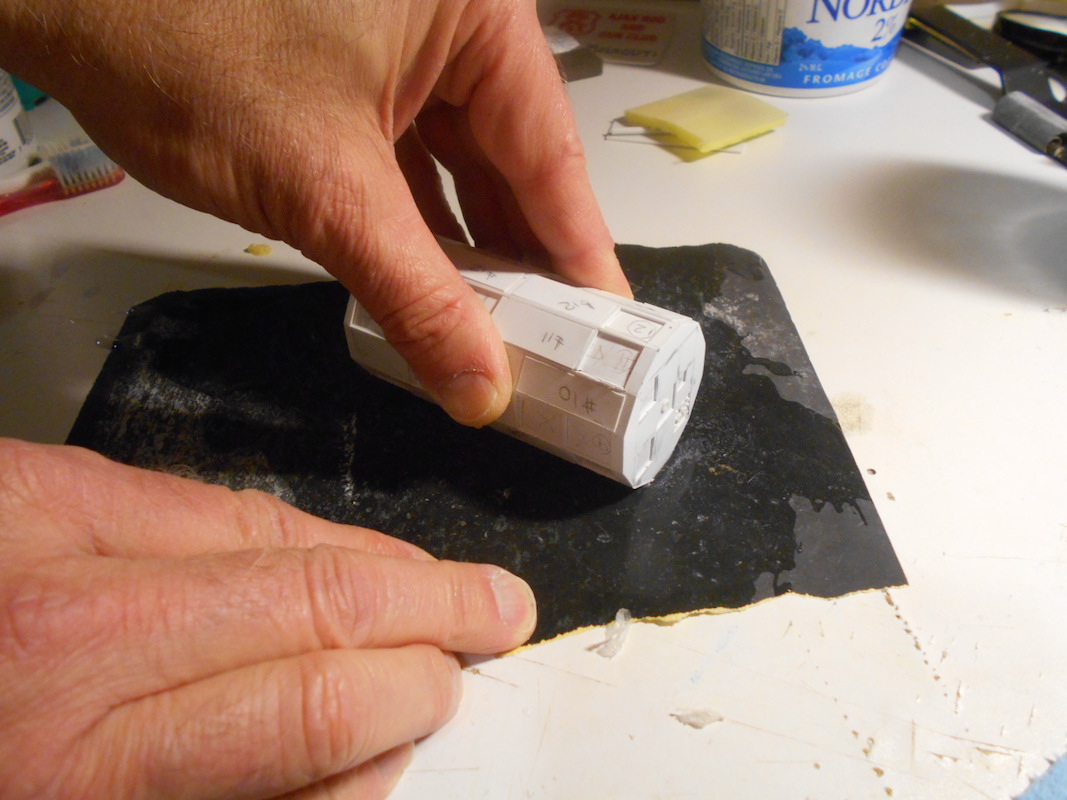
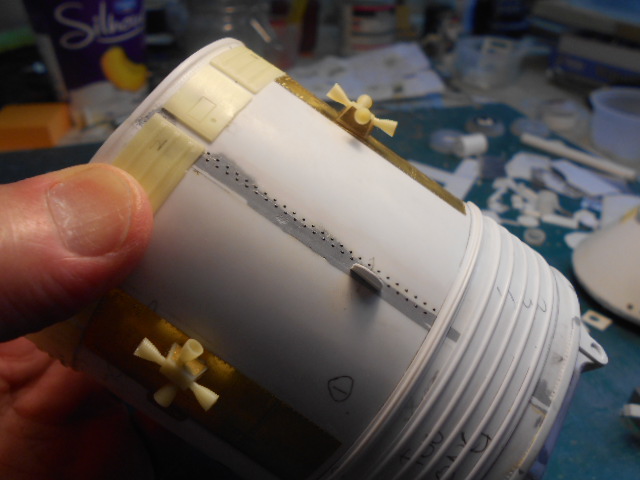
To replicate the blankets, I use First Aid Tape, 2 different textures. Cut them out individually and stick 'em down ...
Using a photocopied guide ...
Attached the SSMEs ...
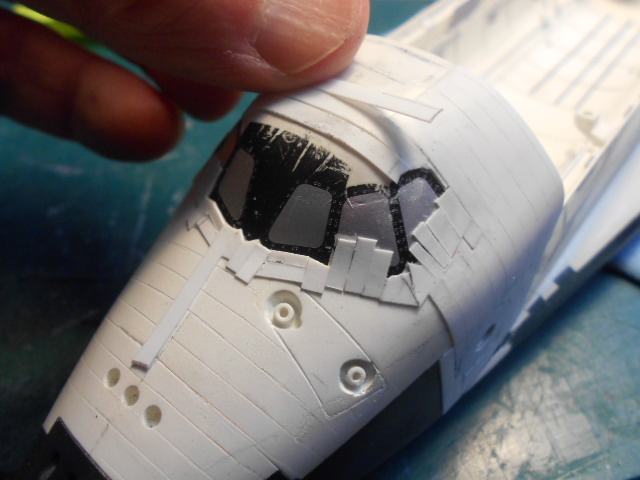
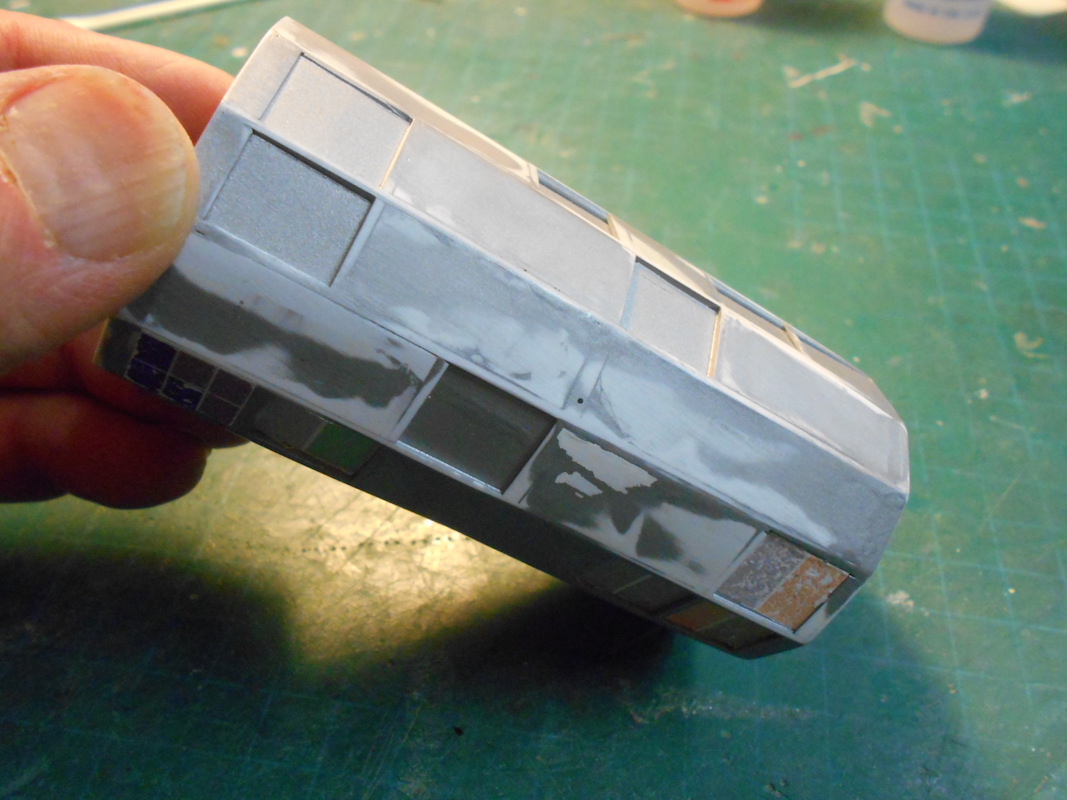
This decal material is awful ... The homemade decal printed out alright but ...
... it didn't adhere to the plastic. My thumb is under the applied decal. I discovered the poor adhesion by blowing on it, and it lifted. It was all sealed with Future, but still ...
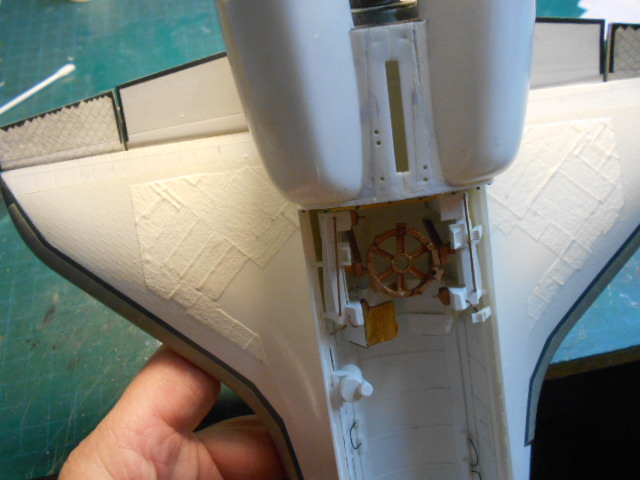
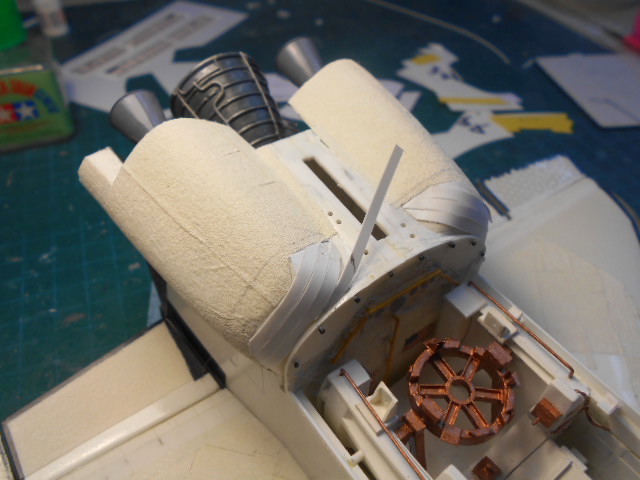
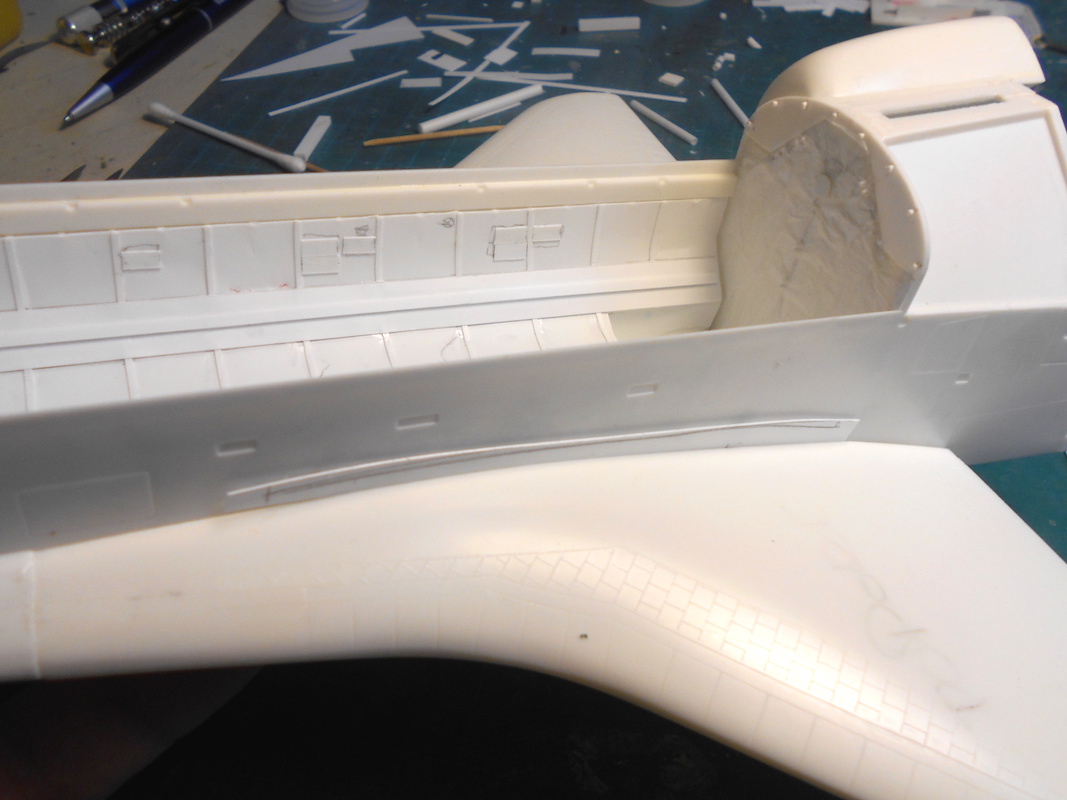
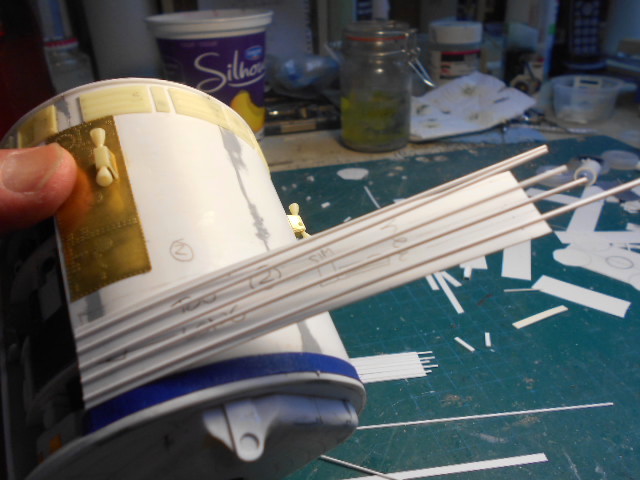
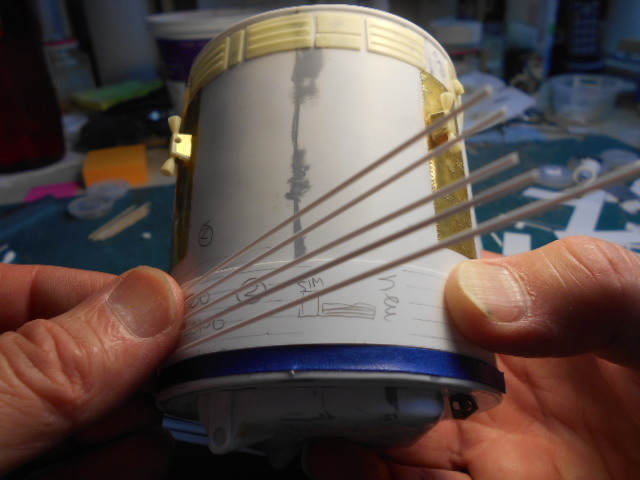
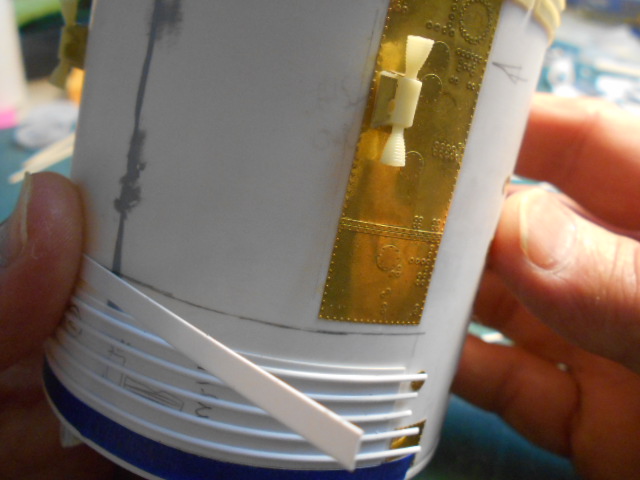
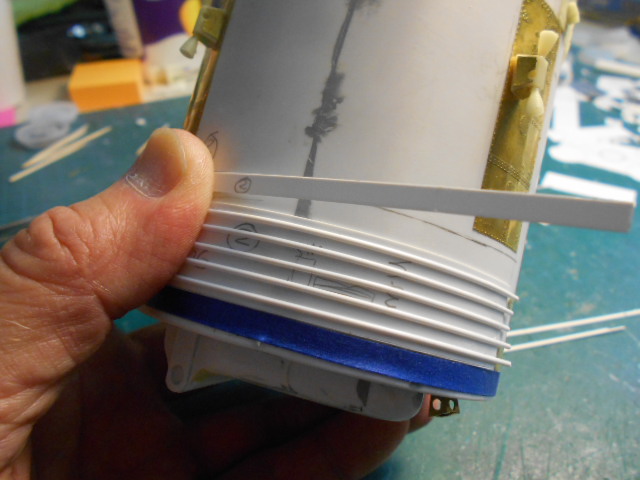
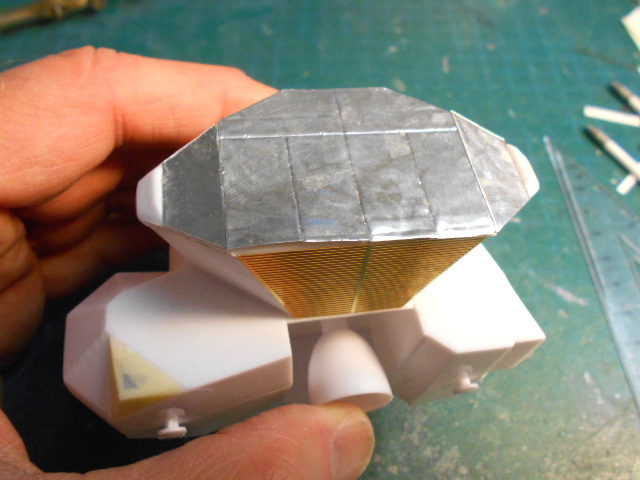
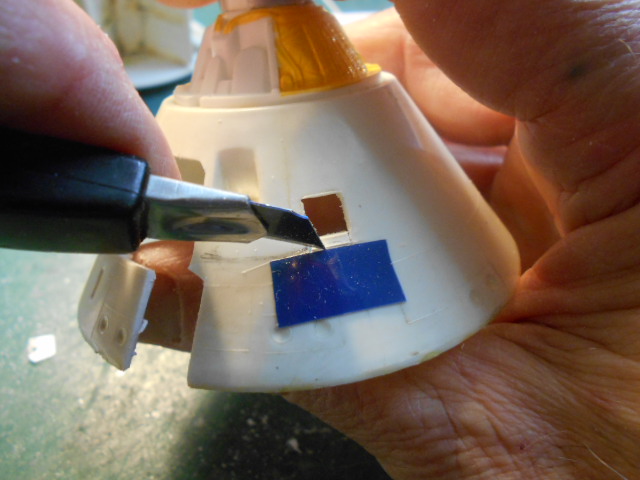
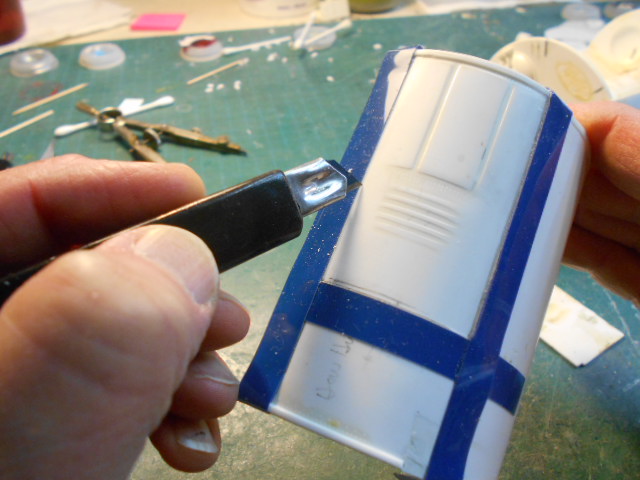
Adding the tiles to the OMS pods ...
Adding tiles to front section ...
... and added some details to the Payload Bay ...
Getting closer to the finish line ...
IPD
-
3
-
-
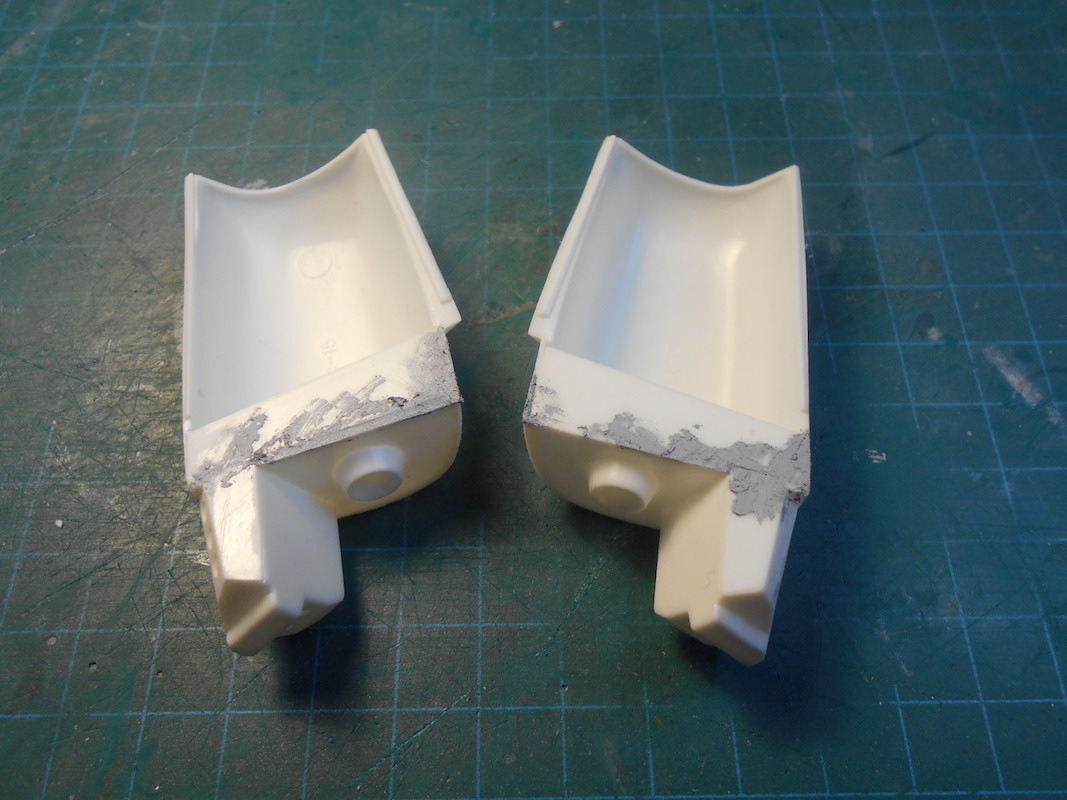
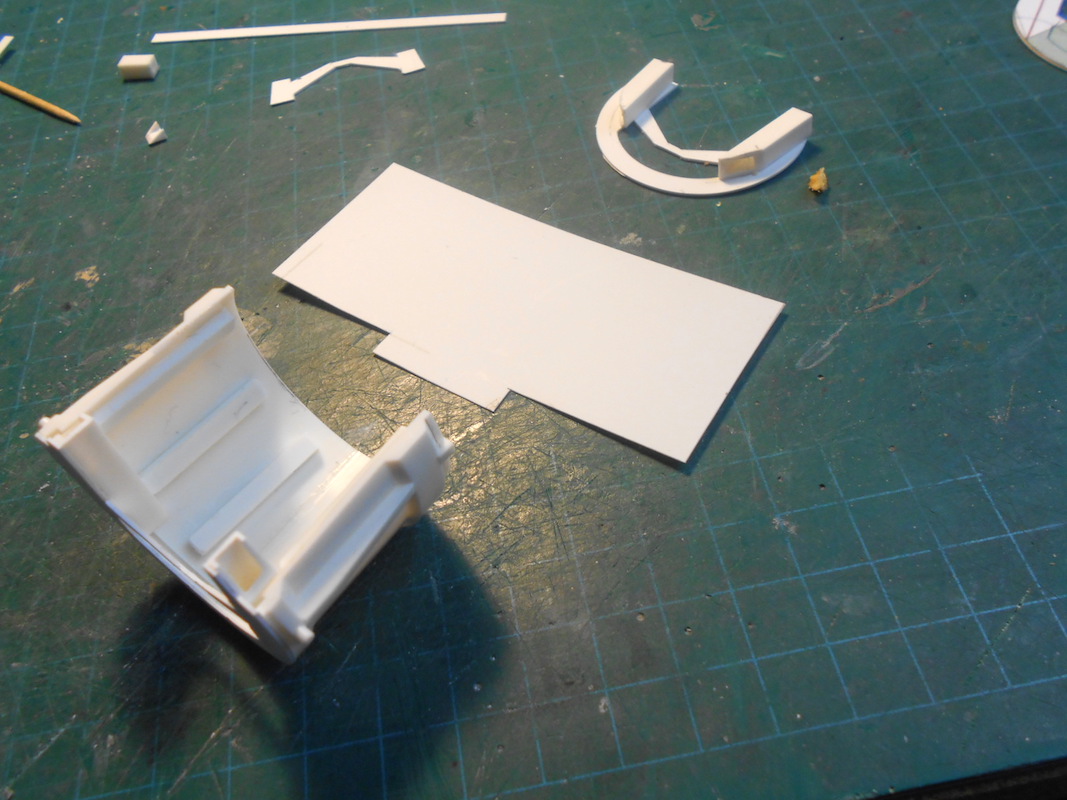
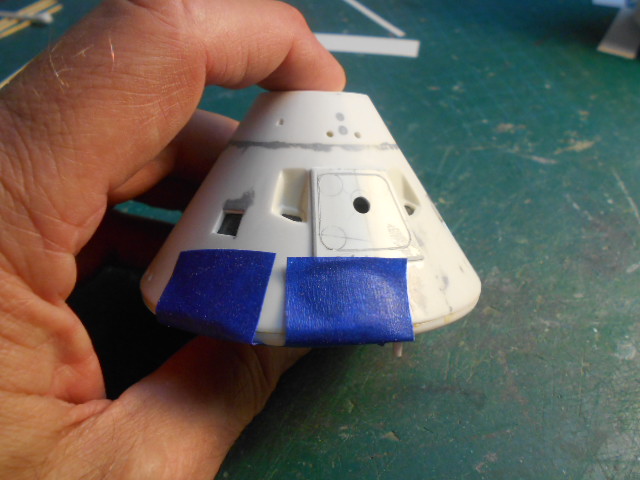
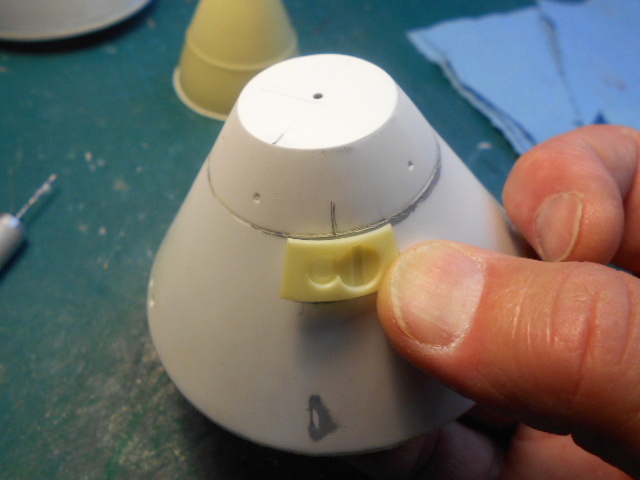
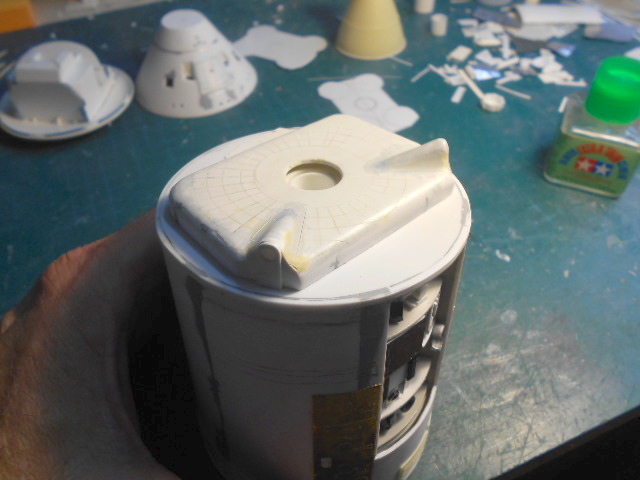
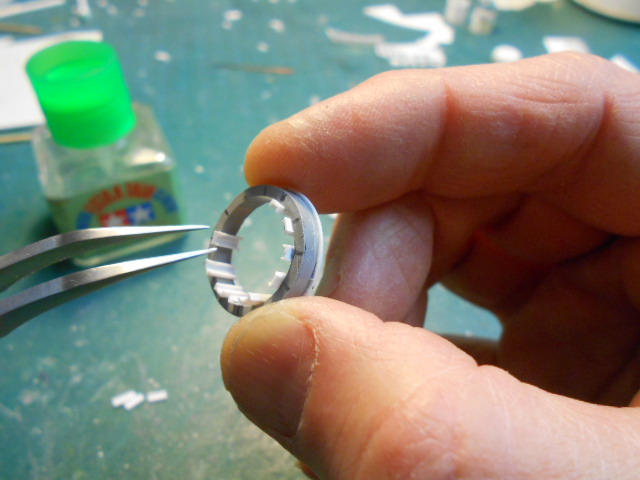
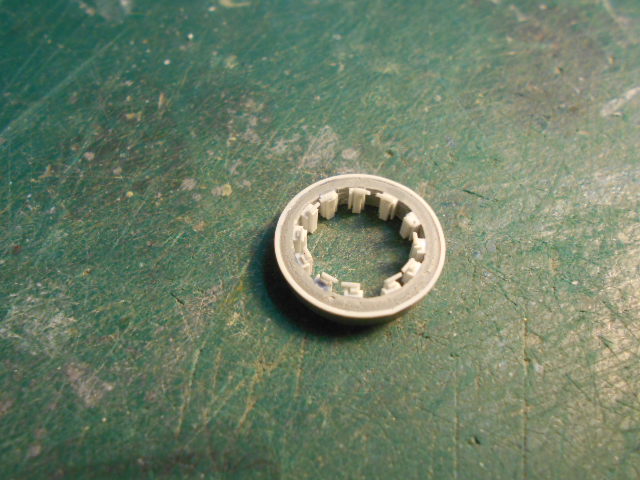
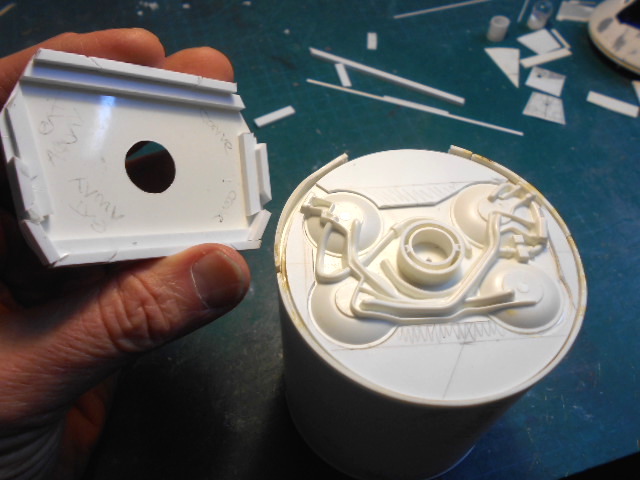
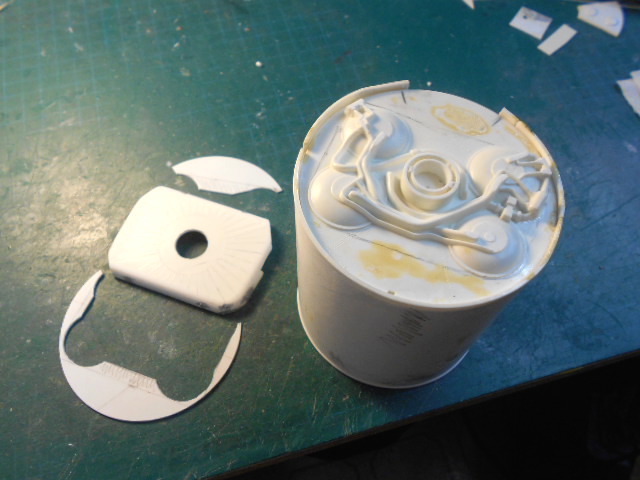
The Repair Fixture was glued in ...
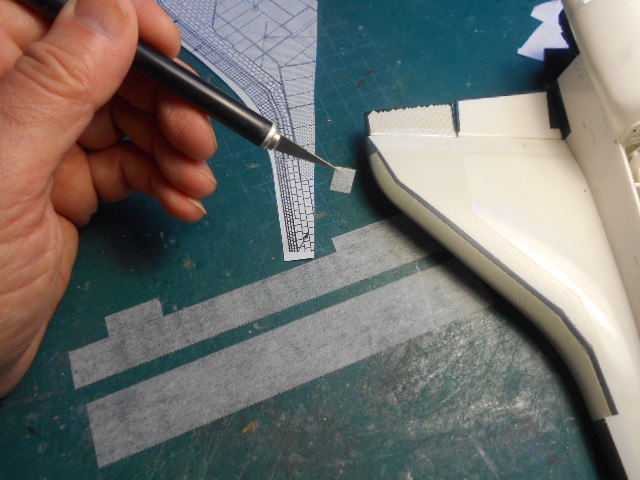
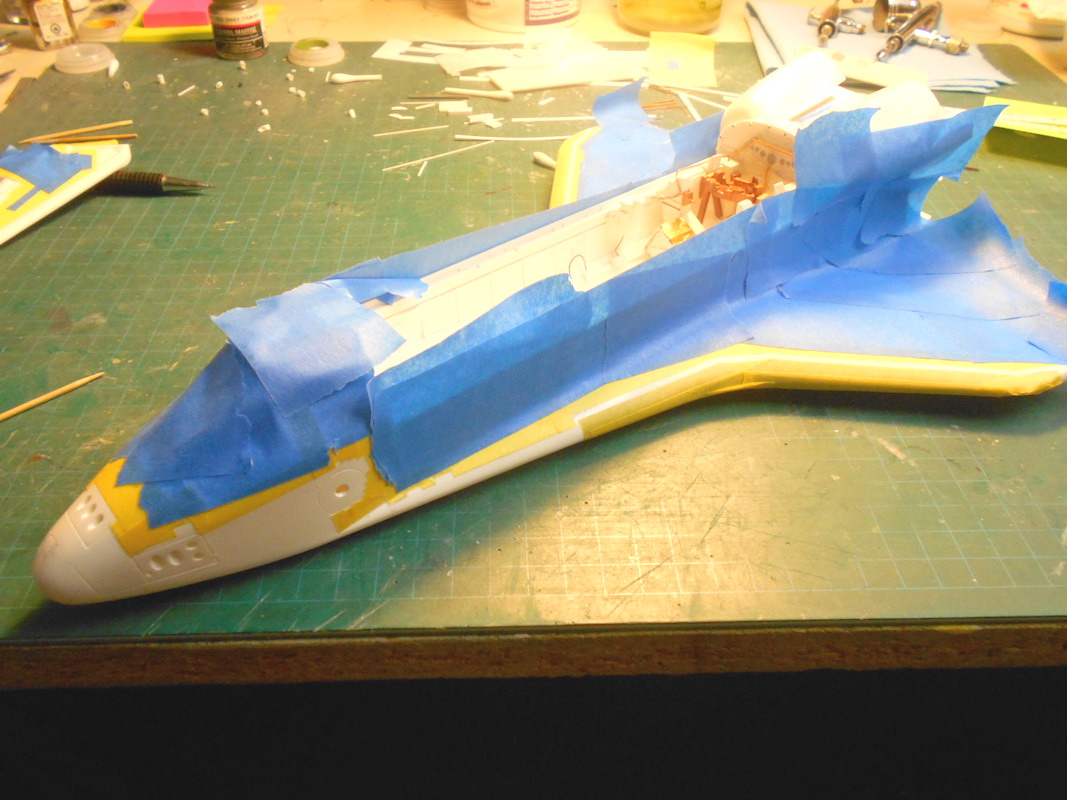
And Masking for Paint ... To get the pattern for the Hatch, I cut through the paper to the tape under it ...
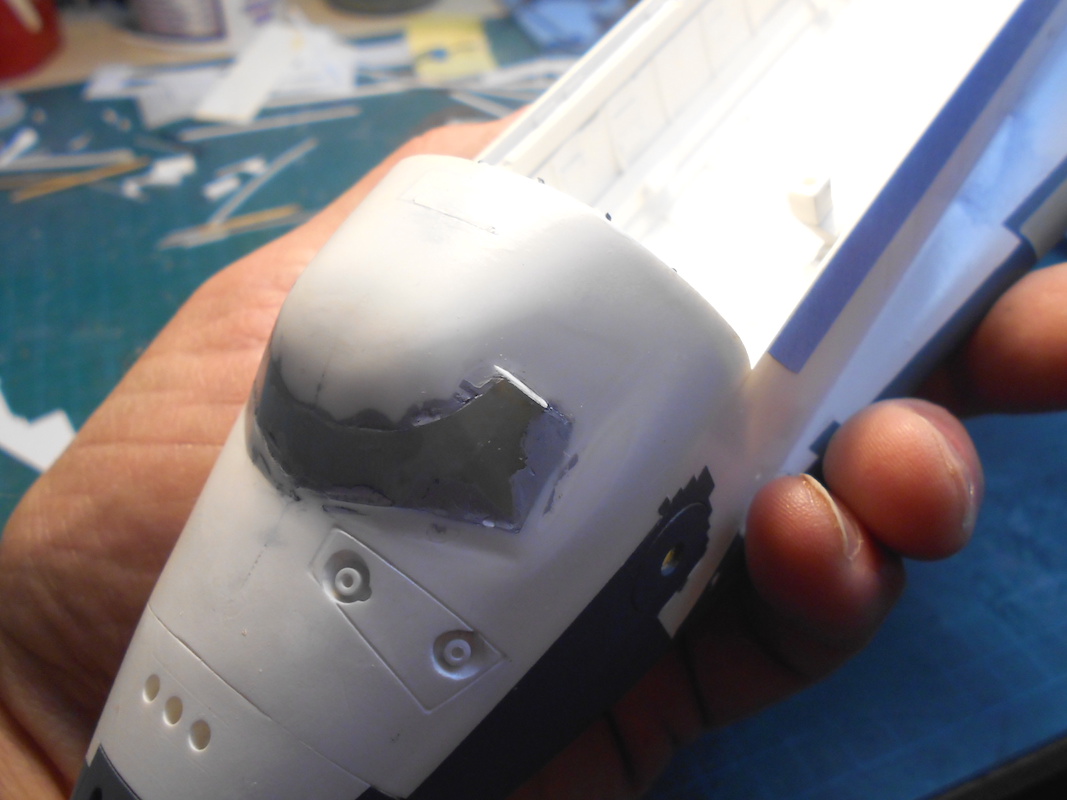
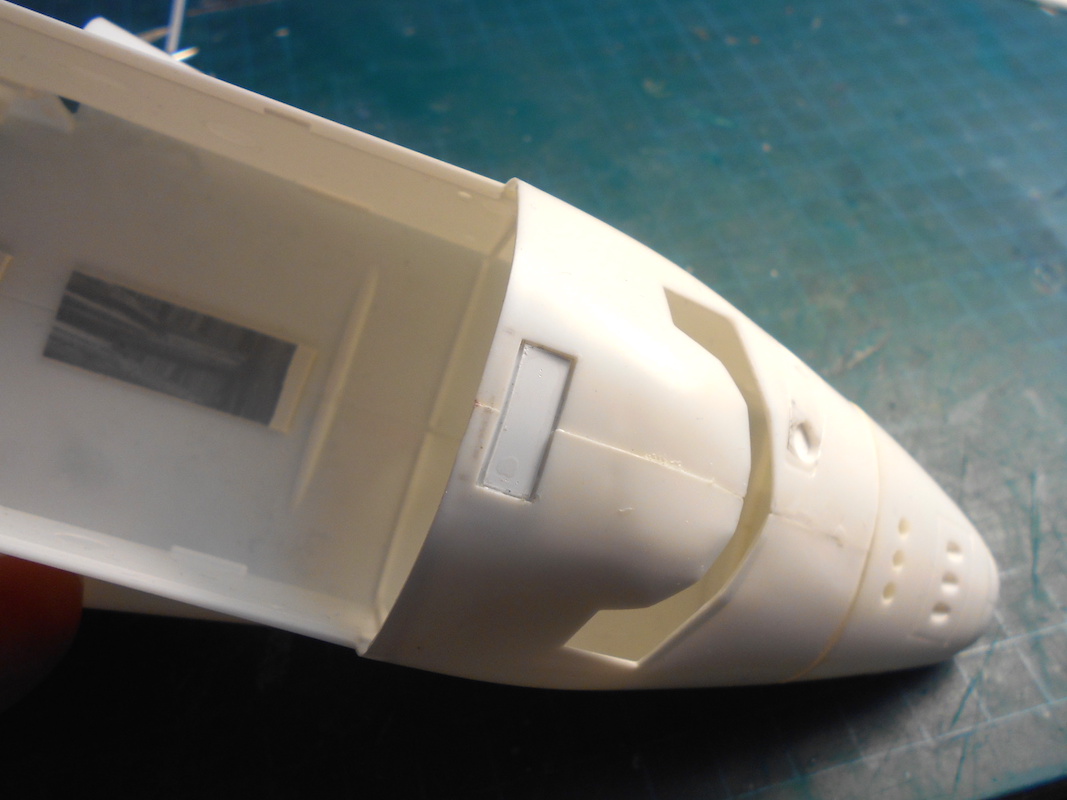
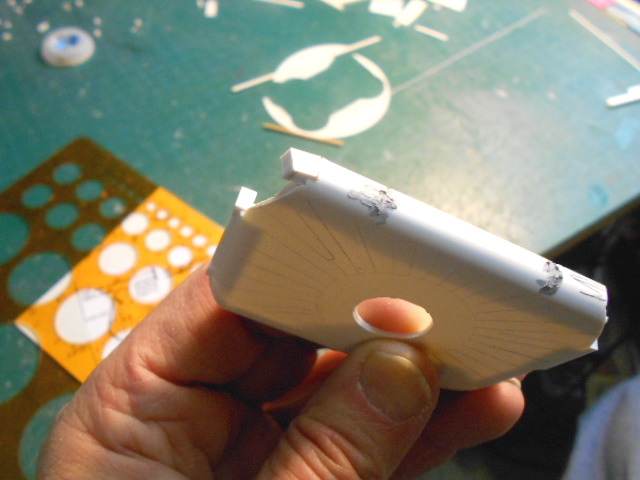
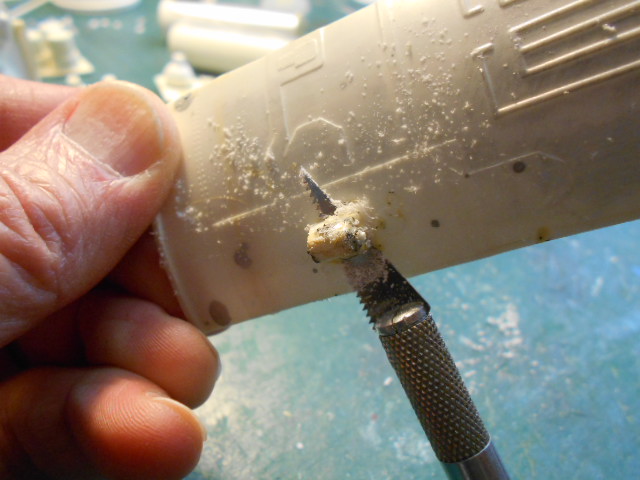
During a sanding, the window got pushed in and a couple of styrene strips were glued in to add a little more bite.
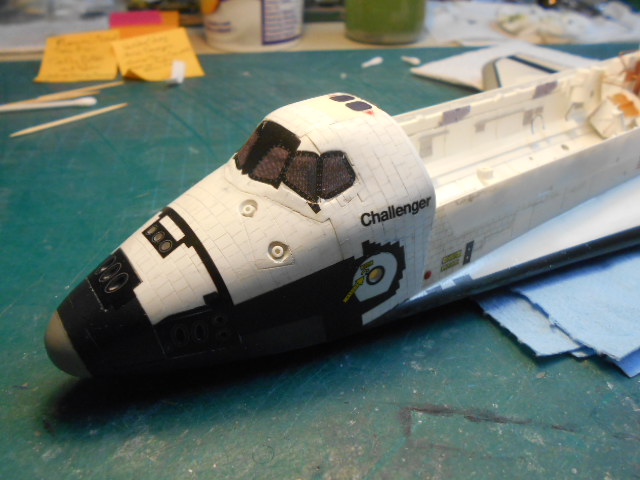
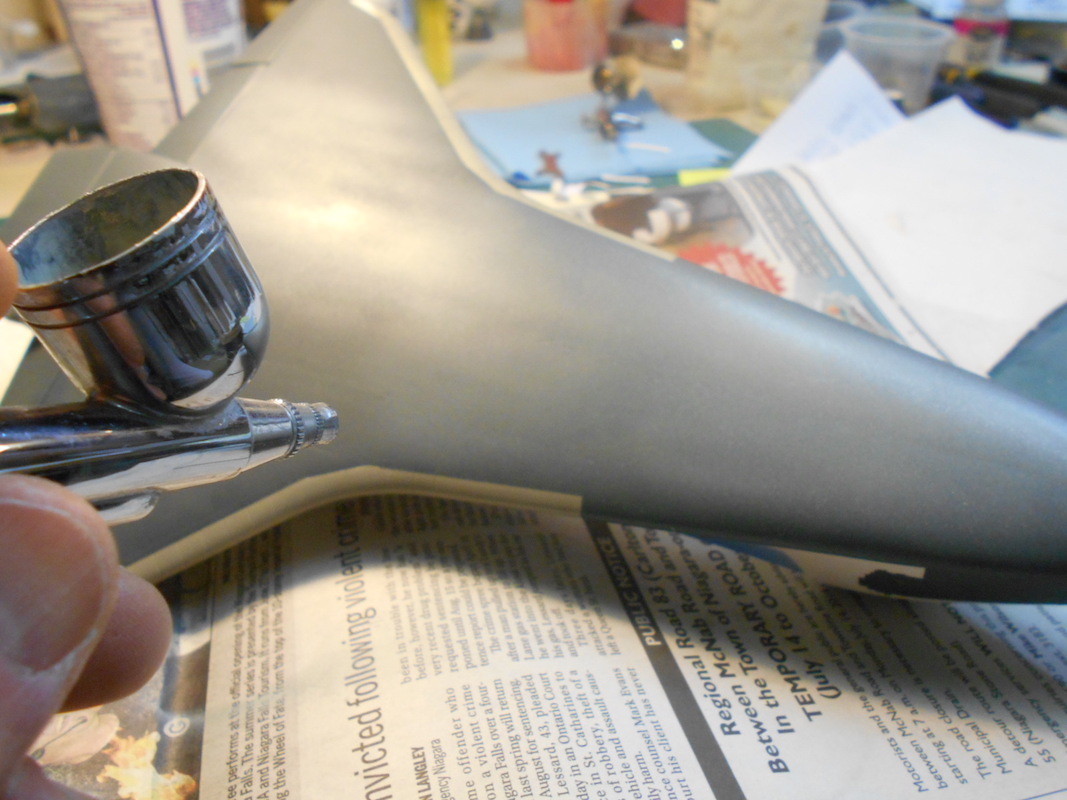
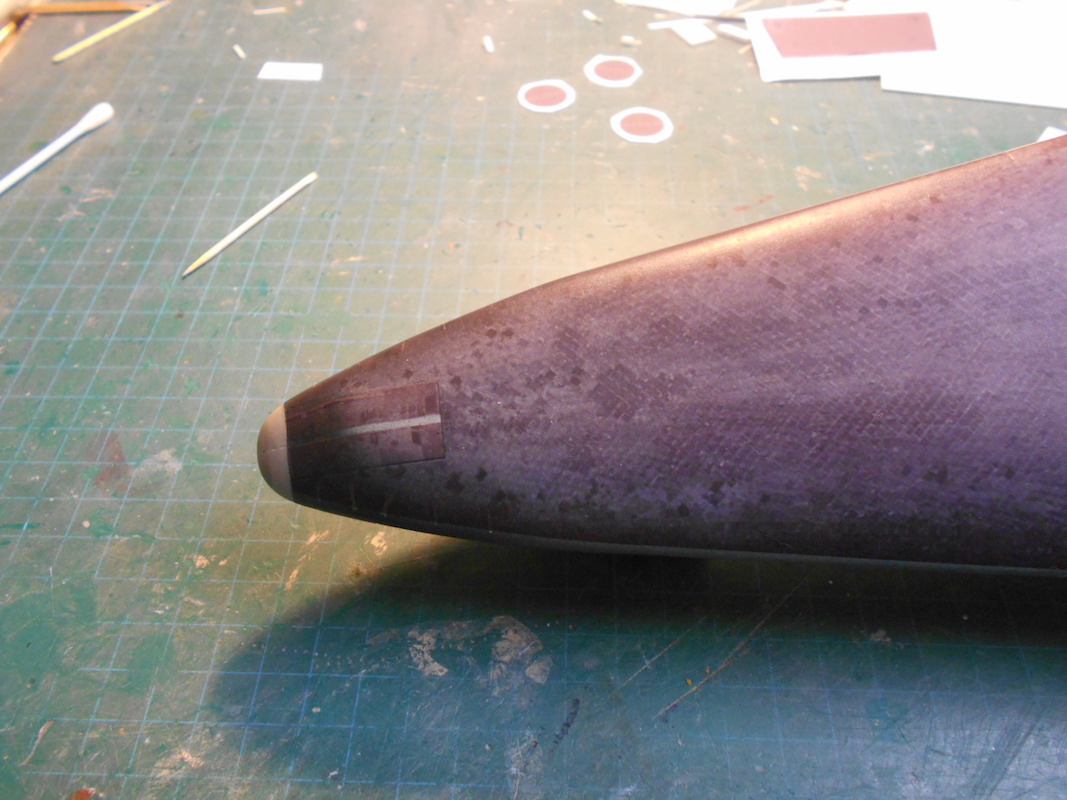
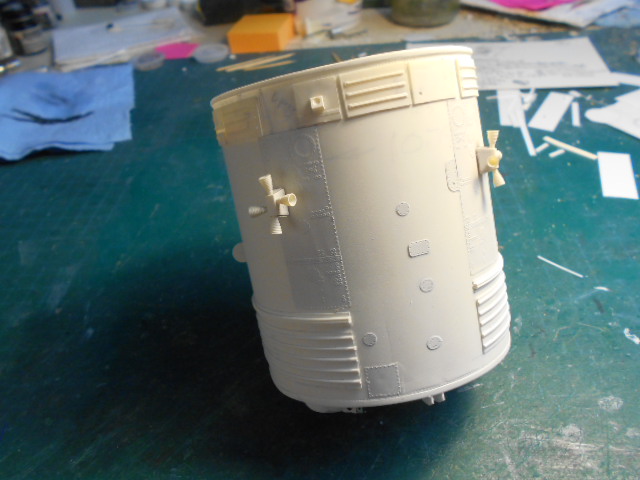
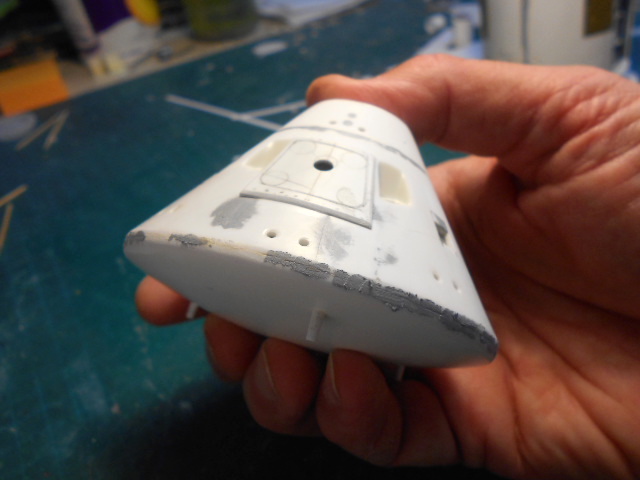
The belly was sprayed Grey in prep for the lovely decals ...
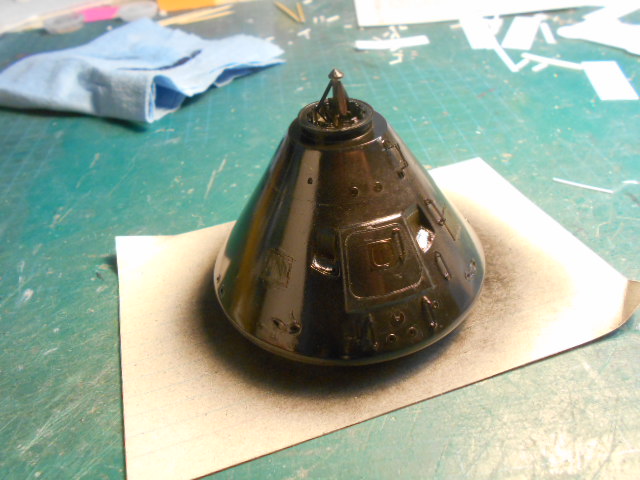
After repainting the window, the nose cap got some paint too ...
The nose gear door decals didn't quite fit, but with a little paint the gap was touched up ...
Till next post ..
IPD
-
2
-
-
Guten Morgen Manfred ... let's keep this little secret to ourselves!


-
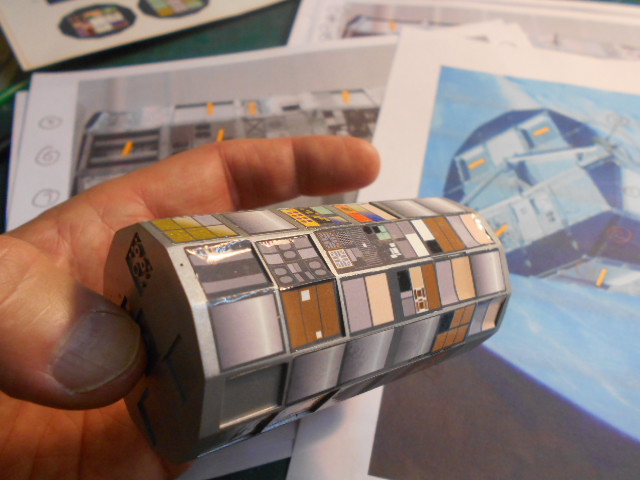
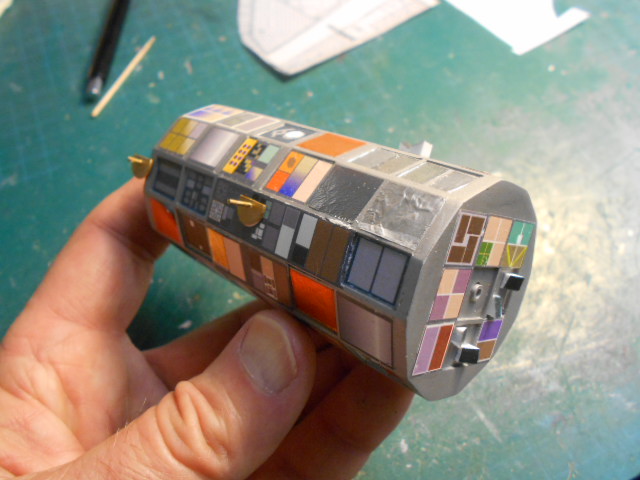
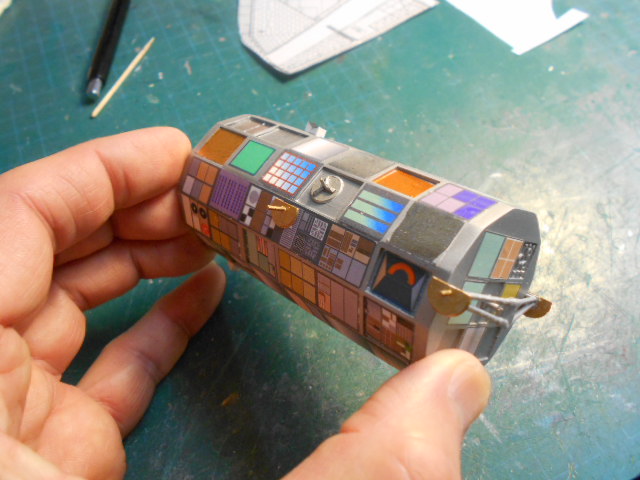
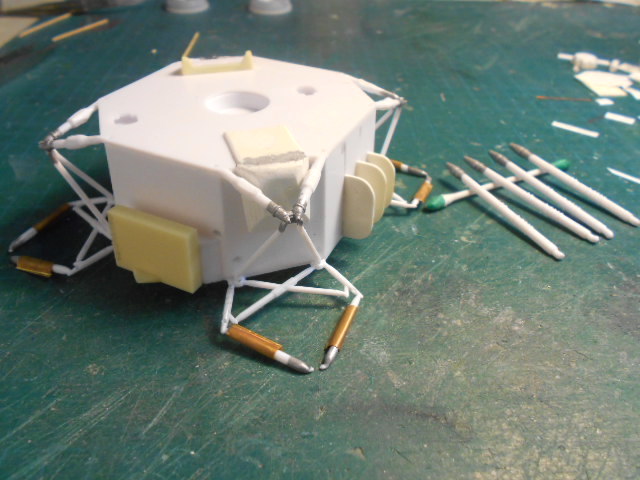
The LDEF took a lot of sanding sessions ...
Ready for a little primer ...
... and some more sanding ...
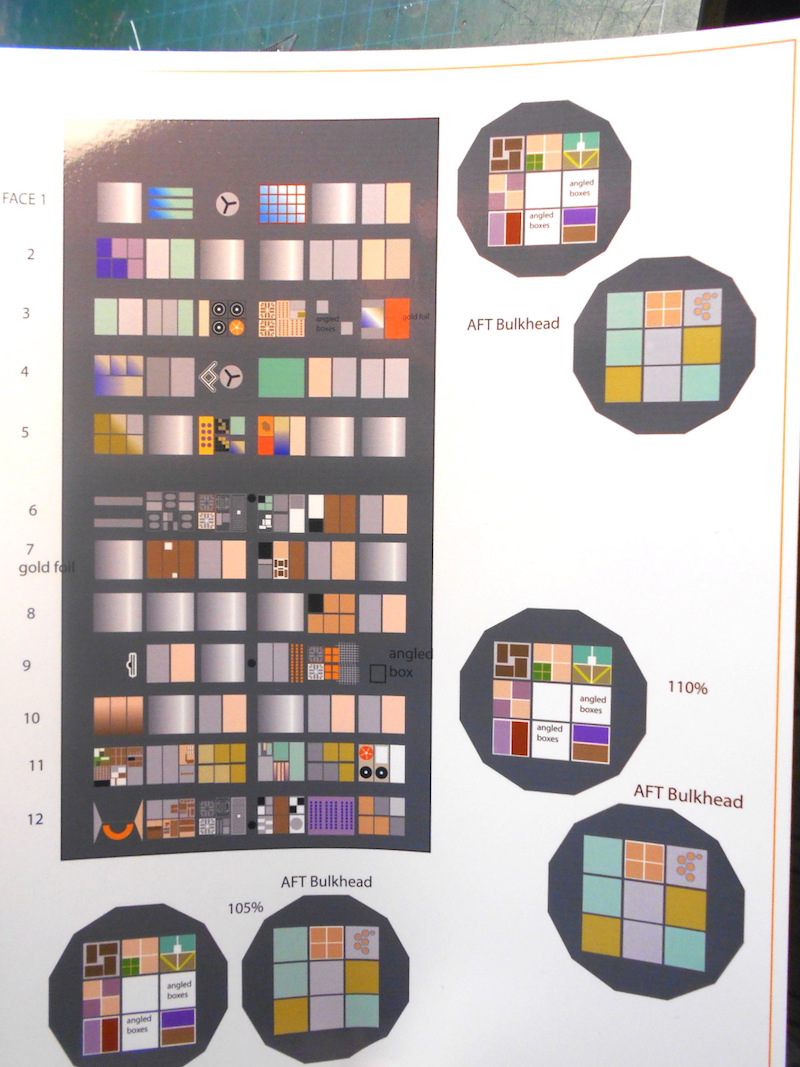
This is the Map for the various Materials to be attached to the LDEF ...
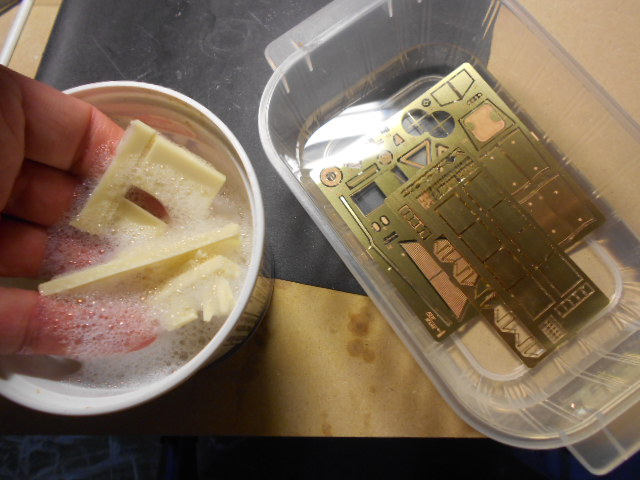
... and my homemade decals ... after a lot of researching ...
... attaching the decals ...
The decal paper/film, in the background, is garbage.
The decals' adhesive was poor, the film was very thick and didn't conform to surface detail ... this awful paper made this more like work than fun ...
That'll do for now!
till next posting!
IPD
-
3
-
-
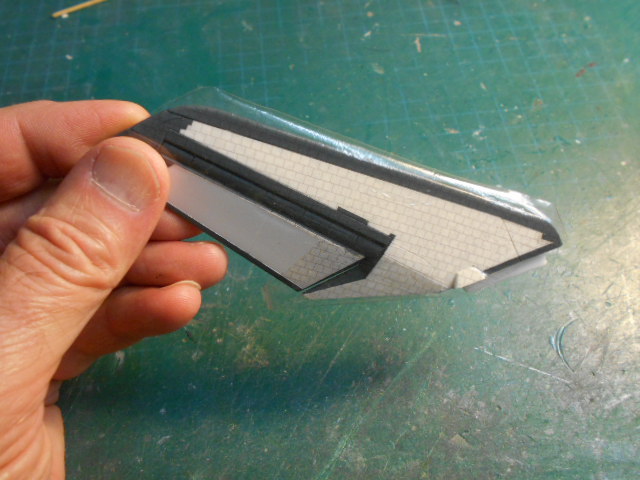
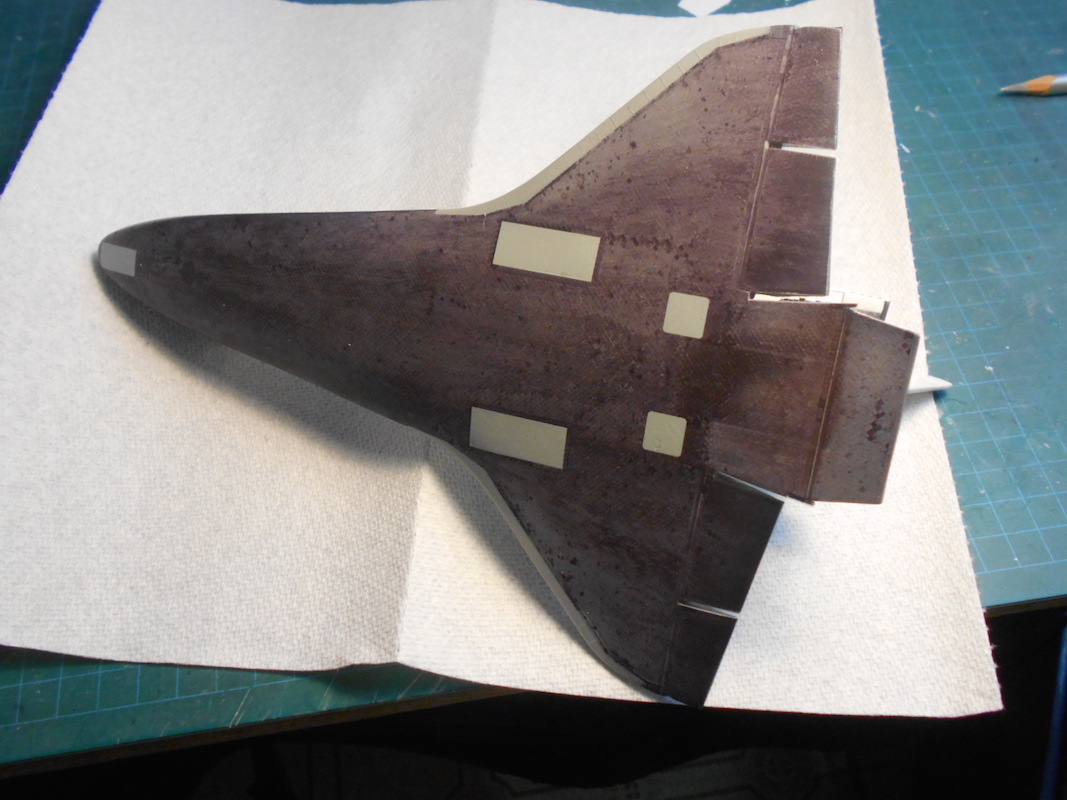
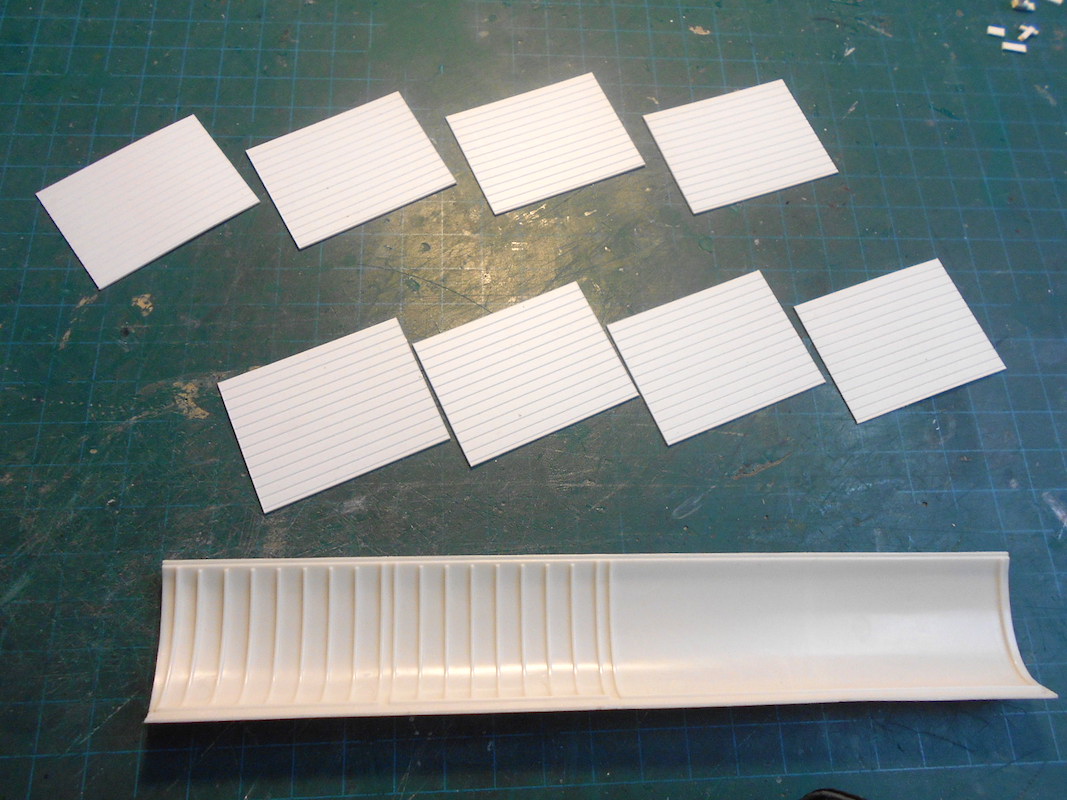
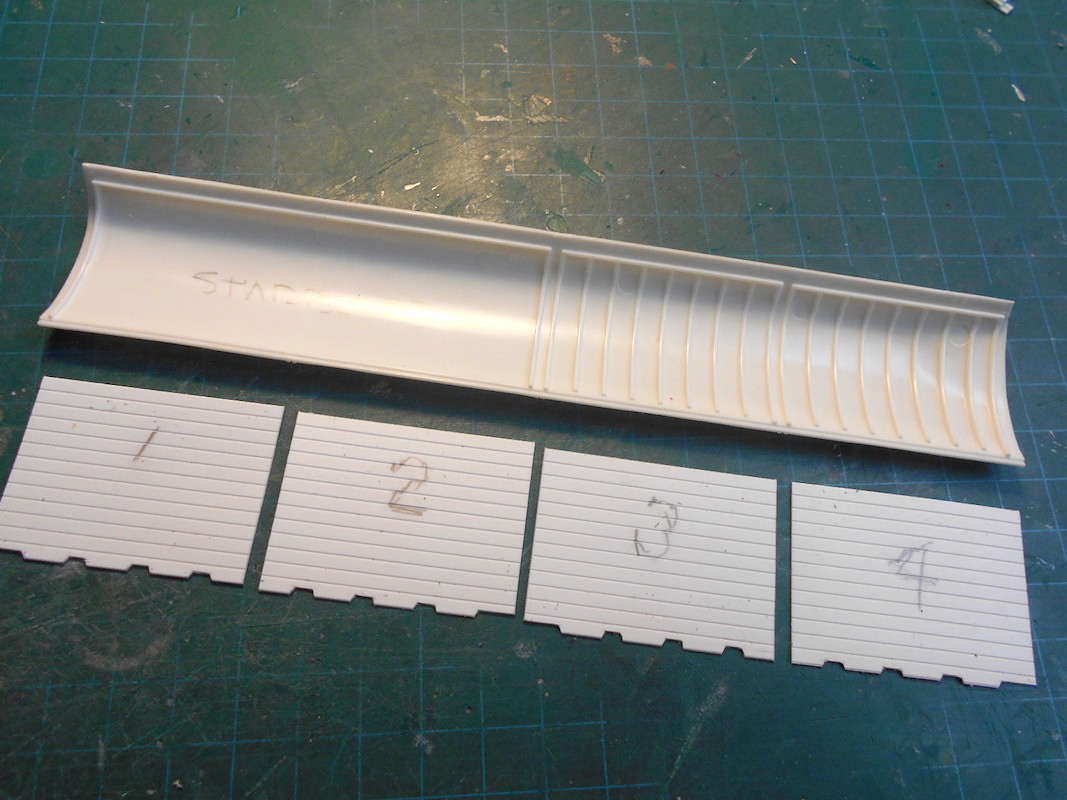
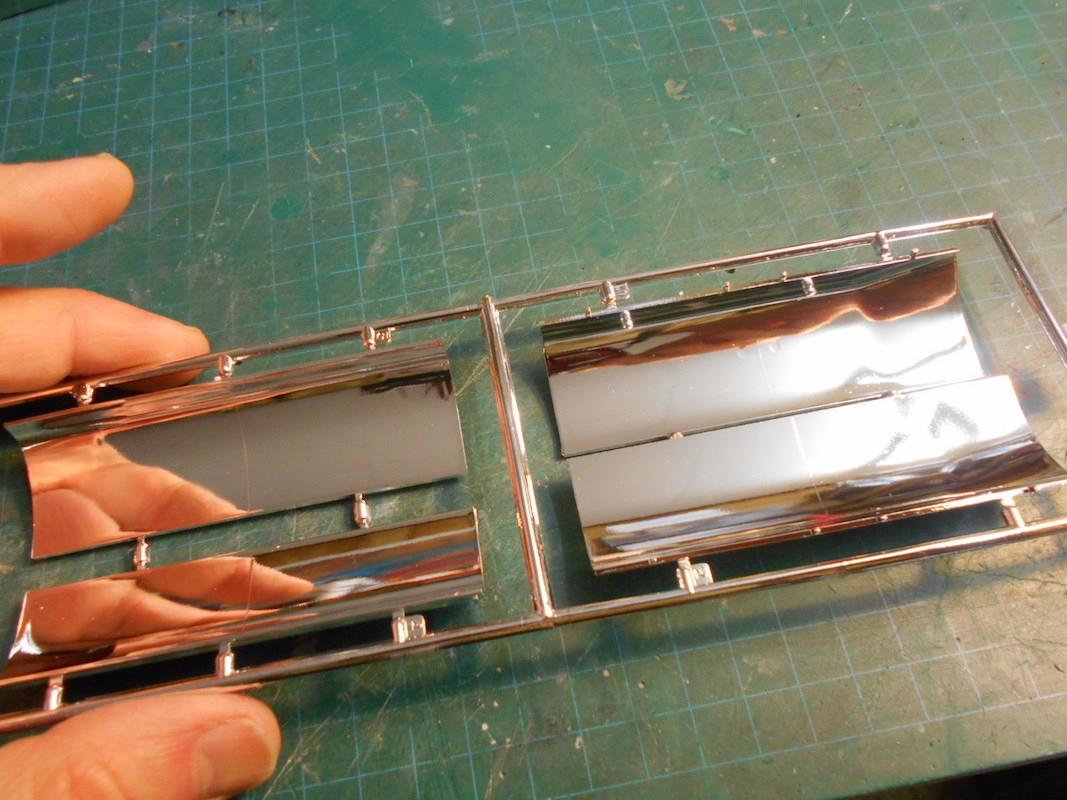
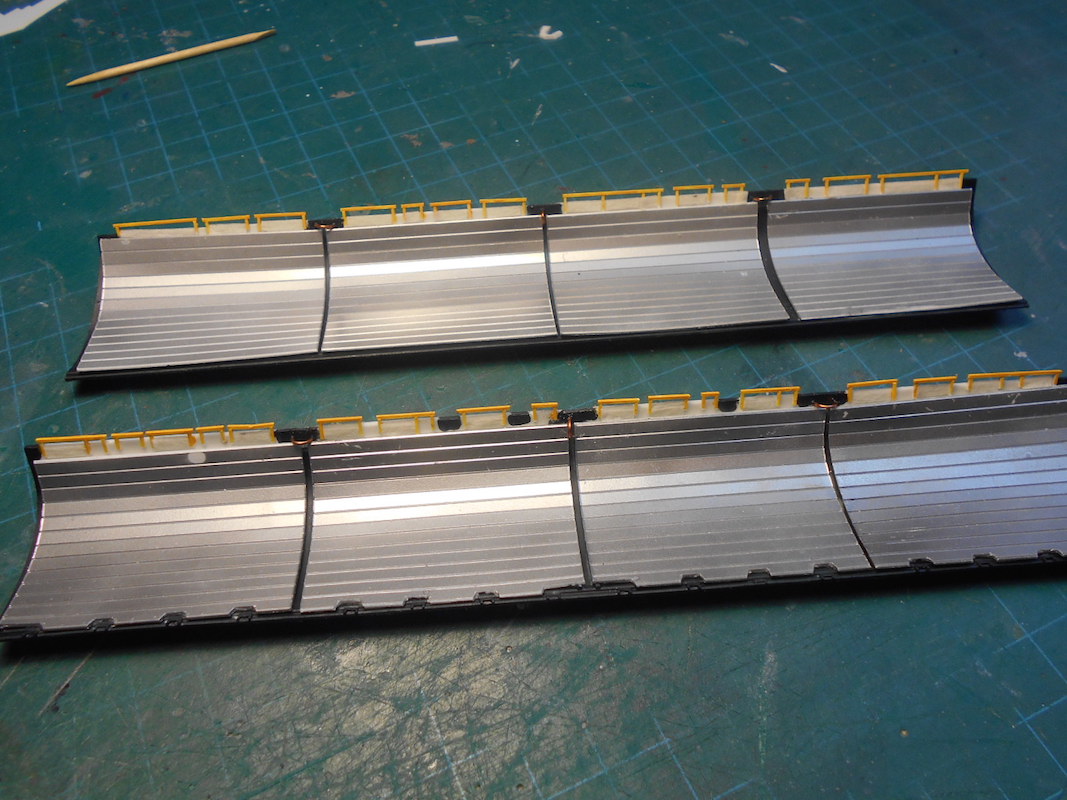
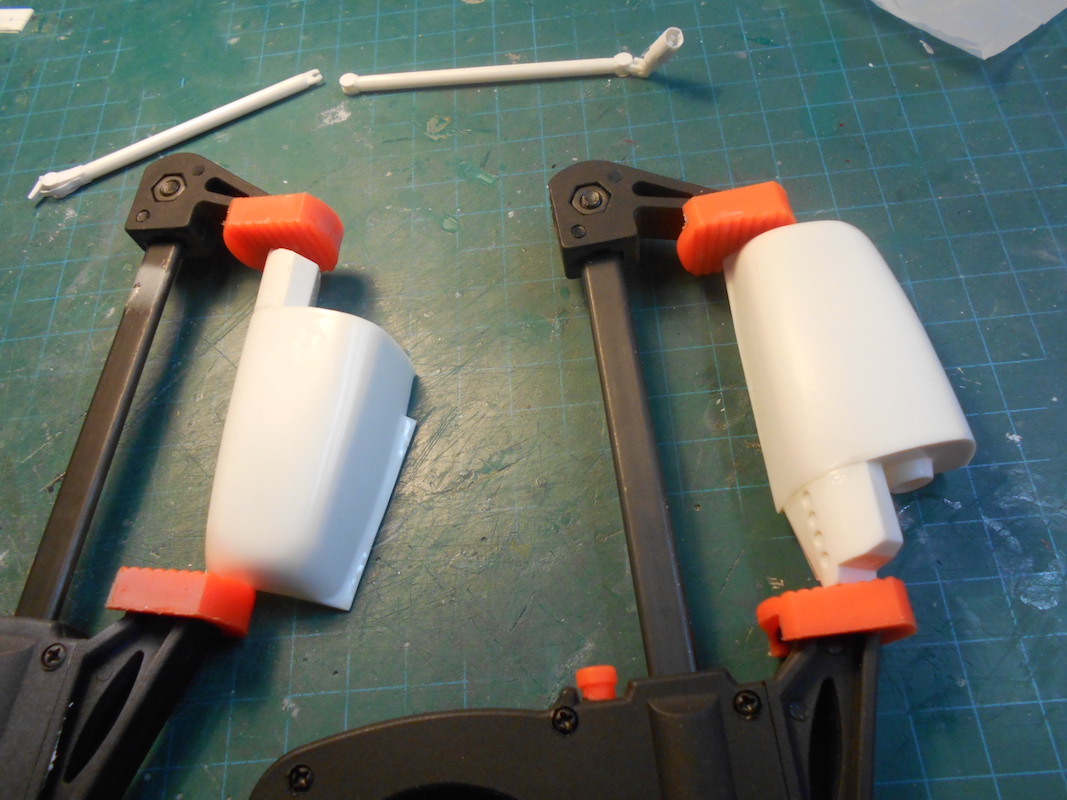
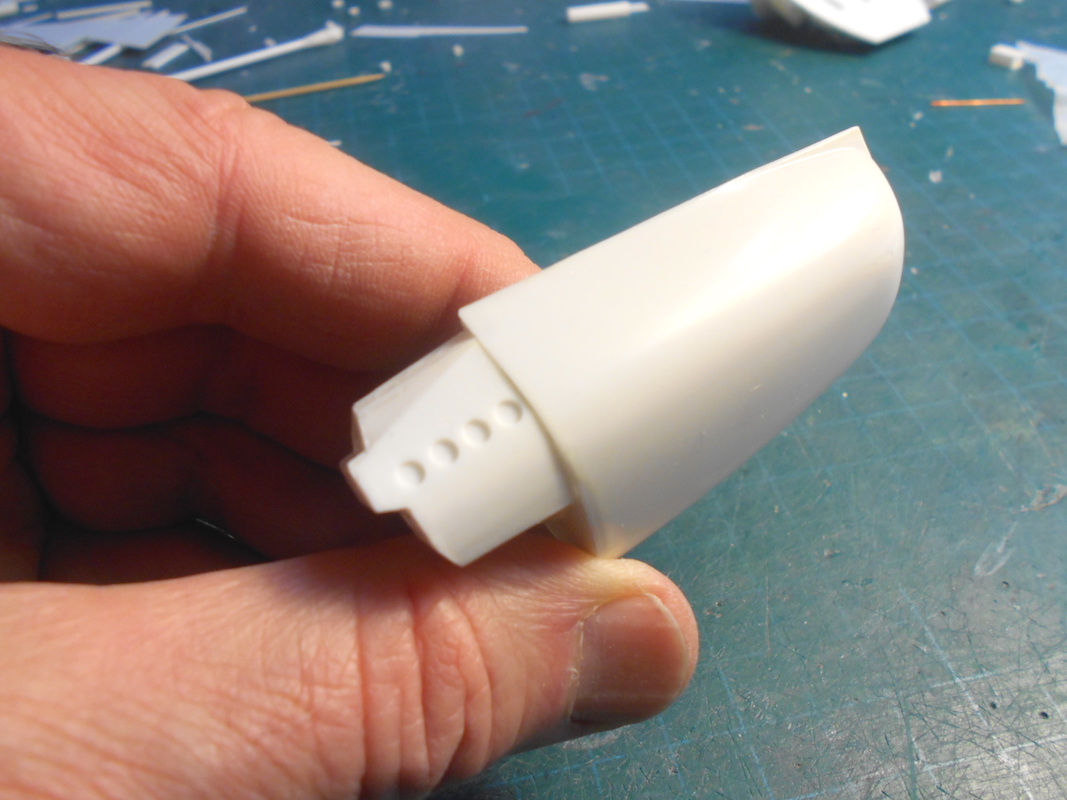
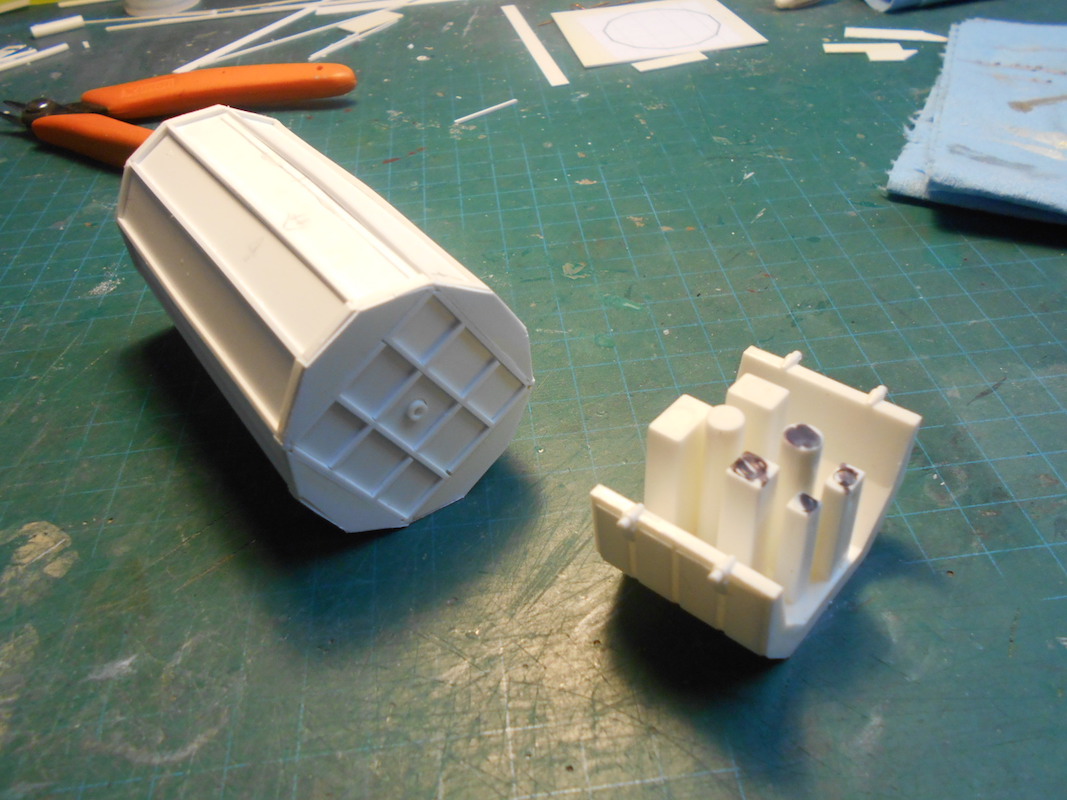
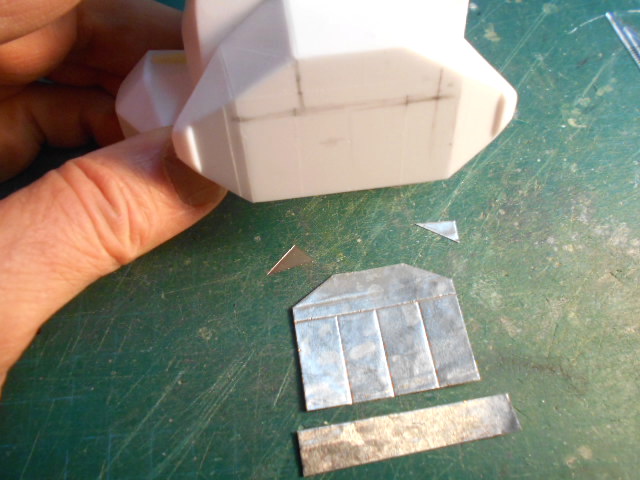
The radiator panels on the Payload Bay doors were made from grooved Evergreen sheet.
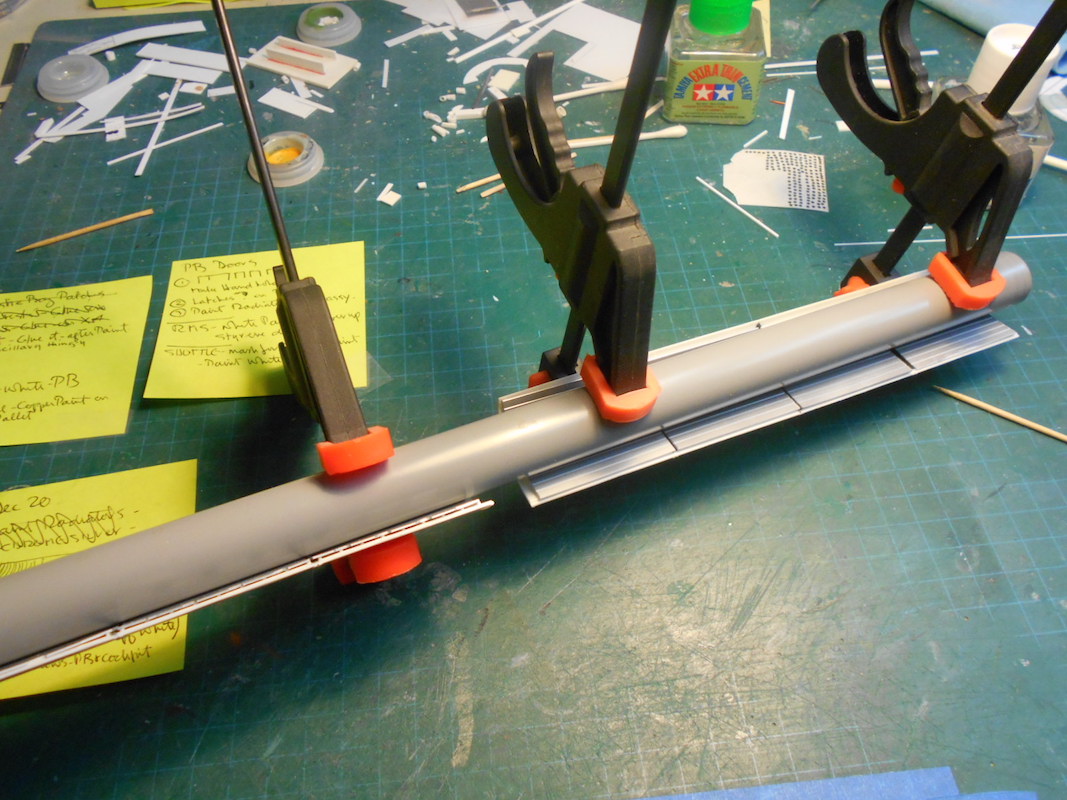
Using some tubing and some clamps, the panels were glued to the kit's doors.
The kit's Radiator panels were nice but completely inaccurate.
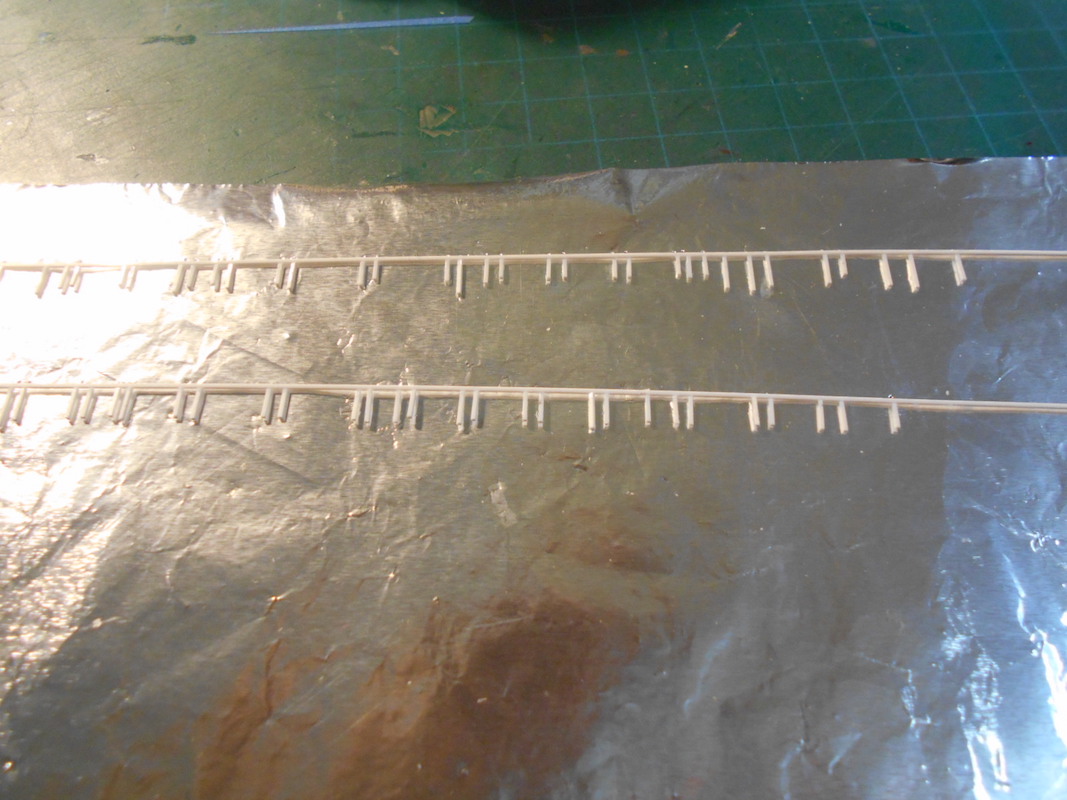
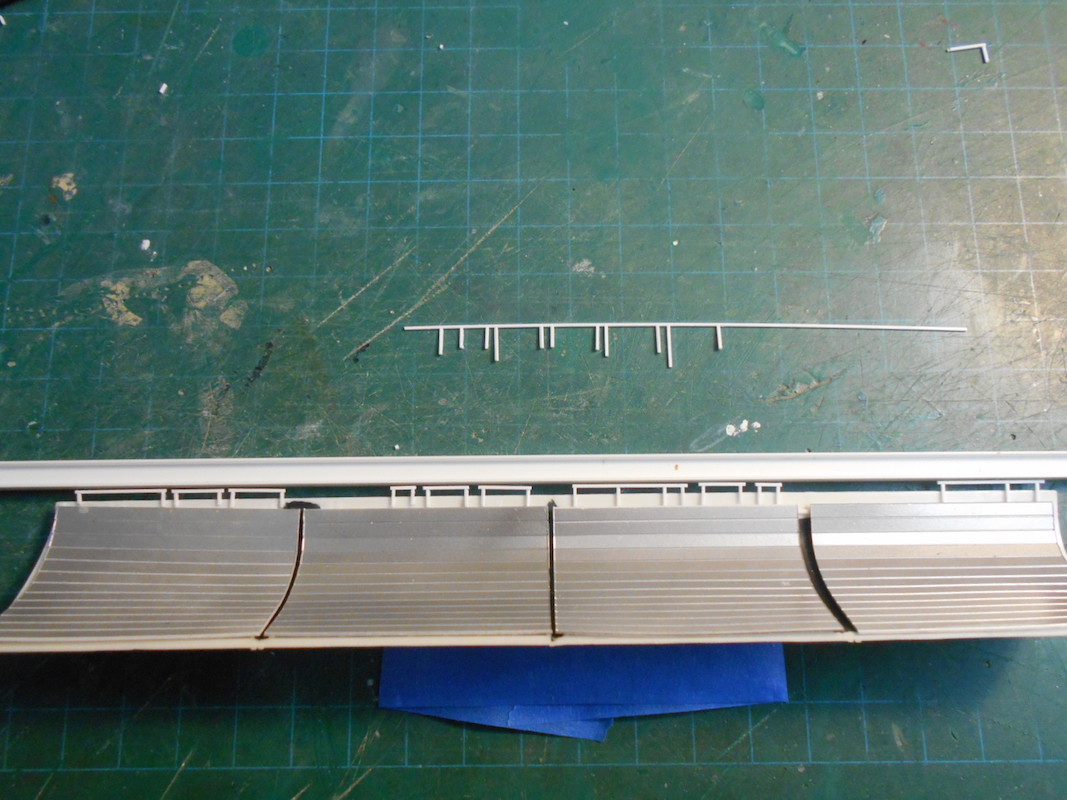
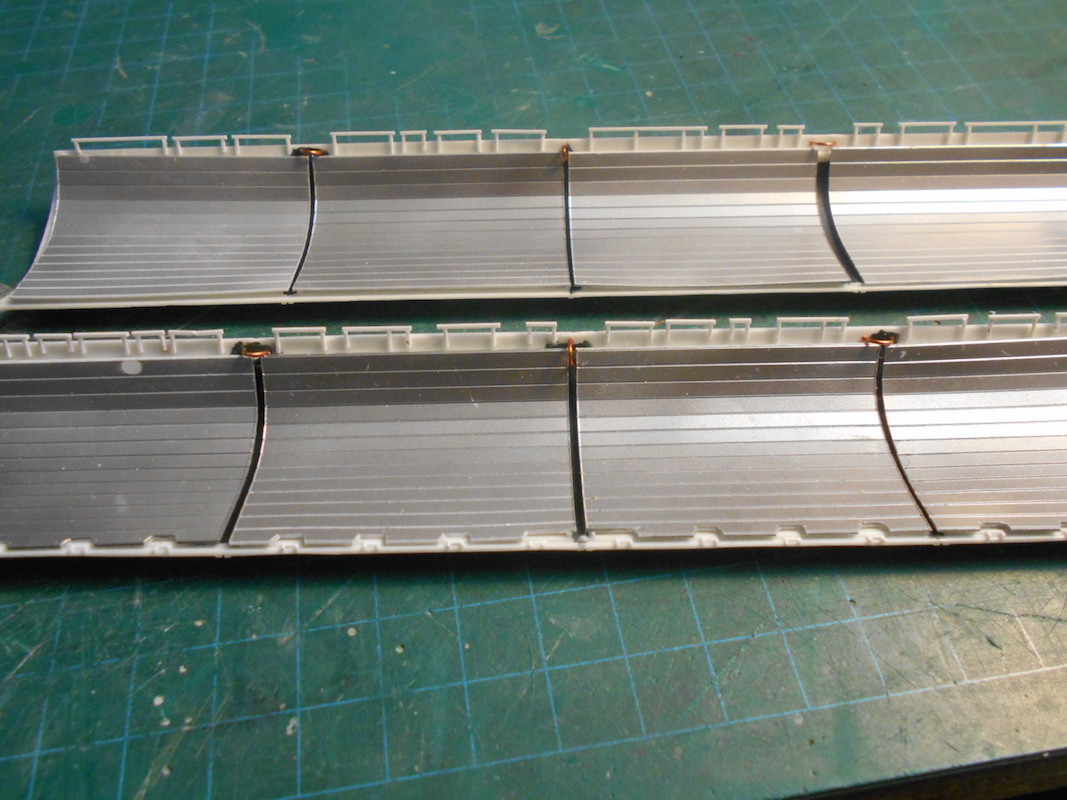
Using 0.020" styrene rod, I made the handholds. They are on a sheet of waxed paper for gluing.
Installing the handholds
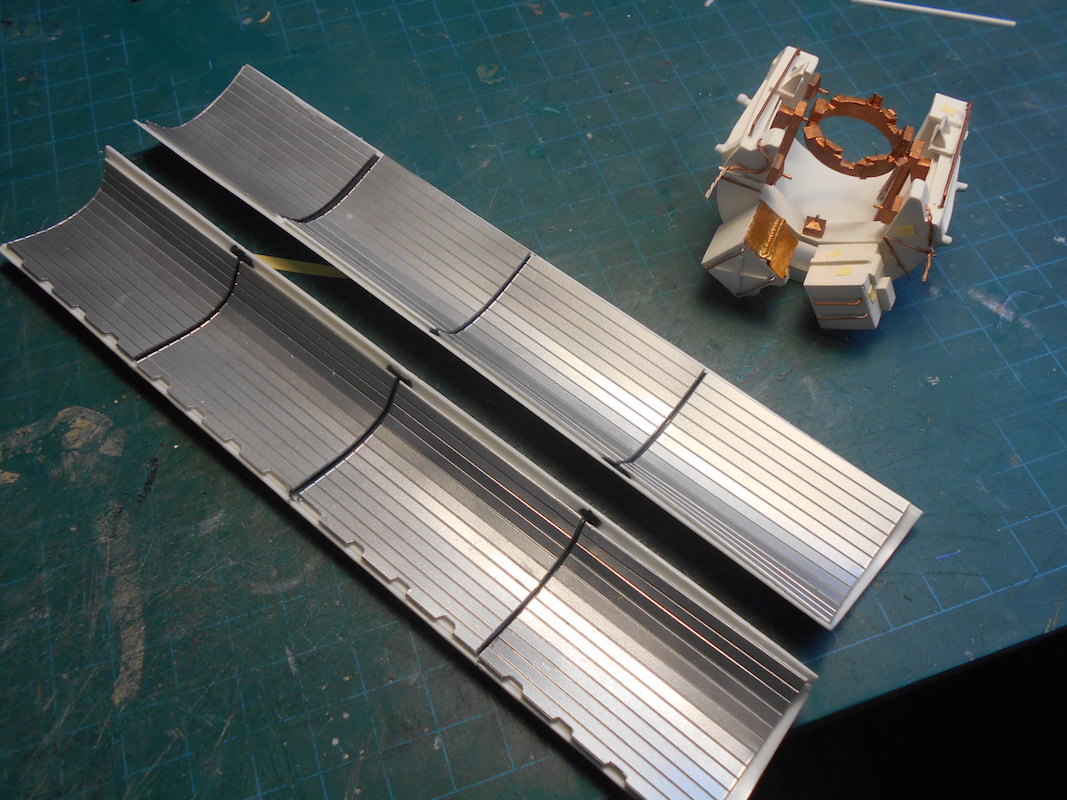
... and DONE.
... onto the LDEF ...
-
3
-
-
Puttying the belly for the first time ...
After the 2nd sanding ...
the fit of this kit is par for the course ... poor, but entirely fixable.
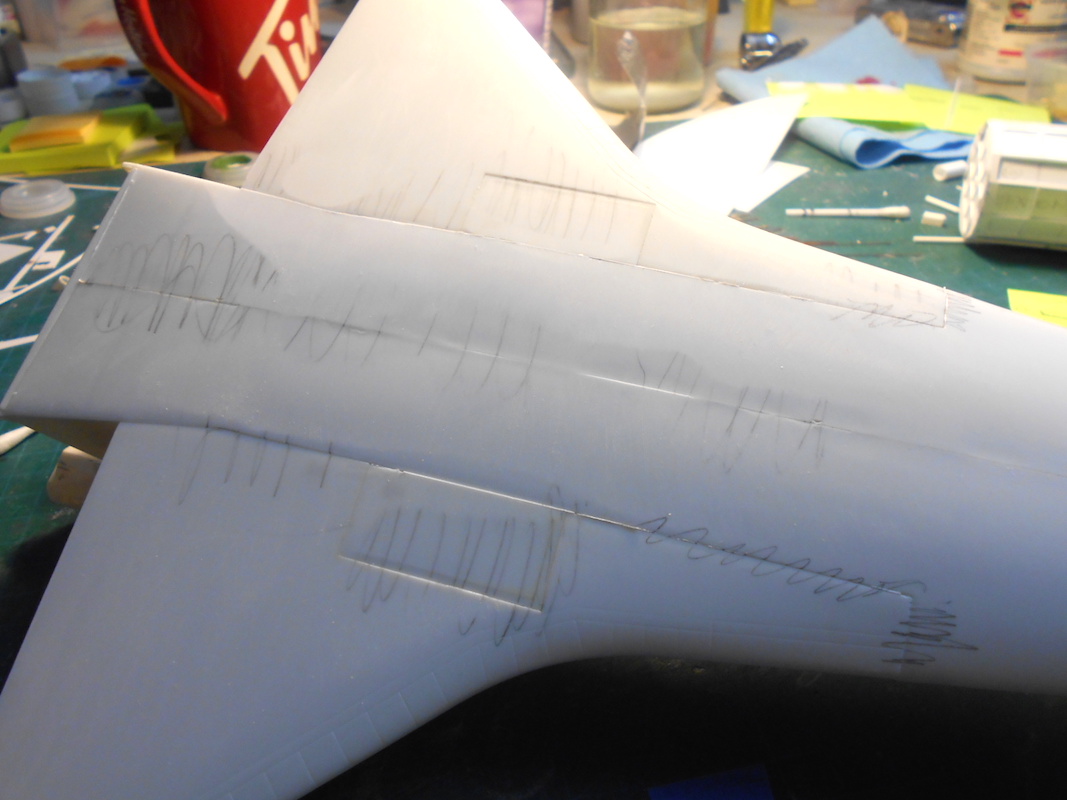
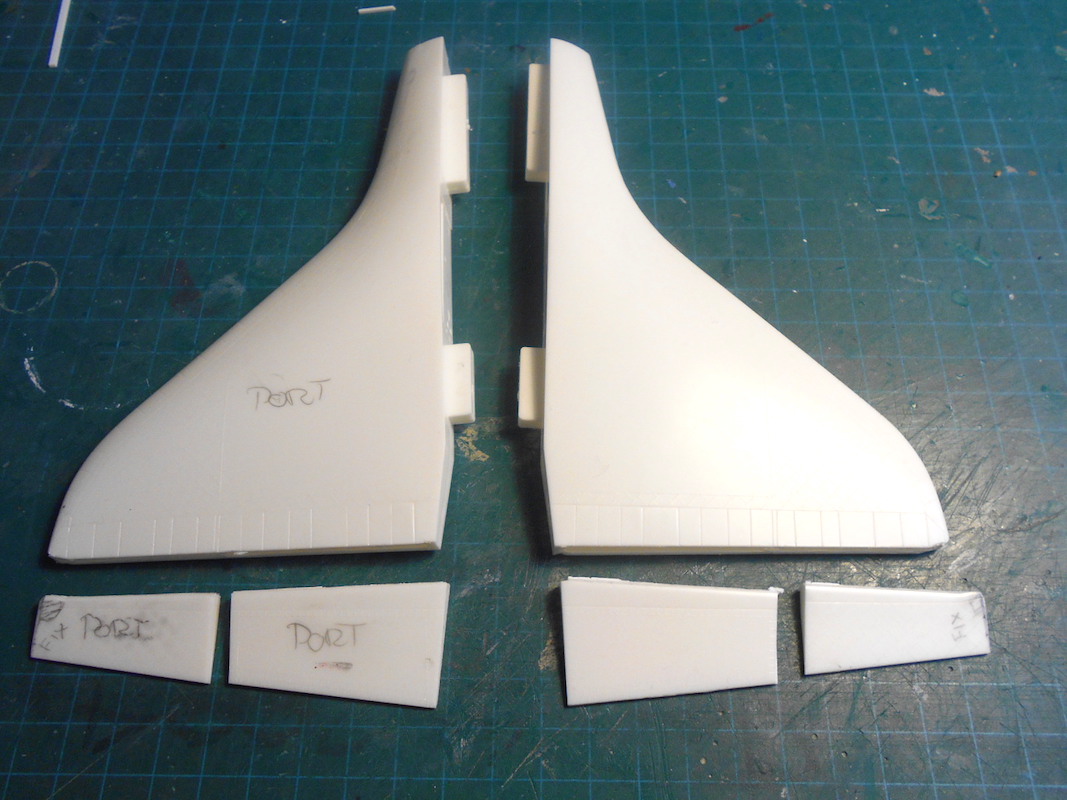
Adding little supports or fairings to the base of the Tail
Filling and sanding the Chines ...
Sanding the window seams ... I put on a sacrificial decal to protect the clear plastic ...
Bulkheads are done ...
Free Floating elevons ...
Adding some detail to the Aft fixture ...
Next up will be the Payload Bay doors and the LDEF itself ...
IPD
-
6
-
-
Thanx Keith ... but not necessary. I've got pul-enty of images and have to create my own decal of each material on the LDEF too, so the images I've accumulated will suffice.
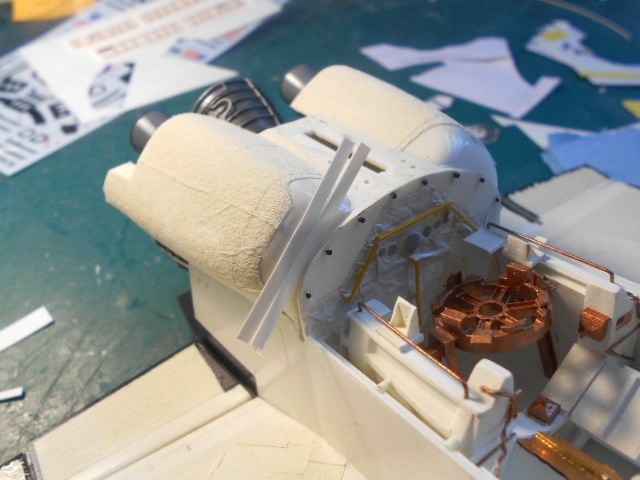
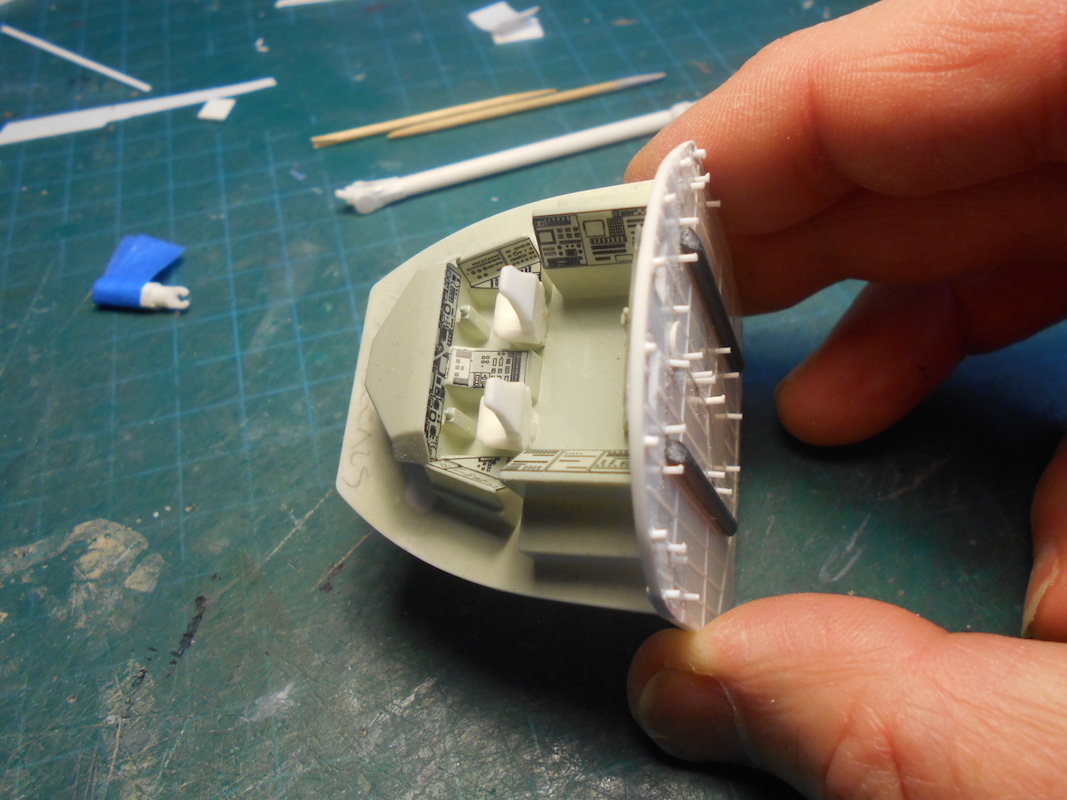
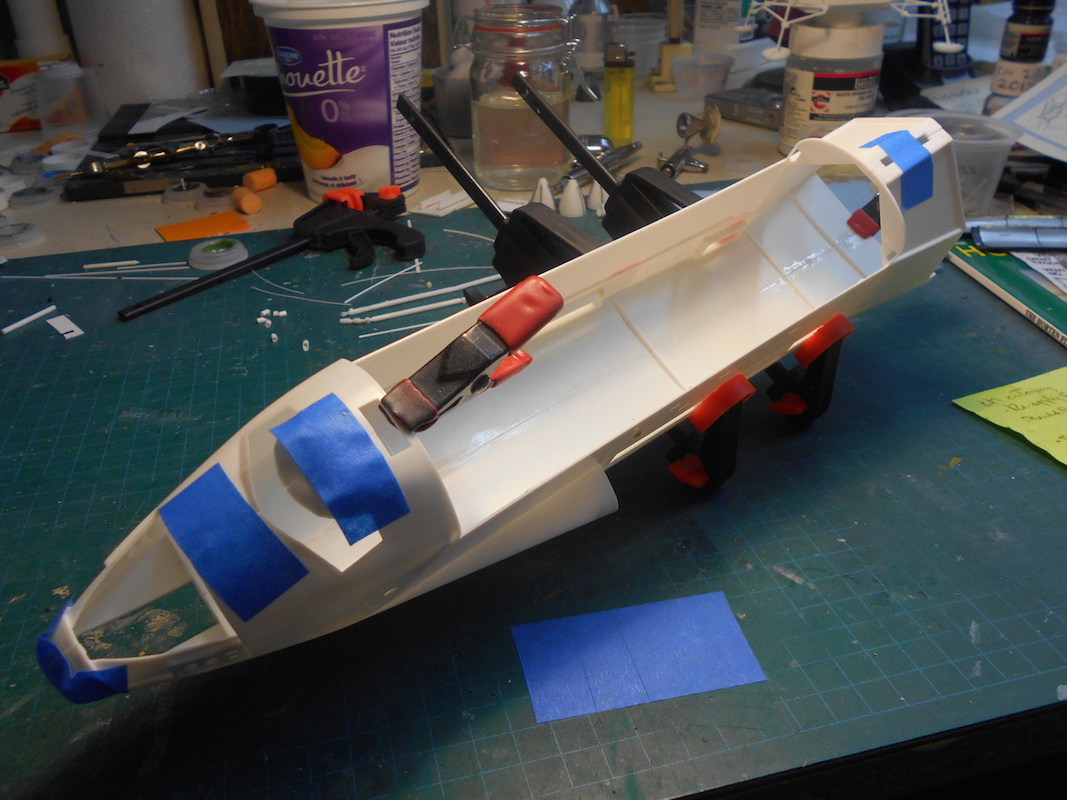
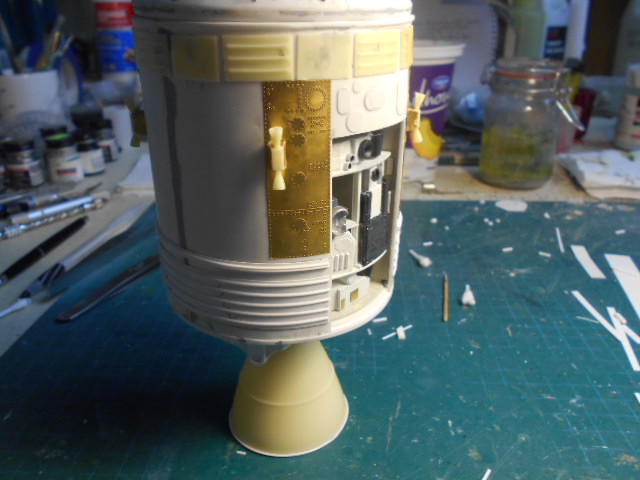
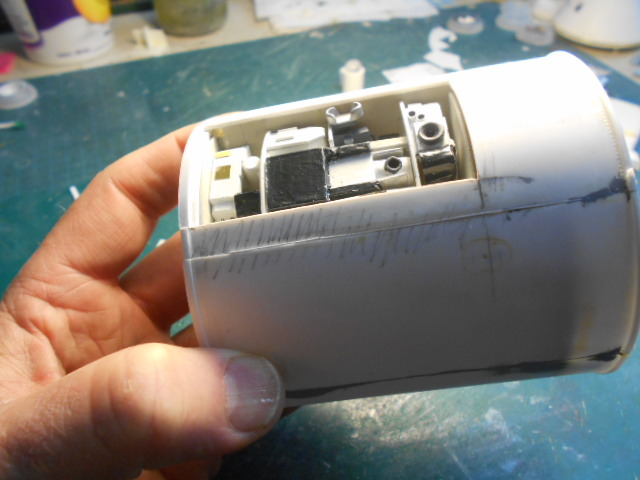
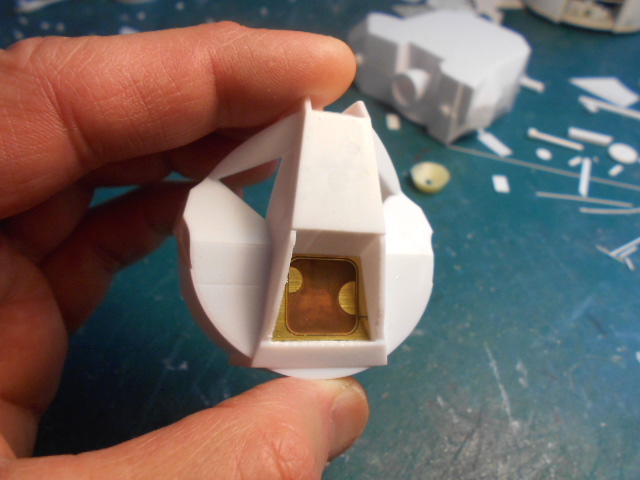
The cockpit won't be visible but I applied the kit's Instrument Panel decals anyway. Just for the fun of it!
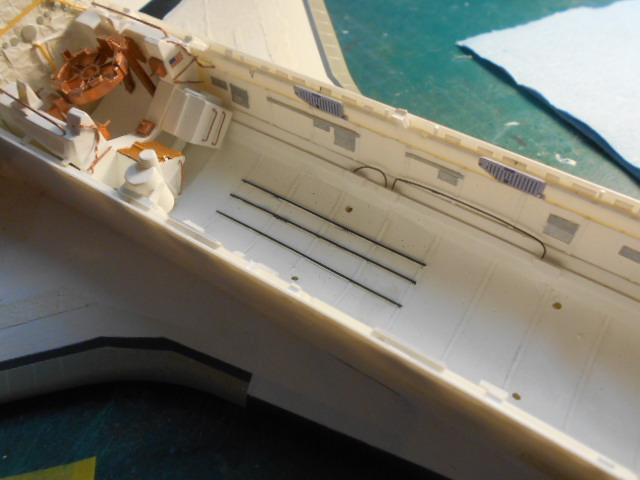
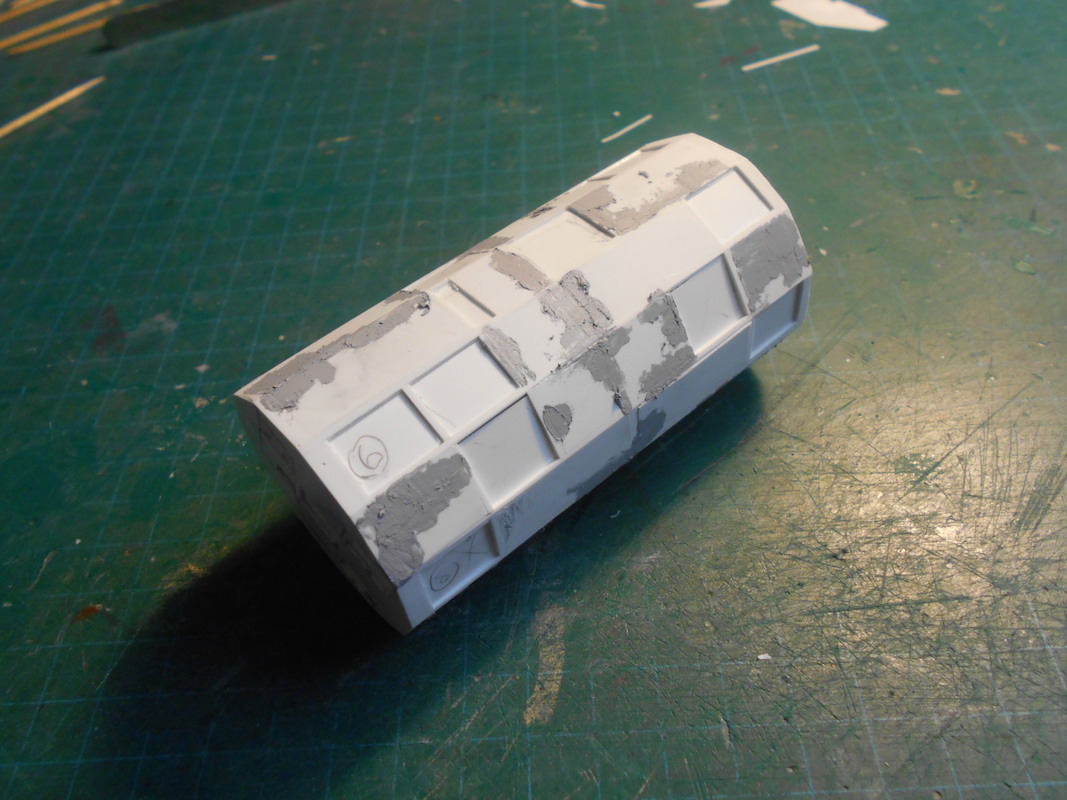
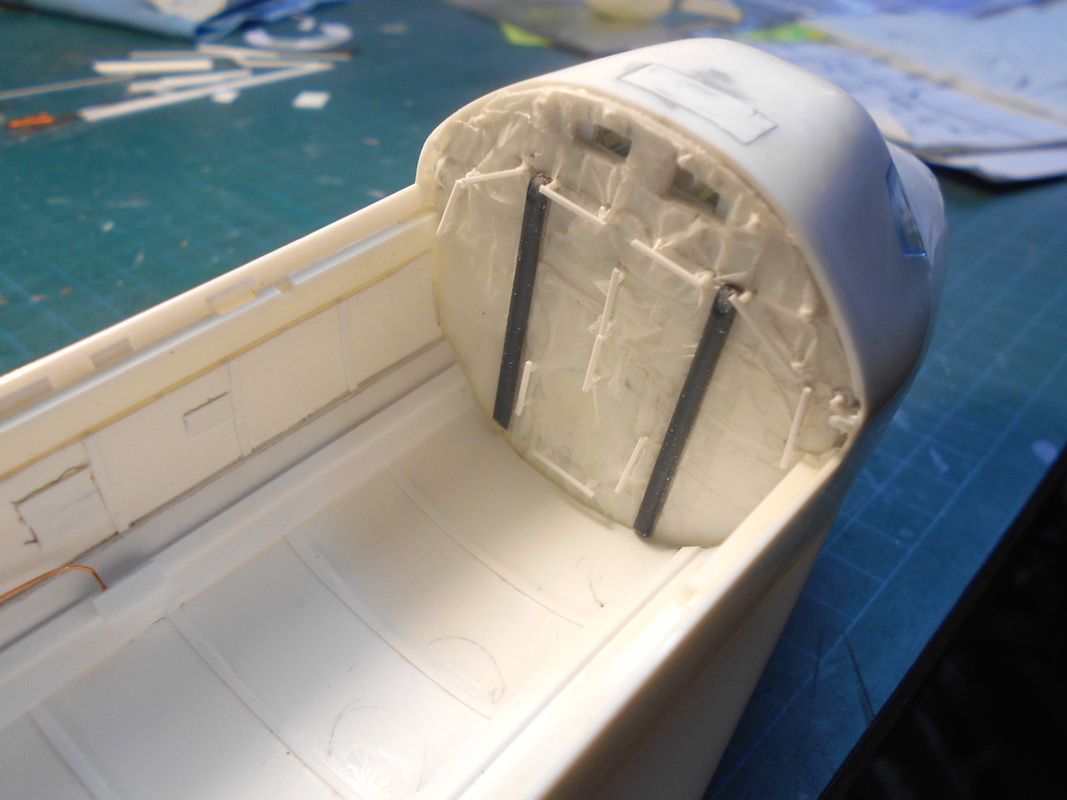
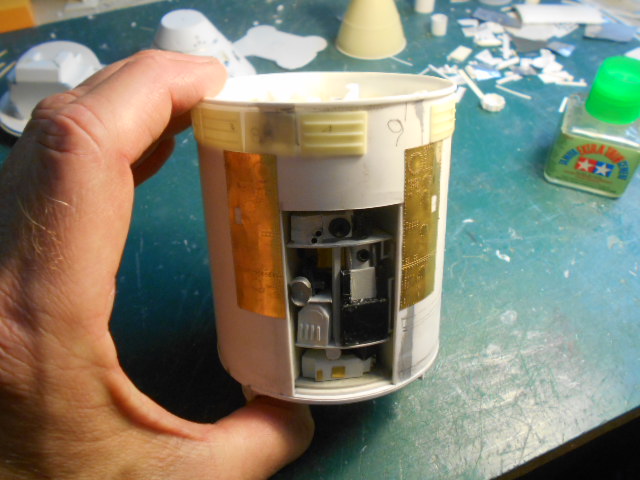
To try to replicate the Insulation batting on the Payload Bay surfaces, I like to use Grocery Bag plastic ... cut in small squares and applied with One Coat Rubber Cement.
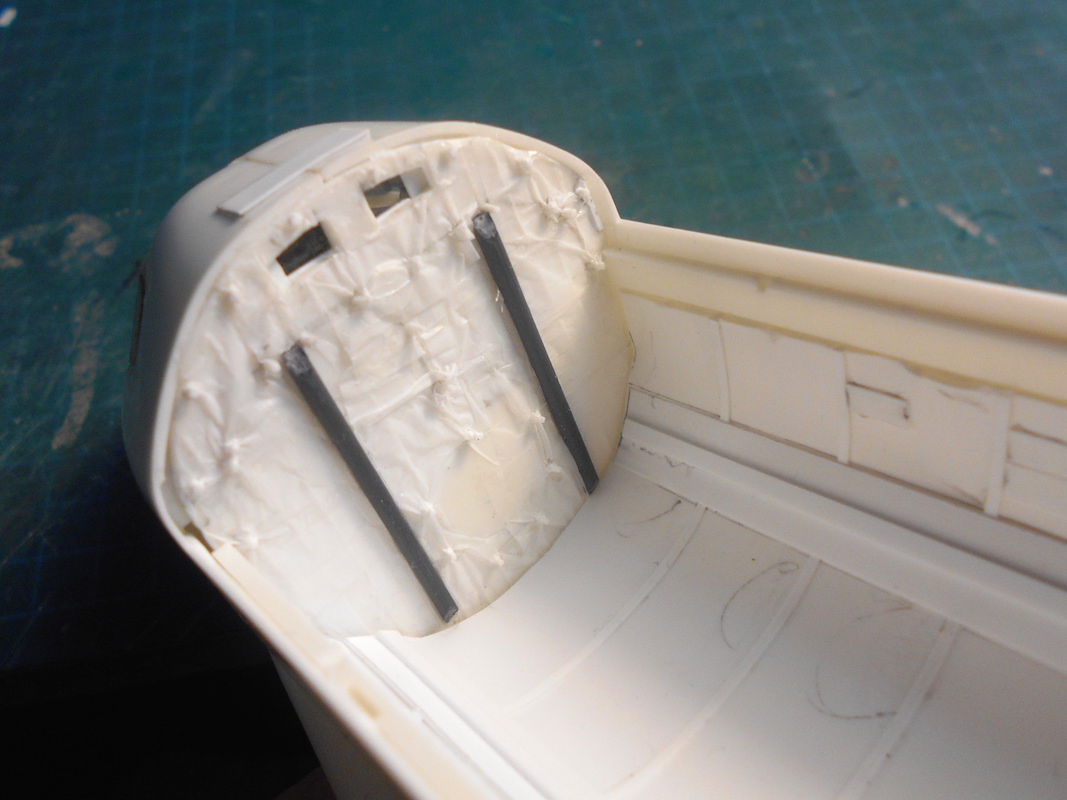
The Fwd bulkhead after the texturing ...
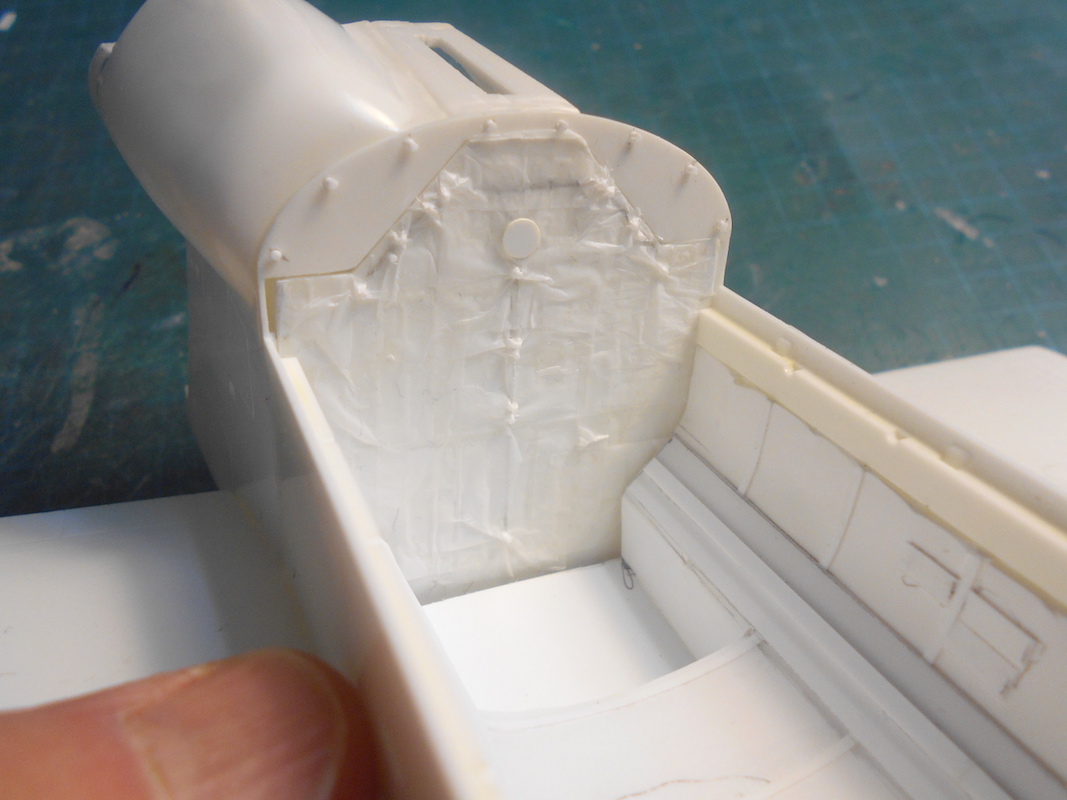
The Aft bulkhead after applying the grocery bag plastic ...
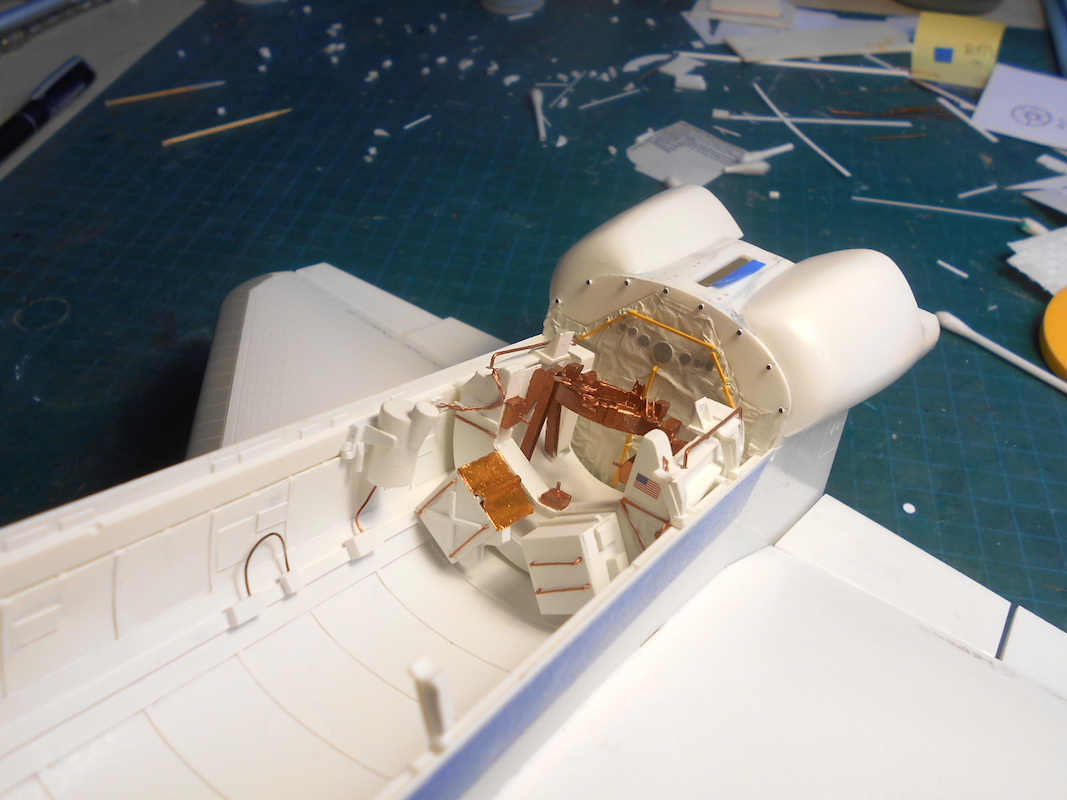
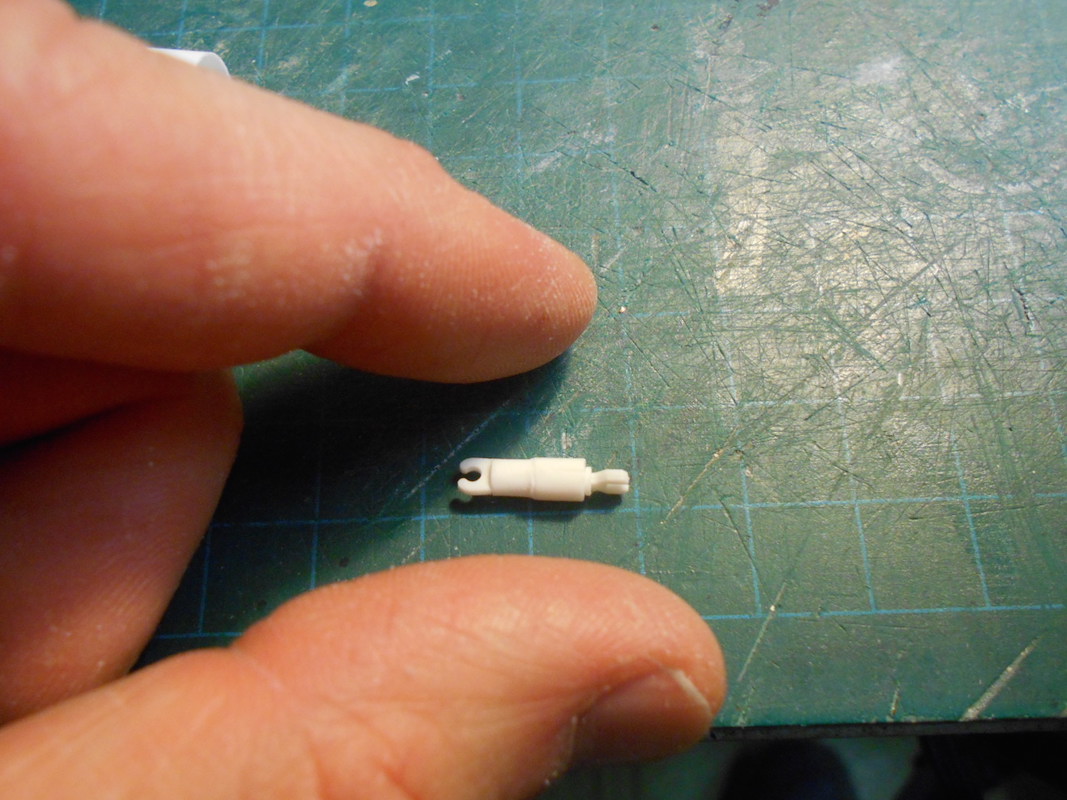
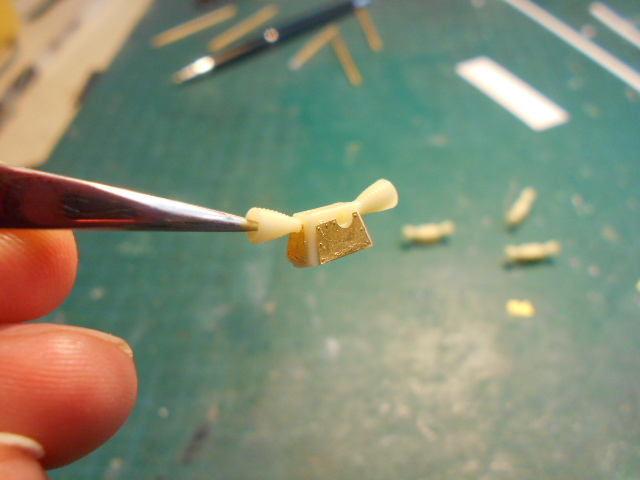
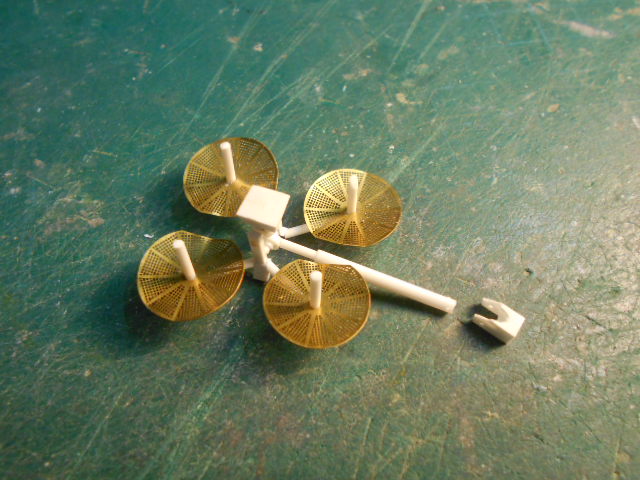
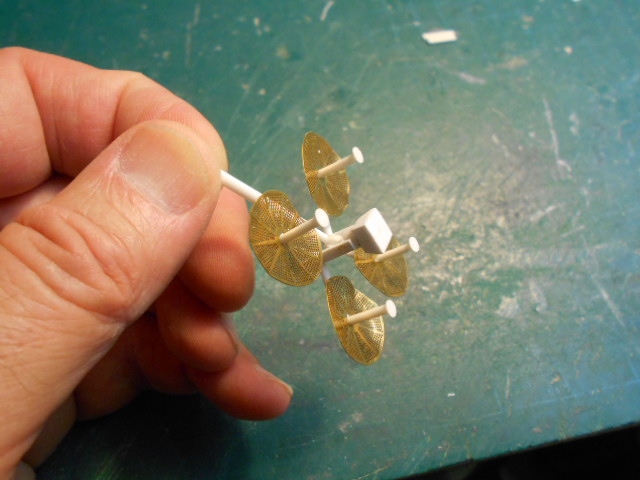
The End Effector from the kit has a claw ... this needs to be reworked.
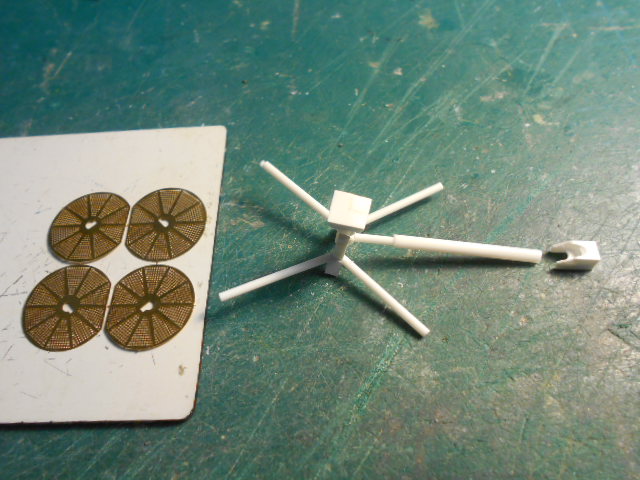
The new End Effector is at lower left and the RMS ( Remote Manipulator System ) has been modified and accurized. I also built the Ku Band antenna and have two tiny cameras made for the PB bulkheads.
Clamping the multi piece OMS pods ...
The poor fit kind of surprised me ... but with some filing and sanding, it'll look just fine!
Filling the gaps with scraps of styrene ...
... and putty ...
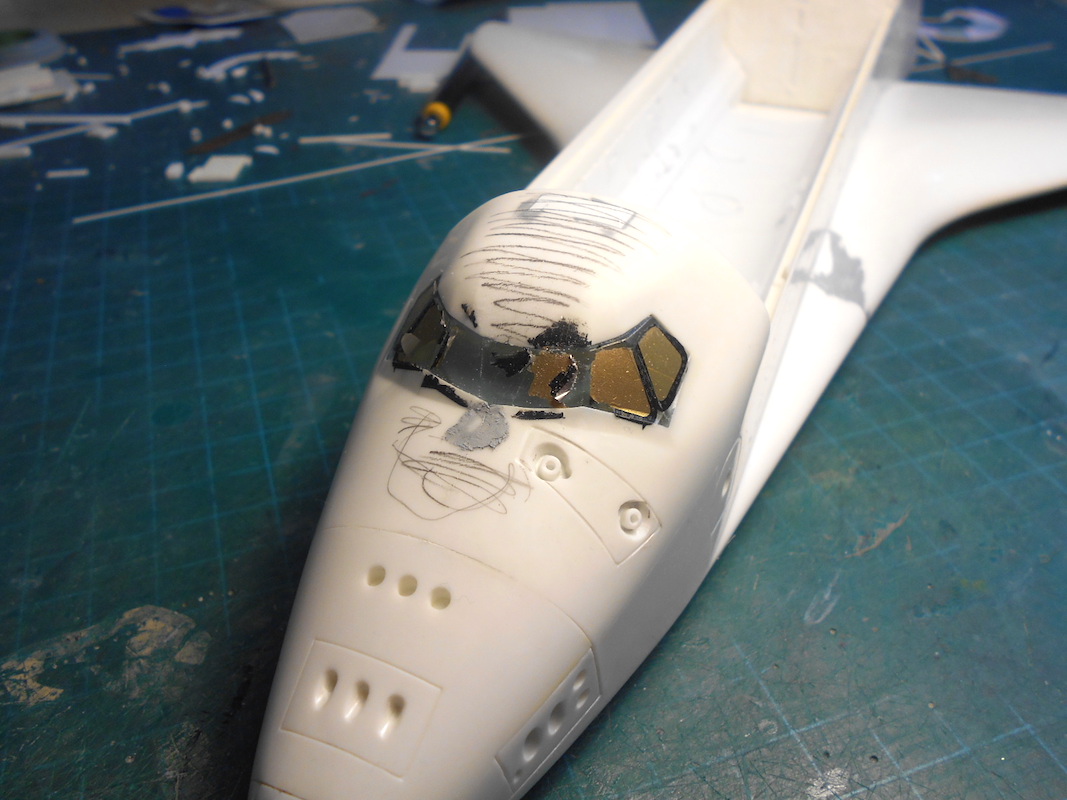
Adding some attaching plates to the cockpit window ... yes, the kit windows are blue ...
Attaching the bulkhead ...
Filling the gaps in the belly ... with a little bit of elbow grease, this'll get done too!
Till next post
IPD
-
3
-
-
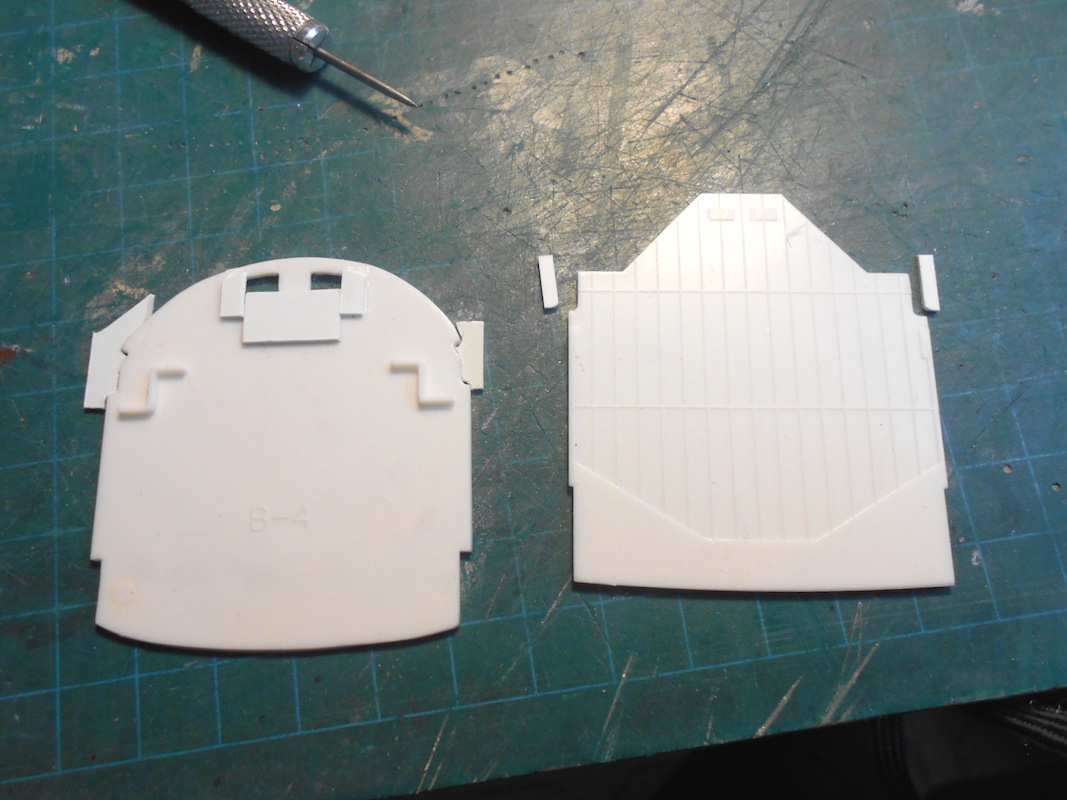
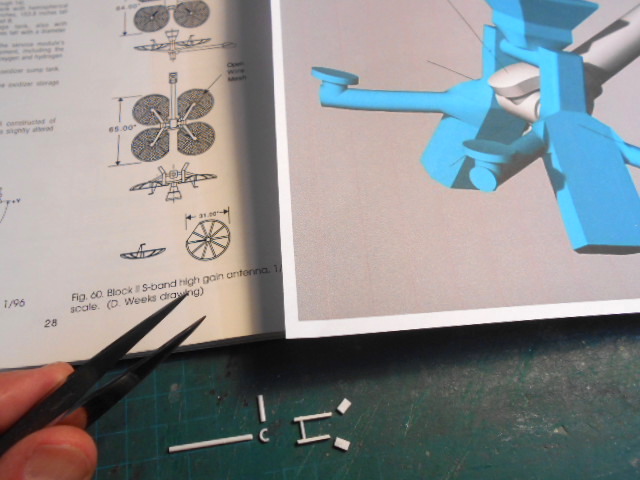
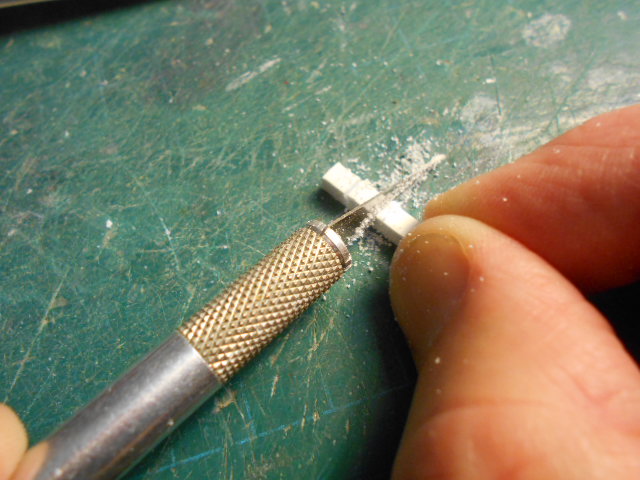
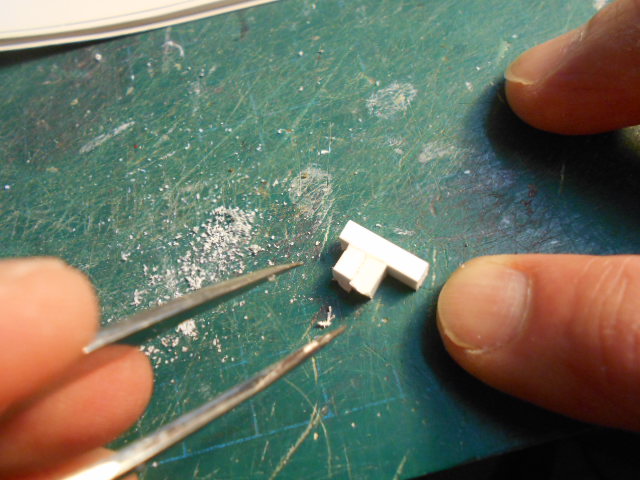
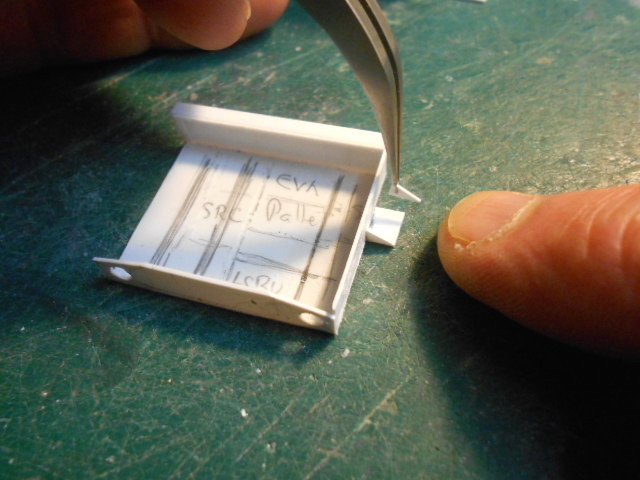
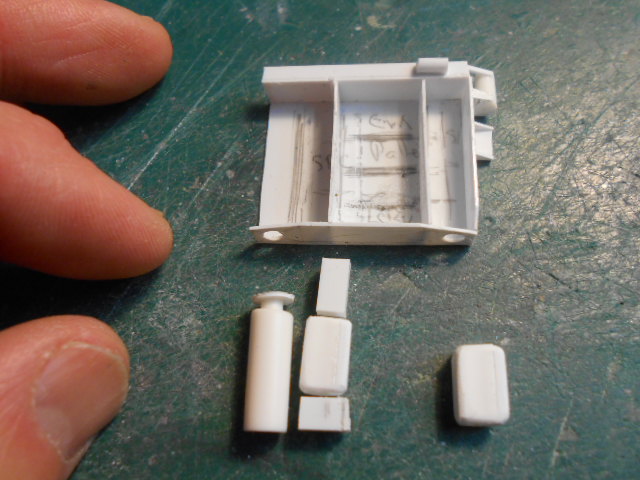
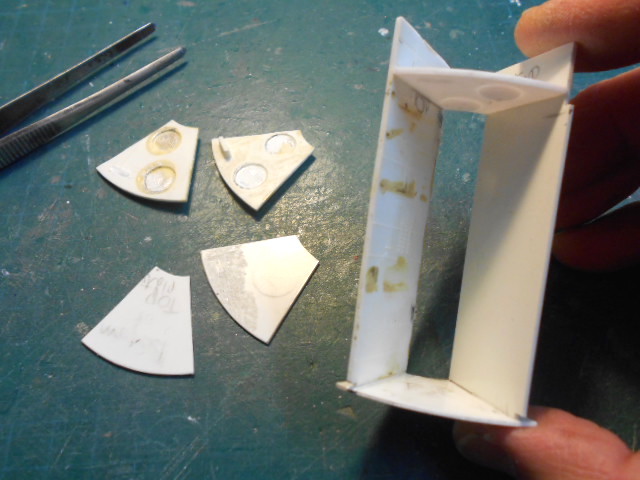
The fixture in the aft area of the Payload Bay needs to be built ... using a kit part of Spacelab and a sketch in Illustrator glued onto a sheet of styrene ...
Here's a ref photo ...
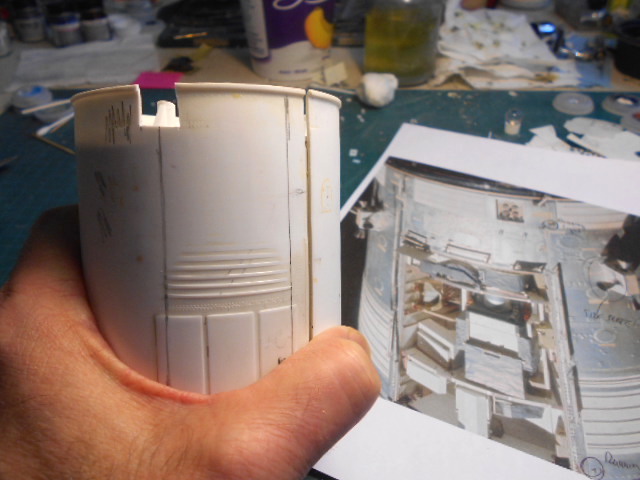
Dry fitting of the Payload Bay
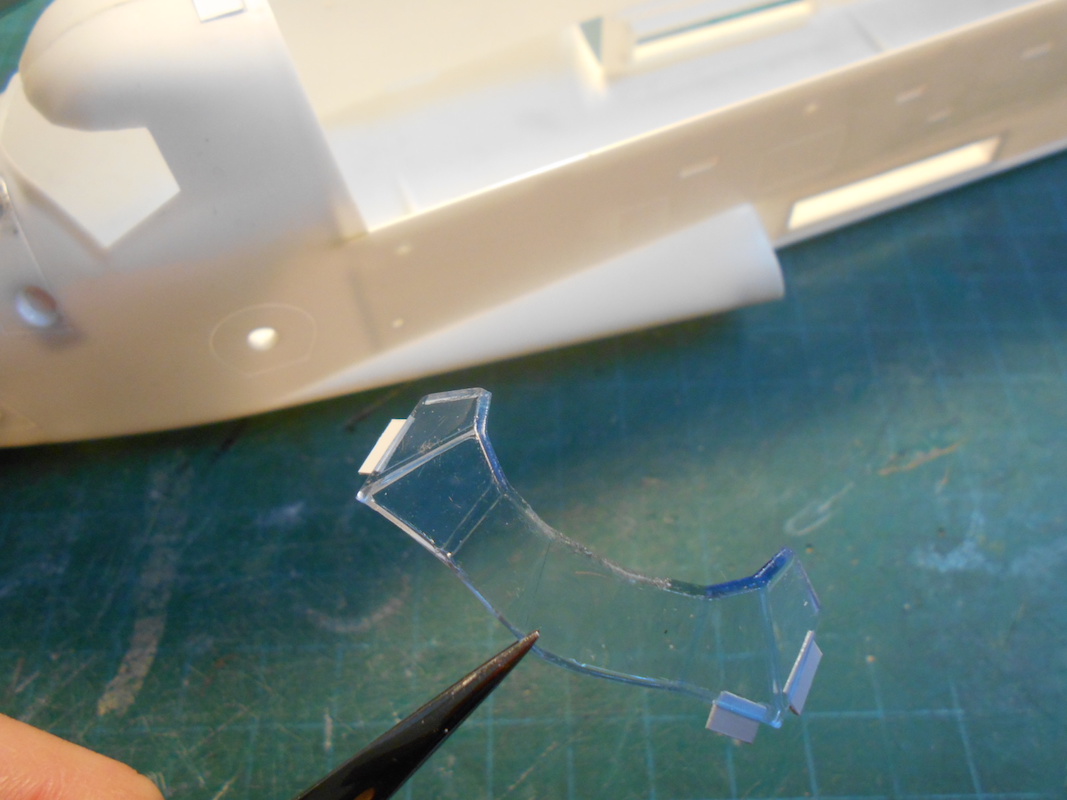
The EVA windows are getting patched because I won't use the kit's glass ... just a decal.
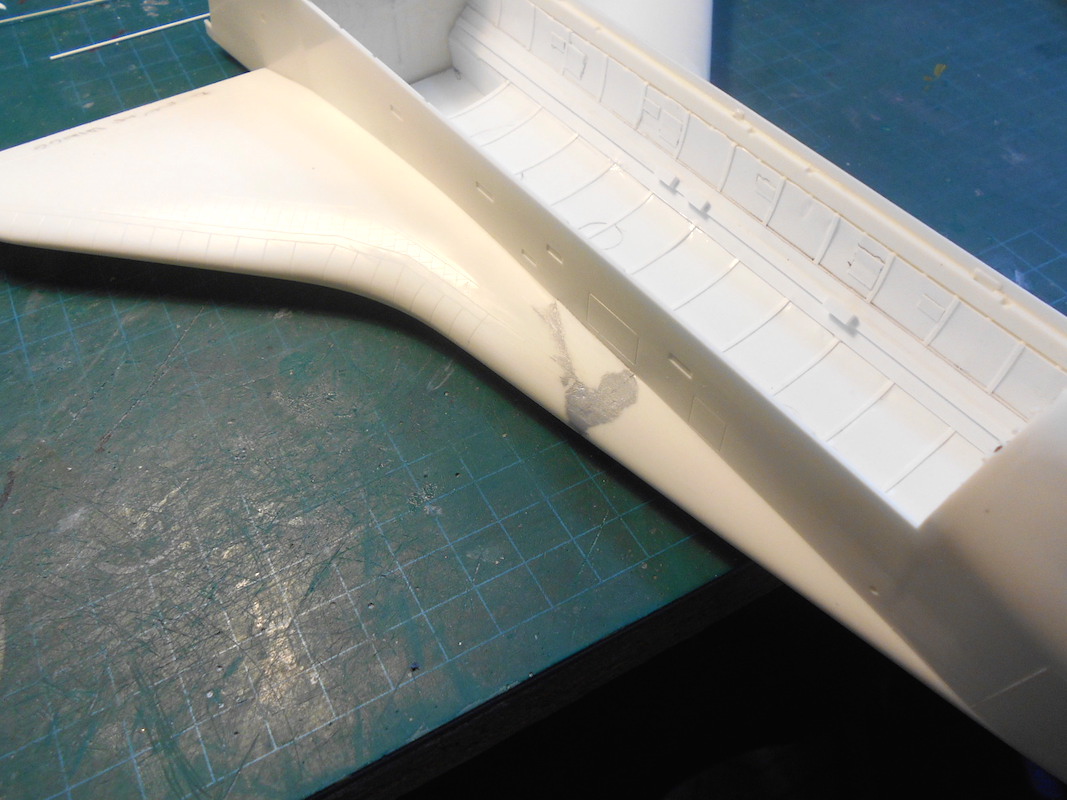
The gap between fuselage and wings were filled sith strips of styrene ... filed and sanded.
Till next post
IPD
-
4
-
-
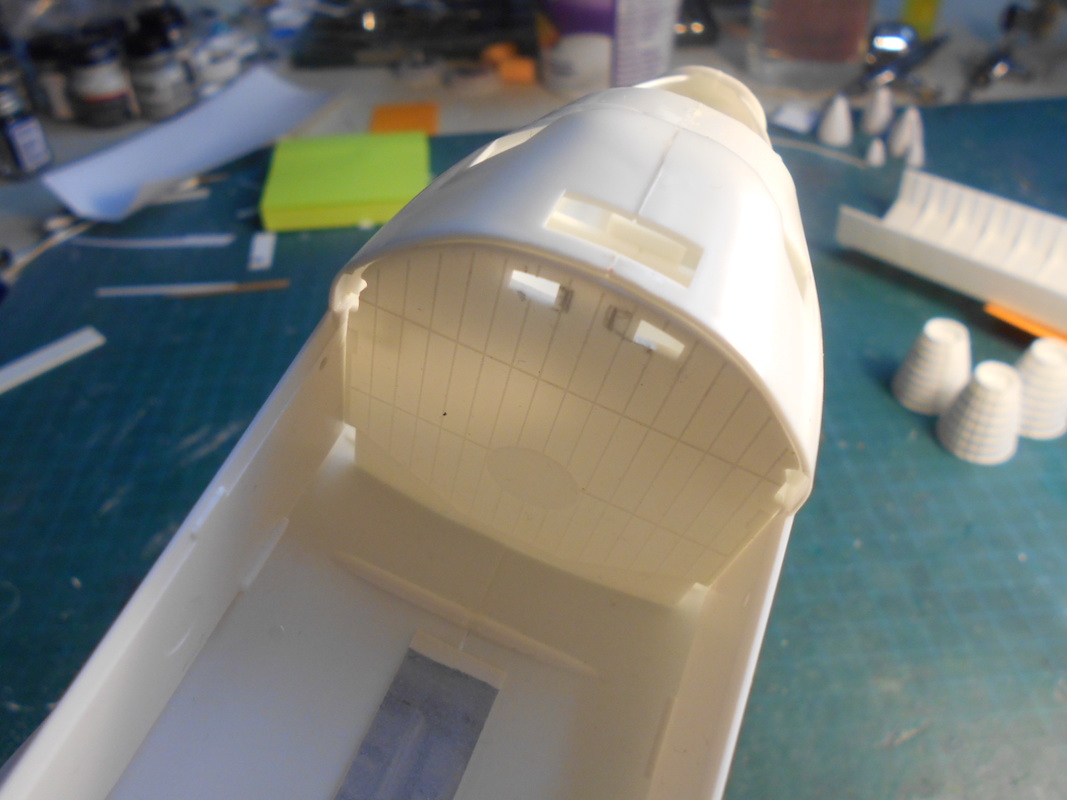
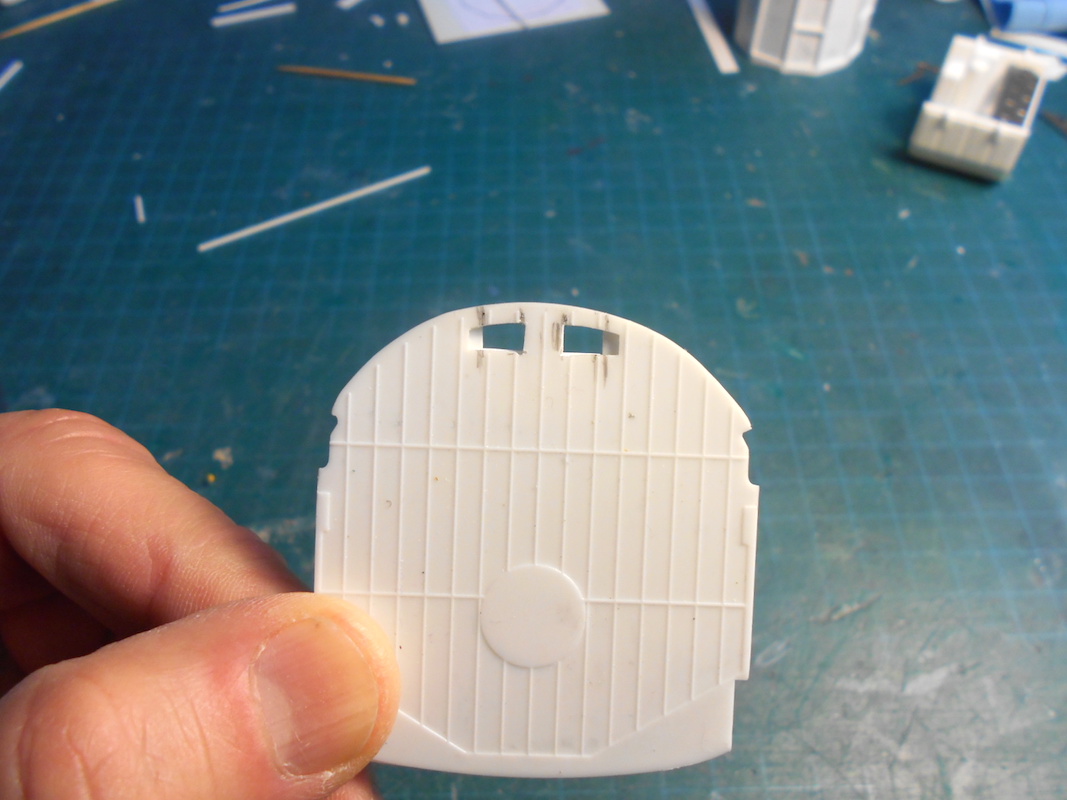
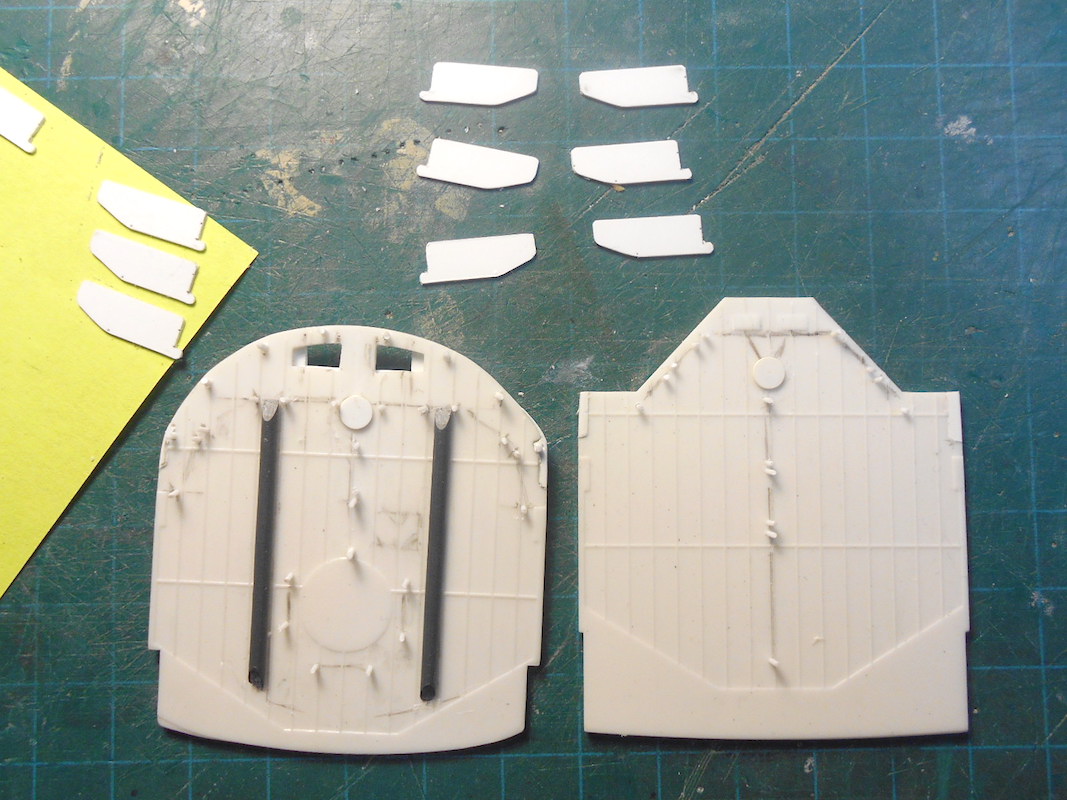
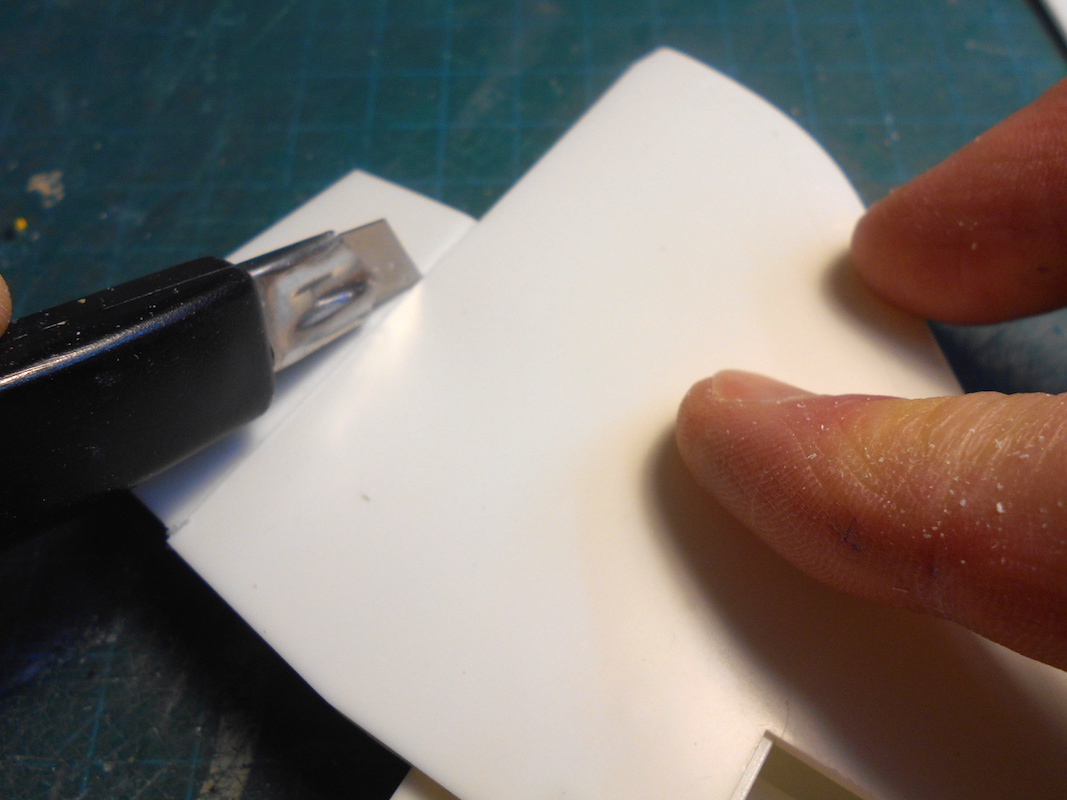
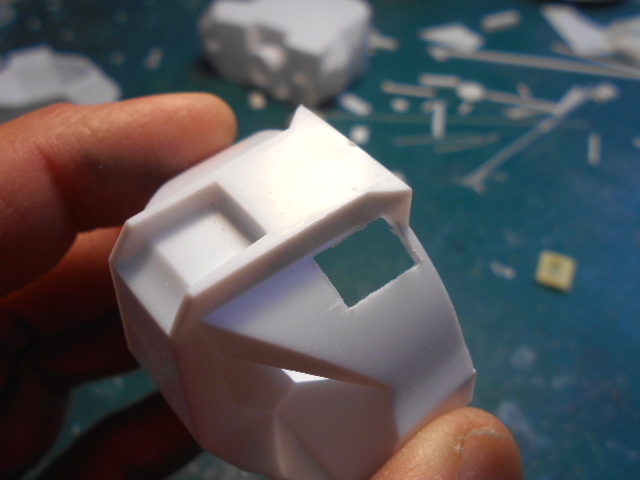
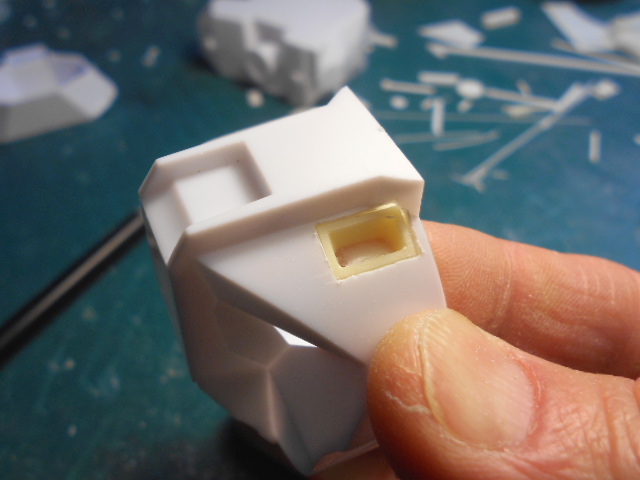
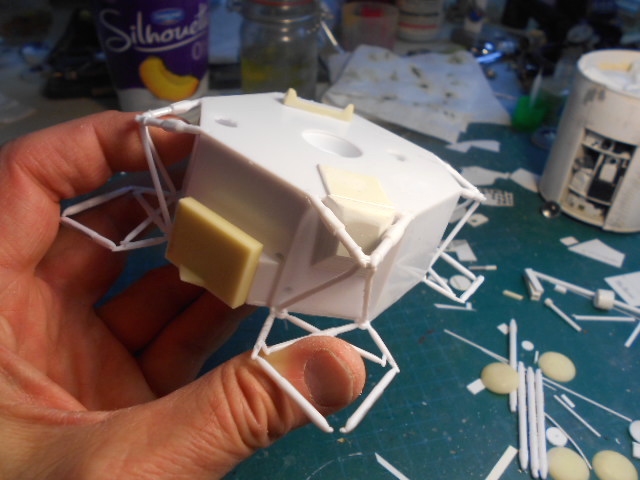
The EVA windows in the fwd bulkhead were too far apart, so I repositioned 'em ...
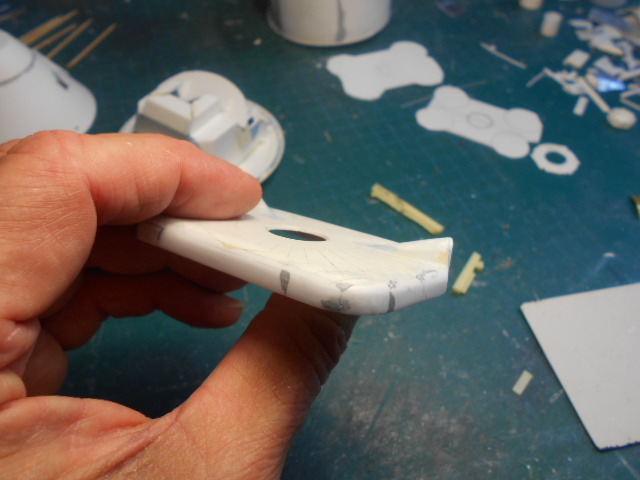
Added styrene bits to patch various notches ...
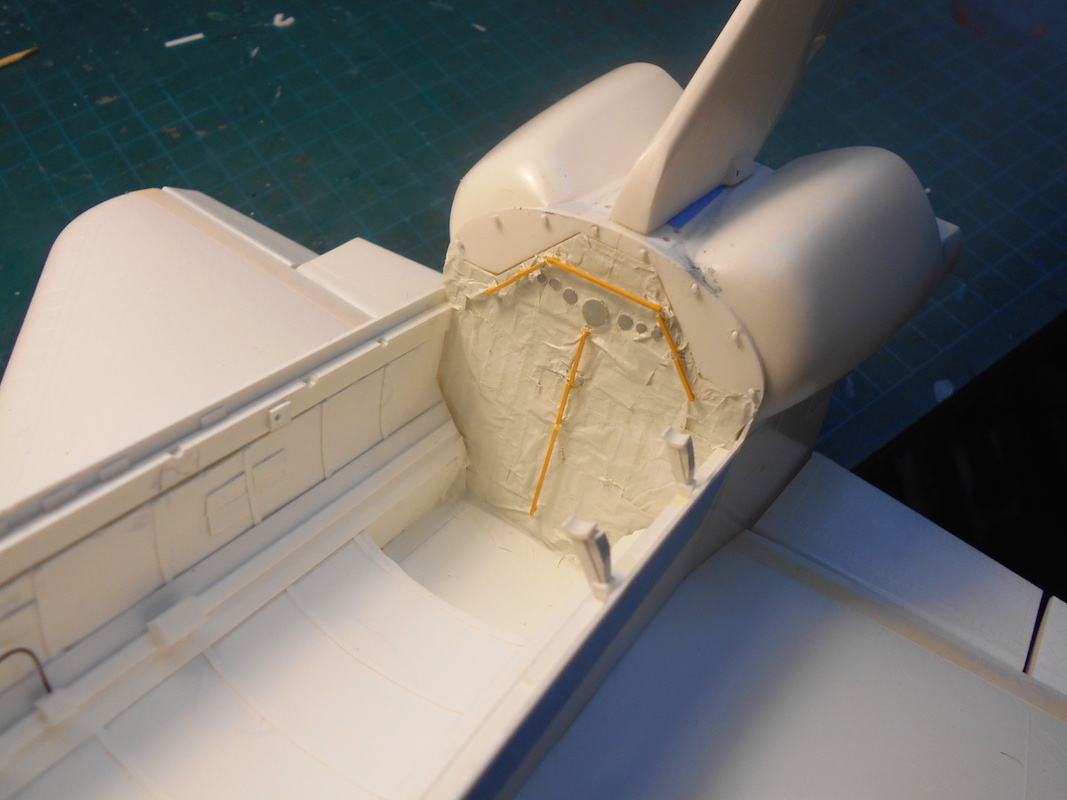
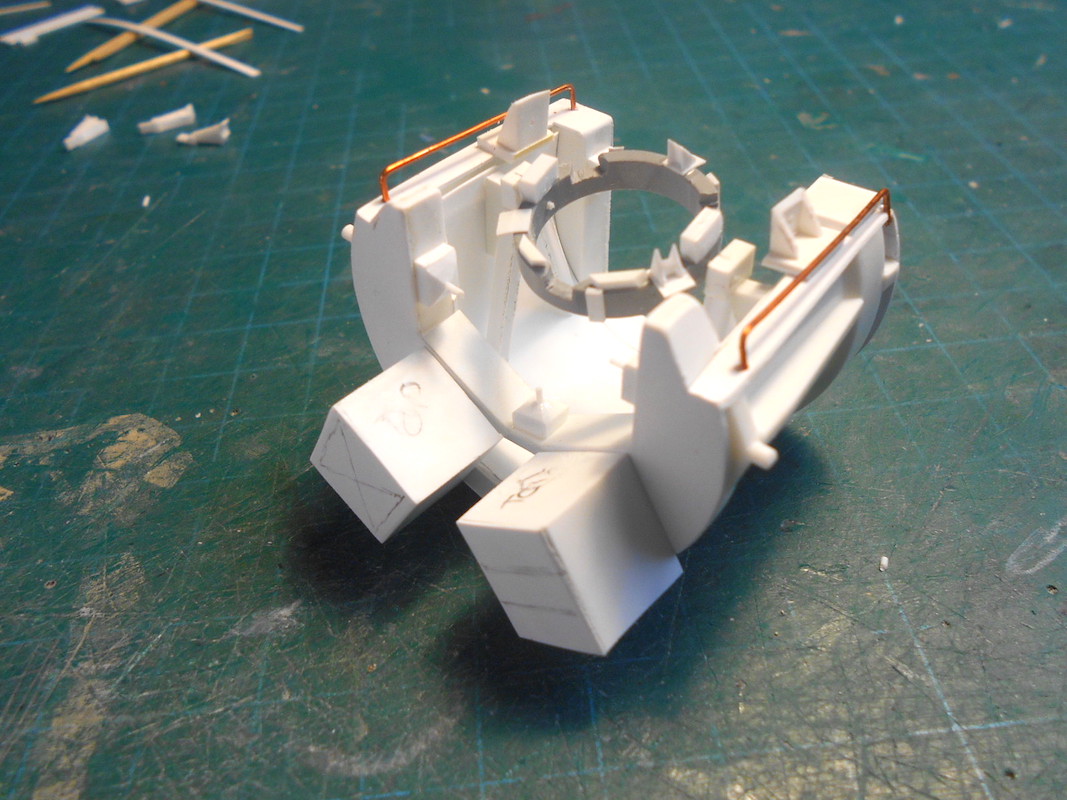
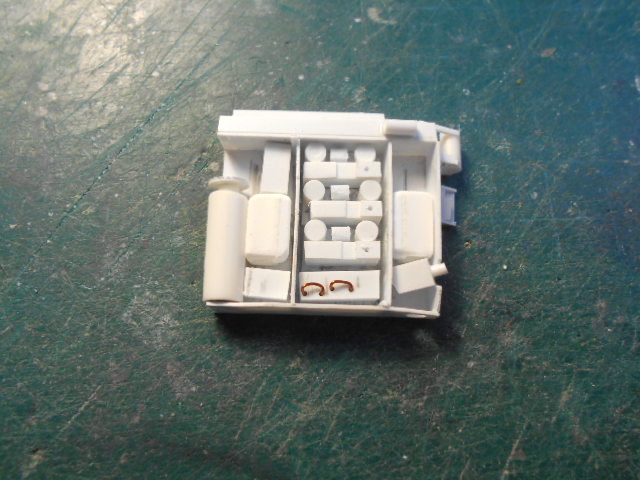
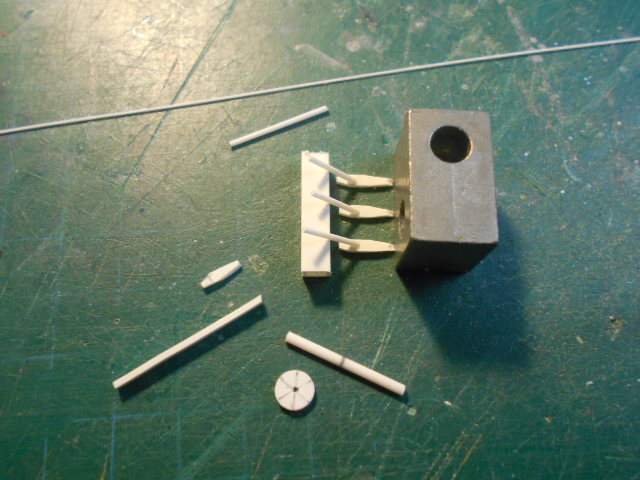
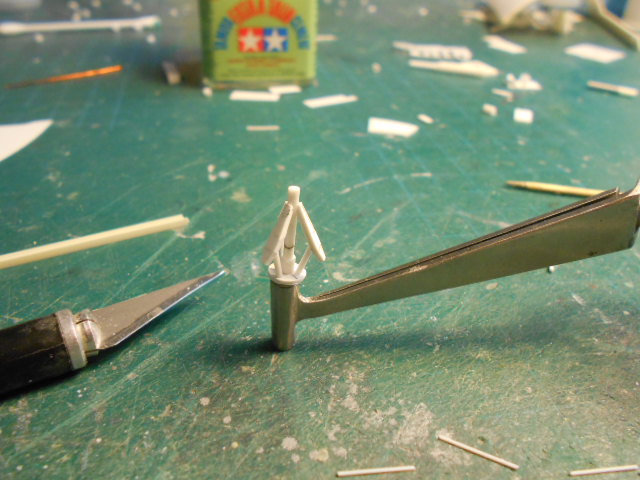
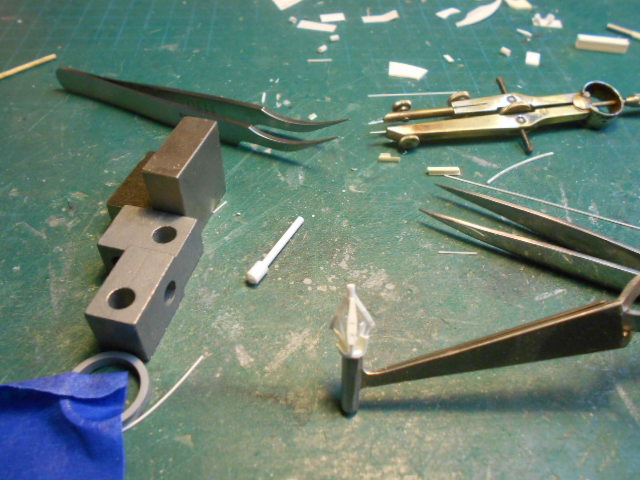
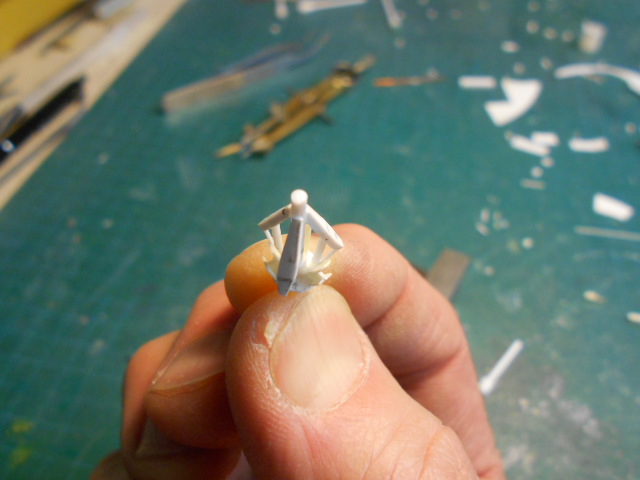
Made the Payload Retention Mechanisms and added some styrene pegs to the bulkheads for the handholds ...
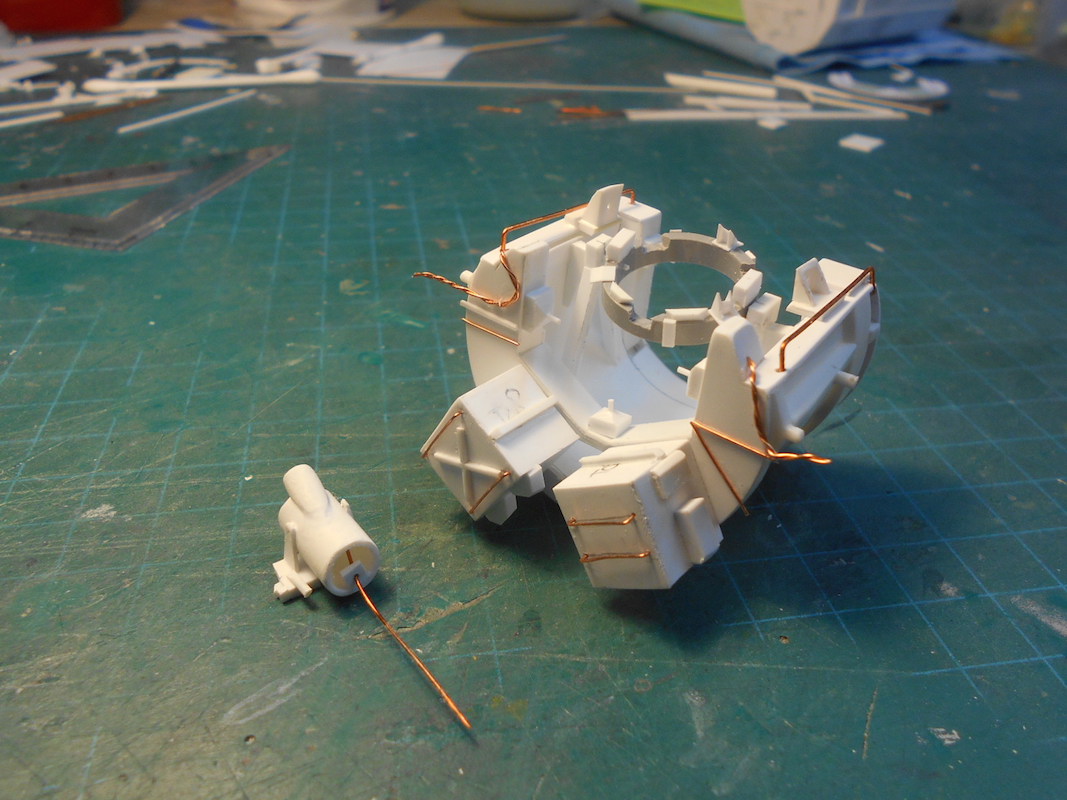
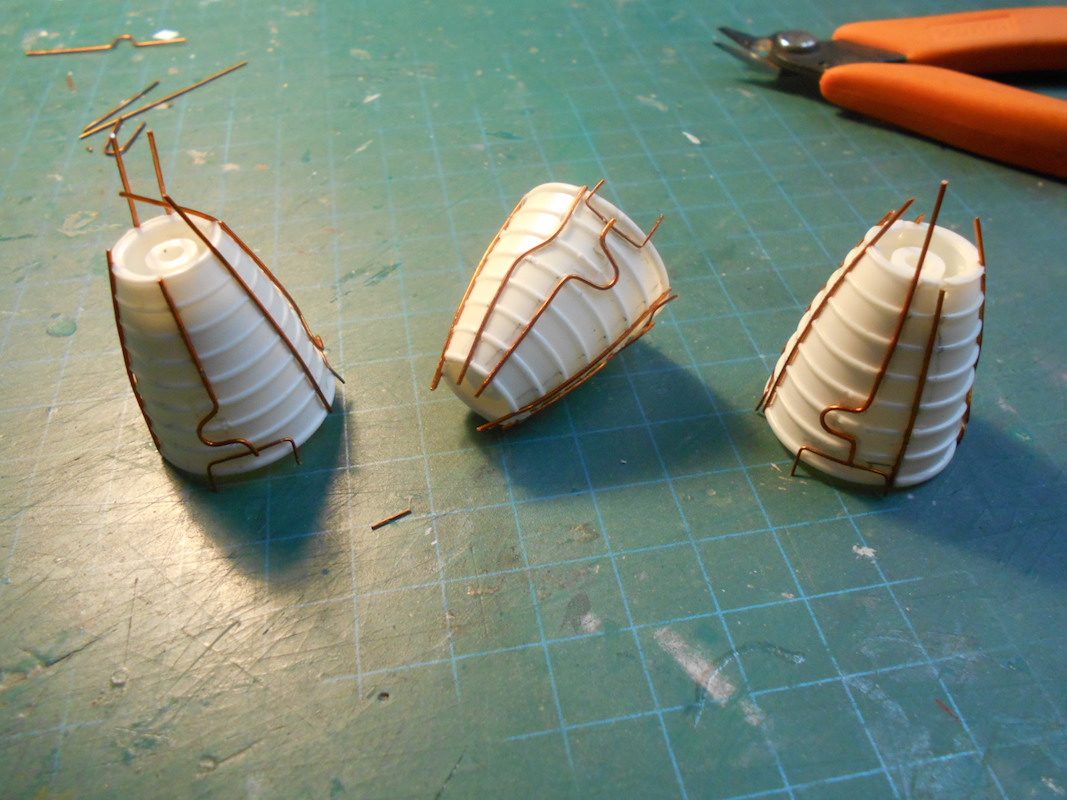
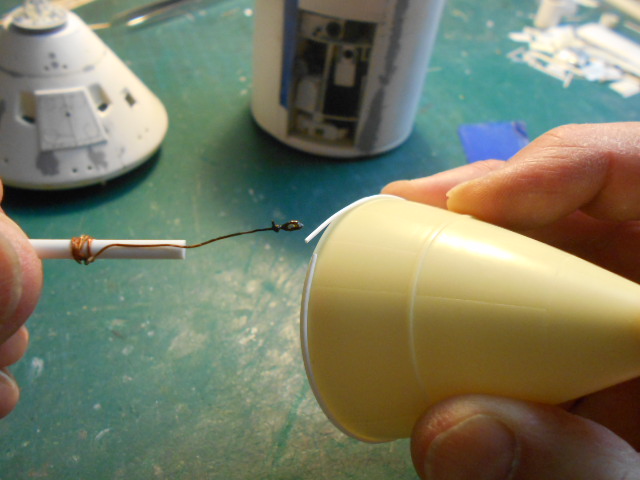
Added some details to the kit's SSMEs with copper wire ...
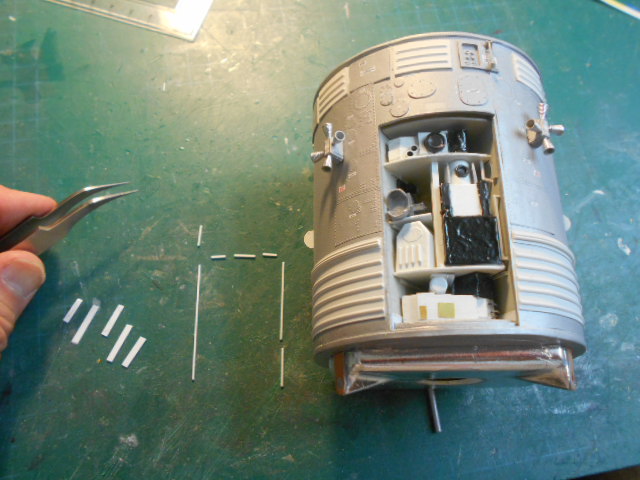
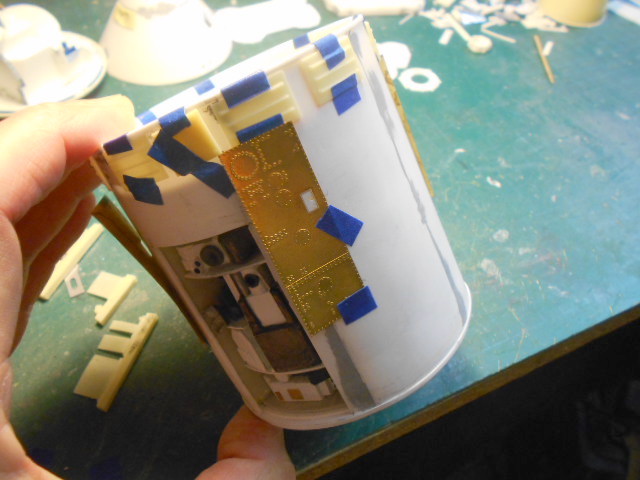
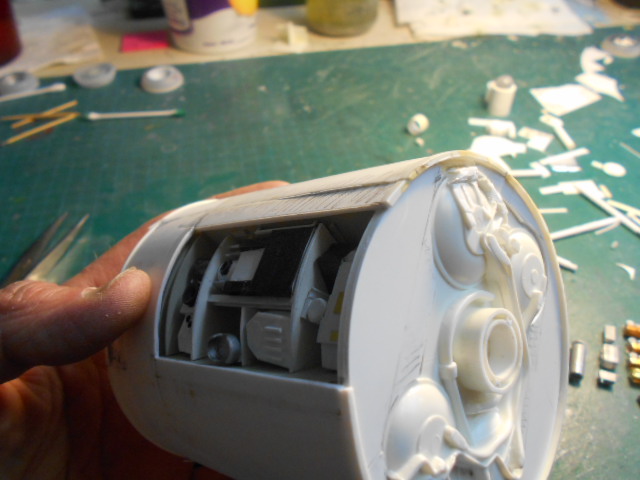
Formed a new interior of the Payload Bay ...
And the result ...
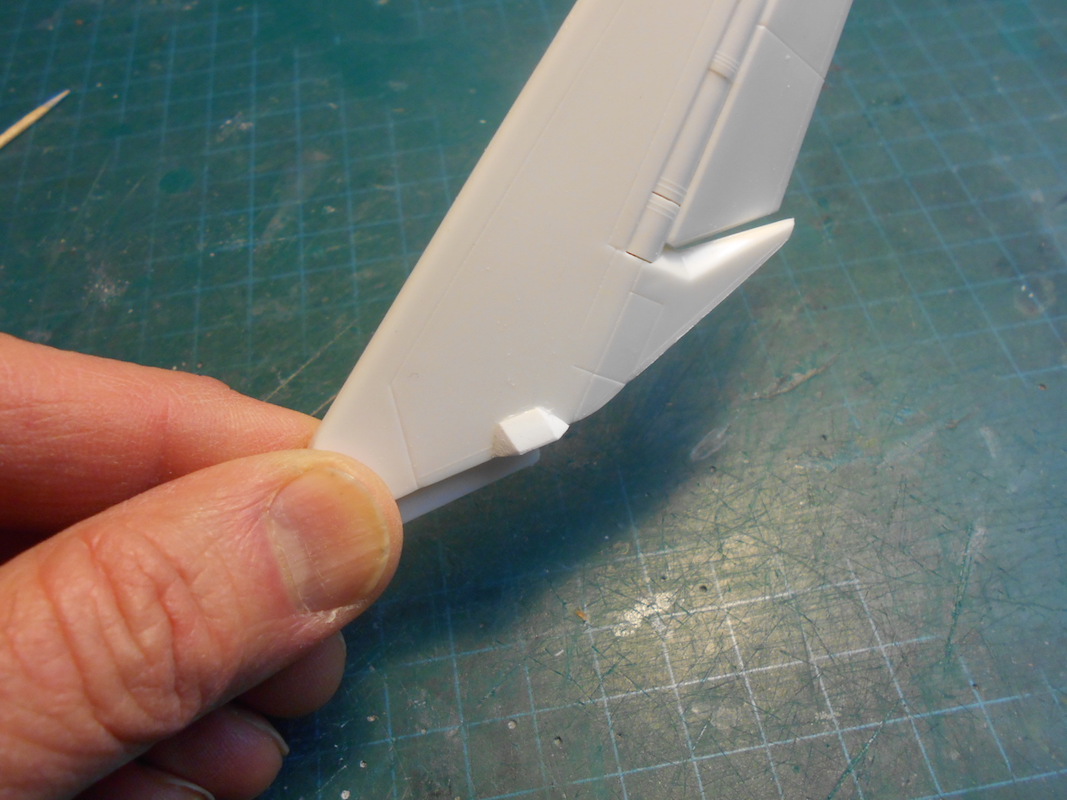
As this is going to show an on-orbit situation, and the elevons were free-floating, I cut them off the kit's wings to reposition them ...
Next up will be a piece of payload.
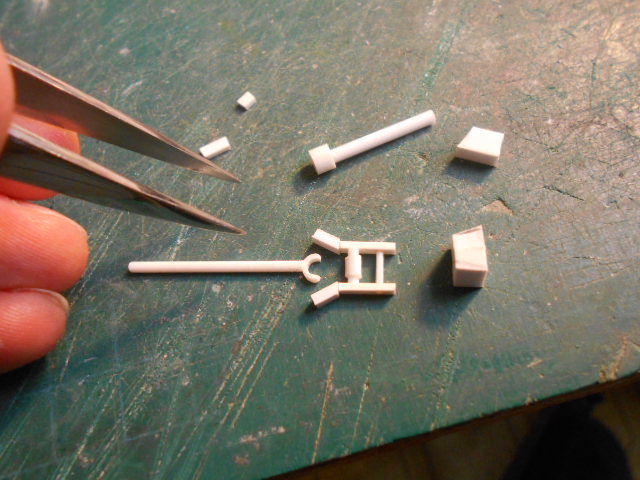
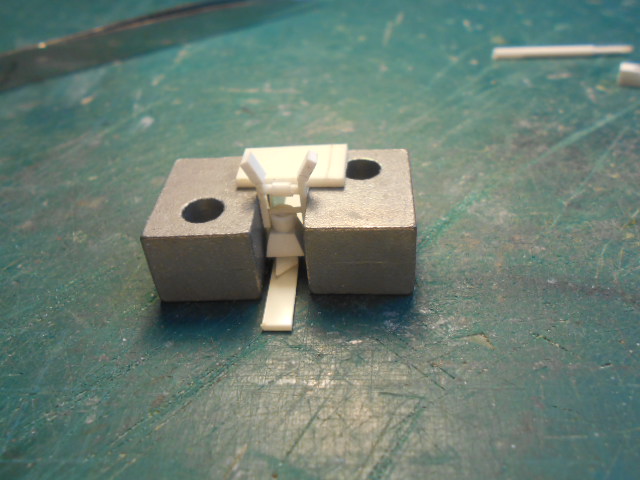
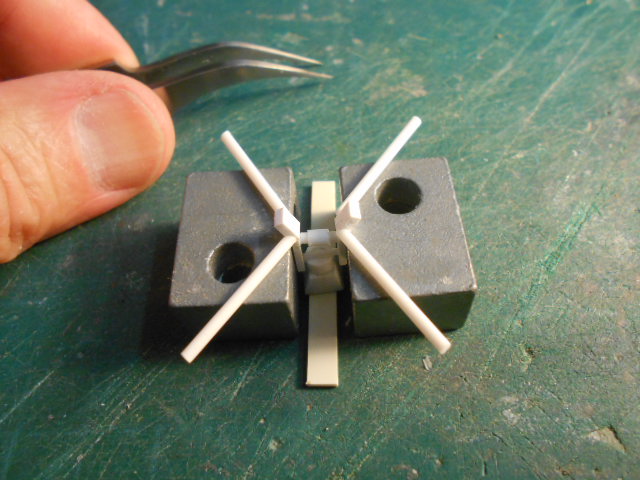
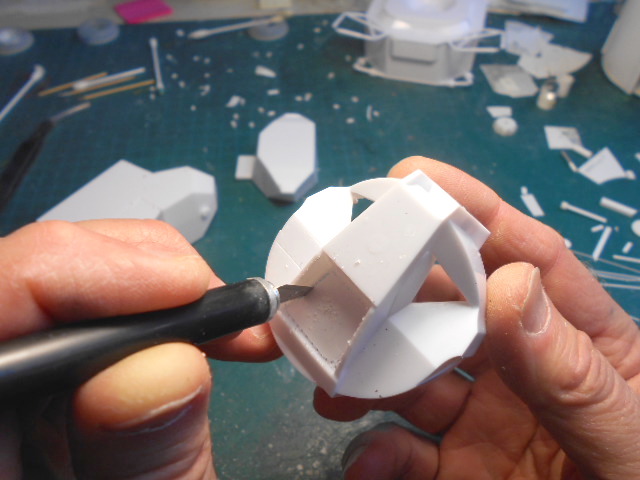
This mission also captured and repaired the Solar Max satellite and the fixture that retained the satellite during repairs needed to be built too.
IPD
-
2
-
-
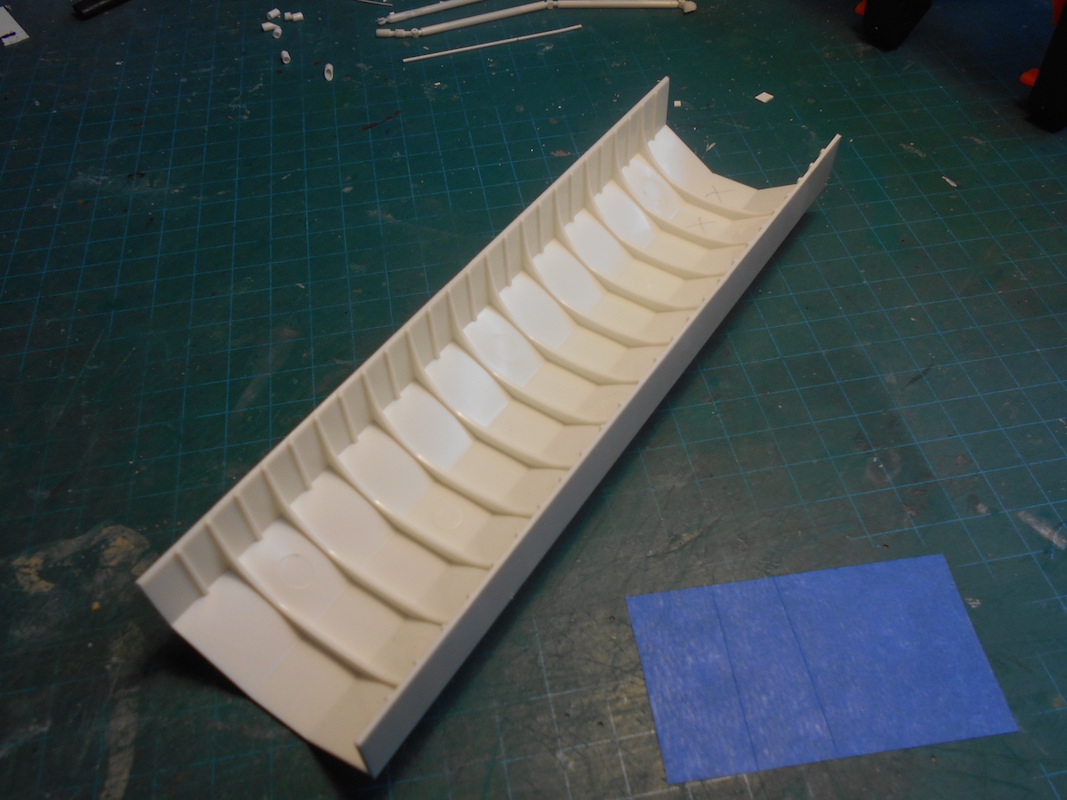
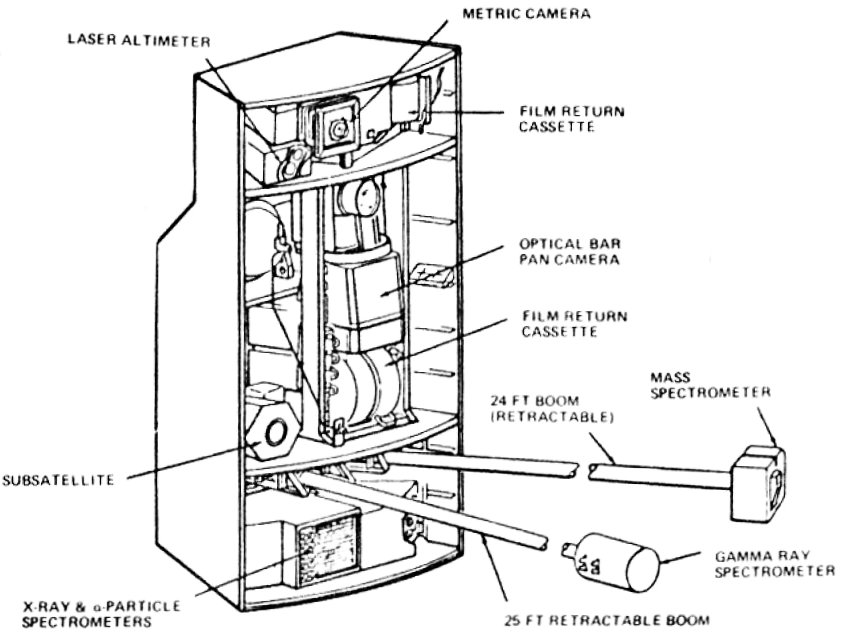
This'll be the Tamiya 1/100 Space Shuttle kit depicting the deployment of the LDEF, the Long Duration Exposure Facility.
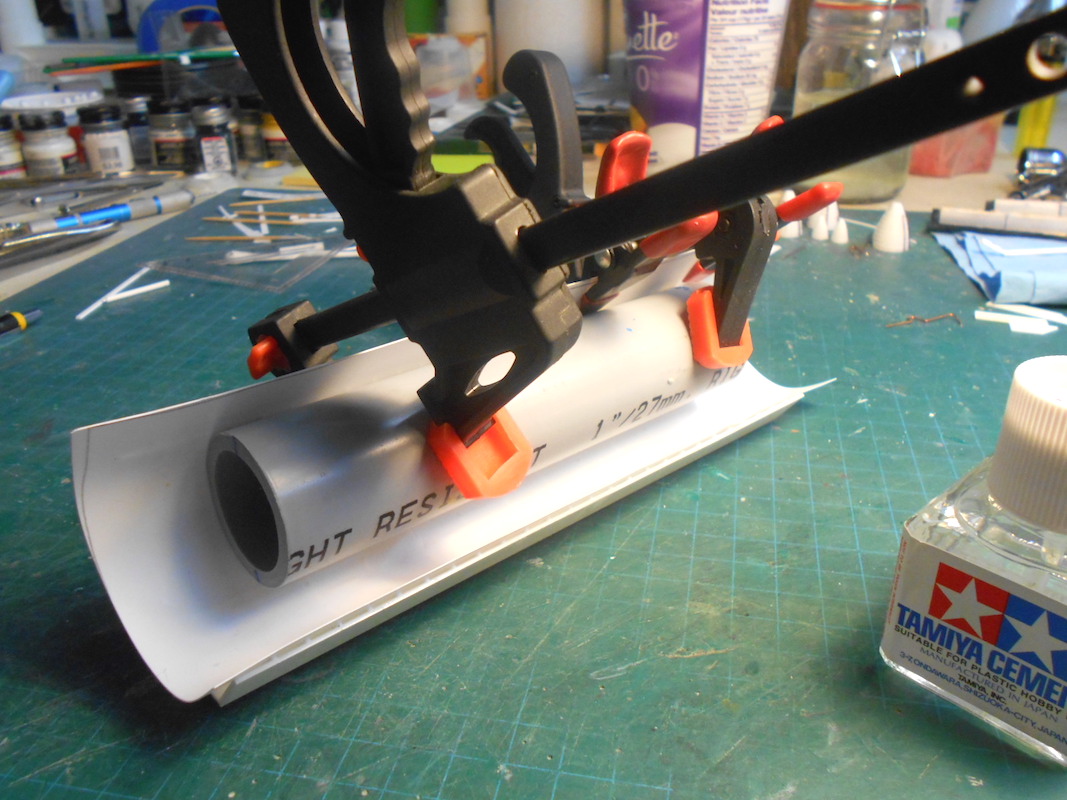
Gluing the fuselage halves ...
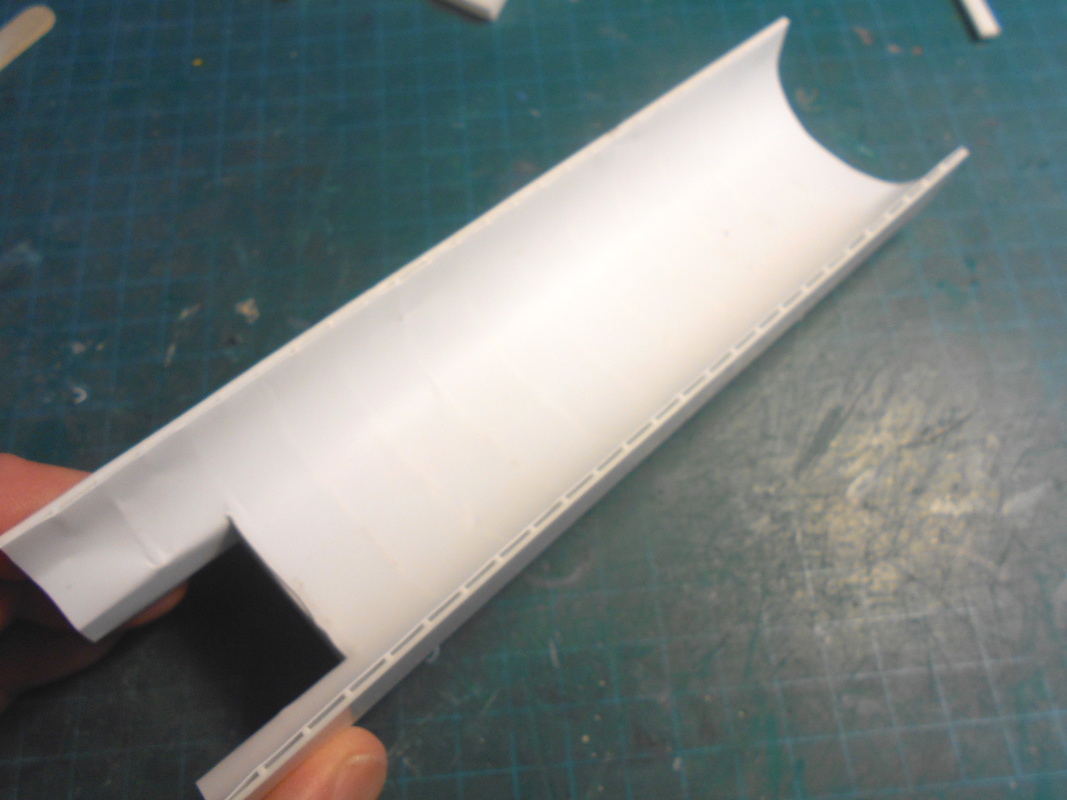
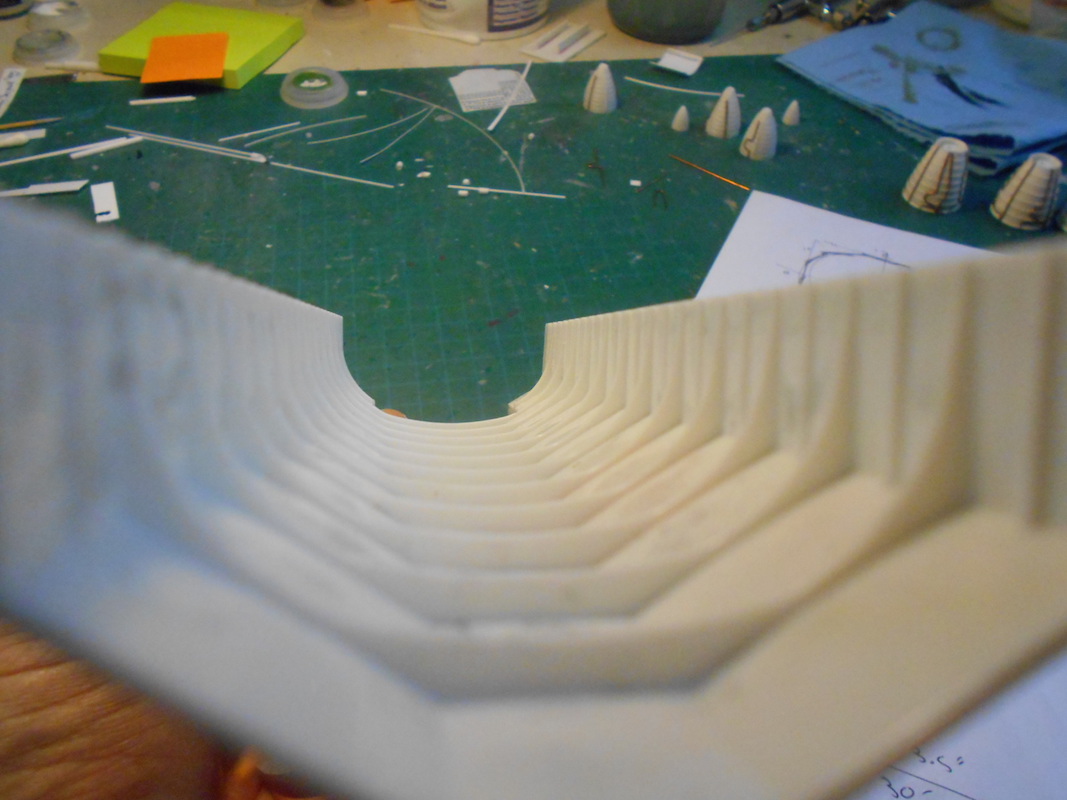
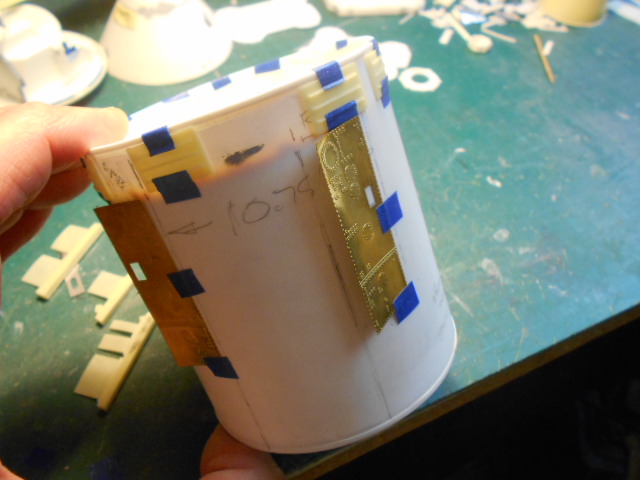
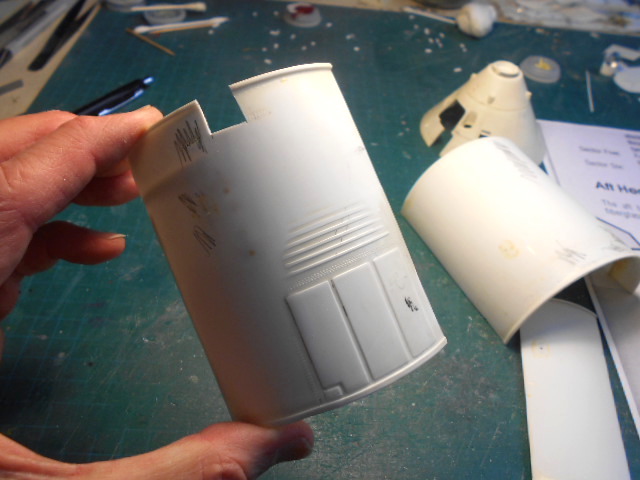
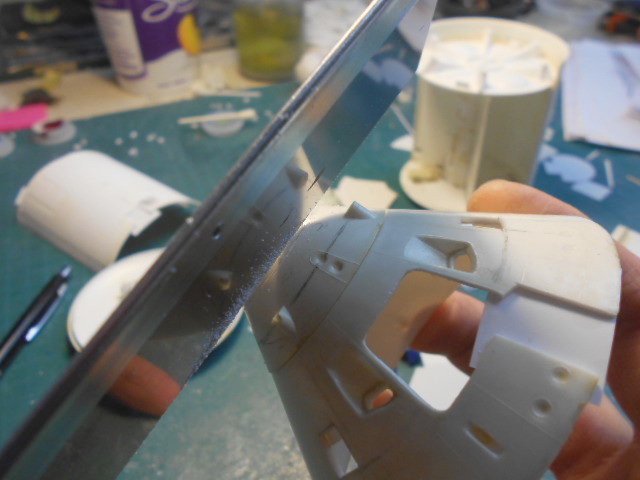
The Payload Bay will be open and the kit's PB is quite inaccurate ... so I shall rework it ... a little.
And rather than semi-circular, it's cross section is more elliptical, but I'll work with this ..
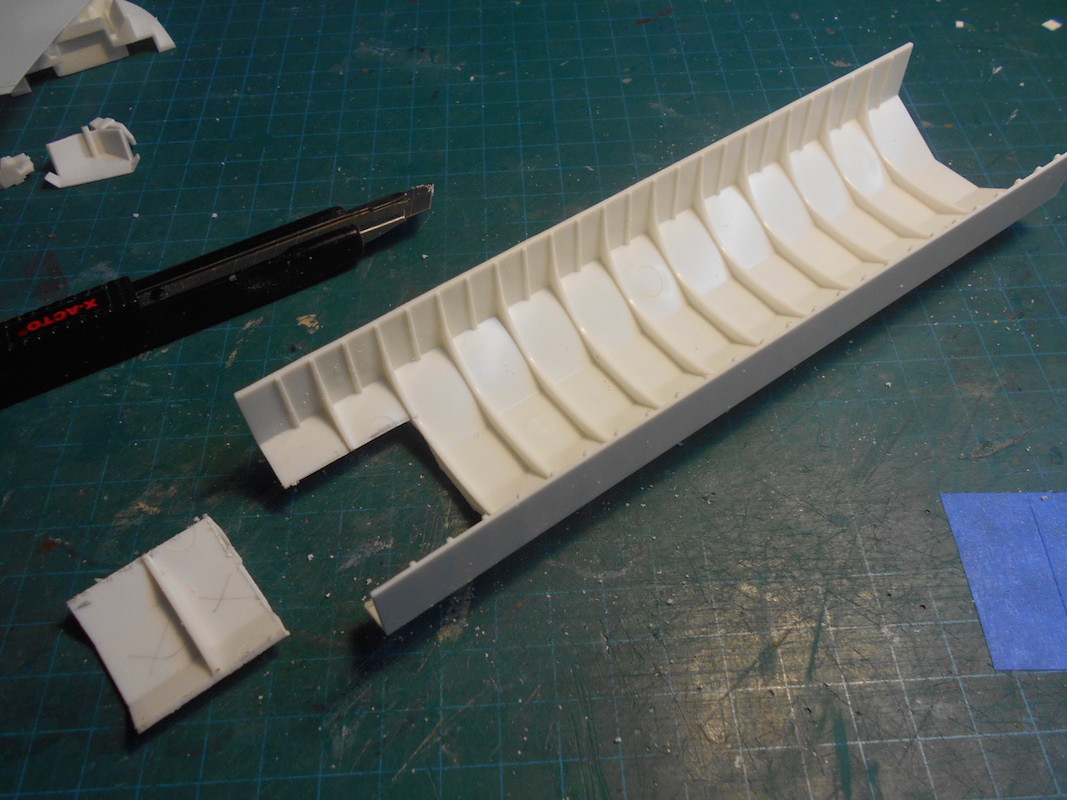
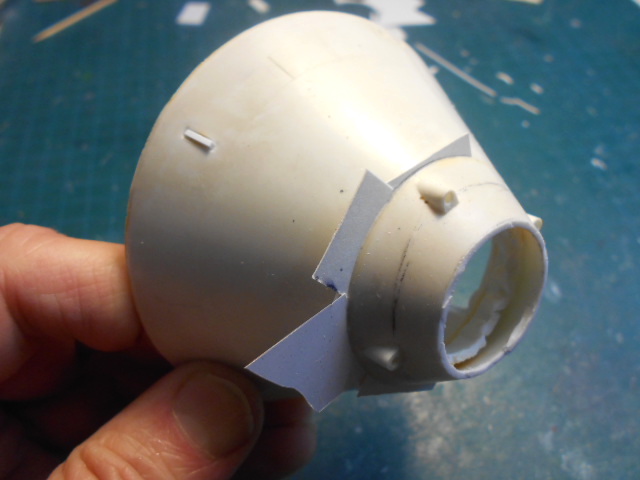
The aft end needs to be squared off on the bottom, so I cut out a section ...
Reinforcing the seam of the fuselage
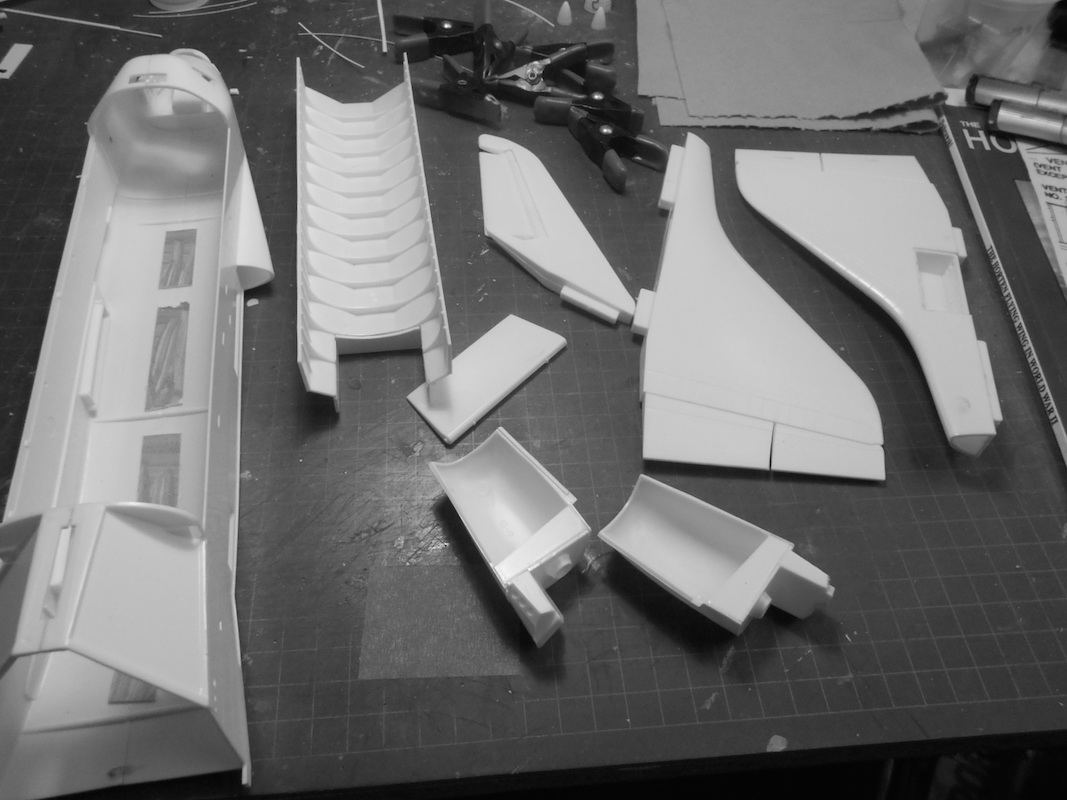
The OMS pods had a lotta parts and the fit was ... poor.
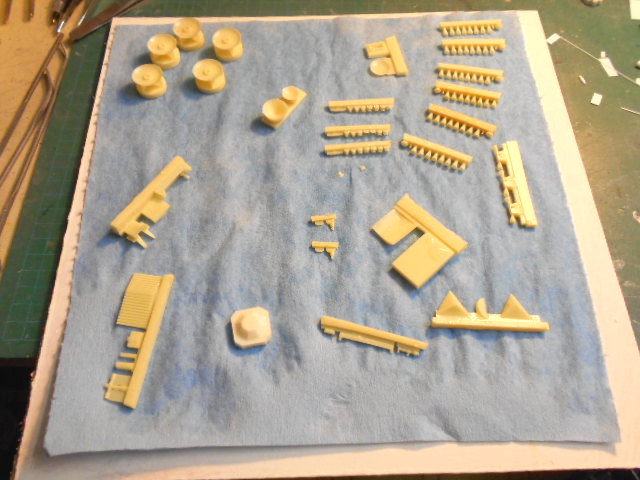
The various subassemblies
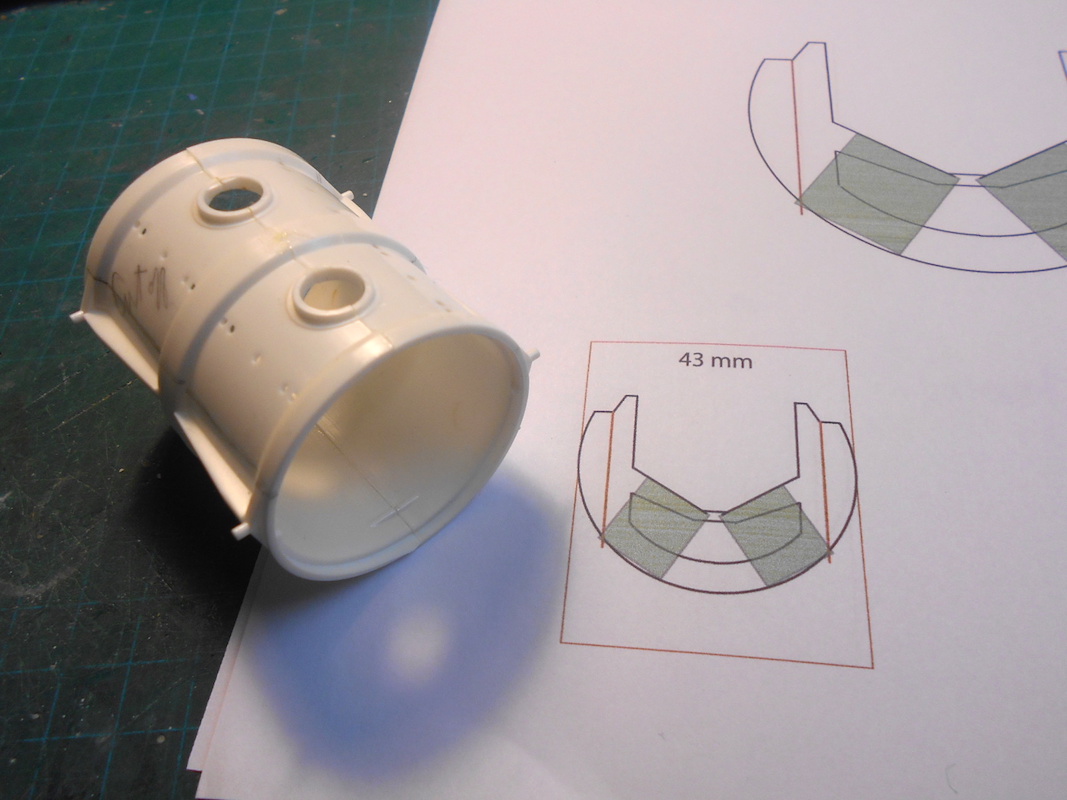
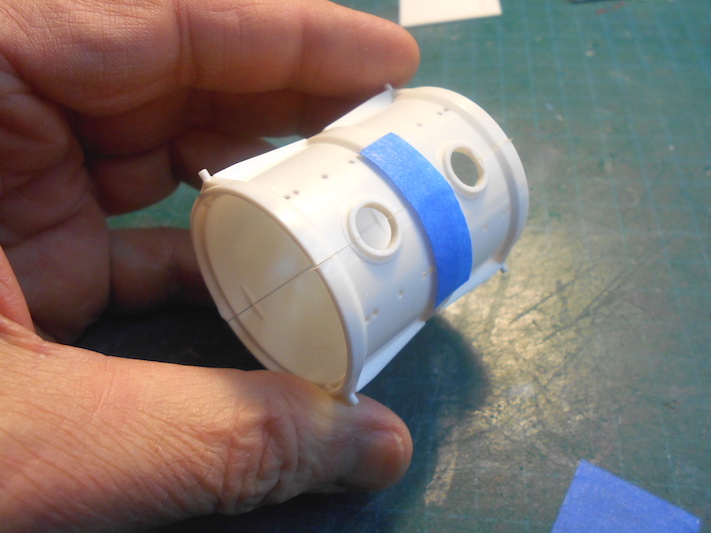
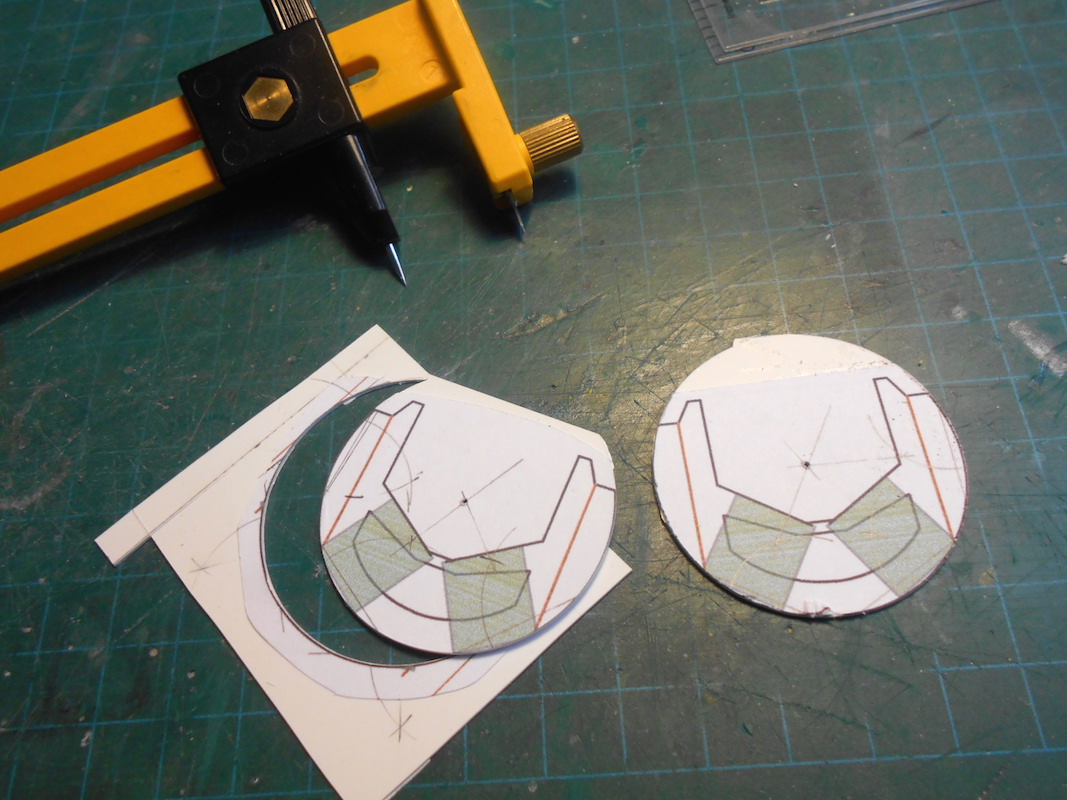
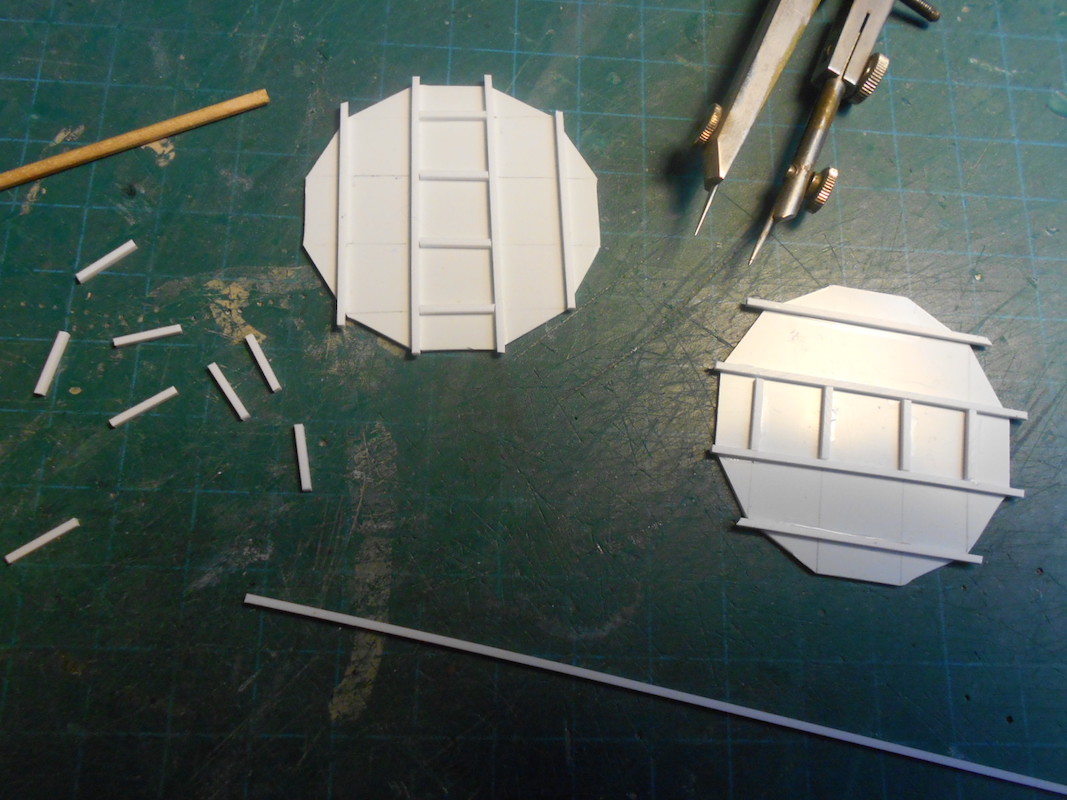
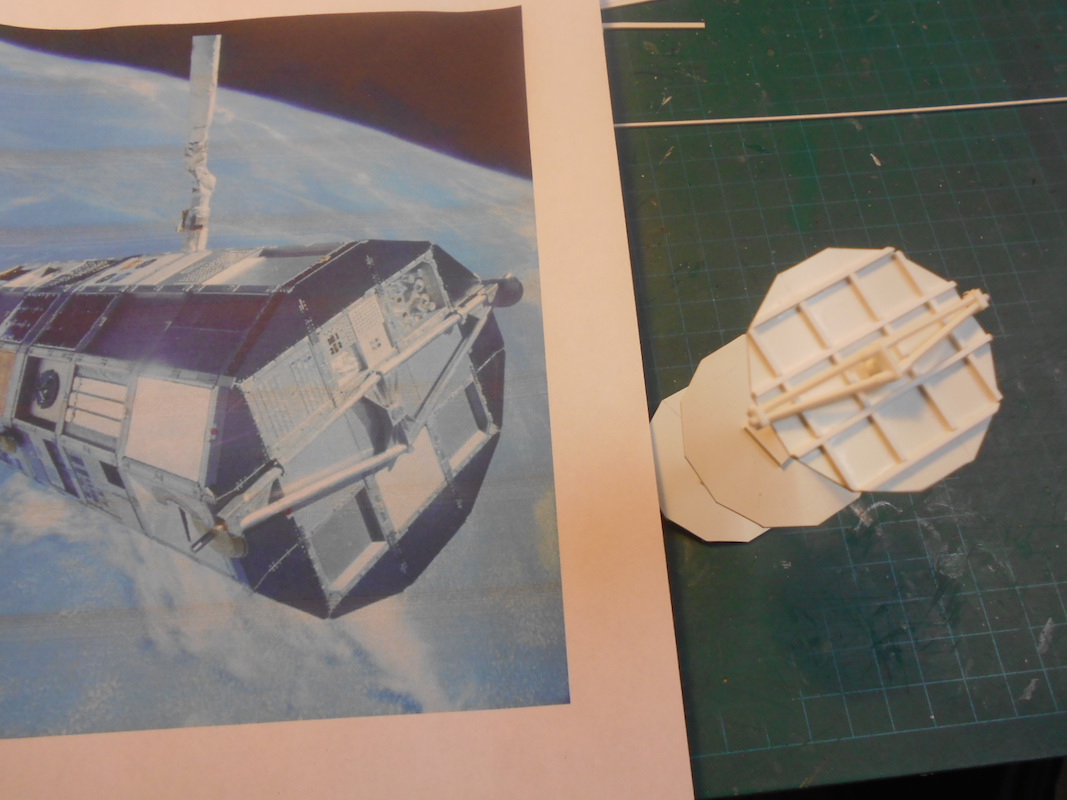
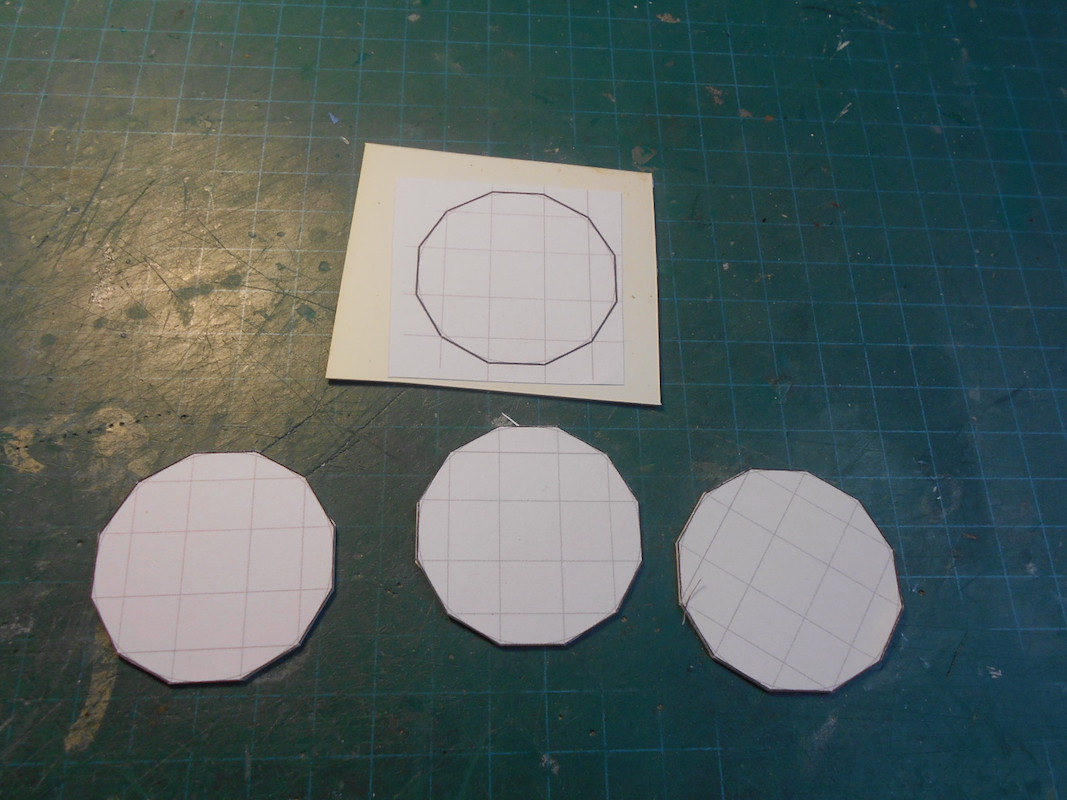
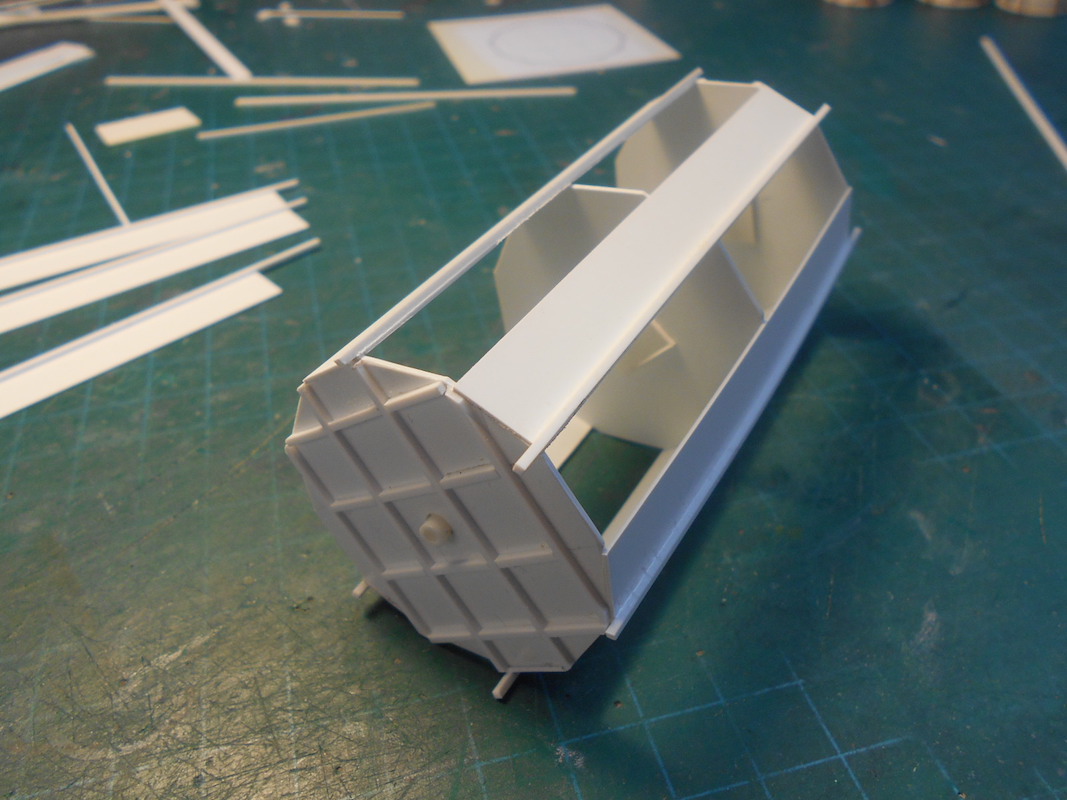
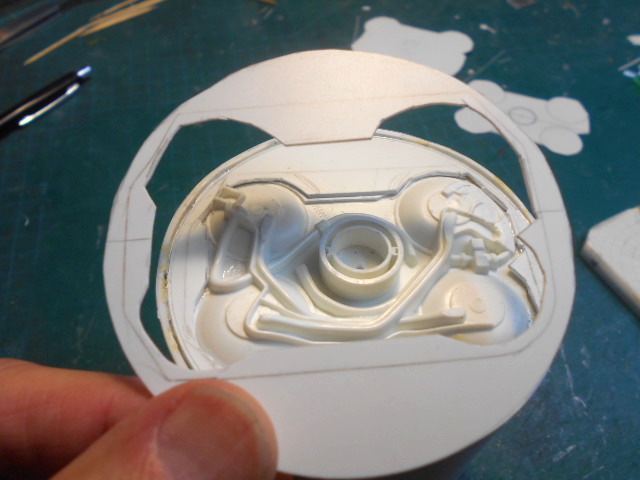
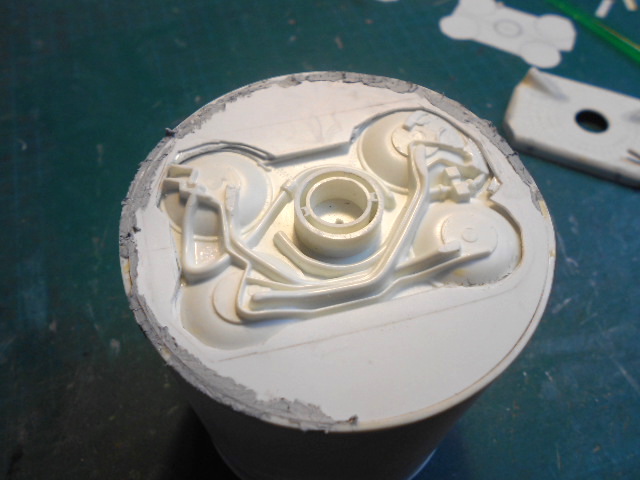
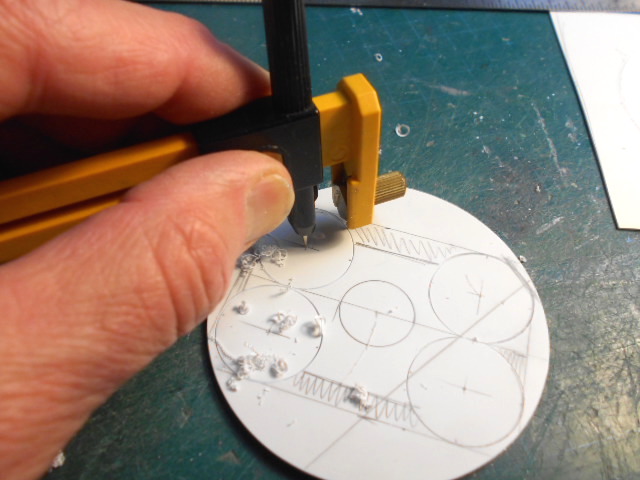
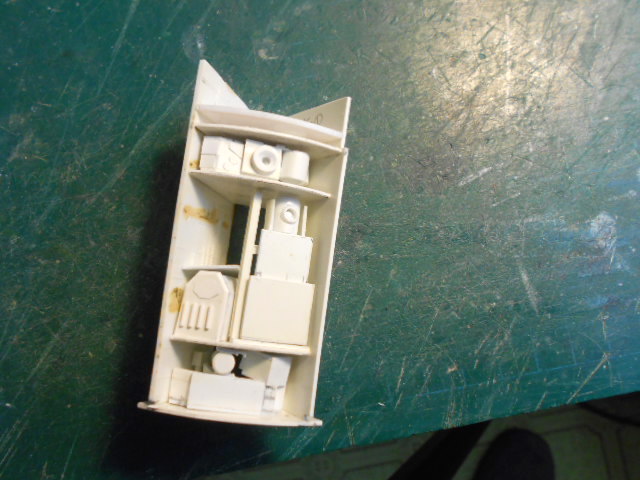
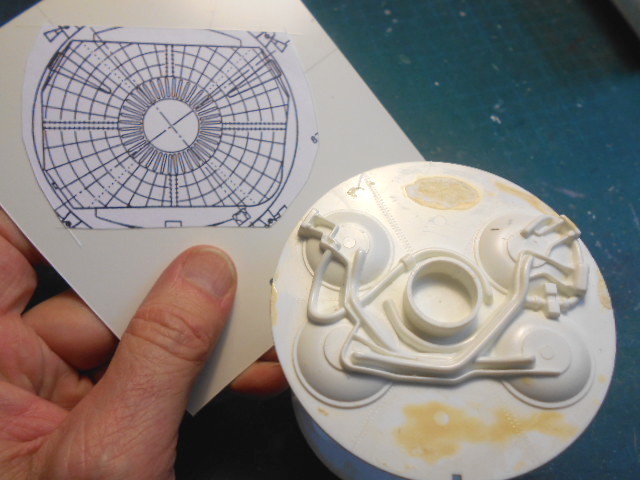
Starting the build of the LDEF. The forward and aft bulkheads ...
One of the references ...
The kit had a piece of cargo which I may use to depict the capture hardware in the aft end of the Payload Bay.
IPD
-
3
-
-
Thanx very much gents for your comments and visits!!
-
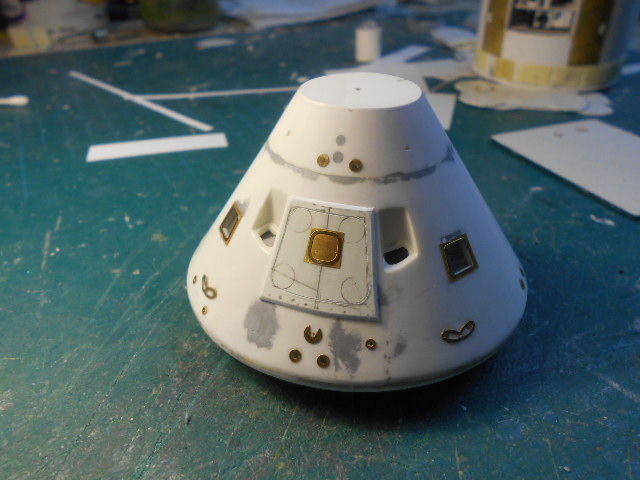
Adding Decals ...
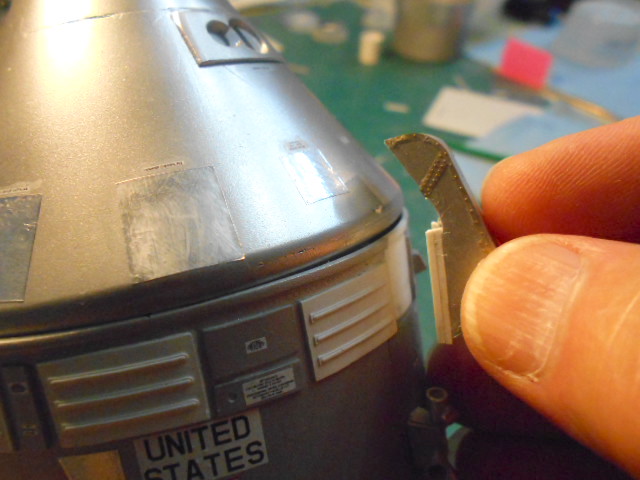
I used squares of household Aluminum foil to indicate the access panels ...
Almost Done ...
Making and placing the handholds on the SIM Bay
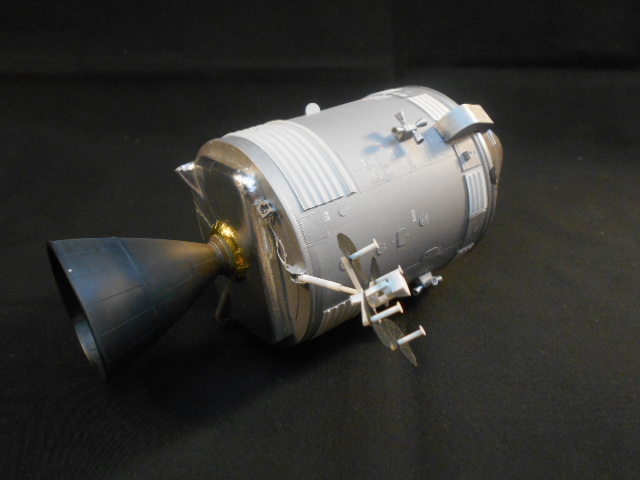
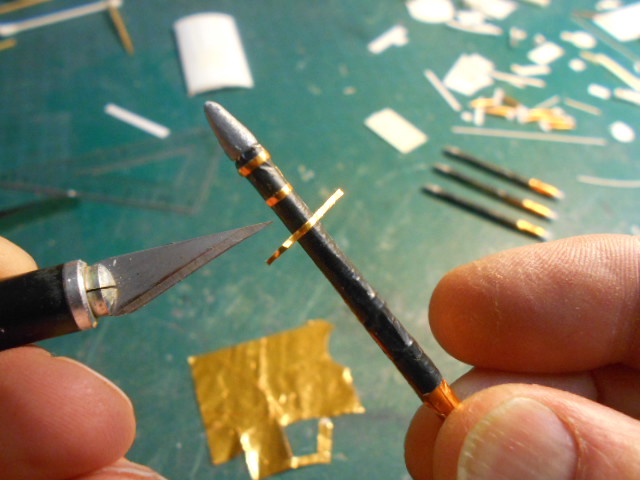
There's another Heat Shield at the base of the SPS engine bell. This was made with styrene bits and Milliput and sanded to shape and covered with Gold foil.
The scratch built Umbilical housing was shimmed and attached ...
And done!
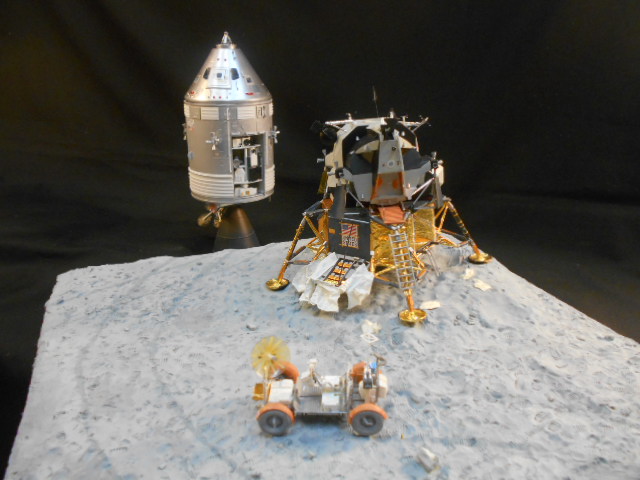
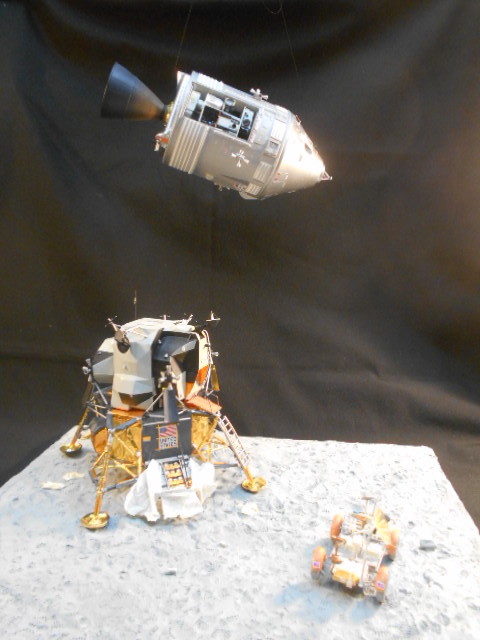
I haven't yet decided how to display this diorama. The LRV is a 3D print from Vincent Meens ...
On to the next build!
IPD
-
9
-
-
I guess, there are two reasons ...
1. if it is indeed their error they need to fix it. If it's MY error in placing the decals, then I need to know that, with a new sheet.
2. The decal film/paper I have, is awful stuff. It's called Papilio and it's thick and not designed for use on scale models ... more likely useful for pix of pets on Coffee Mugs and kid's wagons.
Plus, I erred in the placement of the tile Decals on the nose and I want to repair that. So, still waiting for the new decal sheet ...
IPD
-
I have done NOTHING on this kit ... I ordered a set of BURAN decals from Andrey and he mailed 'em in early March.
Just a couple of days ago, I was going to email him and ask if he had indeed sent them, because I haven't received them.
But his tracking number, indicated that it entered the Russian mail system in early March and, I suppose, it's delivery to near Toronto, has been delayed due to this ... situation.
This BURAN has been put on the back burner as I'm building 2 or 3 other models ... but my fingers are crossed that the Decal sheet will be delivered ... at some point in the near future!
IPD
-
1
-
-
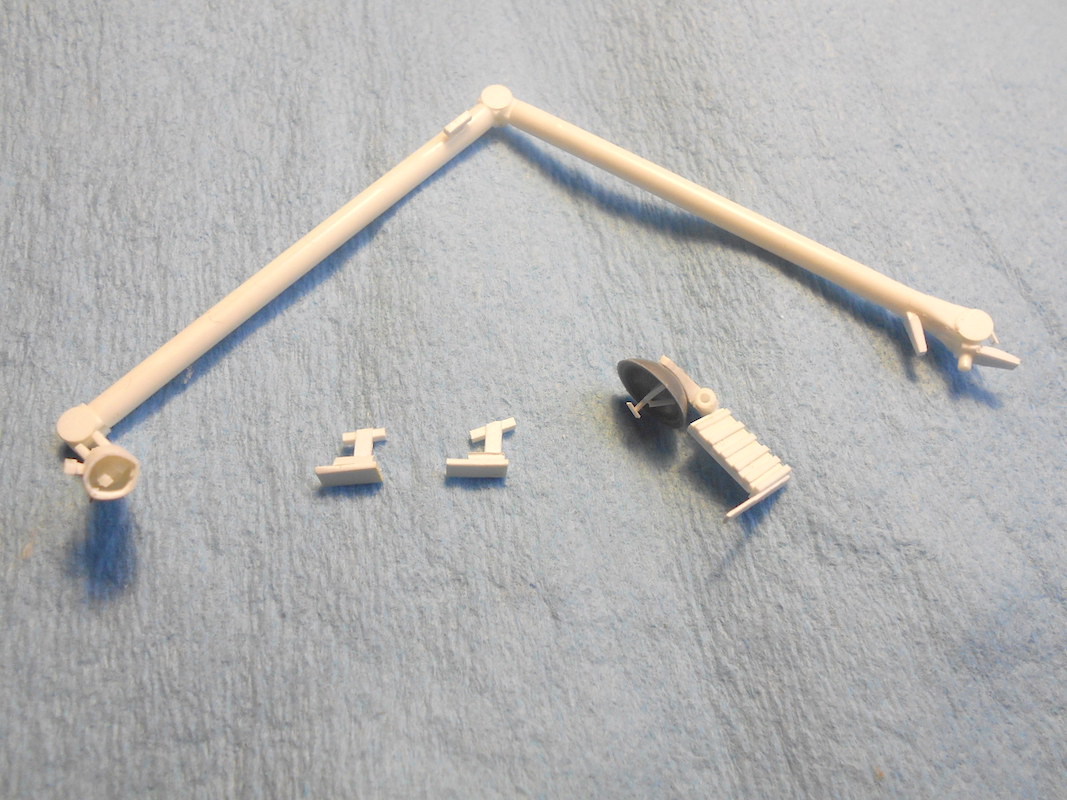
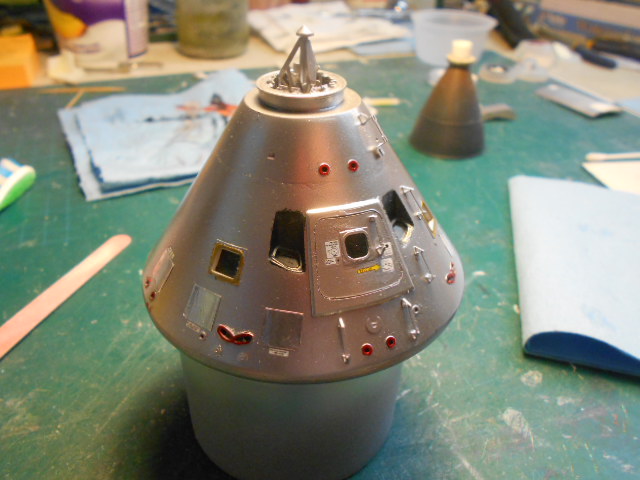
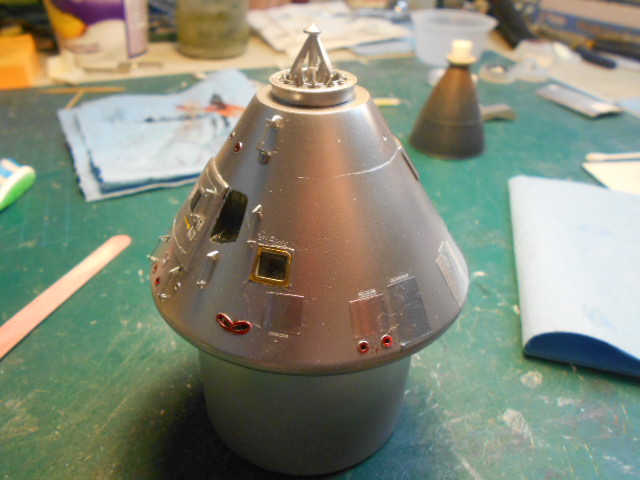
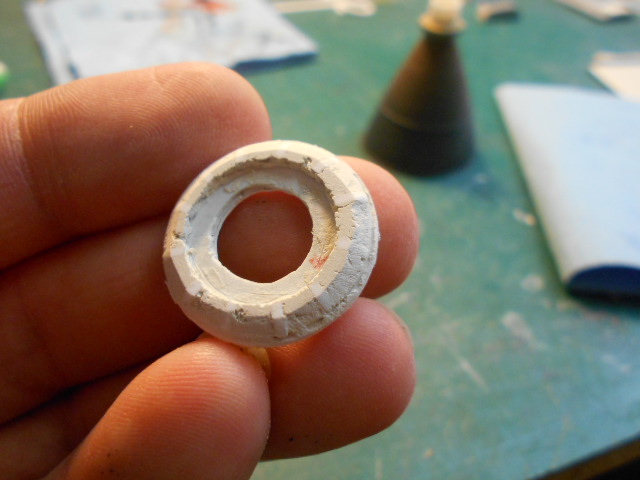
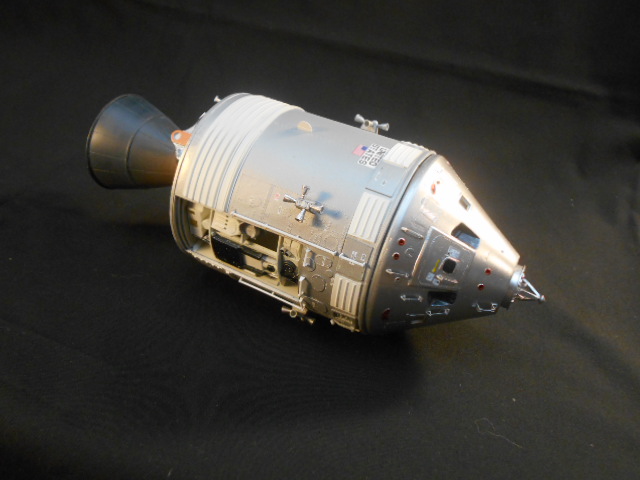
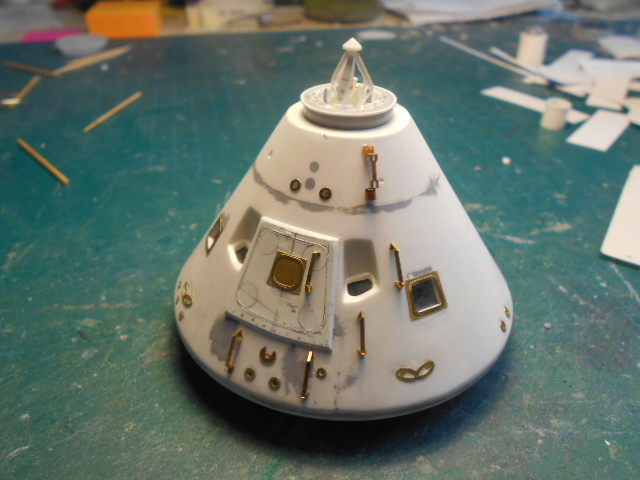
Adding the large Radiator panels to the SM ...
Added some rivets. They're Rivet decals from Archer.
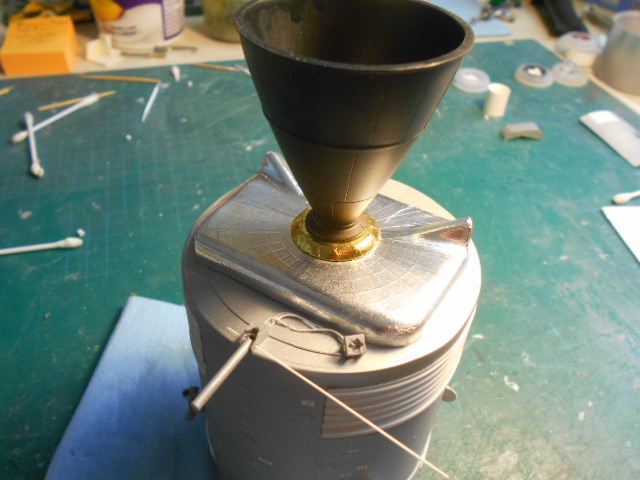
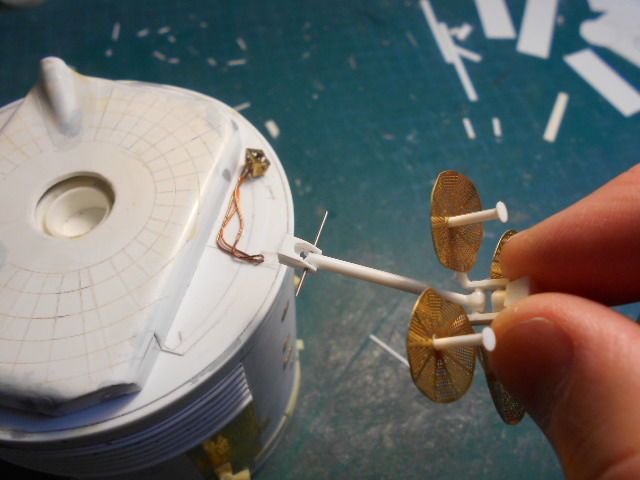
Adding some details to the Hi-Gain antenna ...
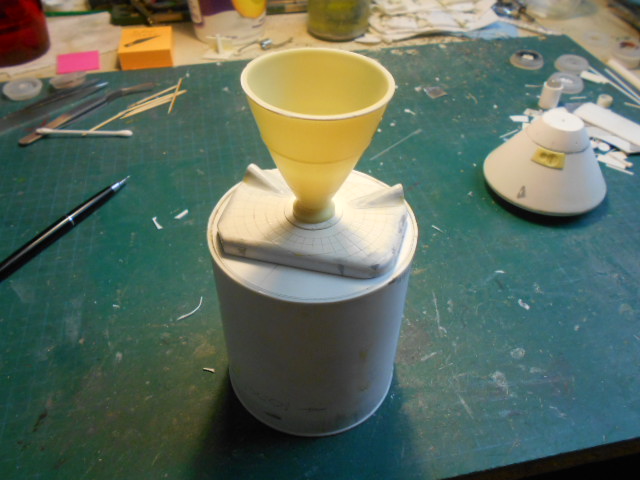
Sprayed some Gloss Black onto the CM in preparation for some Chrome paint.
White Primer on the SM ...
Then Aluminum paint on the SM ...
Masking the SPS engine bell ...
Two tones ...
And it's getting closer to completion ...
IPD
-
6
-
-
INCREDIBLE!
You are indeed the Lord of the Rings! Your patience and precision are displayed perfectly in this application of this delicate texture.
When you say the tape is glued on, do you, in fact, glue the tape or are you referring to the tape's adhesive? Either way ... this is spectacular!
Well done Frodo!

IPD
-
The only solution I see is ... less talk-talk and more build-build ... 😆
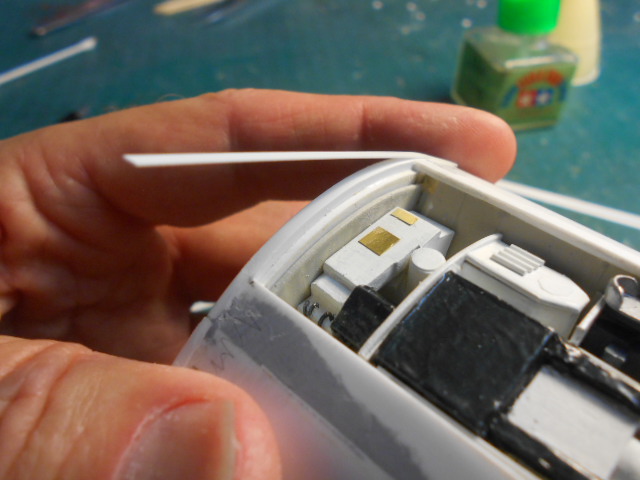
Adding some PE to the RCS housings ...
Onto the High Gain antenna ... which need to be handbuilt. I used Mike Mackowski's CSM book and Vincent Means 3D views for reference ...
New Ware's PE waiting to be used ...
.... and done.
... reducing the stash the only way I know how ...( hint hint
 )
)
IPD
-
4
-
-
Mapping out the location for the New Ware PE and Resin ...
Attached the Resin radiators and PE ..
This, in order for it to fit, needed to be cut out of the kit's SM
The CMs hull glued onto the heat shield ...
Then filling and sanding ...
Adding the PE bits ...
Getting there ... all the subassemblies dry fit.
till next posting
IPD
-
12
-
-
A fixer-upper for sure!
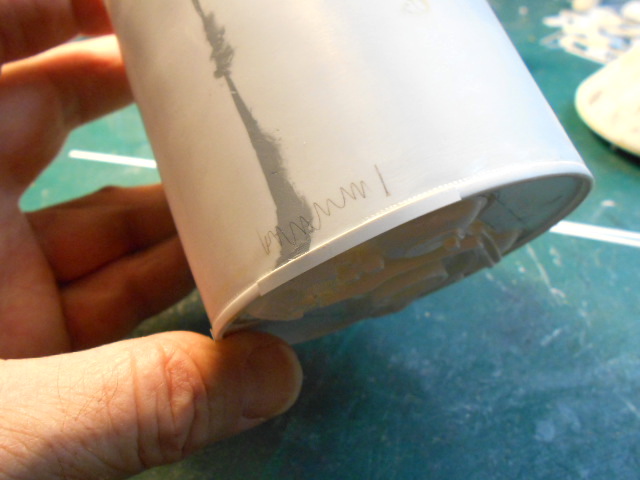
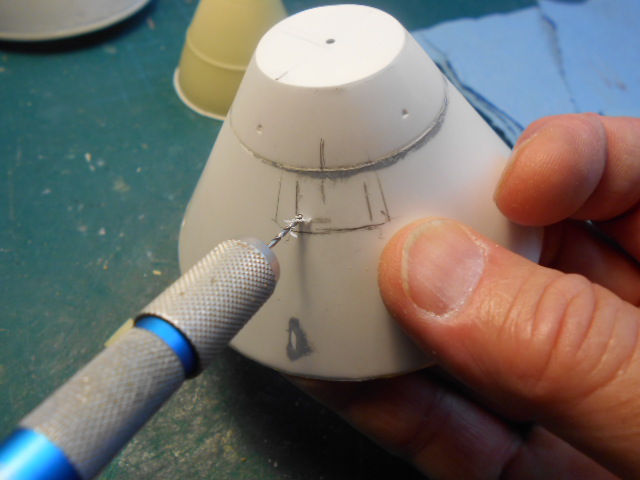
Masking off the SIM Bay so I can do some sanding ...
Adding a strip of styrene to level out the rim ...
It'll get filed and sanded soon
Added another spacer for the Heat Shield ...
With the new Heat Shield and Resin SPS engine bell ... test fitting
Cutting a hole for the resin sextant ...
The Resin casting had broken off so I repaired the lip with a strip of styrene ... the copper wire is my CA glue applicator
Still filling newly discovered gaps in the Heat Shield ...
... and attached to the Service Module.
IPD
-
6
-
-
Some Resin goodies from New Ware ...
Cutting out the Rendezvous window ...
... and with the resin installed ...
... a little putty ...
... the Battery installed ... just above my thumb.
... starting to build the MESA ...
Thick Aluminium Foil pattern ...
... and attached. Notice the PE Radiator underneath.
Installing the PE on the Landing Gear ...
... and wrapping the Primary struts ...
This seam on the SM was gonna be 'fun'. I need to prevent all the dust from getting into the SIM Bay ...
Putty and styrene scraps ...
Till next posting ...
IPD
-
9
-
-
Continuing with the SIM Bay ...
...with some paint and foil ...
... and dry fit into the SM.
Starting on the docking Probe on the CM ...
... and almost done.
Then the Docking Collar ...
There are gaps galore that will be dealt with ...
Getting started on the LM ... by removing the hatch. It'll get replaced with a PE part.
The new hatch is from New Ware and ... I didn't have to cut out the kit's hatch, this one just slipped right over it, and the fit is excellent!
Shaving off the incorrect kit details.
And giving the Resin and PE a cleansing bath ...
Till next posting
IPD
-
9
-
-
Making the SIM Bay, I used a couple kit shelves and made a couple of my own ...
... dry fit ...
The Heat Shield is next up. I needed a spacer between the kit and the new part ...
The Heat Shield itself is stacks of styrene strip. A lotta test fitting and trimming was required.
Scored the surface texture ...
The rough parts ...
A little filler ...
Getting there ... the new umbilical housing was made too ...
Still a lotta finessing to do, but this'll do for now.
Getting started on the SIM Bay components.
Reference images ...
The foot restraint ...
Still a lo-o-ong way to go ...
IPD
-
11
-
-
Thanx for taking a look, TonyC and Michael!
I enjoy rebuilding an old, broken model. I don't try to be really accurate, but just scratch building enough to give the impression of accuracy ... something like the SIM Bay from scratch is quite satisfying.
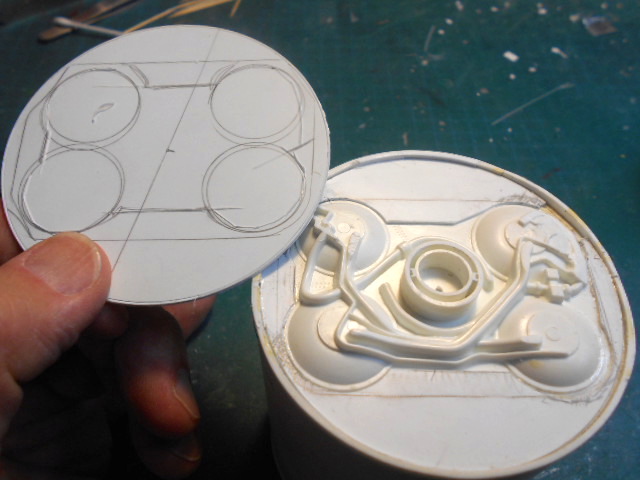
The shelves for the SIM Bay were cut out ...
The Command Module was disassembled ...
... and 2 windows needed to be relocated. Using Dymo tape as a guide they'll be moved down a millimetre or 2. The umbilical connection was cut out as well.
I had to sand off the surface detail on the top of the quad ... as well as all over rest of the Service Module's panels ...
Mapping out the cut. I spent quite some time determining on which quad of the SM to place the SIM Bay
Cutting a new SIM Bay.
Removing the old RCS bits ...
The nose of the CM had to be cut off by 10mm or so ... you can also see where I've removed the Block 1's umbilical connection and patched the hole with styrene.
Clamping the SM panels ...
A new Heat Shield will need to be built. This is an enlarged sketch from Mike Mackowski's "Space In Miniature" series, I'll use as reference.
After the nose was cut off, I used a disc of styrene to cover the opening. And due to the poor fit of the kit's parts, some sanding was required.
I fill wider gaps with scraps of styrene ...
... and a new hatch had to be built.
Till next time
IPD
-
7
-


STS 41c - Challenger and LDEF
in Work In Progress - SF & RealSpace
Posted
Some pix of the completed model ...
... and this image inspired this build of mine. I do like the way it turned out.